
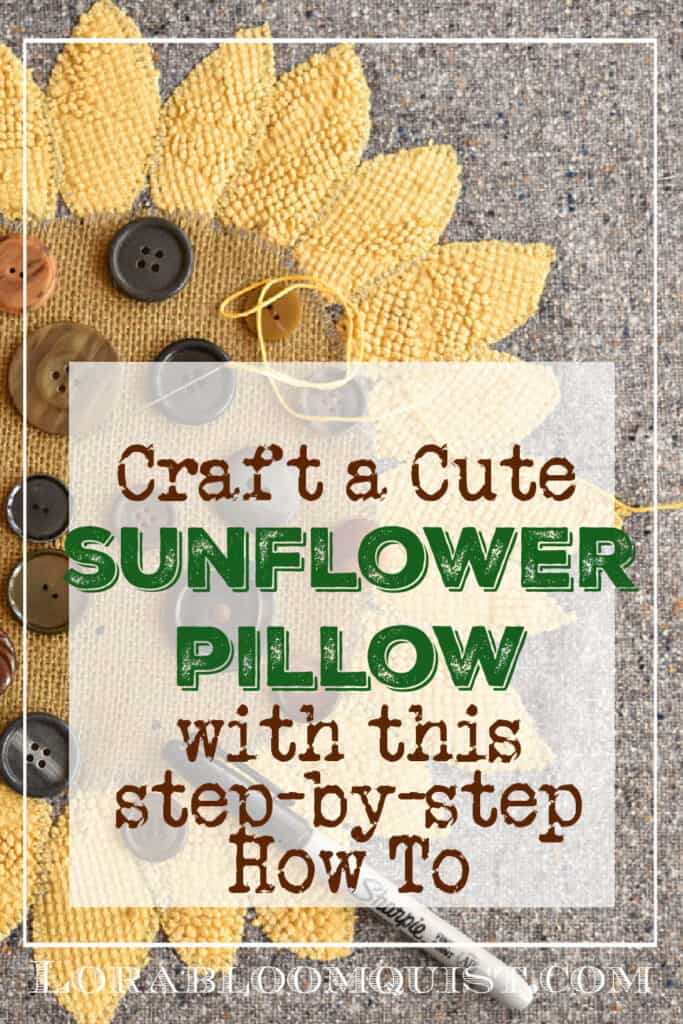
Sunflower Button Pillow How-To
craft a charming sunflower pillow with upcycled vintage fabric and buttons. This cute pillow cover is a perfect late summer into Fall home decor accent. Here’s the step by step how to.
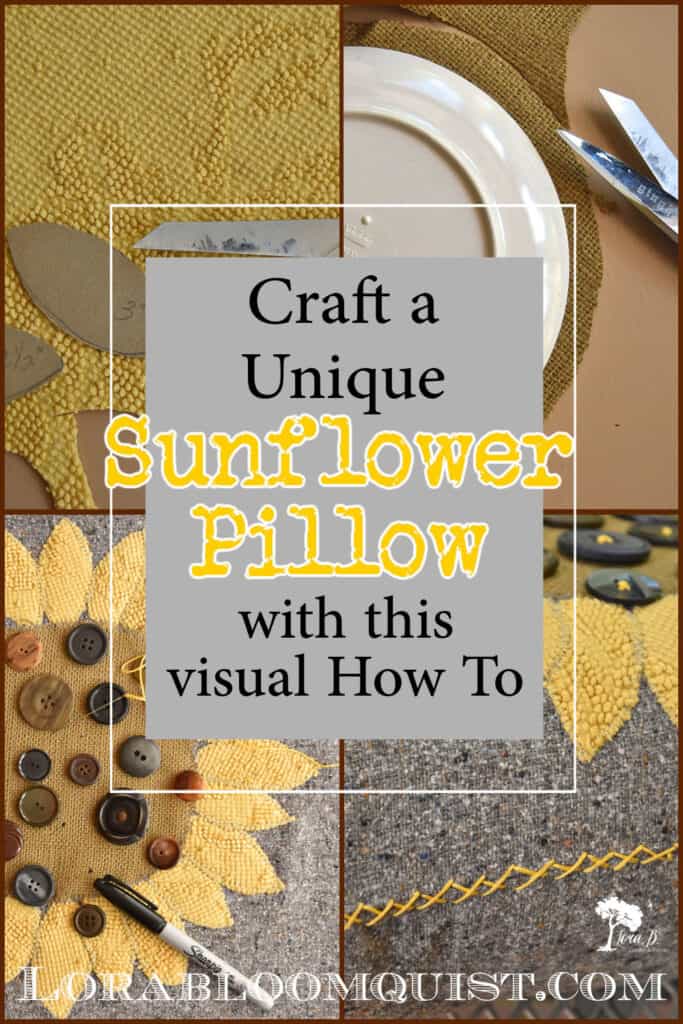
Sunflowers are the favorite of late-summer, early fall decorating! In August, I start craving a big, bouquet of these beauties on my kitchen island. My creative juices have been flowing with sunflower inspiration. First, I created a Easy Cake Mold Sunflower. It’s enjoying it’s new perch in the back entry {“Bedspring Fall Styling in the Back Entry”}. If you’re in the sunflower mood, too, you may want to grab some old buttons and fabrics to repurpose for this Sunflower Button Pillow How-To.
August is when I start un-summer-ing my house and filling it with early fall styling. The bold, bright colors of summer start looking a little tired, and I’m ready to introduce some gray, brown and gold.
Several years ago I designed and sewed a whole family of vintage button pillows from my Grandma’s button stash. I still love bringing them out each spring and summer:
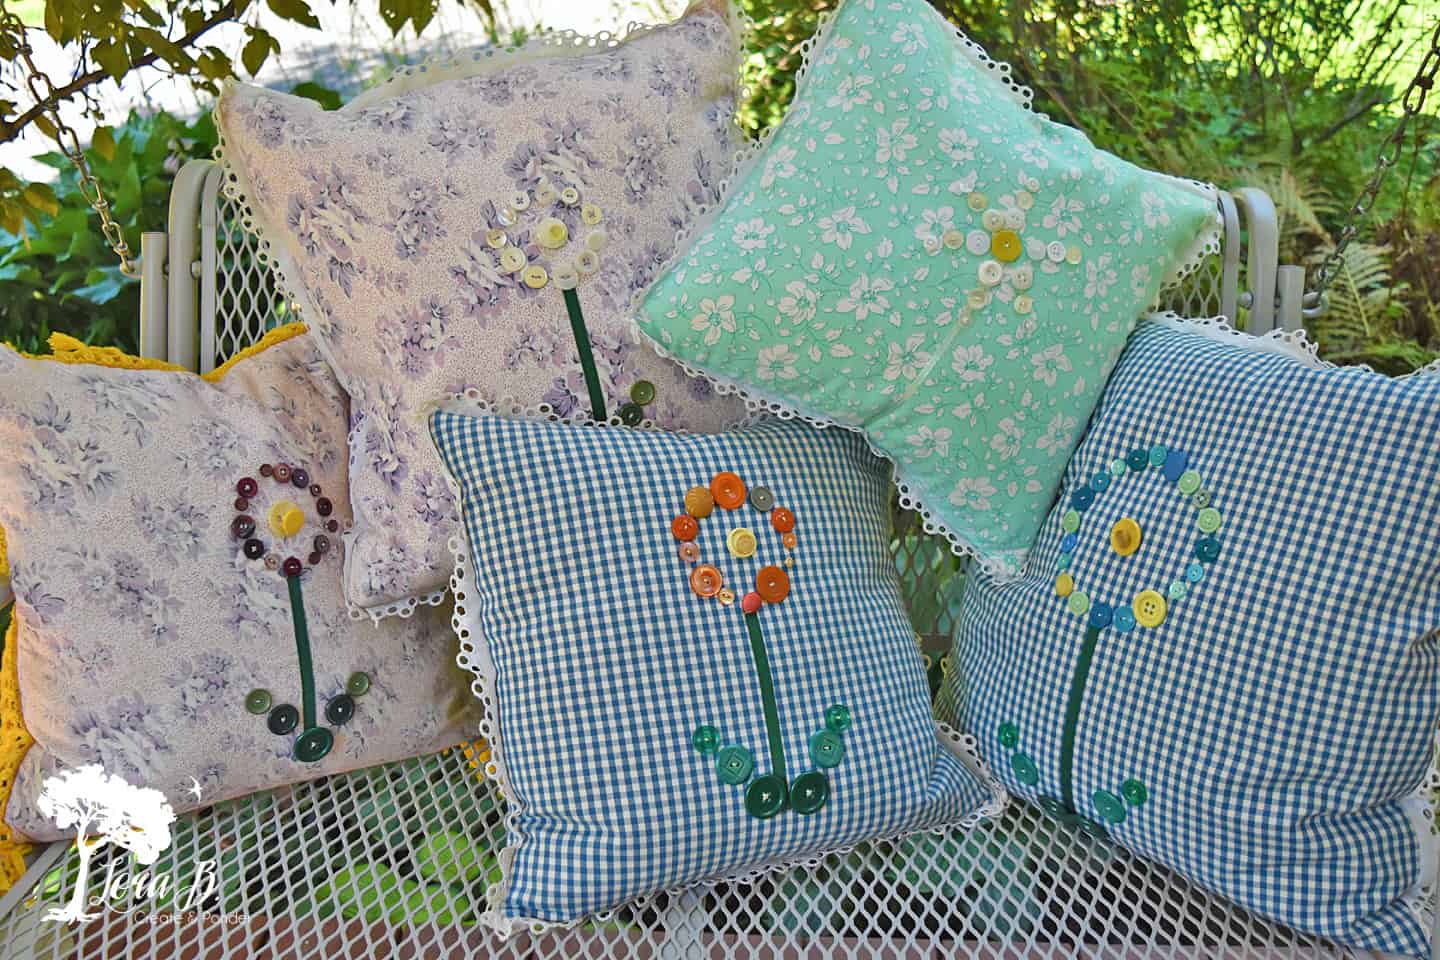
I’ve always wanted to create some more button pillows for the fall. Sunflower week gave me the excuse to dust off my sewing skills (and postpone the cleaning and organizing).
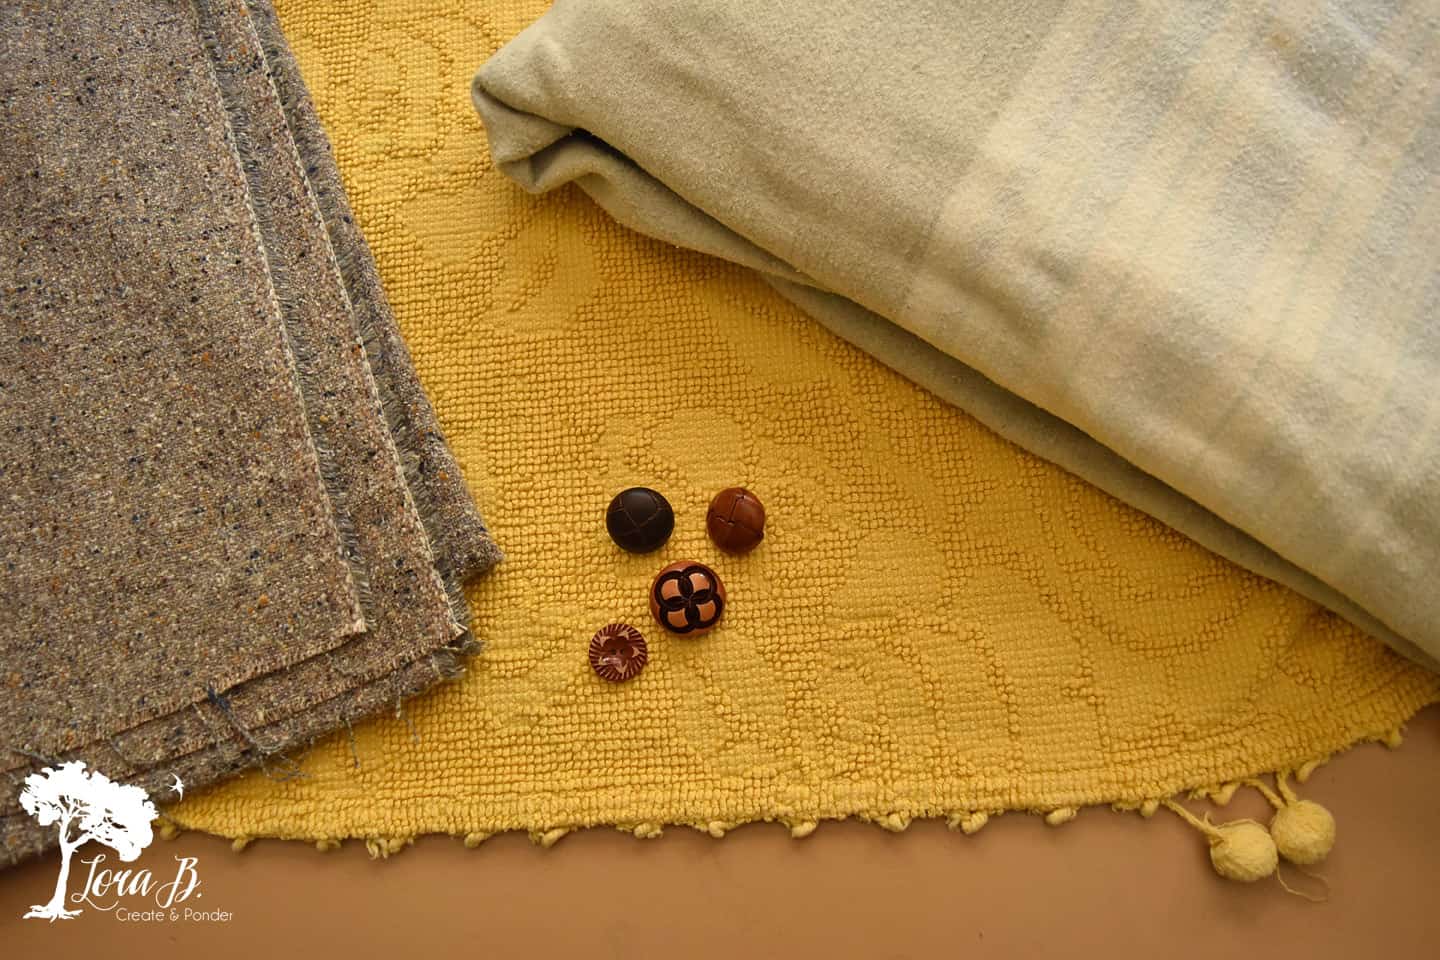
A nubby grey wool fabric I picked up at a church sale, an old gold chenille bedspread and vintage brown buttons were my inspiration (I have plans for the vintage striped blanket, too).
Here’s how the design came together and how you can make one yourself:
Sunflower Button Pillow How-To
For your convenience, this post may contain affiliate links. If you make a purchase, I may receive a commission. There is no further cost to you. My full privacy policy is here.
(You can get a downloadable, printable of this tutorial in my free Resource Library; simply sign up HERE to become an Insider to get access:)
A clear ruler and a good fabric scissors make this project flow smoothly!
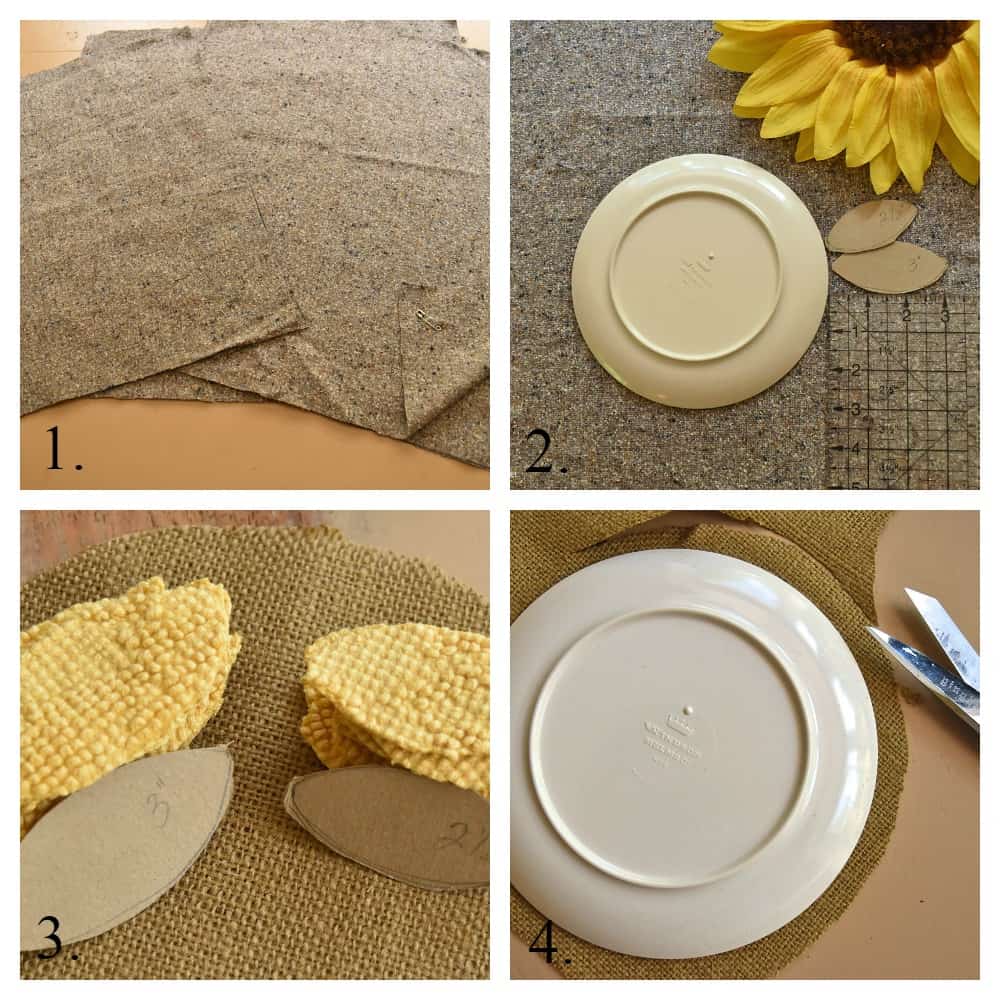
- Cut your pillow front and back, leaving 1/2″ for seam allowance. (I cut 2 squares at 17″ for a 16″ pillow form)
- Create a petal pattern or two out of cardboard or cardstock. I hand drew a 3″ petal and a 2 1/2″ petal.
- Cut 24 petals out of gold-colored fabric, 12 of each if using both sizes.
- Cut a 7 1/2″ circle of burlap for the sunflower center. (I used a 7″ plate as a guide). No perfection required here-this is supposed to be folk-ish!
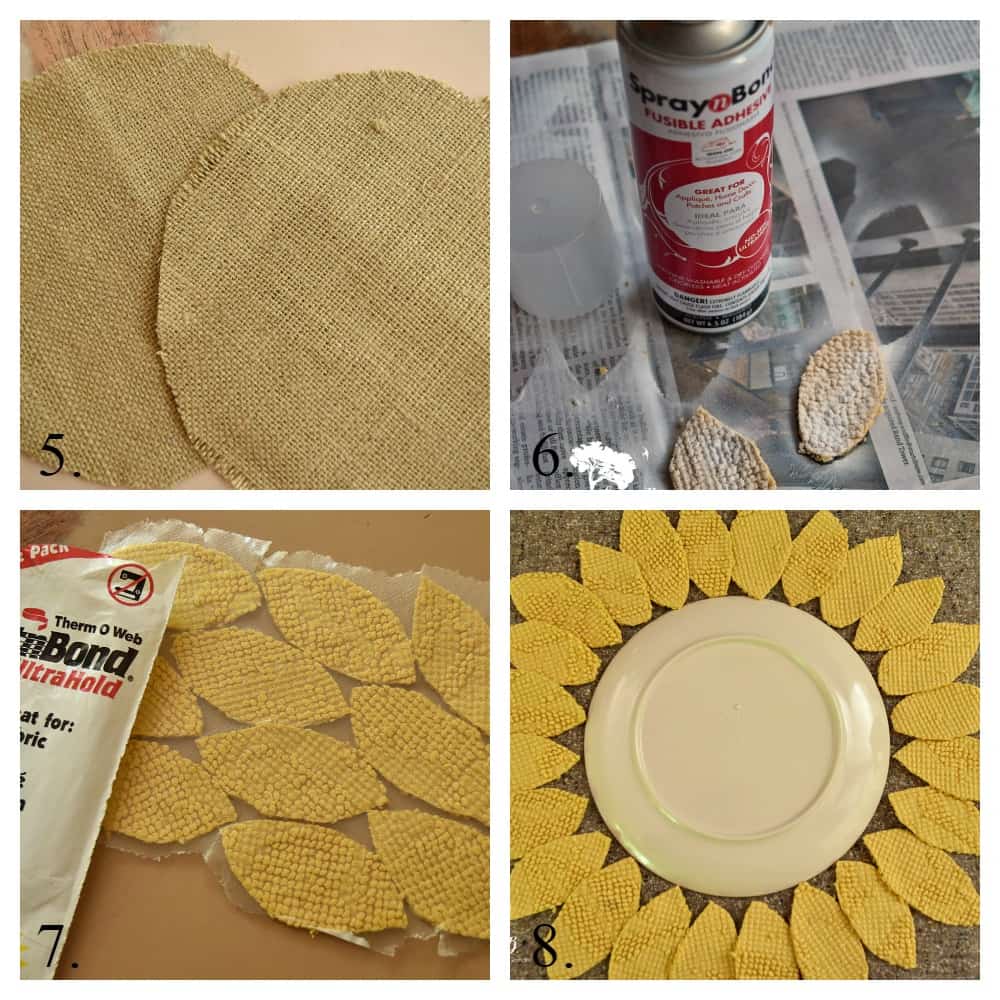
5. Unravel sides of burlap circle a little to add some texture.
6. Use Spray Bond Fusible Adhesive to add stickiness to back of petals. Let dry a few minutes. (Tip-spray down on the leaves or they’ll blow across the room…just sayin’)
7. For my first try I used Heat and Bond Therm O Web, which was a little putsy to cut around the leaves and was really horrible on my thread and needle when I was sewing around the leaves…but it’s always an option, especially if you are not going to sew around the edges of the leaves.
8. Lay out your leaf pattern, overlapping each slightly. I placed them alternately with the two sizes. Use your 7″ plate in the middle for easier placement.

9. Iron per instuctions on the fusible product you are using till petals are fused to pillow front.
10. Fuse and iron burlap circle to middle, which should cover tips of petals.
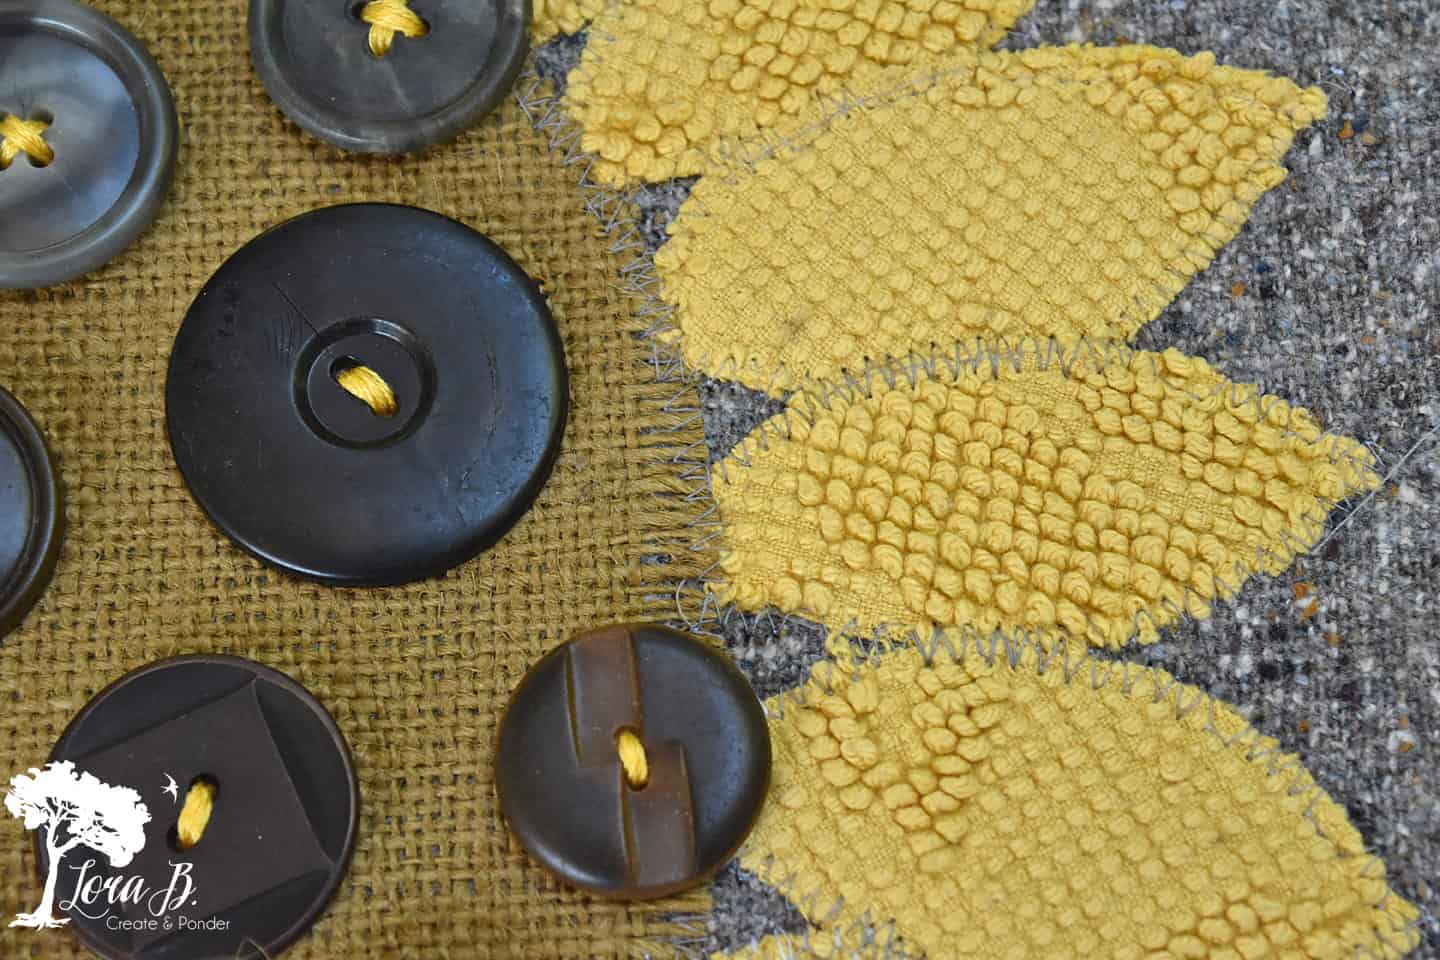
11. Zig zag stitch around burlap middle and then around each petal (yes, this takes a while…and a lot of turning). I sewed them so they still looked overlapping, rather than all the way around each. Hopefully you can see it in the pic.
12. Place your choice of brown buttons on the middle burlap. I put a dot on each spot, or you could pin them. Sew buttons on with full thickness of gold embroidery floss.
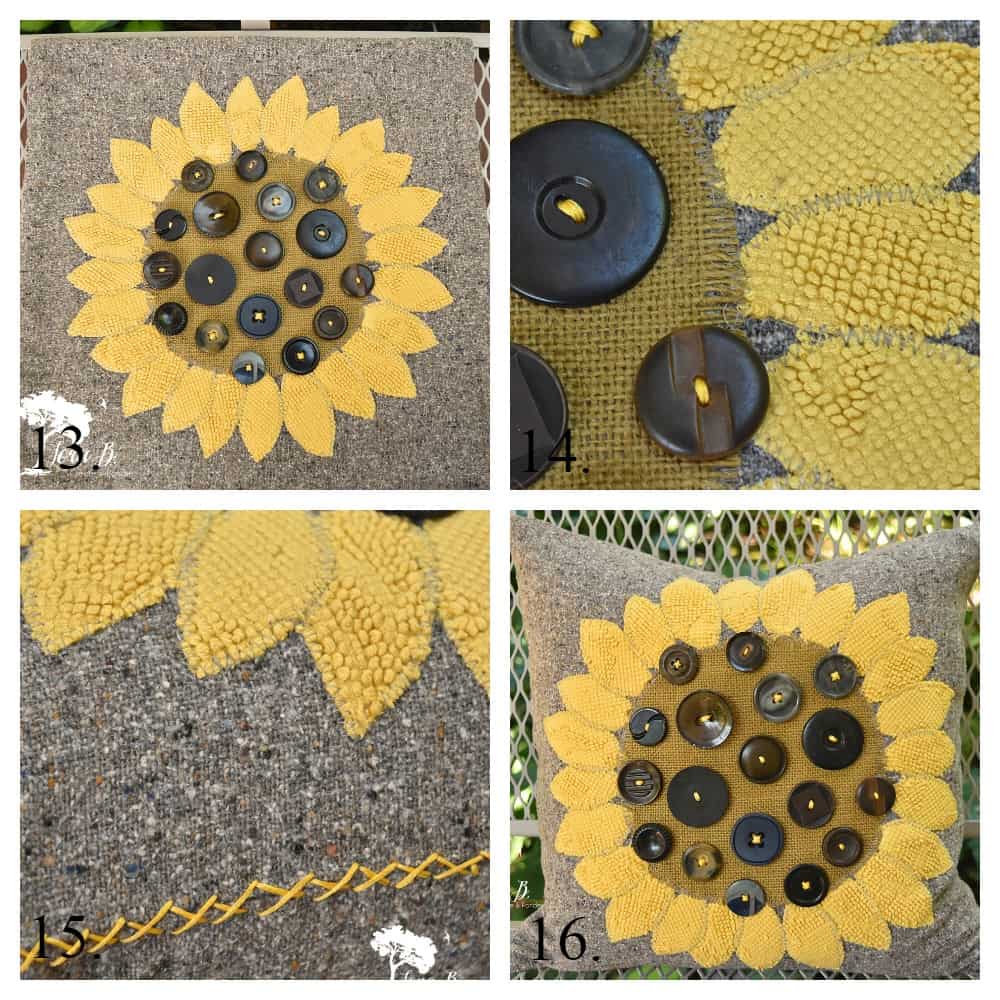
13. Your sunflower is complete! Now sew up your pillow, right sides together. And make sure you leave a good sized opening on one side to put your pillow in.
14. (Up close detail) Turn your pillow inside out, press side seams and press opening raw edges under 1/2″. Fill with your pillow form.
15. Sew side seam closed. I whipstitched the closing shut with the same gold embroidery floss and then went back over the stitches, creating an X design. I like the folk-ish touch and know I’ll be needing to get this open easily, since my green button pillow in the pic above is inside! Why store so many pillows when you can just cover them seasonally?
16. The masterpiece is complete! (Now, to make 2 more for the bedroom!)
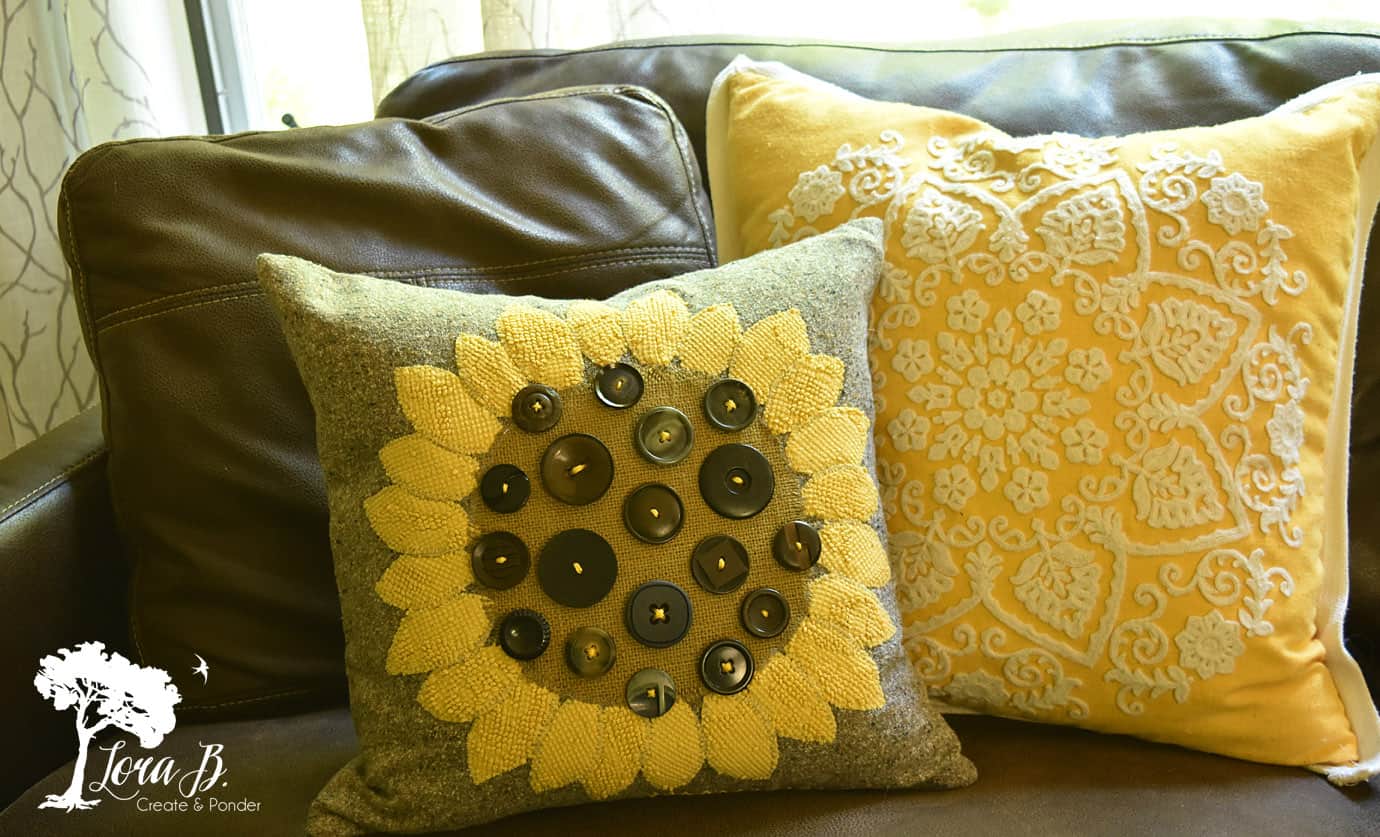
This one looks pretty darn cute on the couch! Think the seasonal transformation has begun! And when the 17 yr old Mr. Freckles even asks, “Did you make that pillow on the couch, mom?” “It’s cool.” Best. compliment. ever.
If you’d like a paper copy of this whole visual tutorial, simply subscribe! I’ve got a bunch of free tips, tricks, recipes and pretty printables in my Resource Library. When you subscribe, I’ll send you a password to access all the downloadable, printable resources, for free!
You may also enjoy these late summer/Fall projects:
“Repurposed Cake Mold Sunflower DIY”
“Leafy DIY Fabric Scrap Wreath”
So dust off your sewing skills and reclaim that fabric and button stash! Have fun making something for yourself; crafting is fun! Hope you enjoyed this DIY Sunflower Button Pillow How-to!
Pin and save

Sharing at these lovely parties:
Sundays At Home
I don’t have any grey fabric but I do have some black & white small herringbone wool from a skirt, would that look okay for the backing fabric. Come to think of it I don’t have the yellow chinele but I have the bottom of a yellow T-shirt I cut off I thought would be okay.🙈😂I never have exactly I make it up as I go.
Yes, use what you have! Then it will be totally unique:) Happy crafting!
GORGEOUS pillow, Lora!
We will be featuring you starting Wednesday at the Creative Crafts Linky Party! Pinned and shared!
Creatively, Beth
Thanks so much, Beth!
I have to make this pillow, so so sweet!
Easy and fun!
I love your pillows. Great job.
Thanks, Rebecca!
So, so cute, thanks for this tutorial, pinned it for later to make. I love sunflowers this time of year, when everything else is almost gone there they are they blooming so pretty.
Your welcome, Marlene! Ours haven’t quite started yet, but I’m anticipating them! Can’t get enough sunflowers!
What a cute Fall pillow, Lora! I love how simple it is to make. The button seeds are too stink’n cute too. And who doesn’t have a jar or two of those kicking around?
Thanks, Marie! Next I want to make some Fall leaf ones to add to the collection!
Love it! Thanks for sharing @Vintage Charm! Pinned!
Thanks, Cecilia!
I love the folkartsy-ness of your pillow and your recycling–no–upccycling of the chenille spread and the old buttons. It was so nicely done. As a dollhouse lover, I LOVE old buttons for mirrors, plates, jellos,dog dishes, etc.
Thanks for the sweet compliment, Kathy. Anytime I can get my pretty, vintage buttons out of their glass storage jars, I’m happy! Thanks for the comment!