
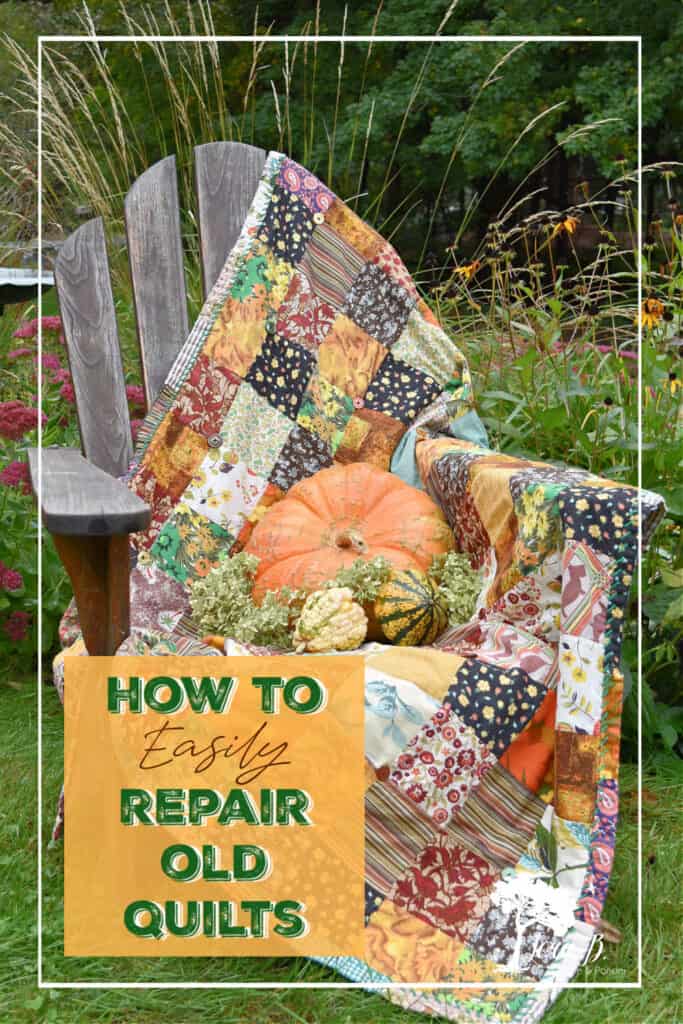
How to Easily Repair an Old Quilt
How do you fix an old damaged quilt? Here are easy ways to repair an old quilt so you can enjoy it’s nostalgic charm
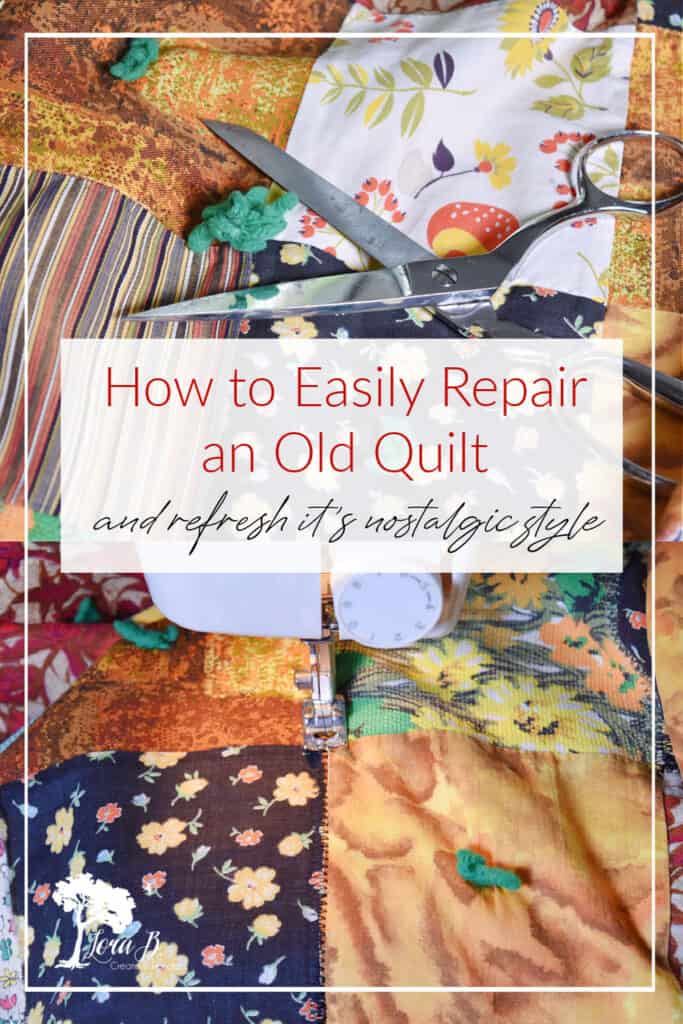
Making something beautiful and useful out of almost nothing is a talent to be admired. That’s the charm of old quilts. Their creators took simple scraps of old clothing, drapes, and extra fabrics and invested their time and effort to produce something completely new and usable. The mish-mosh of beautiful vintage patterns and colors always catches my eye when I’m secondhand shopping. But those years of wear and tear usually show. Today I’ll share How to Easily Repair an Old Quilt so you can enjoy it’s nostalgic charm.
How to Easily Repair an Old Quilt
For your convenience, this post may contain affiliate links. If you make a purchase, I may receive a commission. There is no further cost to you. My full privacy policy is here.
First, Let’s Talk About Vintage Quilts
Yes, there are preservationists that completely repair antique quilts that are worth a lot of money. This is not that type of repair. These are easy, quick fixes for beginner-level sewers who own a simplistic sewing machine. All you need to know is how to do a zig-zag stitch and be able to sew on a button. With these tips, you’ll be hunting down your next old, patchwork quilt (at a reasonable price).
These simple patchwork quilts were made by everyday moms and grandmas for their kids, grand kids and families as bedspreads and extra throws. They weren’t meant to be fancy. They were practical, useful, and often sentimental because of the fabrics used.
I pick quilts up secondhand at church sales, estate sales and the thrift store. I never pay more than $25. We use them everyday as seasonal decor or next to a campfire on a chilly night. These simple repairs I’ll be explaining, strengthen them and add a little to their charming folk-ish style.
Next, Don’t Overthink the Old Quilt Repair Process
If you’re not a professional preservationist, don’t overthink the repair process. You can easily and quickly repair the damaged quilt and start enjoying it!
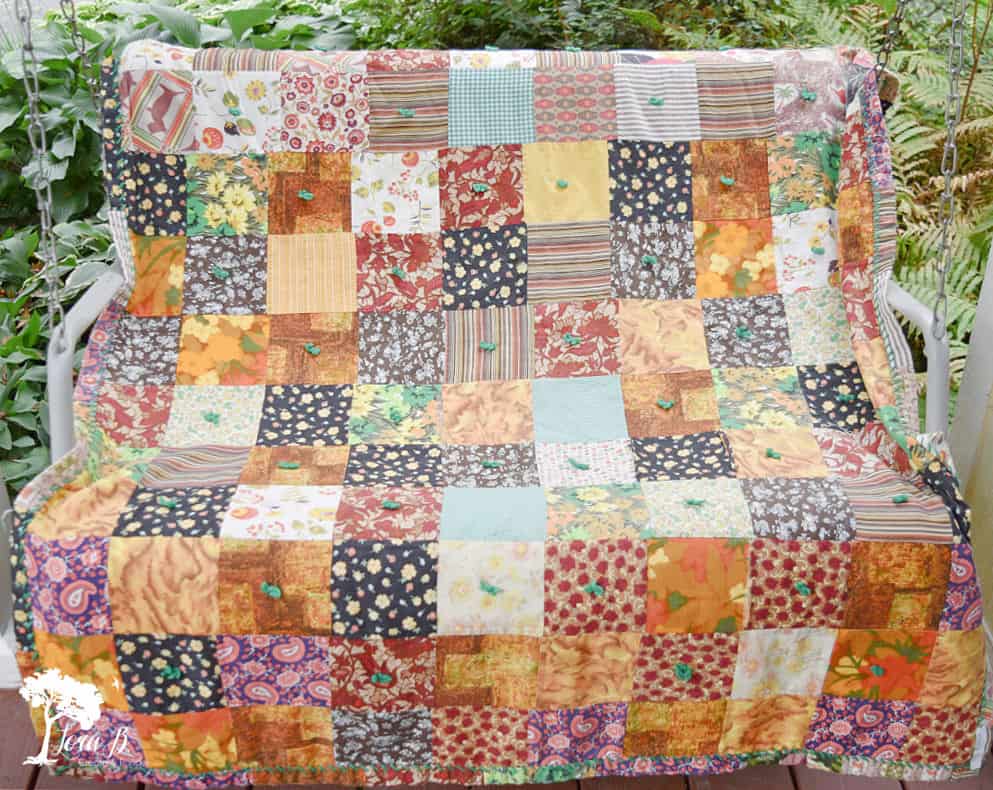
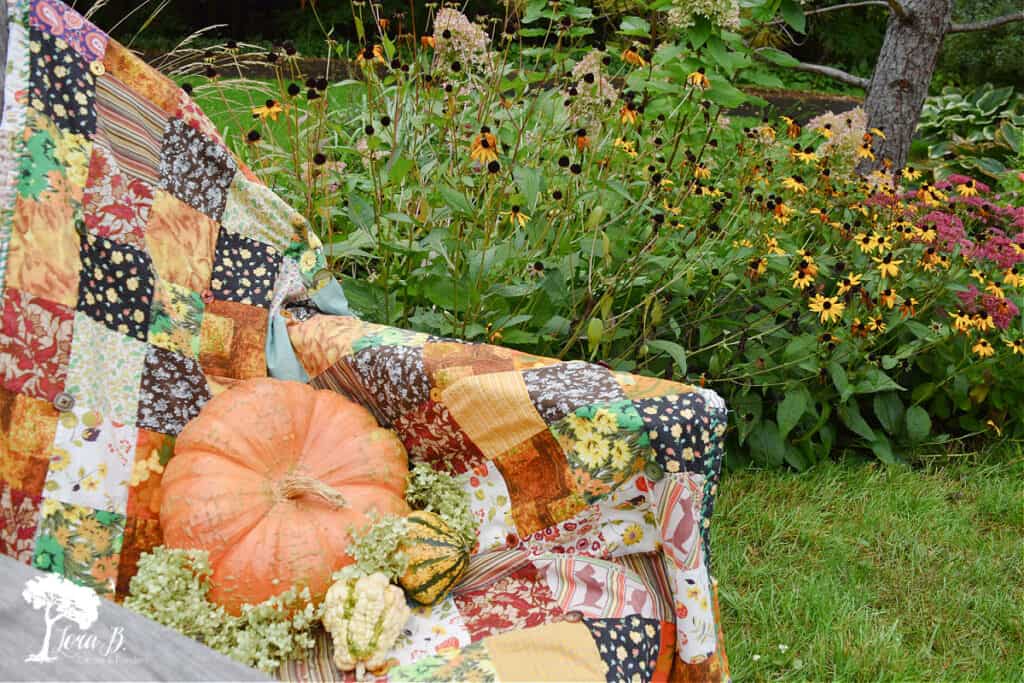
I picked up this lap quilt recently at a church sale for $3! Yep, I had a smile on my face when I tucked it in my armpit, since both my hands were already holding heavy grocery bags full of goodies! The charming mix of vintage barkcloth fabrics from the 40’s and retro fabrics from the 60’s in an autumn-colored mix had me at hello! I always have room for another quilt;) {See some of my other vintage quilts in “Men’s Suit Patchwork Quilts” and “Thankyou, Quilters”}
Before Washing, Assess What Needs Repair
Before laundering, assess the damaged quilt and decide what needs to be repaired.
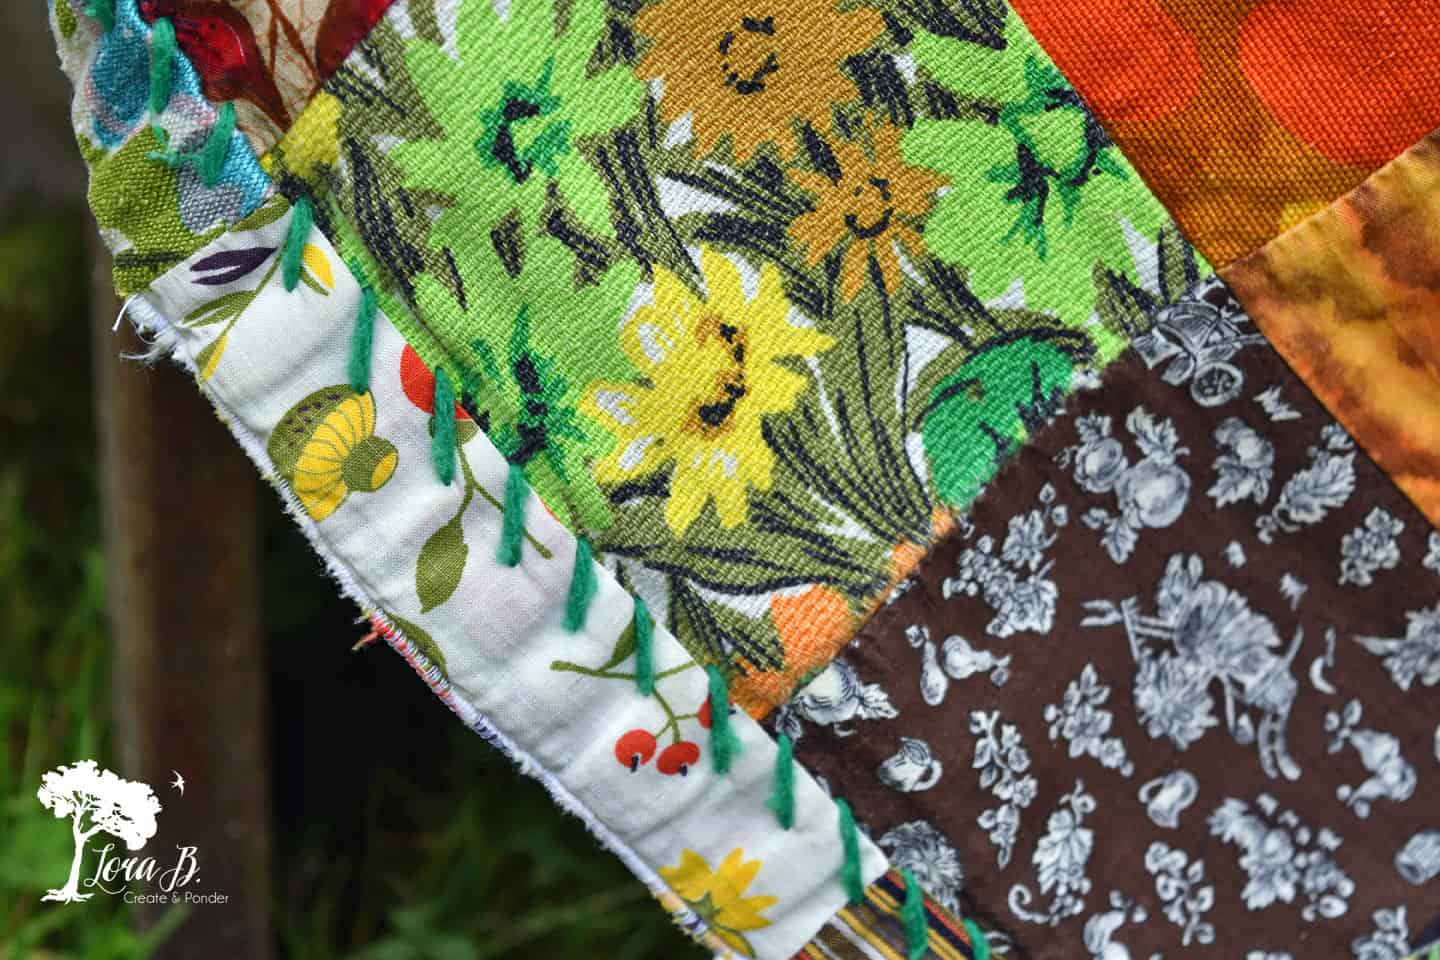
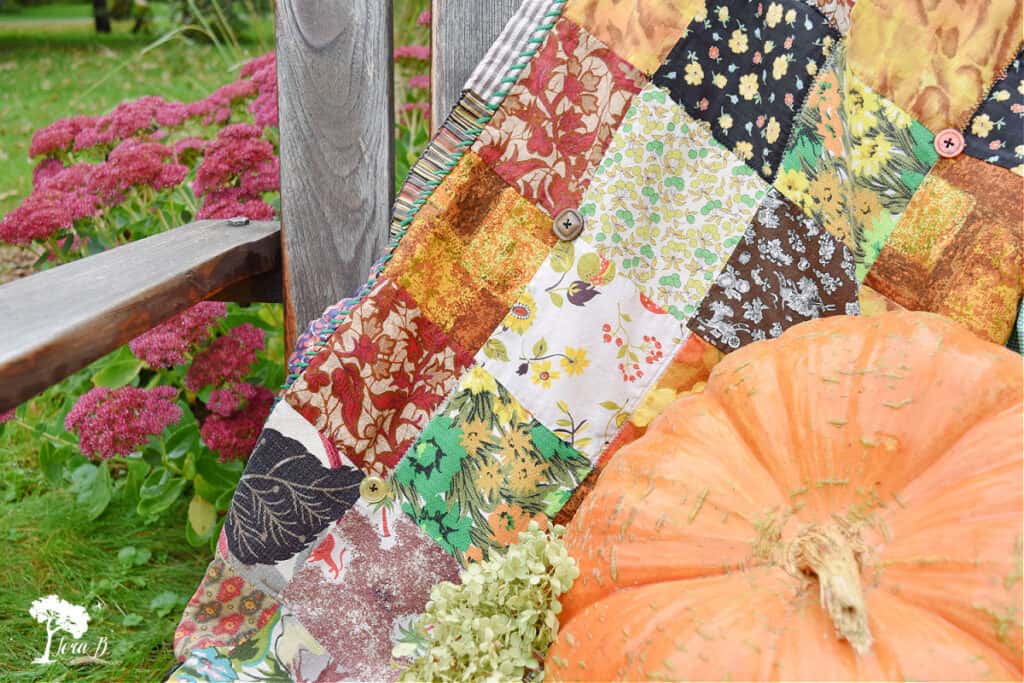
On this quilt, several seams had come undone. Often it seems to be one or two particular fabrics that maybe shrunk more in washing, or weren’t as tightly woven. On my quilt, the black floral fabric was the problem. At least half of it’s sides needed repairing.

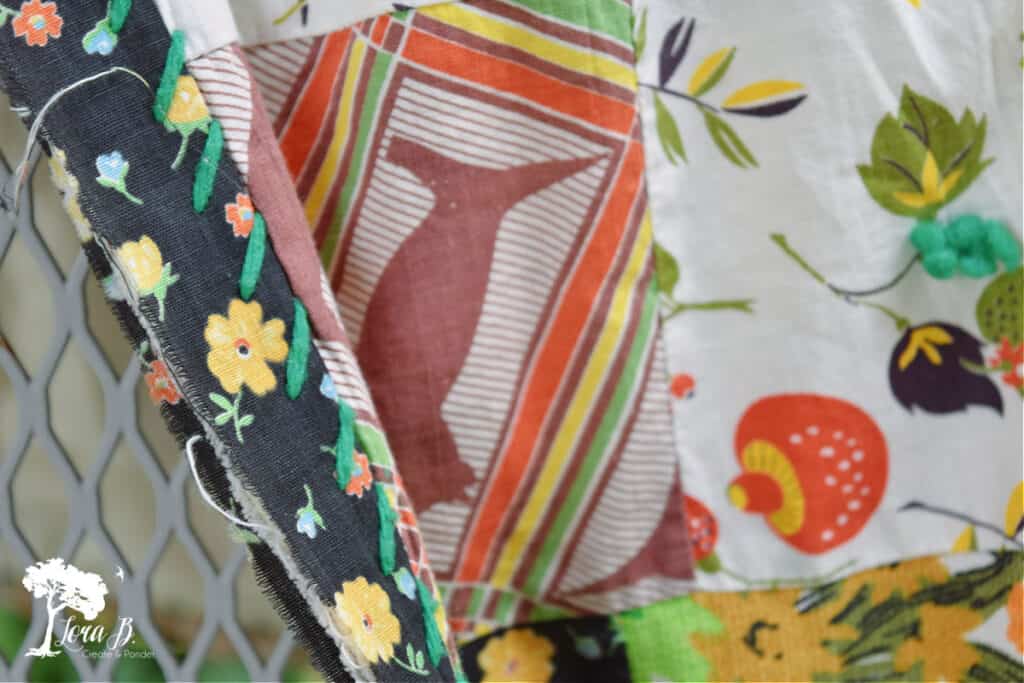
Another problem area is often the binding that goes around the edge. The edges take a lot of wear and tear and often this is the area where it shows the most. Here the black fabric has once again giving way. But isn’t the green yarn stitching a cute way to edge this piece?
Repair Weak Quilt Seams with a Zig Zag Stitch
You don’t need a fancy sewing machine; a basic, easy to learn model is all you need. THIS brand and model is a great one to start with!

Match or coordinate your thread to your old quilt. (I put white in the bobbin since the back is muslin). Set the machine on a wide zig-zag stitch so you can span the seam and catch both fabrics in. Pin, if needed.
Sew all loose seams, going back and forth if needed.
If you have a small hole, run back and forth over it with the zig-zag stitch. (If you have a larger hole, add a patch with a scrap of old fabric).
Remember, Don’t overthink it! The zig-zag stitching adds folk-ish charm and fits these humble creations. It will hardly show in the overall beauty of the quilt.
How to Repair Frayed Binding
If the batting is sticking out the binding edge, simply zig-zag the edge with a tighter stitch. Trim threads and batting.
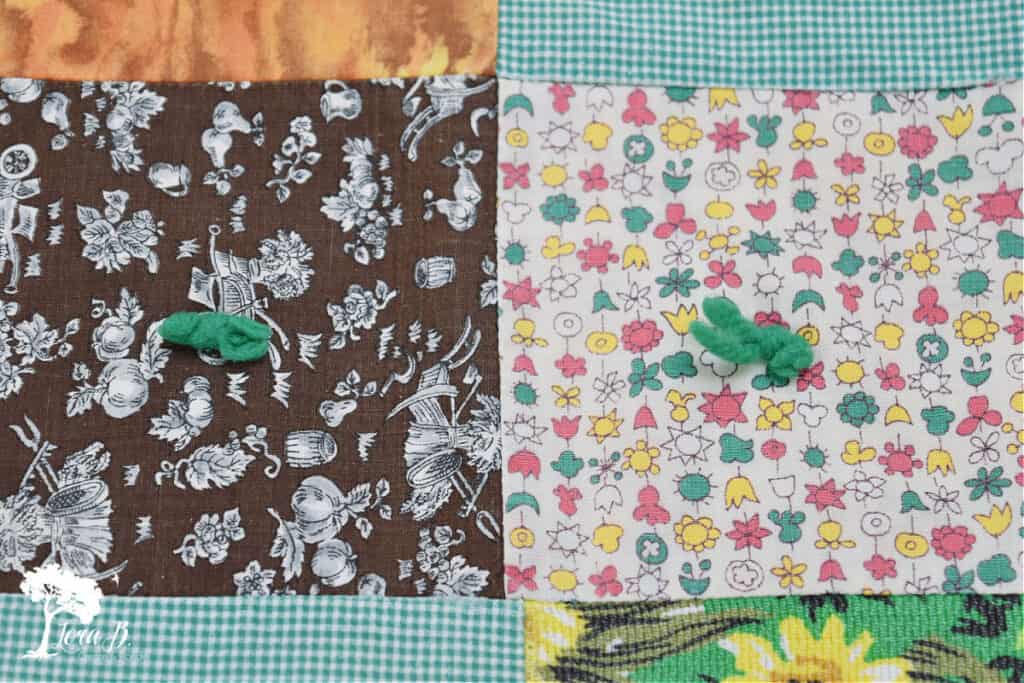
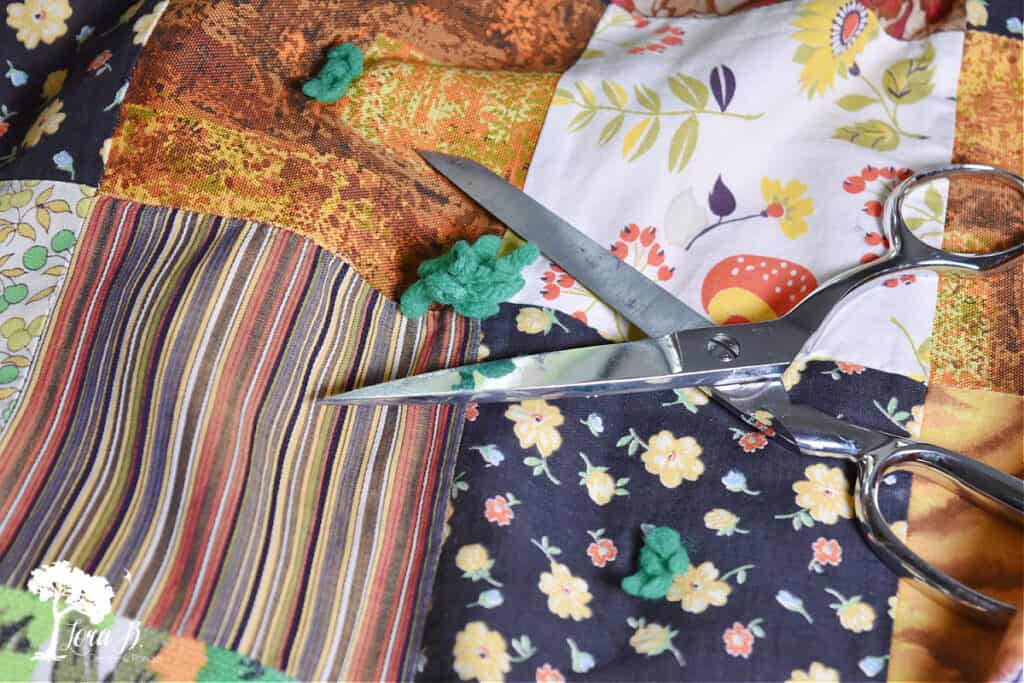
How to Replace Old Yarn Ties
Yarn ties get scruffy from years of wear. But you still need some way of connecting all the layers together so the batting doesn’t slip around.
I’m also picky and don’t like the ties in the middle of the squares. I prefer to see all those pretty fabric patterns.
For a fresh change, cut off the tired-looking yarn ties. Use a fabric-only, sharp scissors for this type of job. I love THIS brand. (Don’t let anyone cut paper with it; only use it for fabric.)
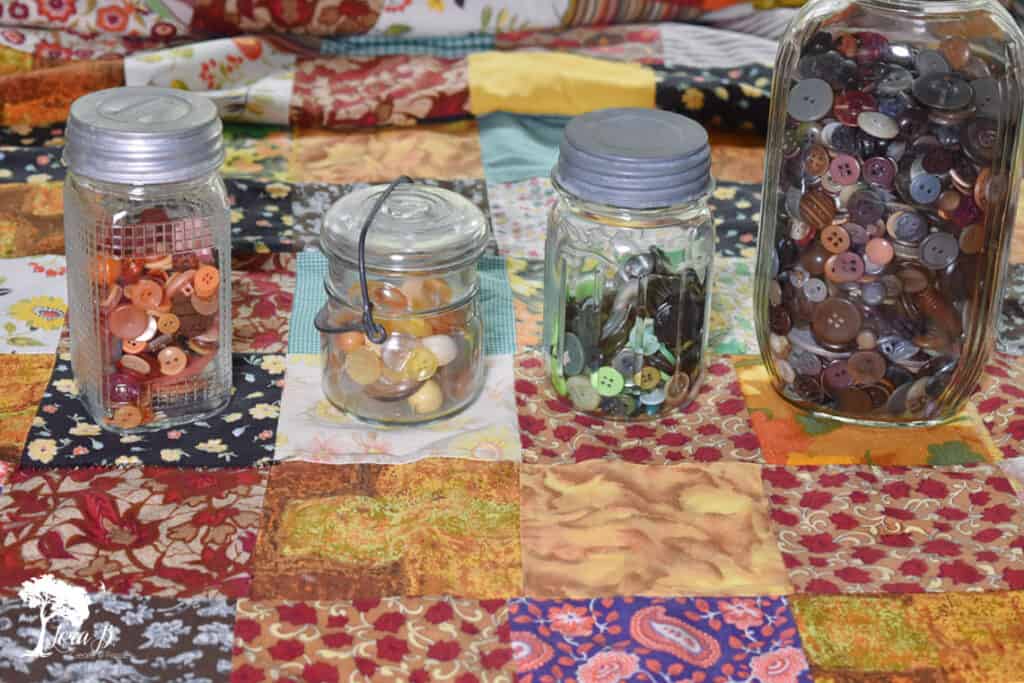
Buttons are a fresh way to update old quilts. They add charm and will keep all the layers together nicely. They also won’t get scruffy when laundering. (If you don’t have a button stash, you can get them HERE).
Match or coordinate your buttons to your old quilt. I used a variety of colors to punch up the fun on this quilt.
Sew buttons at intersecting seams to connect layers together. You can use contrasting thread for a fun look, too! Normal thread or embroidery floss works nicely.
Once Repaired, Launder Vintage Quilts with a Mild Detergent
After the repairs and updates are made, wash the quilt in the washing machine on gentle and damp dry in the drier. The yarn holes will close up in the wash/dry process. Use a mild, color safe detergent, like THIS. You can also soak it for an hour or so beforehand if there are stains or odors. Finish drying flat in the sun, if possible.
This old quilt is ready for a whole new generation of family fun around the campfire!
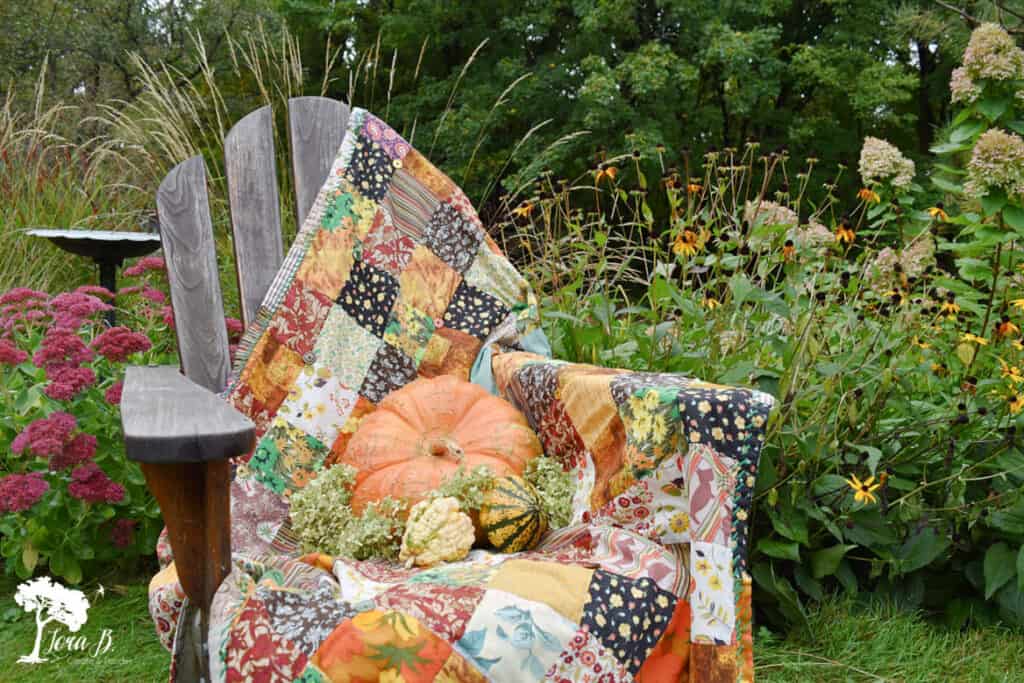
Do you like the buttons instead of yarn ties as a fresh update? I just love all the pretty fall colors in this quilt.
Taking something quite ordinary (and cheap) and investing some time and energy can result in a beautiful, usable, completely unique home accessory! With some simple sewing skills, repairing a vintage quilt can be a satisfying project. I hope you’ll be on the lookout while you’re secondhand shopping for one of these oldies, now that you know How to Easily Repair an Old Quilt!
Get more ideas in “14 Simple Ways to Repurpose an Old Quilt”.
If you enjoyed your visit, be sure to Become an Insider so I can send the ideas right to you! You can Sign Up HERE.
pin and share!

Shop Sewing Supplies: Click on Image for more info

I love your collection of quilts Lora. That’s one vintage item I have not dipped my toe in. I love that you used them at your Dads ceremony and the sentiment. Have a wonderful day. XO- MaryJo
Thanks, MaryJo! I love that I don’t have to iron them;)
Thank you for this! I do have some quilts that need some repair. Now I know how to do it! I do have some that my grandmother made. (I’m almost 75). I also have a couple that my MIL made. She was 20 years older than me. I love quilts!
So glad you found it helpful, Deborah! I’ve loved quilts for as long as I can remember; will always bring one more home for a good price;)
Hi Lora I just wanted to say how pretty the quilts are and sorry about your dad .
I’m with you on the old yarn ties. After a while, they tend to look pretty matted. And like others; I like the button idea. Thanks for sharing. I just joined a few days ago, but already love all the info you’ve sent me so far and have scoured your website for anything else I can find. Keep them coming – I love them all!
So happy to hear that, Brenda! Yes, wish I had time to replace all my quilt’s ratty yarn ties with fun buttons:)
I absolutely love the buttons! Would not have thought of that. I’m currently working on a patched quilt that my mother and daughter, when she was young put together from all of the fabrics that she had. Some of the fabrics are not a high-quality and they are starting to fray. They are also not bound around the edges just sewn. The problem is, is that the outside edge squares are really frayed and I don’t know how to fix it other than you take the piece completely out and replace it. Not really looking forward to that as I am not the sewer my mother was. Thank you for your content.
Could you maybe just salvage the top of the quilt? And enjoy as a table covering? That’s what I do with those that are just too far gone to be used as blankets anymore. Hope that helps! Sounds like a wonderful, sentimental treasure.
My mother made all her family kids and grandkids machine quilts in the 1800’s.Most of my girls still have theirs and mine sits in my closet because one of the fabrics has fallen apart. You have encouraged me to try and fix it. This sounds simple so I will give it a try. Thanks
Good luck! Yes, don’t overthink it; better to be able to enjoy it:)
Love the idea of using the buttons – have not seen that before. ❤️
Glad to send a new idea your way!
Lots of great tips. I would just remind everyone to use pre-washed (and shrunk) cloth for patches so they don’t pucker the quilt if they shrink! (Ask me how I know!). I had to smile when you said “cloth only scissors.” All of my scissors seem to get used as wire cutters; my children were threatened with death (they knew I wasn’t serious!) if they touched my pink (cloth cutting) shears!
Yes, I caught my kiddos using my fabric scissors a couple times for things they shouldn’t, too! :0
Love old quilts…but I can’t sew!! I’m glad you can & save these pretty old things!!!
I am a very basic sewer, Jennifer. Nothing fancy here!
I love the idea of replacing the ties with buttons! Thanks for the great idea 😊
Not quite ready for Fall- but a fun project helps!
It’s a fun update, Shelly! Now if I could just do it on the dozens of quilts I own;)
Oh my goodness Lora, I’m so glad we’re friends. I have a quilt that my MIL made my daughter when she was a baby. It was her favorite quilt. It is pretty tattered at the seams and it’s been nicely rolled and stored in one of my cupboards, never to be used again……or so I thought. I am TOTALLY going to be restoring it and I think my late MIL would approve. Thank you so much. PINNING!!!
So glad to give you a reason to revive it, Cindy! Good luck!
I have a few old quilts, some from family and some I tried myself. I love the idea of using buttons instead of tied yarn. Thanks Lora and have a great week.
Glad you enjoyed it, Marlene!
Lora what great tips to fixing them! They are always so beautiful but tend to look worn. Love your ideas to making them look amazing!
Lora,
I love this creative way to repair an old quilt. I look forward to sharing it on Thursday.
Love your info
Wonderful!
You did a lovely job restoring a treasure that many would have overlooked due to the work involved. Great tutorial!
The fabrics were so fun, Kathy, I had to save it!
Thank you sooo much for posting this ! #1, what a beautiful quilt for only $3!!! The colors are amazing and just say “cuddle up under this” for sure!! I have a quilt that my Mom made and have used regularly, but now it has some lifting of some of the areas and wear on some of the edges. But…now I know how to fix them thanks to you! I’ve been a little nervous to attempt to repair it, but with your instructions, here I go!! Not using it for fear of more tears or lifting up, made me sad so now I’m a much happier daughter knowing I can fix it and pass on to my daughters down the road!!
I’m so happy to hear that, Karolyn! Your welcome! It will like being used again, I’m sure:)
Loved to see someone else using buttons. I’ve done this for years. It works great and with so many styles of buttons they add such charm. As to yarn ties – they have their place. For us age challenged, who prefer doing these treasures by hand, it is no longer possible to hand quilt. Yarn is easier to handle and keeps us “in the game”. Your redo is beautiful and I will now be on the look out for these treasures.
So fun to hear someone else likes the charm of buttons on quilts, Betty! I’ve got several other quilts I want to do this on. I love the pop of color the buttons add to the whole artistic scene! Thanks for the comment!
Hi! Just letting you know that I’m featuring your post at our Best of the Weekend Link Party tonight at 8 p.m. EST. Congratulations!
Awesome! Thanks, Liberty;)
Thank you for the post at To Grandma’s House We Go. I do have some of my mother’s and grandmother’s old quilts that I would love to fix. These quilts have so many hours of tender loving care that were originally put into them, which is something that I think that it is hard to appreciate unless you have actually quilted. They are not only beautiful, but they also have sentimental value.
Beautiful and sentimental make for the most treasured quilts, Amy! Cherish all that hard work;)
Just WOW.
Thanks, Betty!
What a beautiful quilt and handy tutorial, Lora! Thanks for sharing at Vintage Charm! Pinned!
Glad you enjoyed it, Cecilia! Thanks for pinning!
Stunning artwork!!!Congrats!
Love the way you enhanced this beauty. I had an aunt that made quilts and i have a few that i cherish. I also have an old quilt that my grandmother made, it wasn’t pretty so no one wanted it. I cherish it because it was the type of quilt made to truly use, made out of grandpa’s old wool suit jacket or pants and flannel and things used everyday.
Those family memory quilts that were made from their everyday lives are the best kind, Marlene! What a treasure!
“ sew “ cute!
Love your sense of humor, friend;)
I love the colors in this quilt and am so glad you saved it. I have a couple of quilts my Grandmother made and my Aunts would point out which patches were made from their little dresses. My Mother-in-law made one from her husband’s and three sons’ old dungarees. I like what you did with the buttons–what a good idea!!!
It turned out beautiful Lora! I have a couple of old quilts from my grandmas but at the moment don’t think they need any repairs. I will keep this in mind when they do though!
Tania