
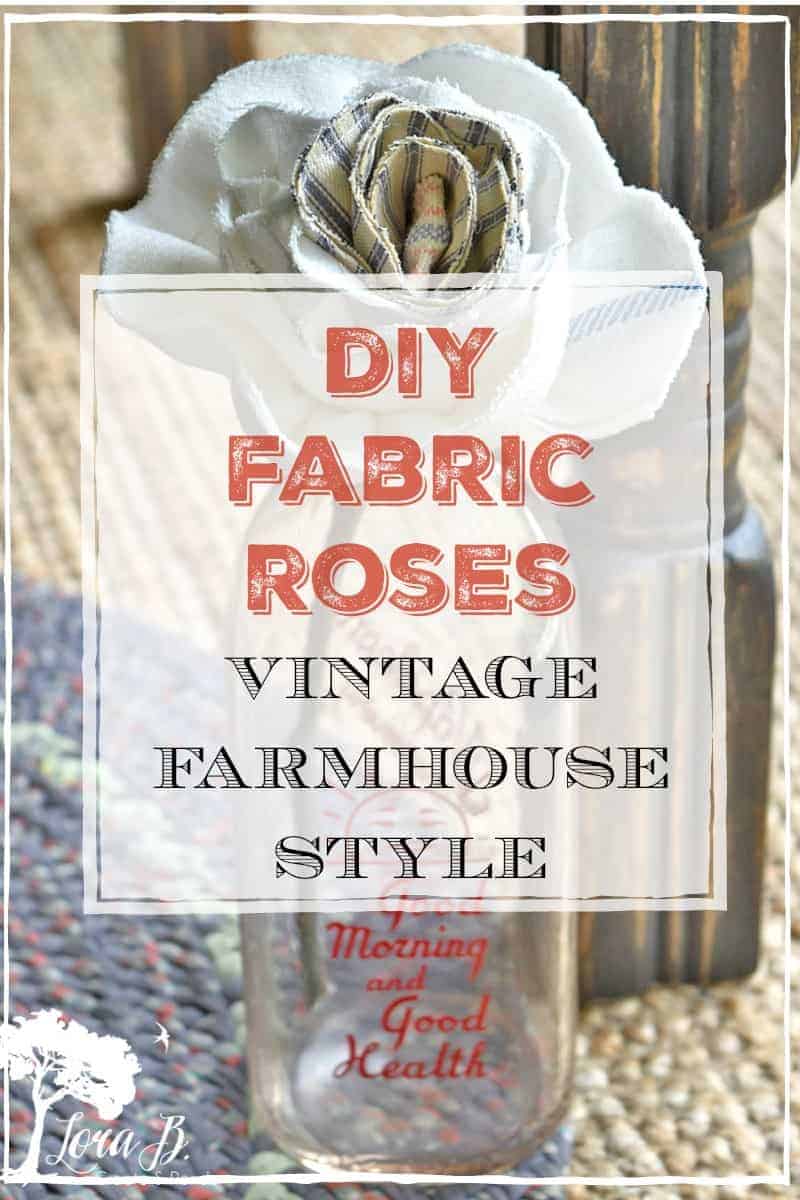
DIY Fabric Roses, Vintage Farmhouse Style
Craft DIY Fabric Roses with vintage farmhouse style for a fun home decor accent.

Whenever I displayed the fun feedsack fabric roses I bought at a vintage market {“Junk Bonanza”}, my readers would drool. “How do you make those adorable flowers?” “I love them!” I’d hear in the comments. I finally broke down and pulled one apart so I could see how they’re made. Here is the long-awaited tutorial with lots of how-to pictures for DIY Fabric Roses, Vintage Farmhouse Style.
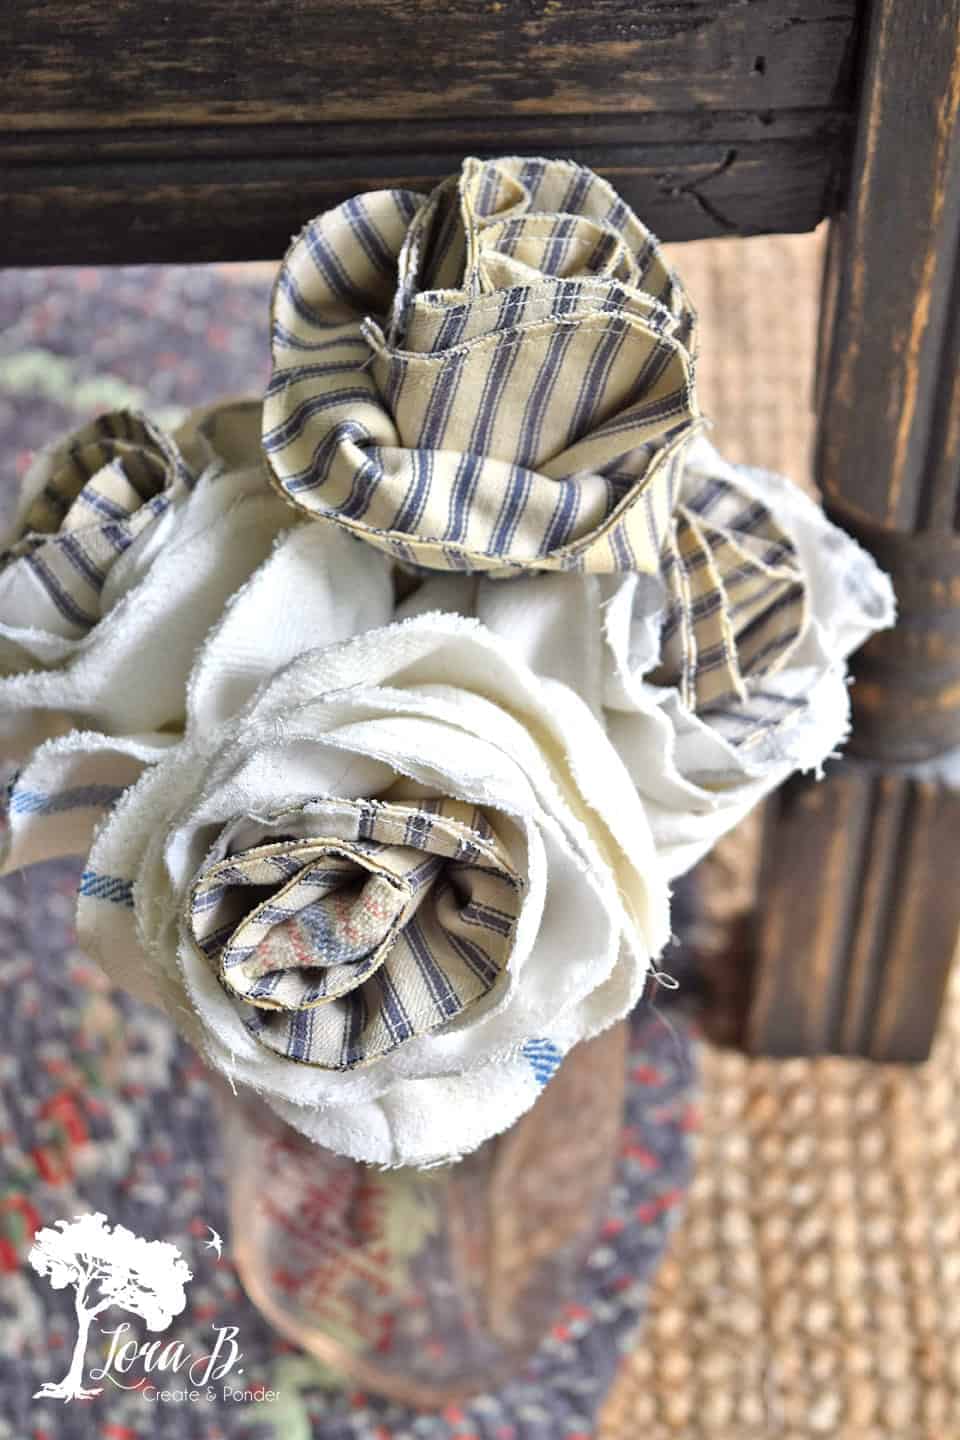
These are the original flowers made with vintage feedsacks that got all the oohs and aahs;)
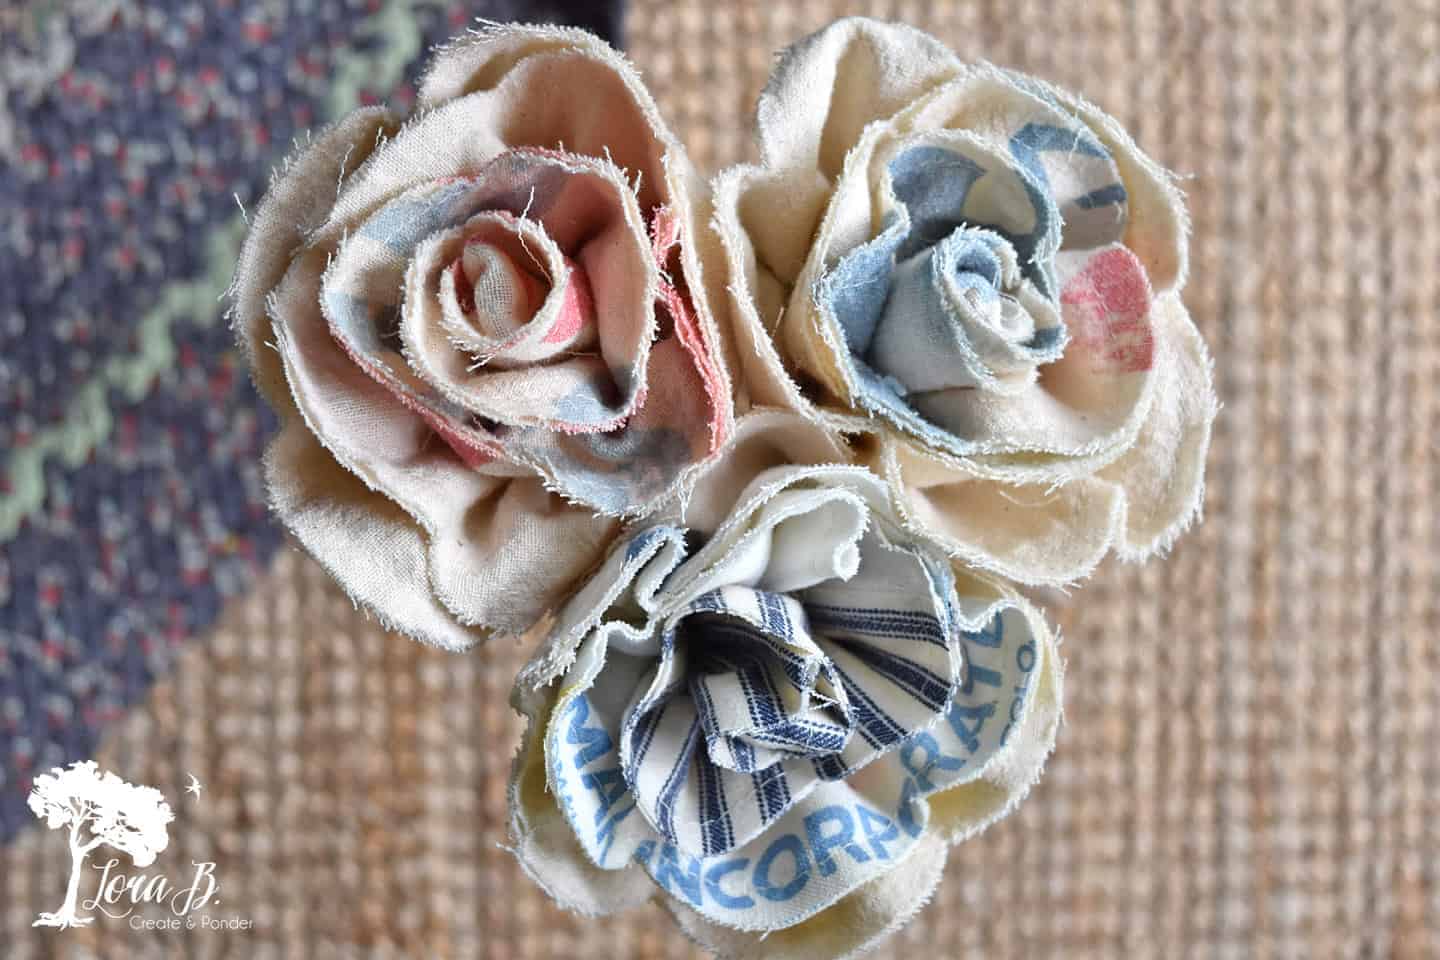
There are several different variations on the web. One of the reasons these are so cute are because the petals are all made from 2 sided fabric. Each flower also has 3 different fabrics which makes them extra fun. Here is how to make them.
DIY Fabric Roses, Vintage Farmhouse Style
For your convenience, this post contains affiliate links. If you make a purchase, I may receive a commission. There is no additional cost to you. My full privacy policy is here.

Materials Needed:
Fabric: 3 feet wide total, 5″ width for each flower
Sticks
thread, pins, pencil or fabric marker
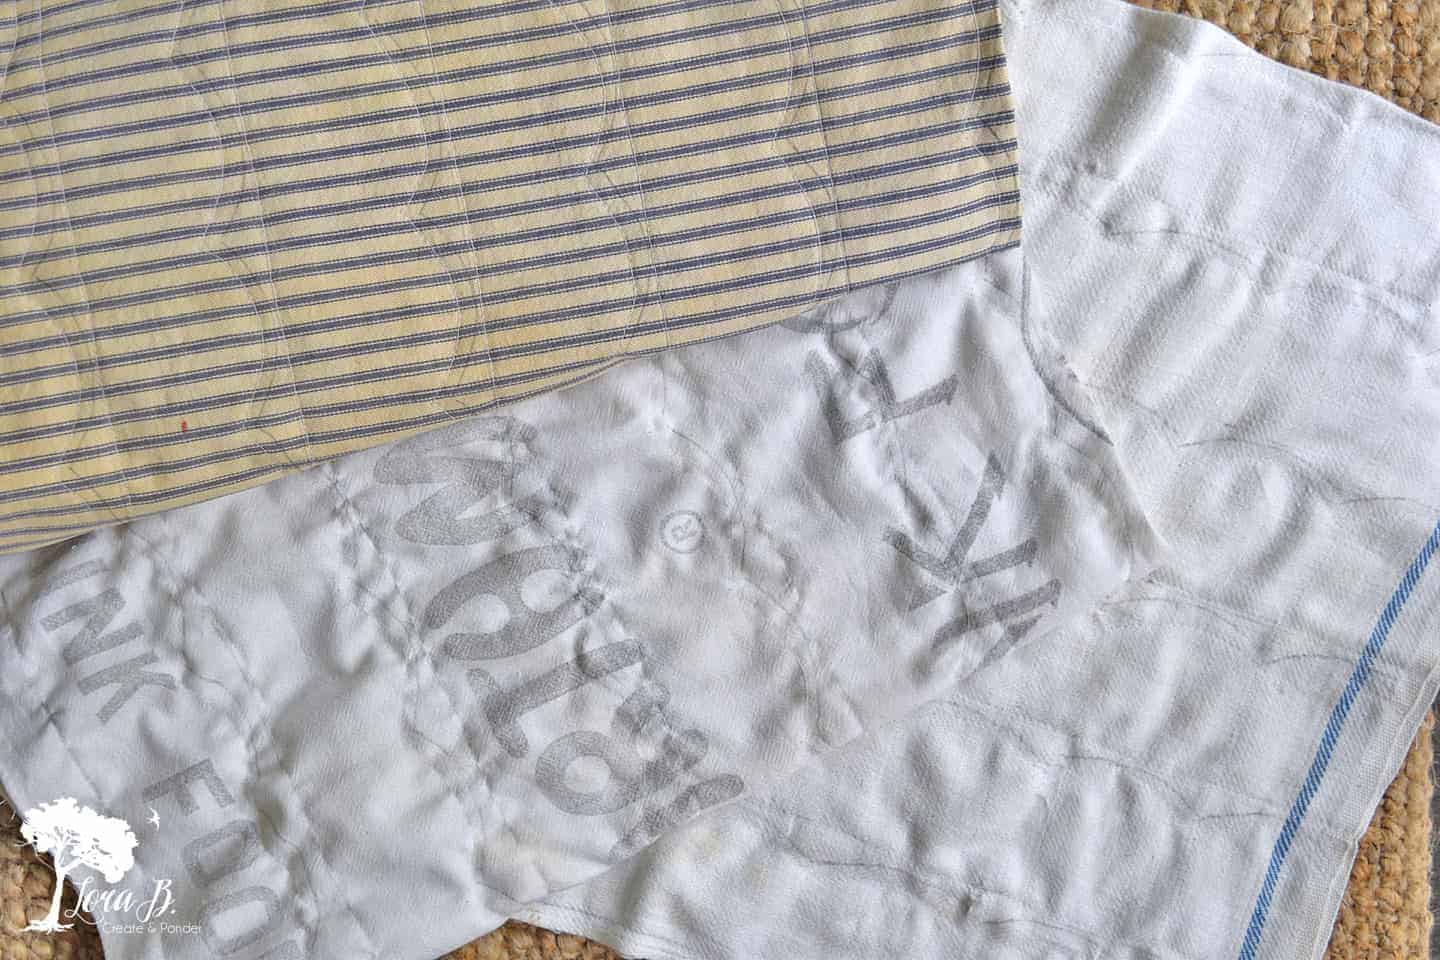
First, Choose and Prepare Your Fabric
For vintage farmhouse styled fabric roses, I chose a printed feedsack, a ticking pillow cover and an old cotton towel. You need about 3 feet length of fabric by 5″ for each flower. I’ll share how I made mine, but I like the version found HERE that started with fabric strips. I may try it next time. My version makes many flowers together (I ended up with 9 from this piece).

Iron your seams down and fold the fabric wrong sides together lengthwise. Pin to keep in place.
Create Scallop Strips for Flower Petals
With a piece of cardboard or cardstock, make a scalloped template with 2″ scallops. Draw lines every 2 1/2″. On the top edge of each section trace scallops using your template.
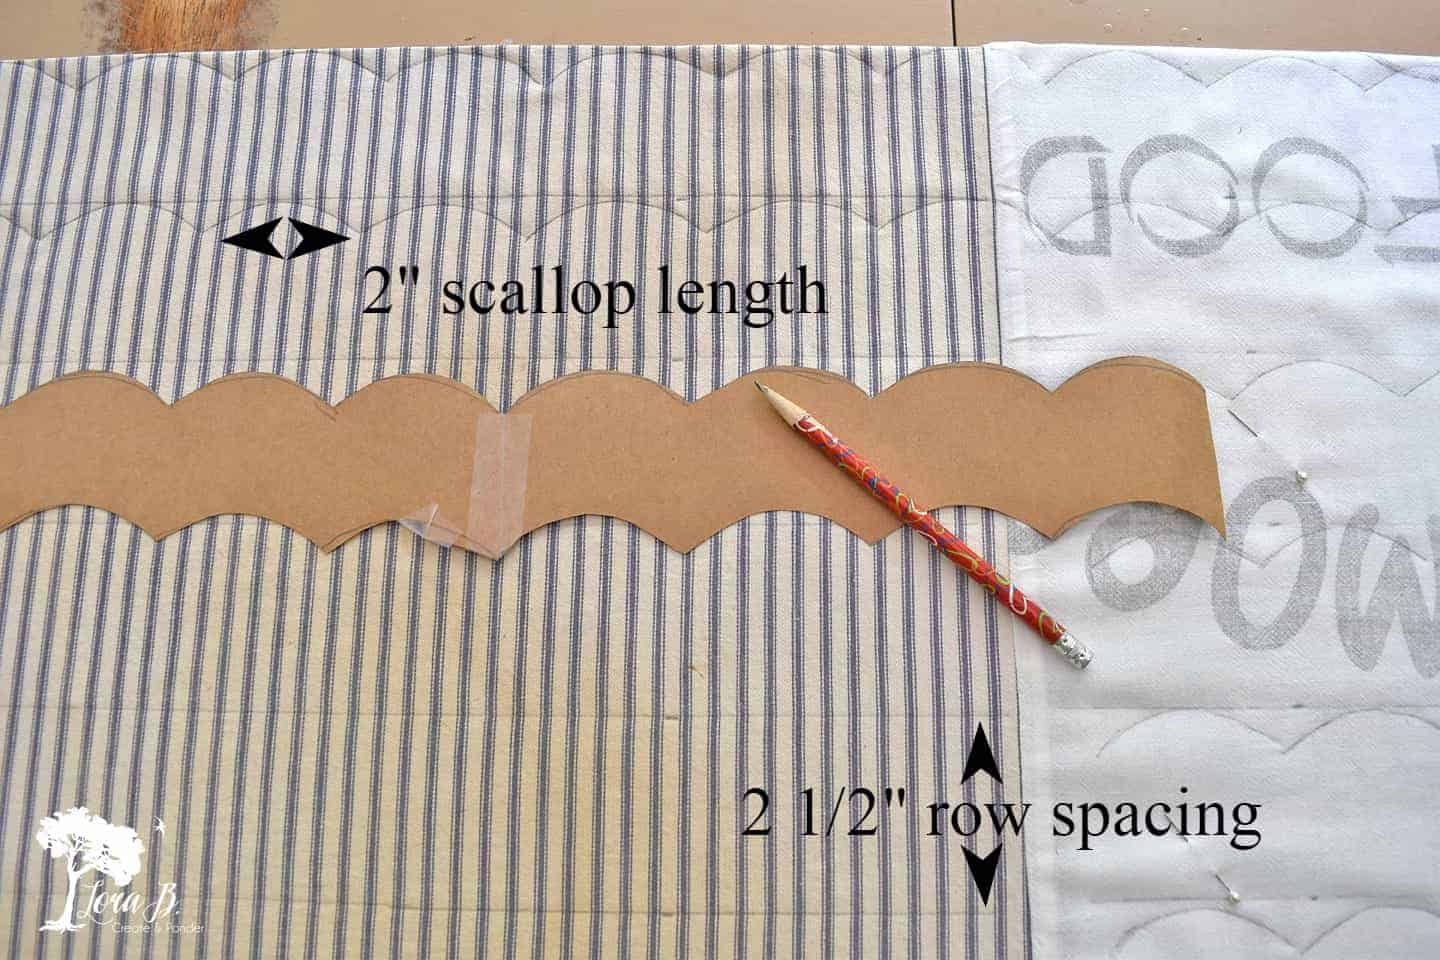
Sew to Create Flower Roses Strips
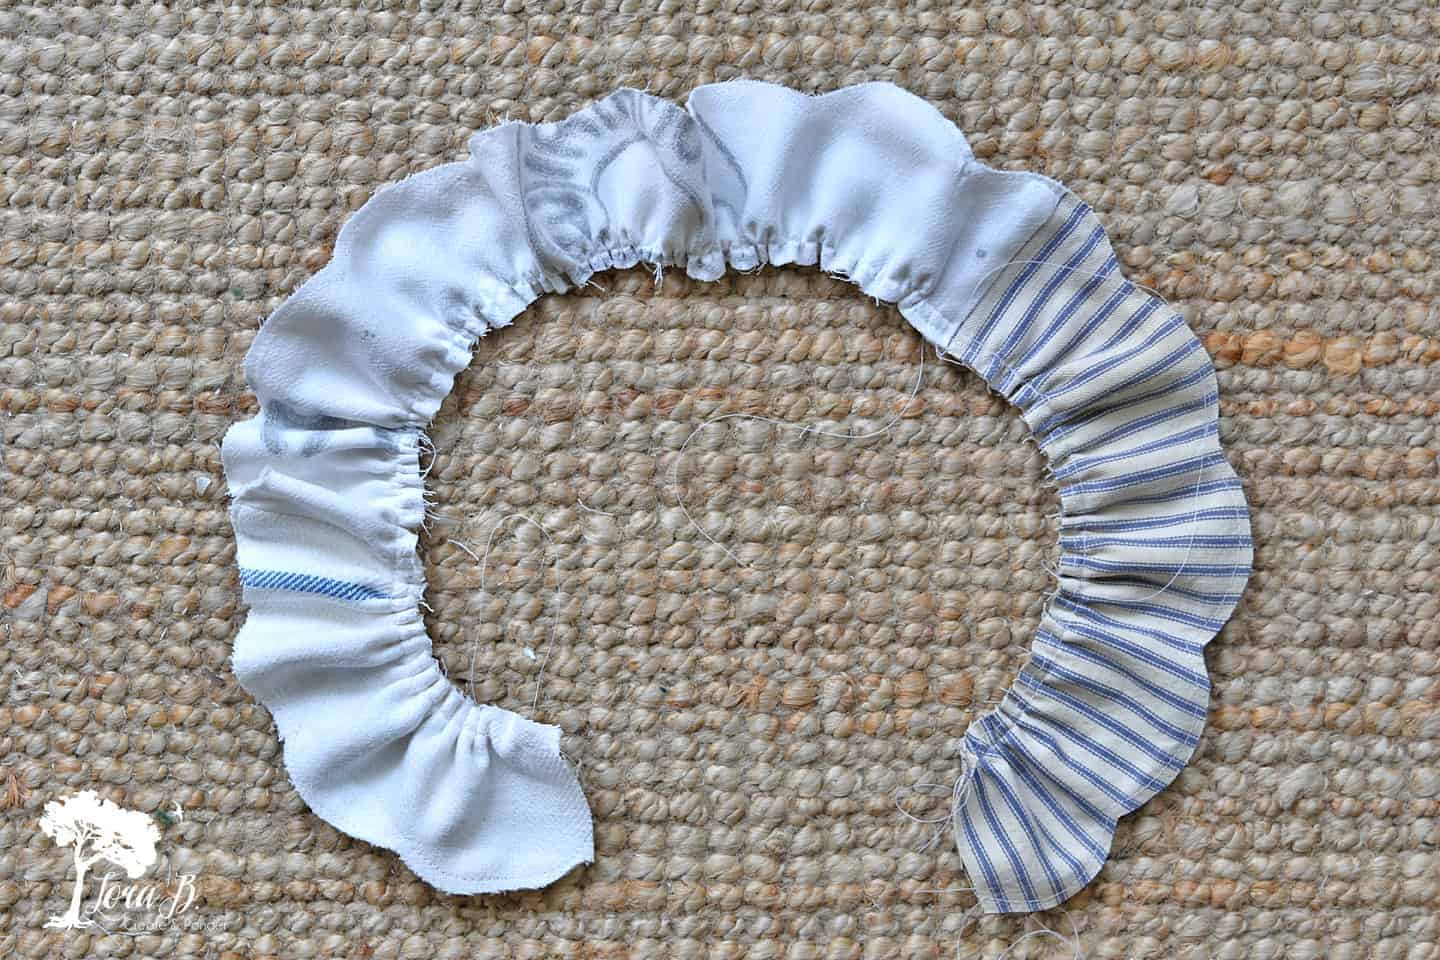
With a regular straight stitch, sew 1/8″ inside your scallop lines. Yes, this takes a while. Sew another regular stitch on the straight line. Do this with the whole piece of fabric.
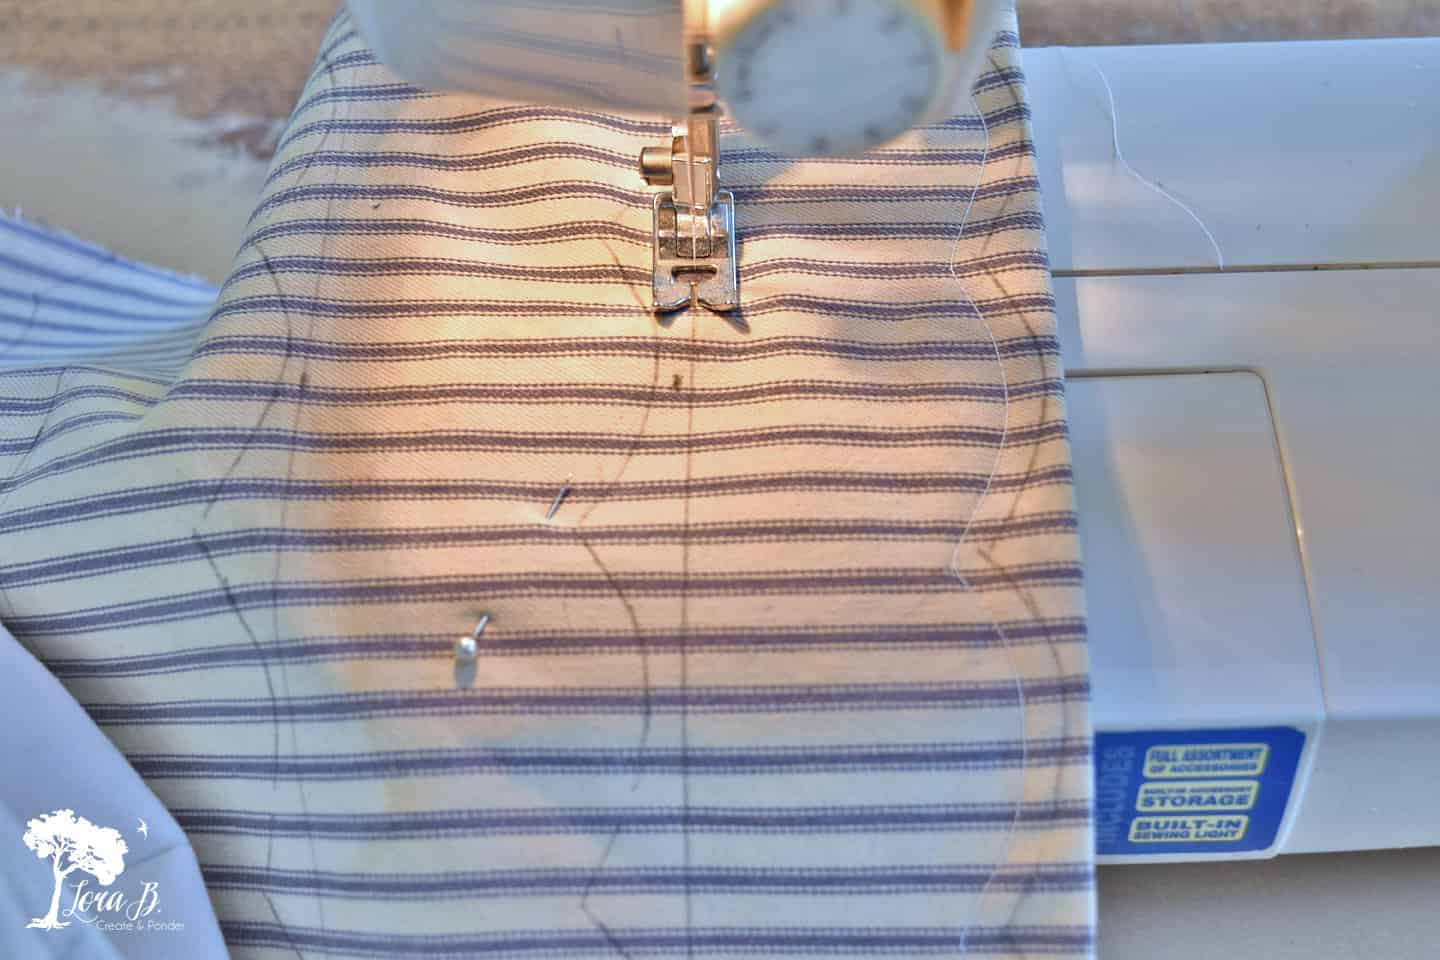
When you’re all done, cut on the scalloped line. I also cut the extra scallops off below the straight line. Your strips should look like this. You can iron them if you’d like.
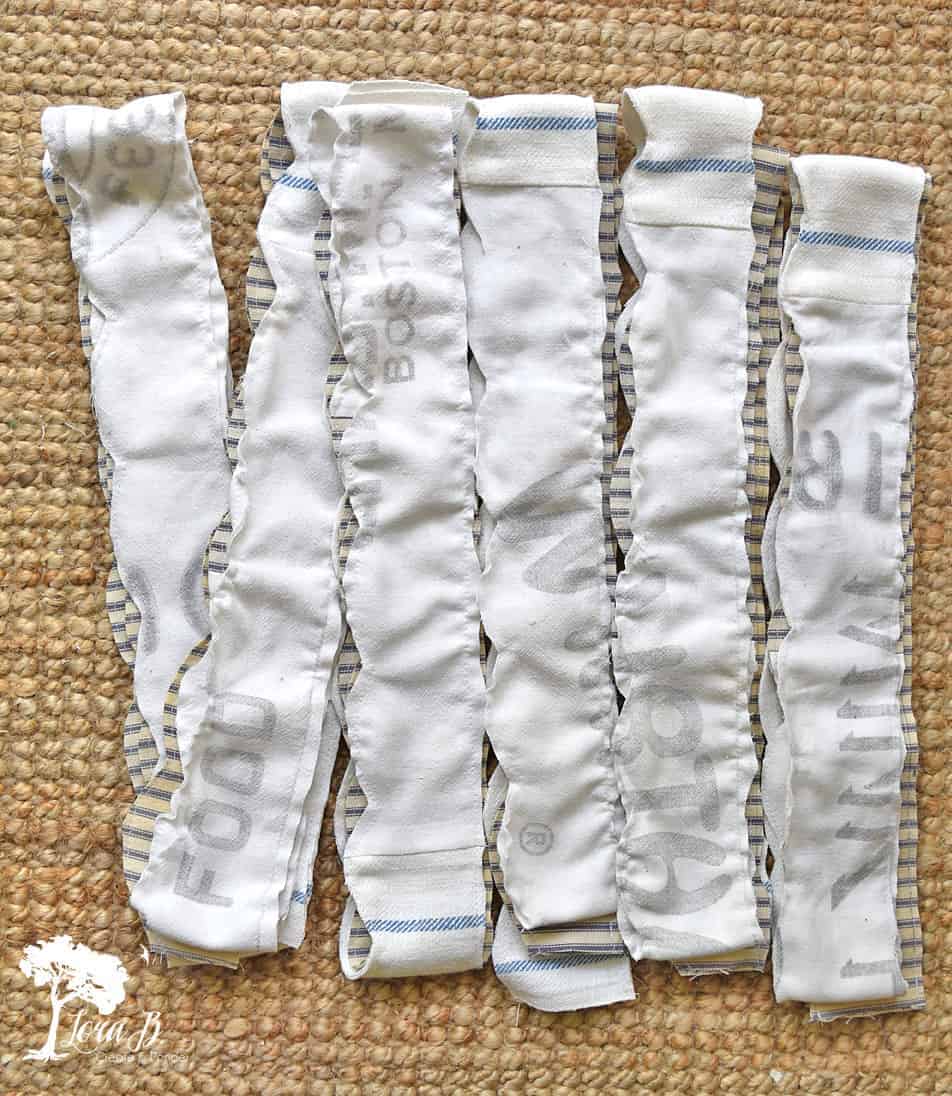
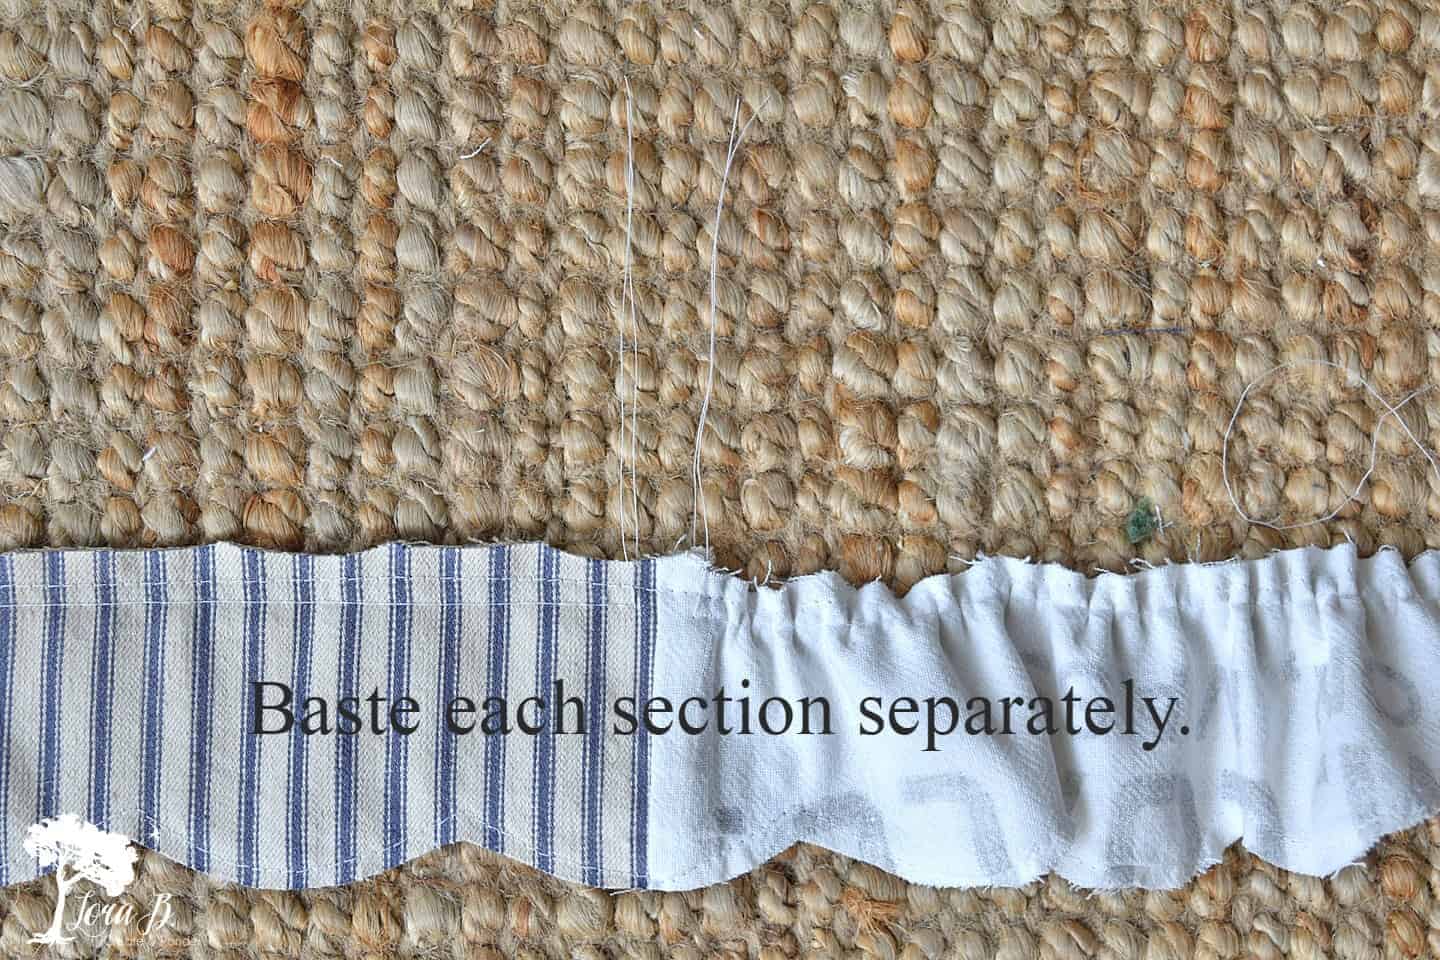
To Create Fullness, Baste and Gather
For my first flowers, I didn’t realize this was needed, but adding a basting stitch and pulling the gathers totally created a full flower.
Sew a basting stitch on the bottom of each strip. If you use 3 different fabrics seamed together like I did, start and stop your basting at each seam. It makes it easier to gather and saves you if the thread breaks. Pull the threads to create the gathers and fullness.
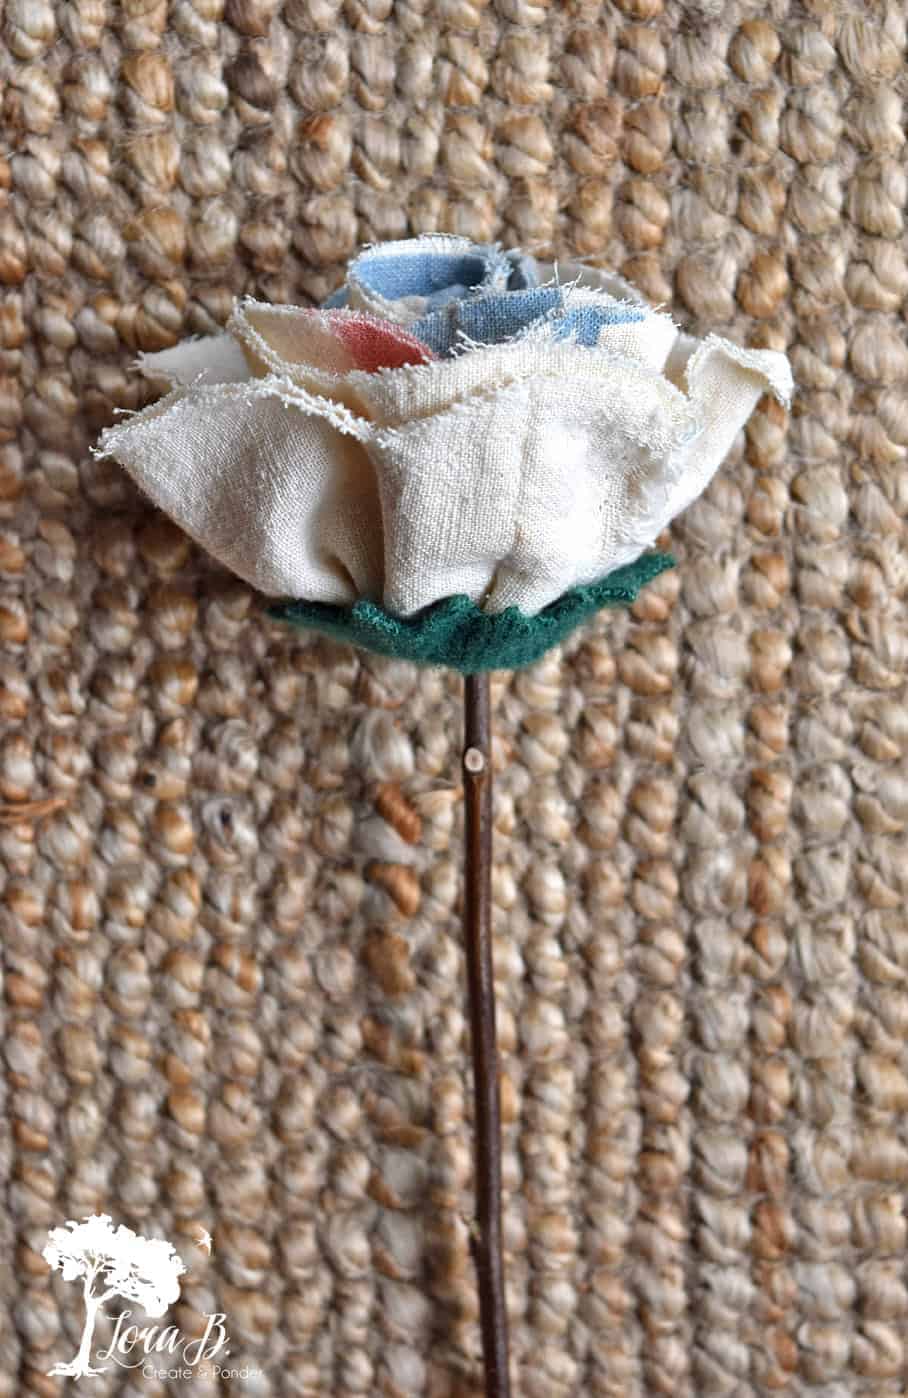
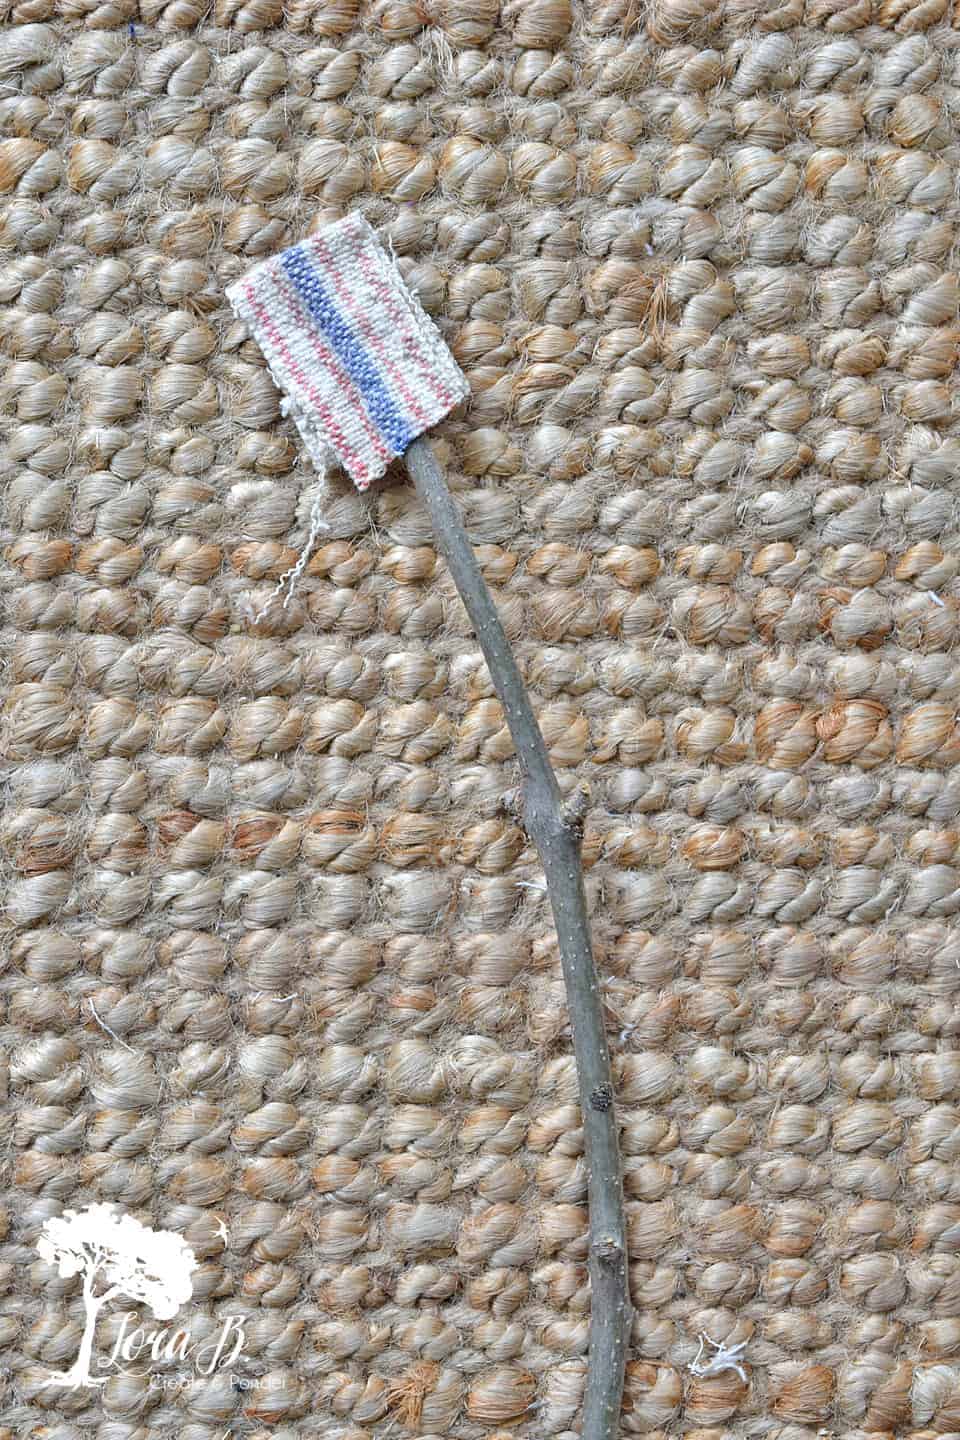
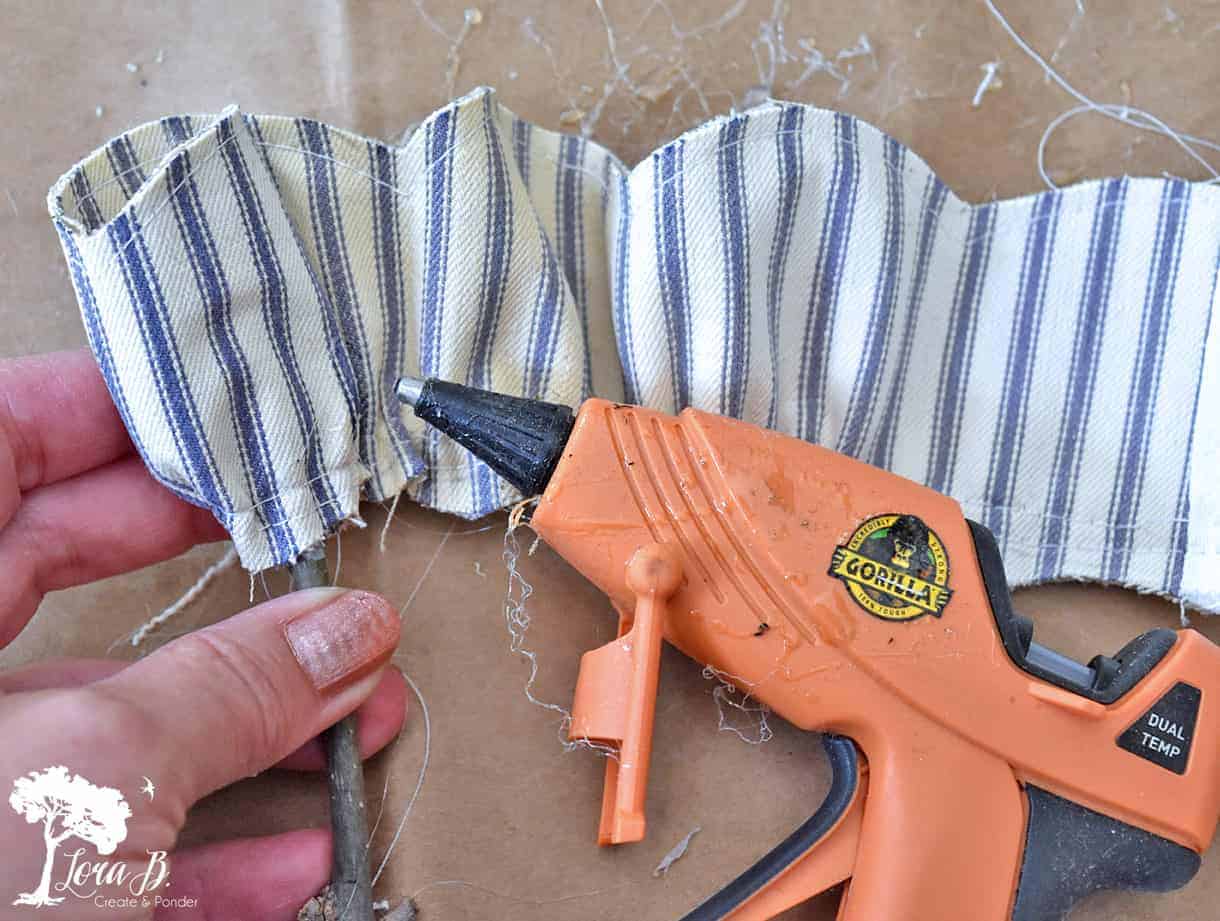
Assemble the Fabric Rose with Hot Glue
To begin, hot glue a scrap piece up and over a stick stem. This will be the flower center.
Then begin gluing your gathered fabric strip around. Place the hot glue on the bottom stitching. As you press the seam onto the previous layer, lean the petal part out at the top to create a more open flower.
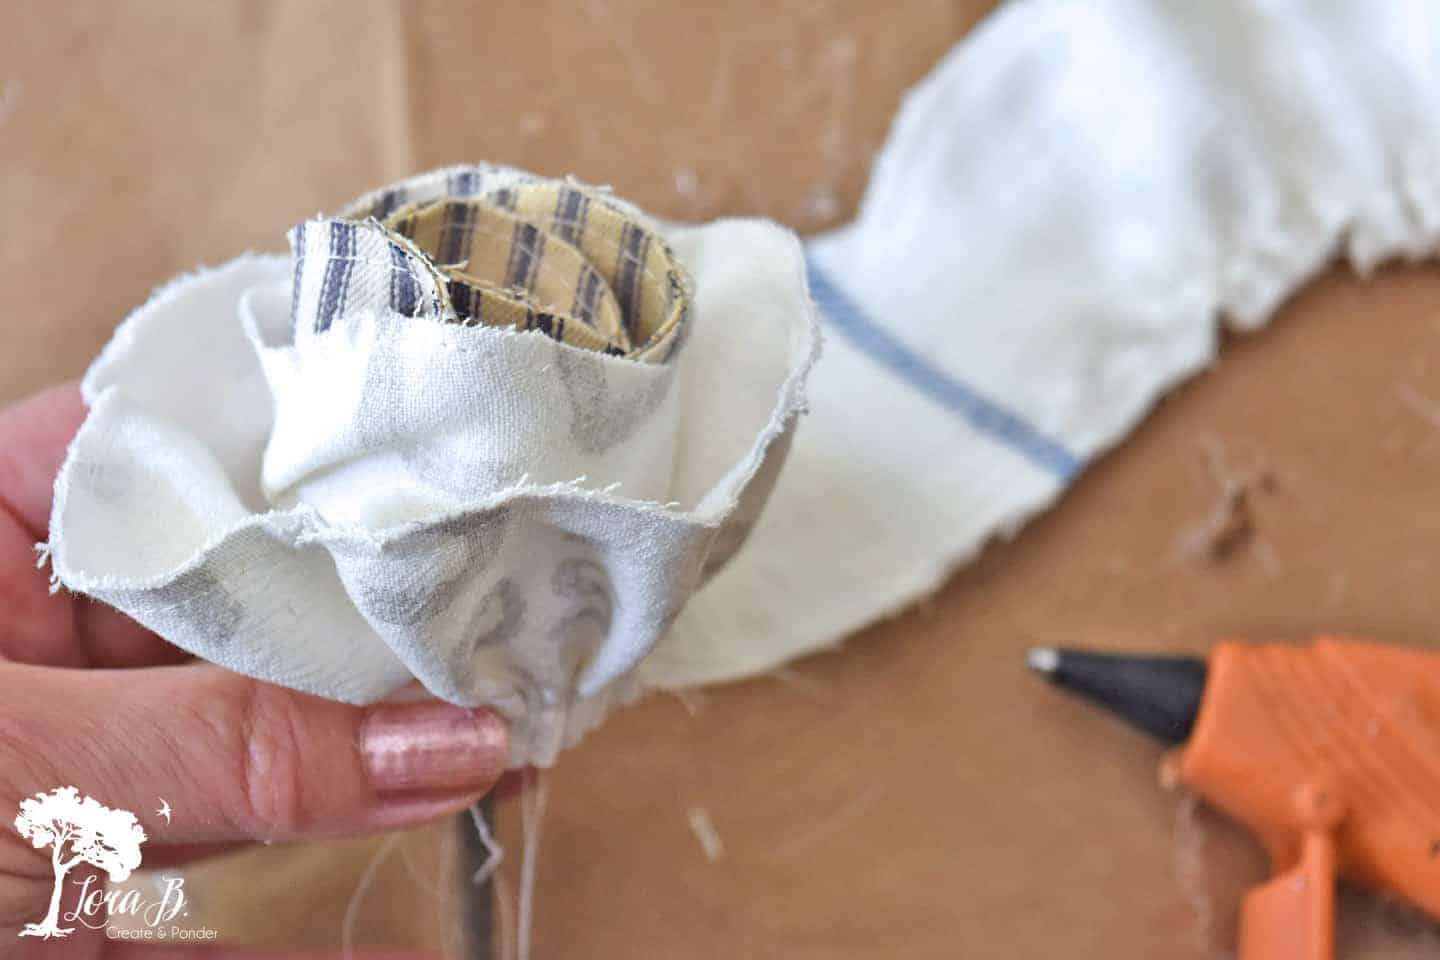
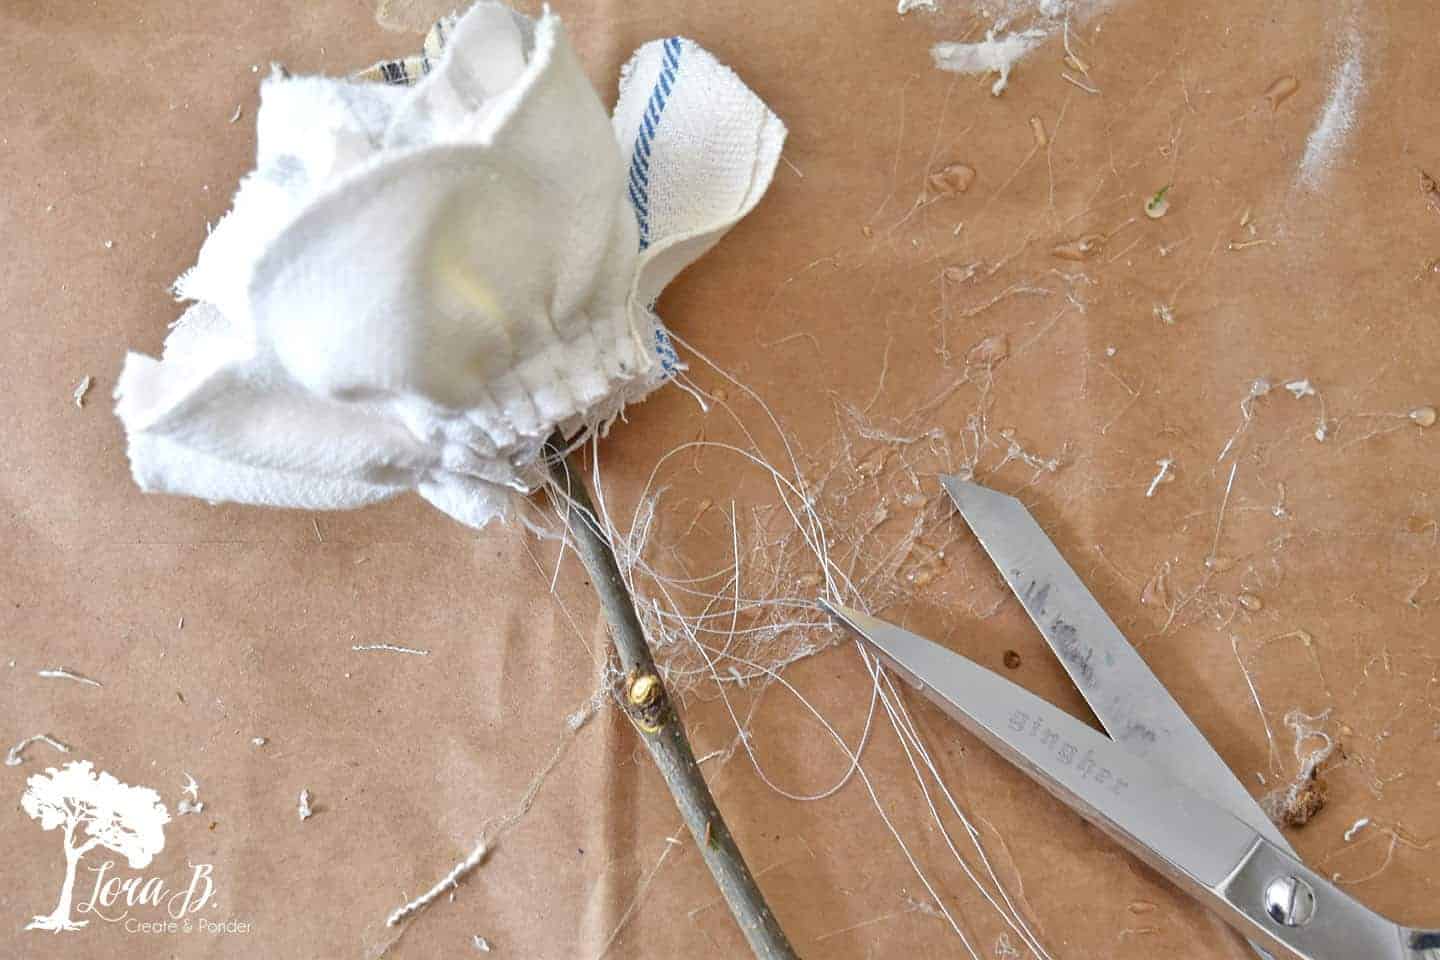
When you’re done gluing, trim off all the basting strings.
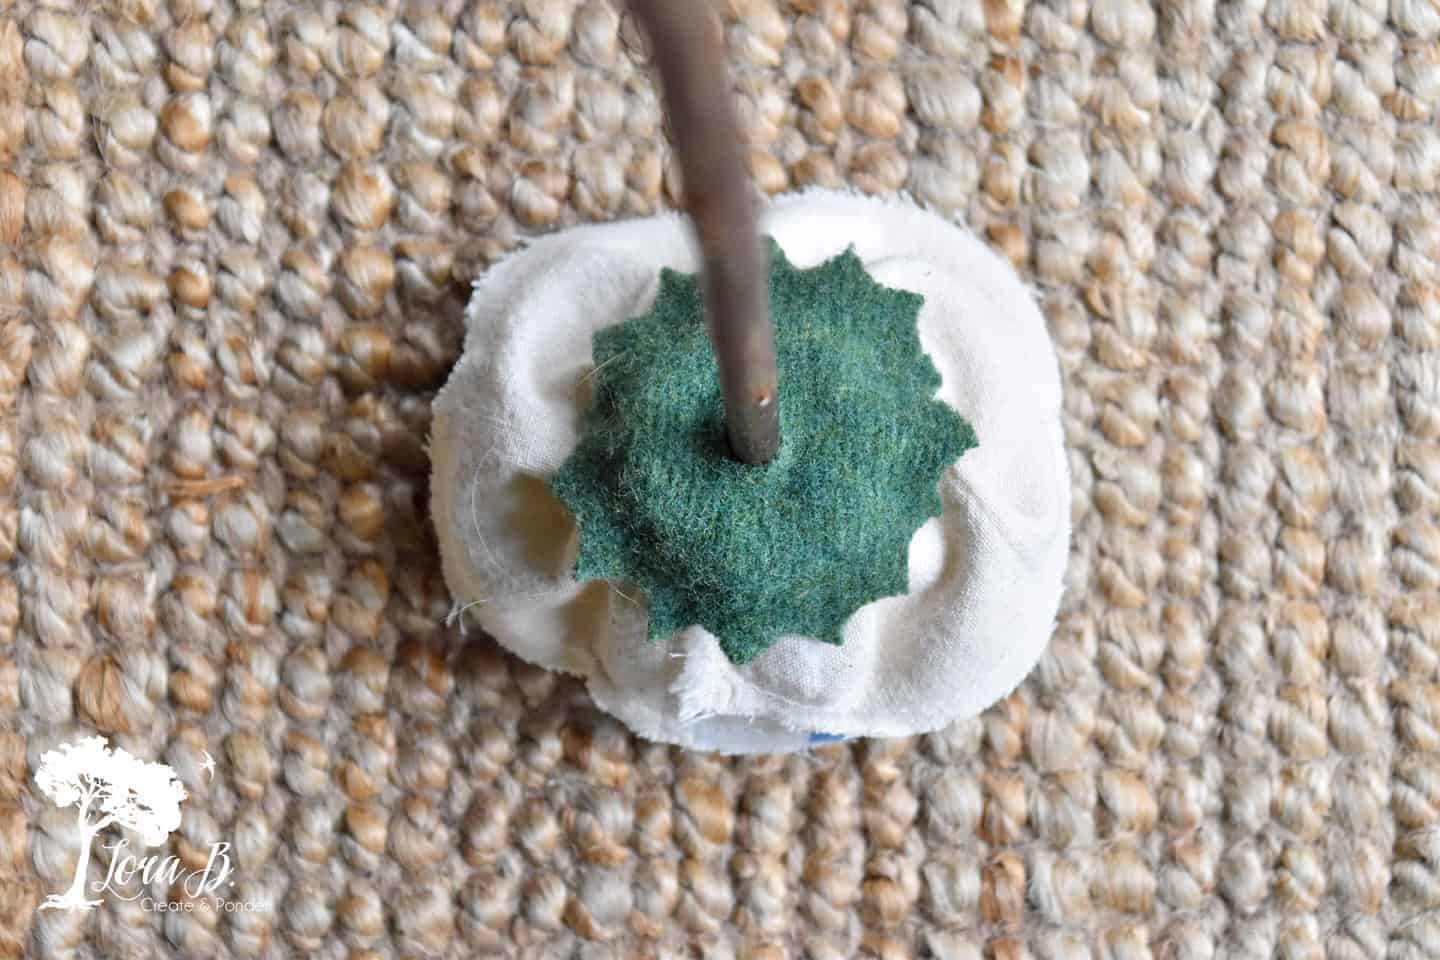
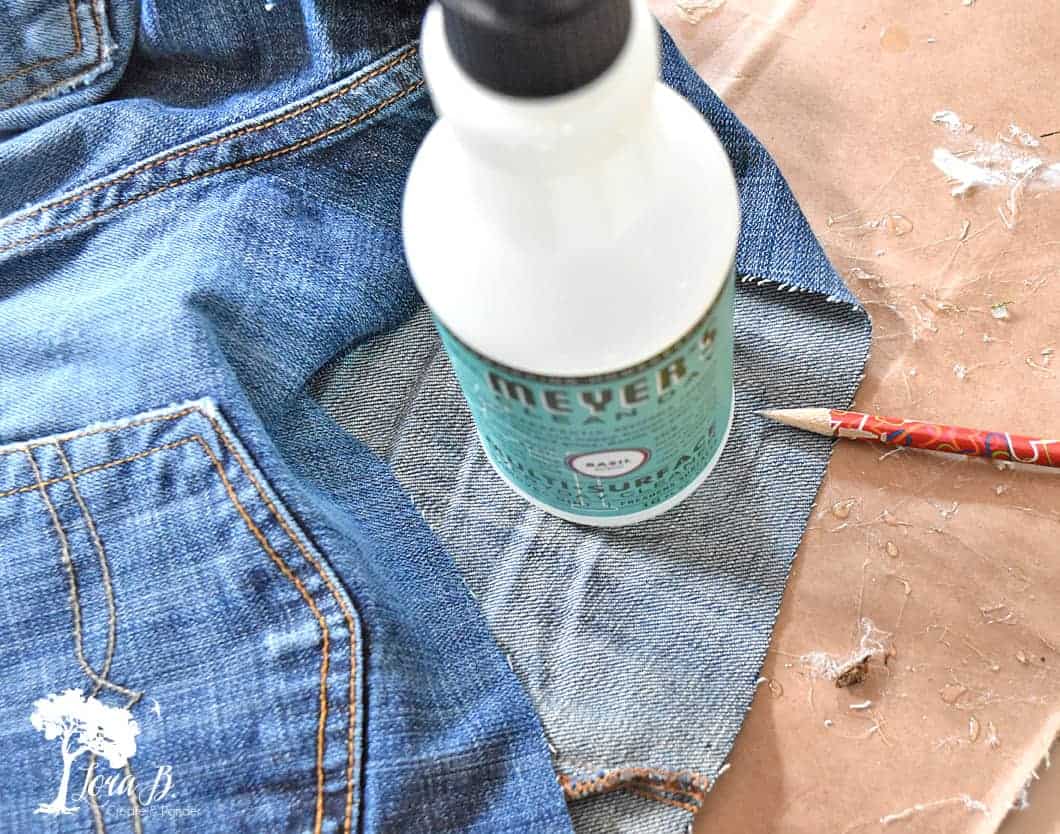
Finish off Fabric Rose Base
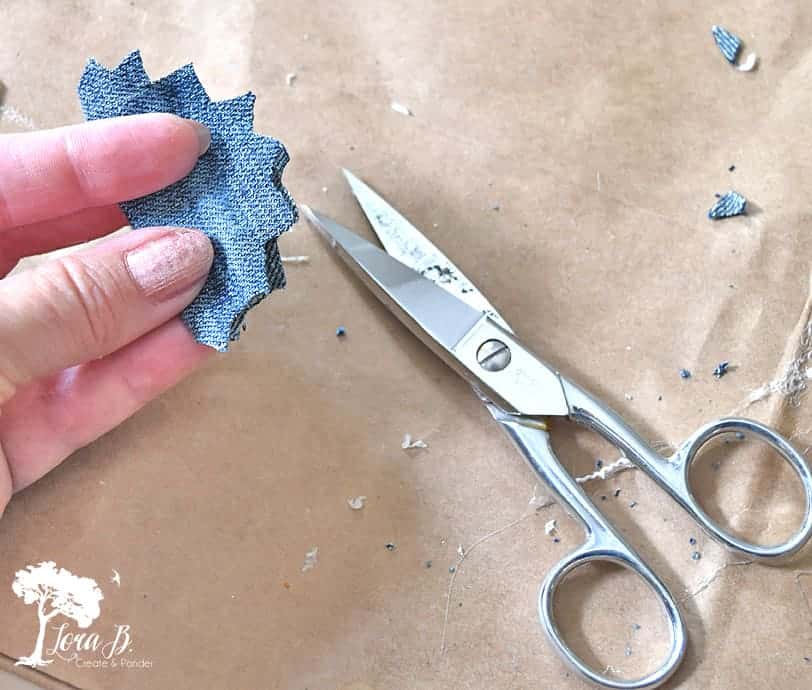
To finish off the fabric rose, hot glue a round, notched piece of contrasting fabric. I used the denim from an old pair of jeans to go with the blue and white theme. Cut a 2 1/2″ round piece (the bottom of a Mrs. Meyer’s counter-top spray bottle worked well).
Fold the circle in 1/2 and notch around the edges. THIS sharp little scissors is one of my favorite sewing tools.
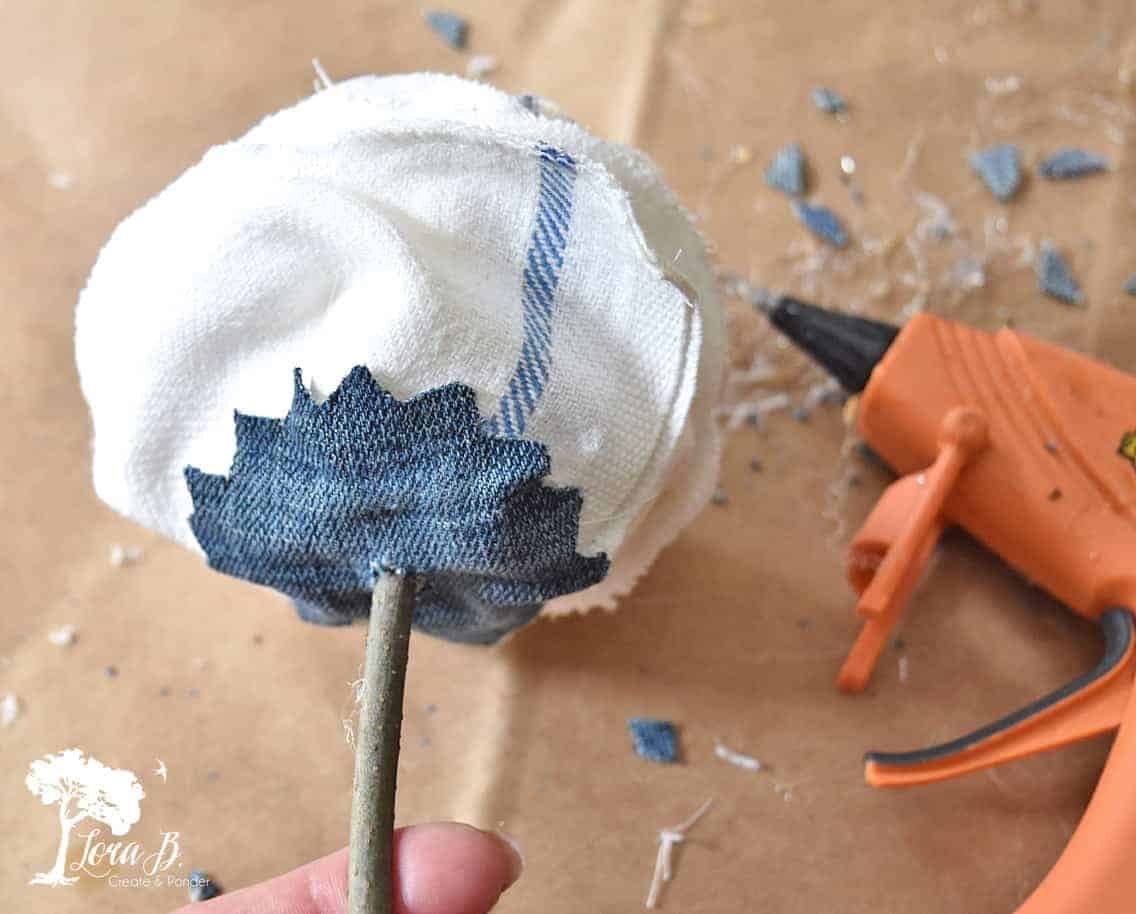
Cut a hole out of the middle and glue to the bottom of the fabric flower.

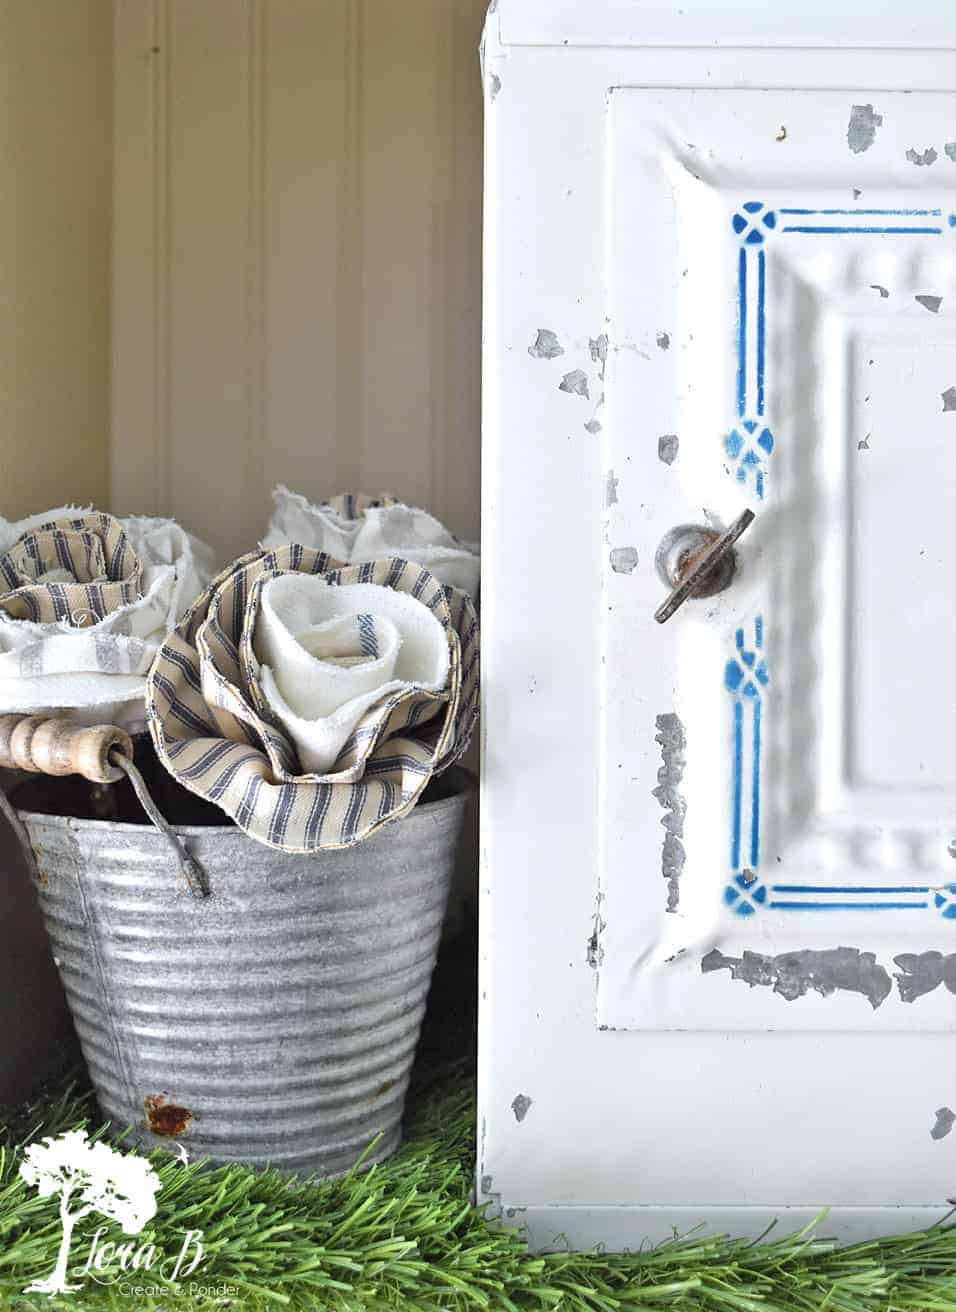
All done! You can pull, fold and shape the petals as you like. The more you play with them, the more you’ll get those nice frayed edges. Once you get the hang of it, I have a feeling you’re going to want a whole bouquet!
For more vintage feedsack inspiration:
“Feedsacks, Flour Sacks, or Grain Sacks, Is There a Difference?”
“Adding Vintage Feedsacks to New Furniture Seats”
“DIY Feedsack Stenciled Reindeer Pillow”
“Easy Stapled DIY Feedsack Mini Stool”
I hope you enjoyed this DIY Fabric Roses, Vintage Farmhouse Style tutorial. Let me know if you give them a try! I’d love to see how yours turn out!
If you enjoyed your visit, be sure to Become an Insider so I can send the ideas right to you! You can Sign Up HERE.
Follow Me: LTK | Amazon | Pinterest | Instagram | Facebook
Pin and save!

Sharing at these lovely parties:
so cute,i love it
Glad you enjoyed it!
Simply GORGEOUS, Lora! We will be featuring you starting Wednesday at the Creative Crafts Linky Party! Pinned and shared!
Creatively, Beth
Thanks, Beth; that’s wonderful!
These are so pretty, Lora! Thanks for sharing at Vintage Charm!
Your welcome, Cecilia!
Love these!!!!!!! I for one could never have figured that out and to be honest, it looks like a lot of work for one little flower. But that’s one of the things I love most about you. – You are not afraid to try all the things. Yikes, does that mean we really aren’t alike?! No. I still aspire to be just like my bestie! Pinned.
I was pretty determined, Cindy! Now I want to make more.Once you get the hang of it, it goes pretty smoothly! Thx, friend!
Oh thank you! These are sooo cute! I started following you after reading the post that inspired these. I love your blog!
Patti
Awesome, Patti! I’m so glad you found your way here:)
Love how your fabric roses turned out Lora! I can see that these could be changed up in so many ways. So pretty!!
Definitely, Tuula! I want to make some with old floral pillow ticking now;)
These are adorable! Thank you for all the work you went to to figure out how they were done!
Yes, I did have to sacrifice one, but now I have 9 more!
I love these roses so much better than the paper or felt i’ve seen. I will need to try this,i pinned them, thanks so much.
There are so many wonderful flowers out there to make, Marlene. But yes, these are my latest crush;)
These are gorgeous, Lora! I’ve seen lots of fabric roses on Pinterest but what makes yours so unique is the lovely vintage fabric combination. I’m definitely going to give these a try. Pinned 🙂
Wonderful, Marie! I’m sure yours will be beautiful!
These are so wonderful, Lora! Thank you for sharing! Pinning!
Thanks, Linda! Thanks for pinning:)
Lora, these are adorable. I love that you used different fabrics, so cute. thanks for the tutorial!!
Your welcome, Debra! Thanks:)