
Vintage Silverware Art for the Kitchen
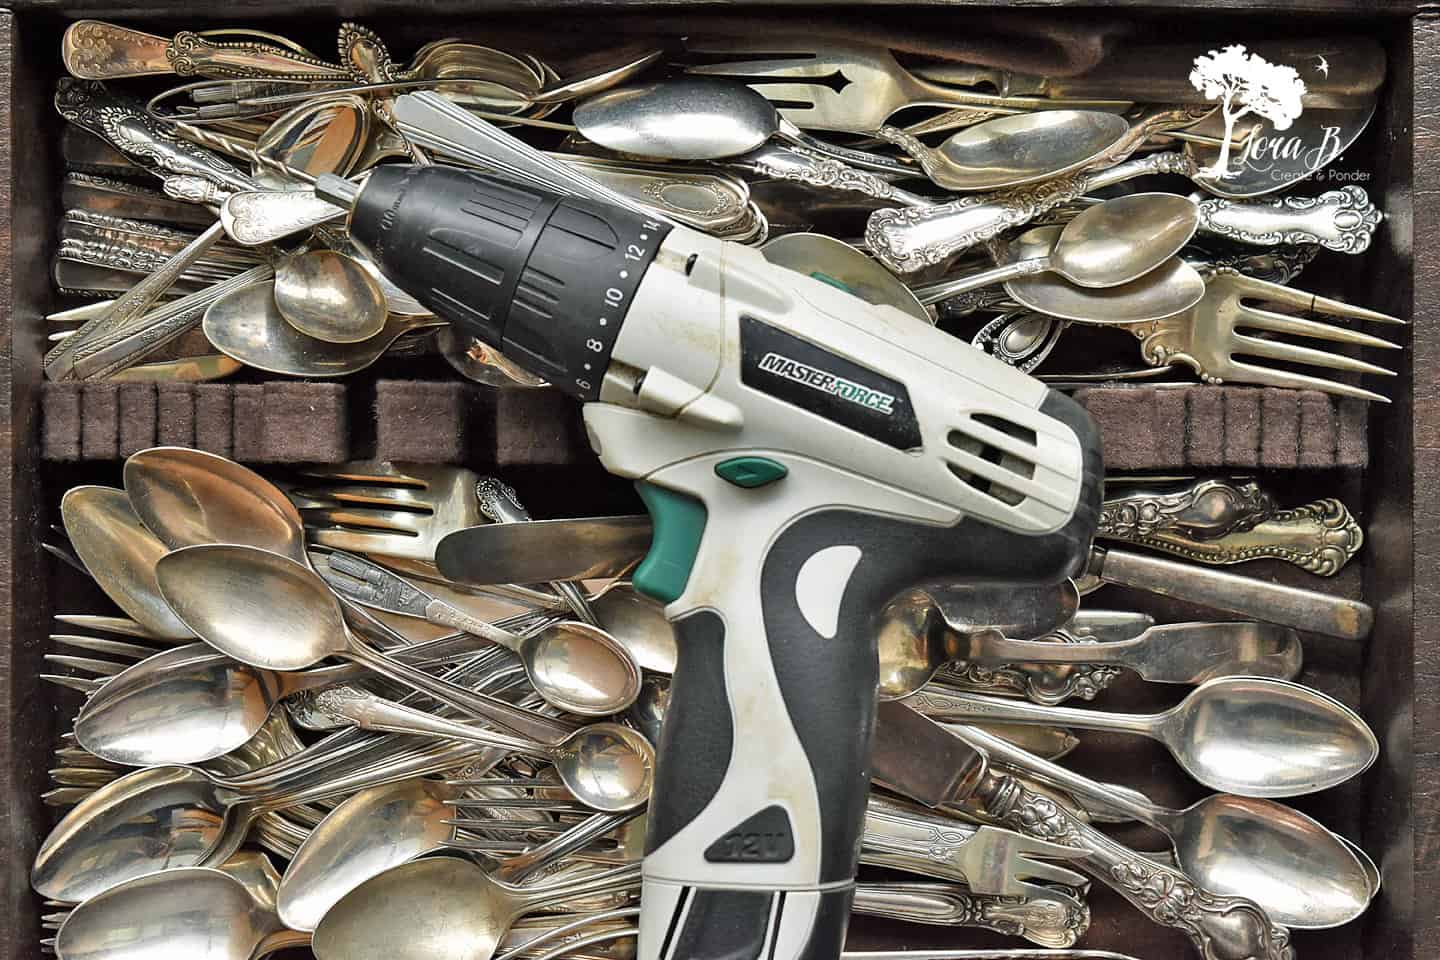
Having a lot of something always drives me to come up with an idea of how to use and enjoy it in a fresh new way! This box of vintage silverware was given to me by a friend when her grandma moved to the nursing home. It’s a mish-mosh bunch that doesn’t include many valuable sterling pieces, but pretty nonetheless. Here’s a great repurposing project to use up and enjoy extra silverware, Vintage Silverware Art for the Kitchen.

Today’s project is part of our Thrifty Chicks monthly challenge, where a group of talented bloggers create around a theme. If you’d like to check out some of our other junkovers, you can see them HERE. Today is all about silverware! Can’t wait to see what everyone came up with this month; all their links will be at the end.
Vintage Silverware Art for the Kitchen
My kitchen sink wall has been getting a little makeover, which you can see in “Decorating is Like Dominoes; One Thing Leads to Another”. The full reveal hasn’t happened, but I’m making progress…stay tuned. This vintage silverware art is going to hang on the other side of the windows from my clock display, which you can catch in “Re-purposing a Vintage Printer’s Box“. My walls are filled with re-purposed junk!
I’ve often been asked, “How do you come up with all of these ideas?” So I actually made a checklist of the questions I ask myself to get the brain wheels turning. It’s all about seeing potential so you can create the unique! You can grab a printable version to inspire you ideas down below in my free Insider’s Resource Library. More on that later…
For your convenience, this post contains affiliate links. If you make a purchase, I may receive a commission. There is no additional cost to you. My full privacy policy is here.
First, Lay Out Your Silverware Art Placement
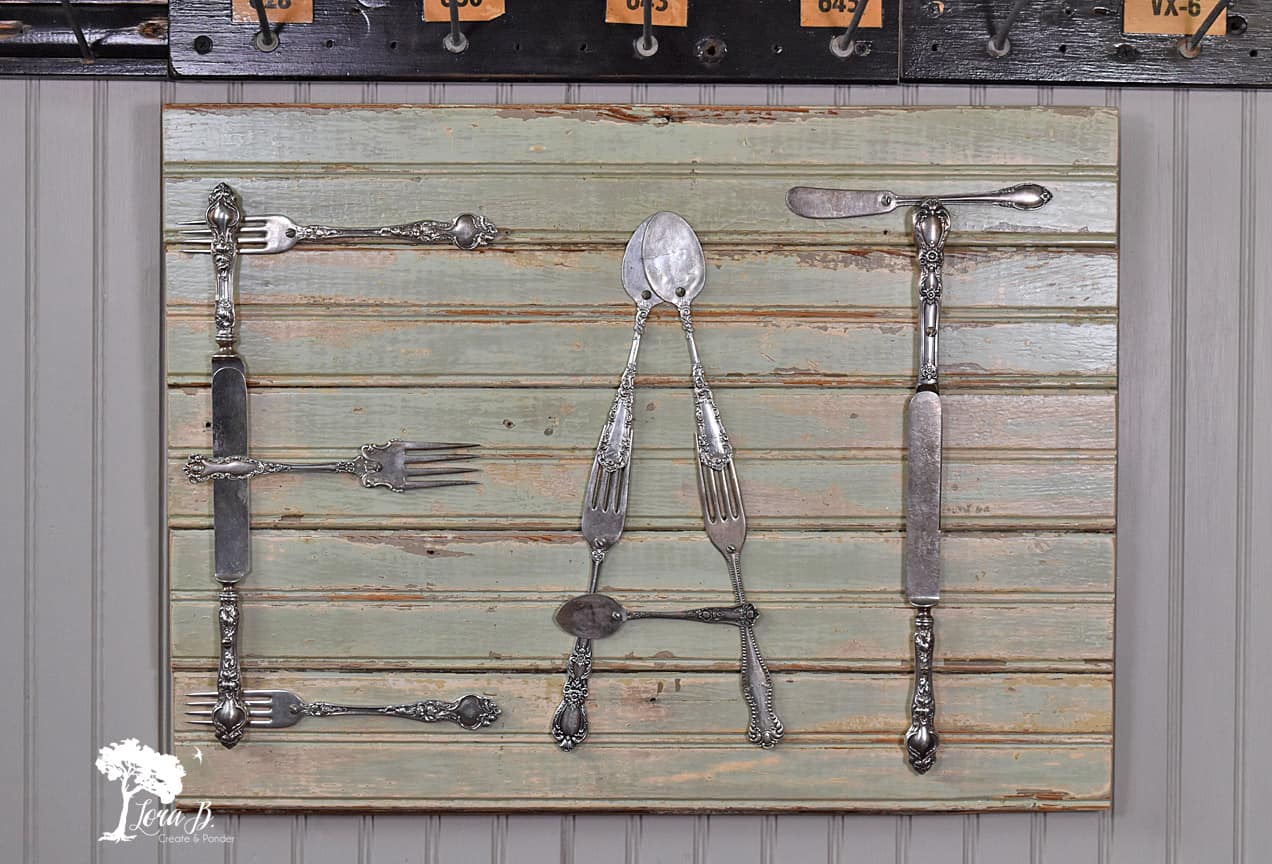
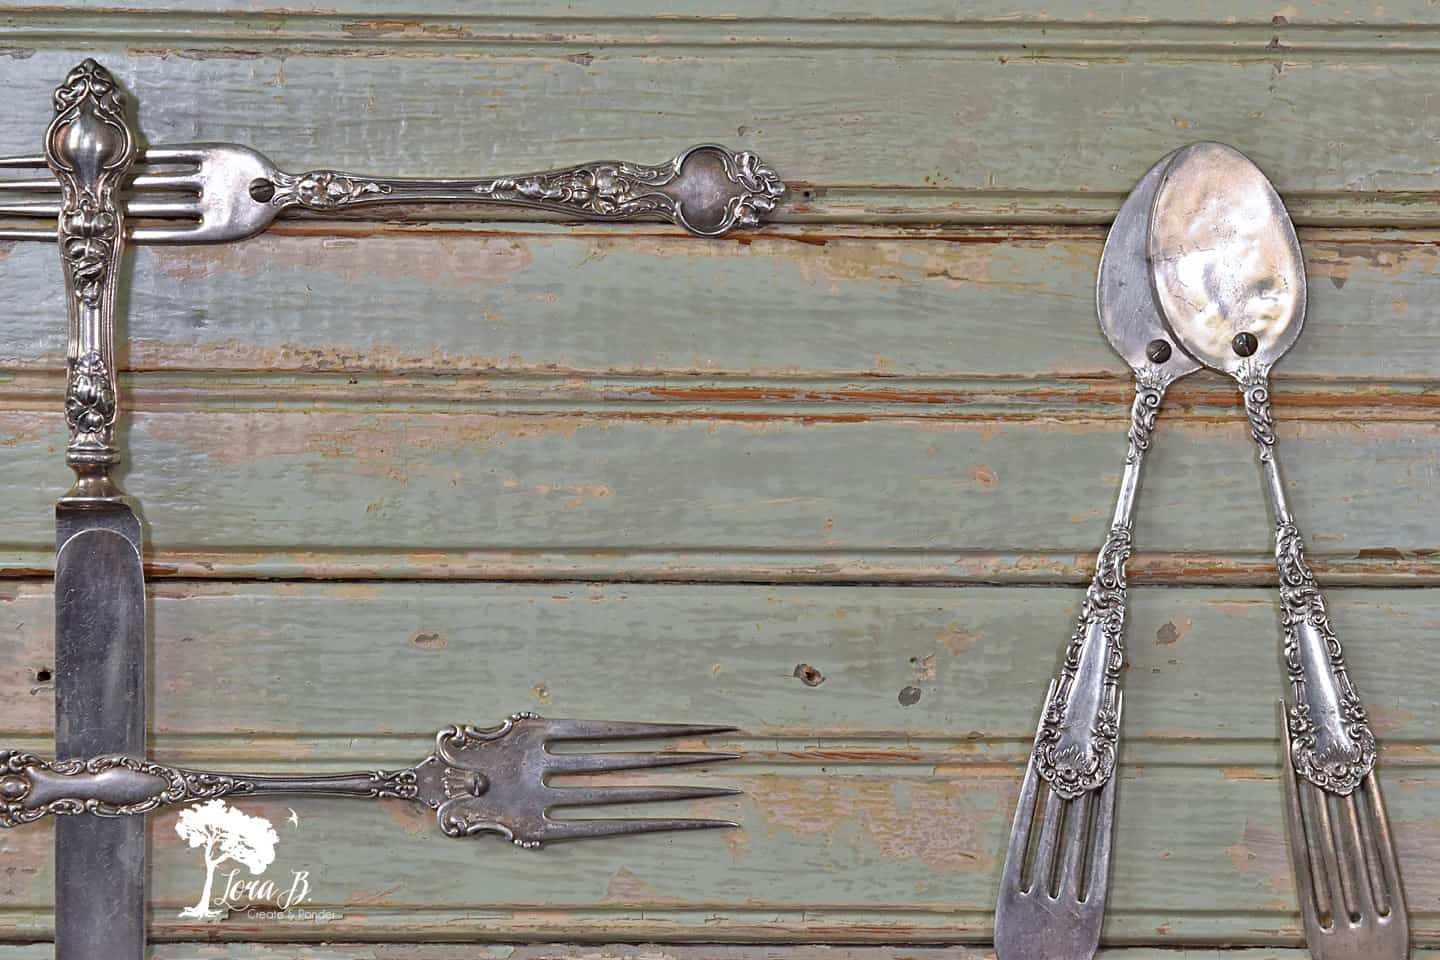
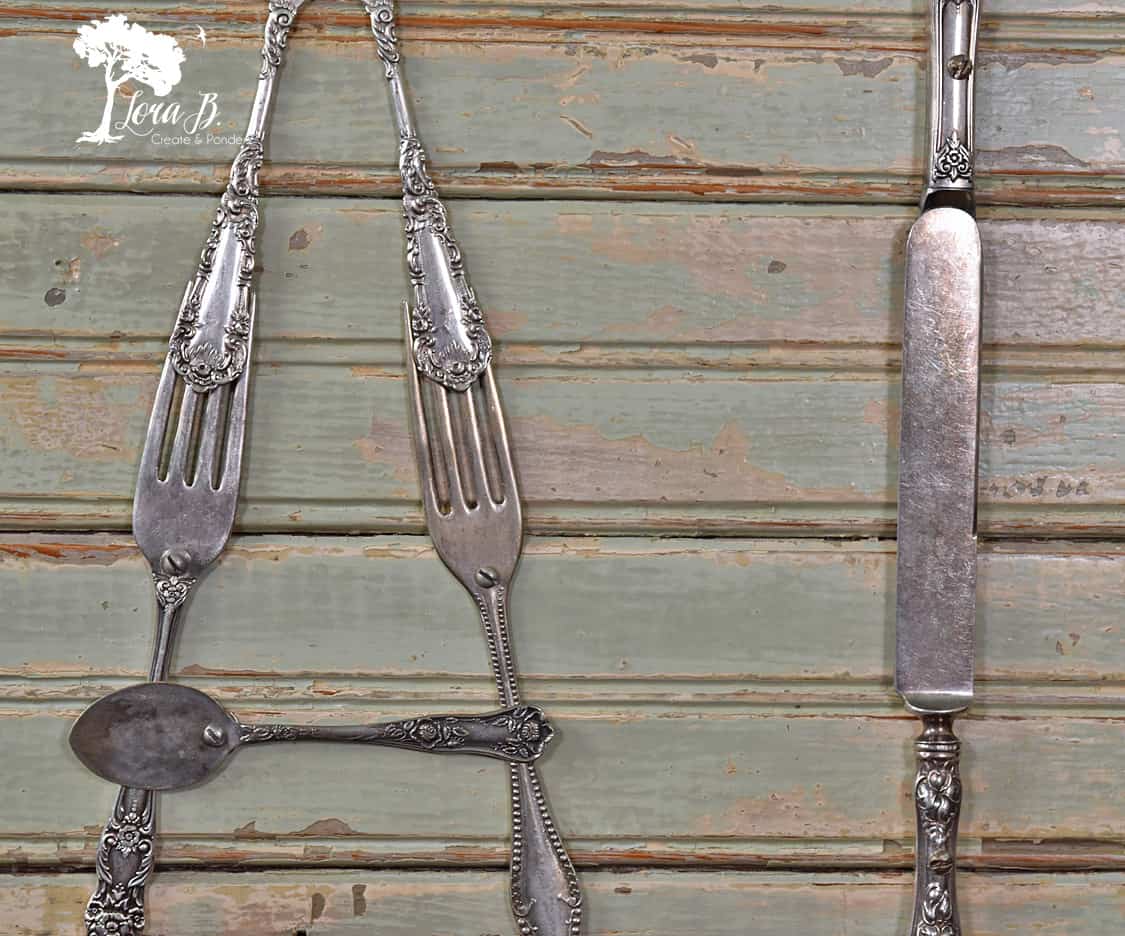
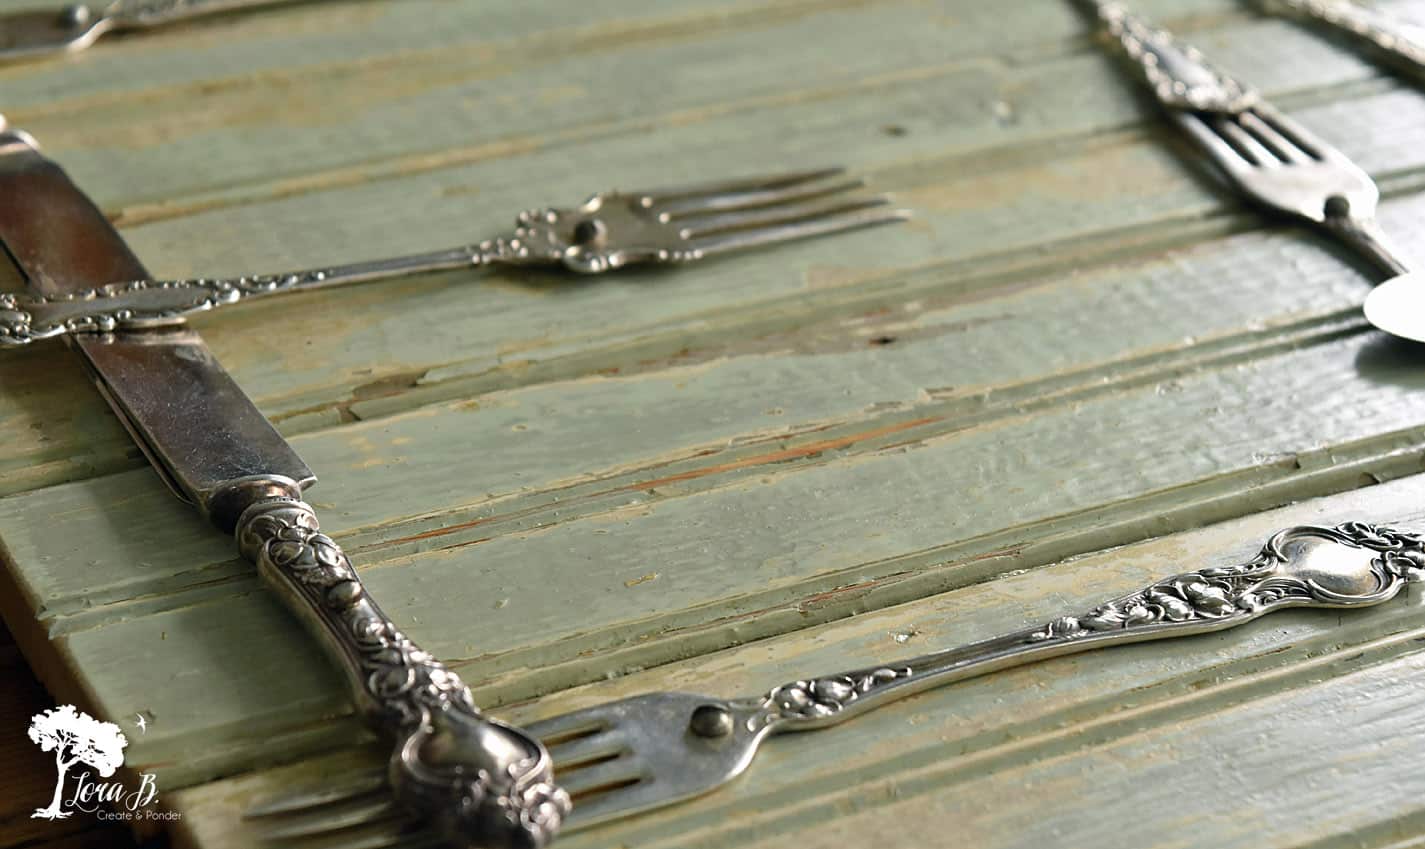
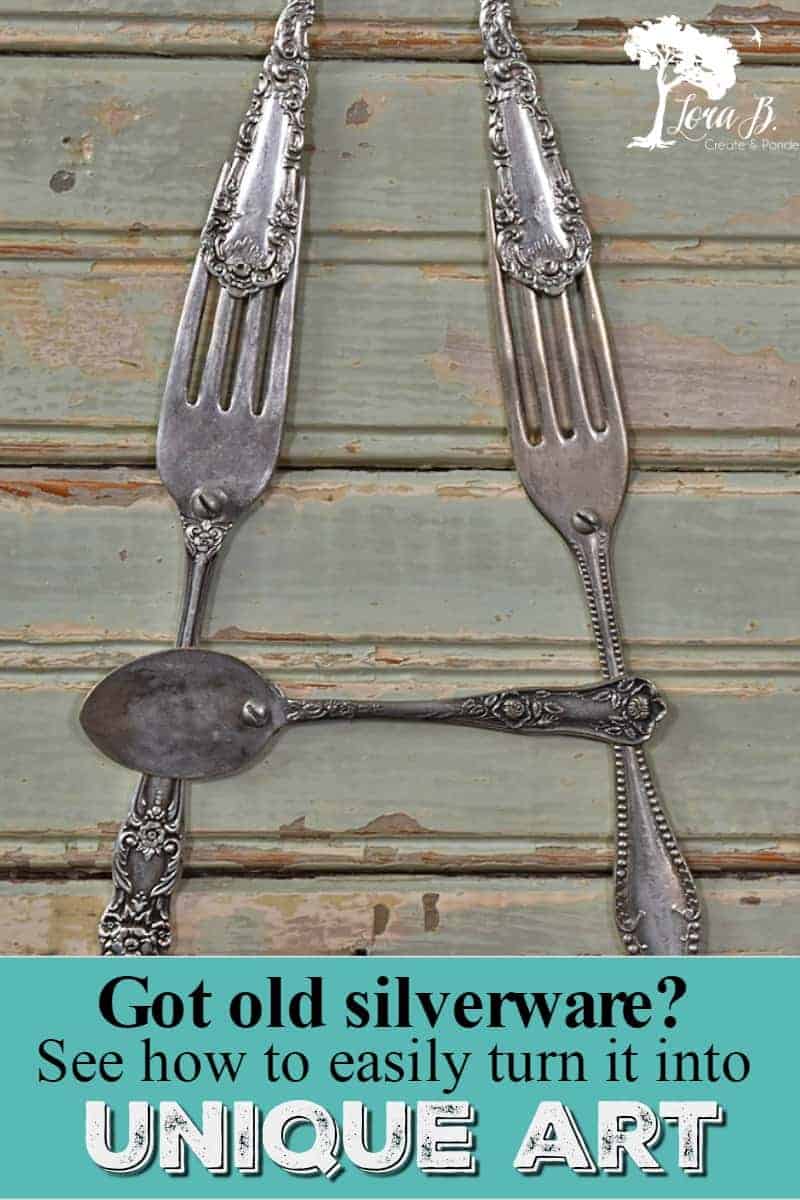
Pick out your favorite pieces of silverware. I love the ones with heavy, flowery texture. I decided the word “Eat” was a good word for the kitchen (well, maybe not if you’re on a diet;). Luckily, the letters are nice and straight. Play with the composition a little and try some different words to see how they’ll look.

Next, Hammer the Silverware Flat
Once you have your desired layout, it’s time to get out a little aggression out!
Hammer the silverware pieces flat, with a heavy ball peen hammer, avoiding the pretty, detailed parts (you can get a ball peen hammer HERE). You can place an old rag over the silverware if you’re worried about scratching it. Everything around here has “character”; we don’t mind if there’s a little more. Even this hammer looks pretty vintage;)
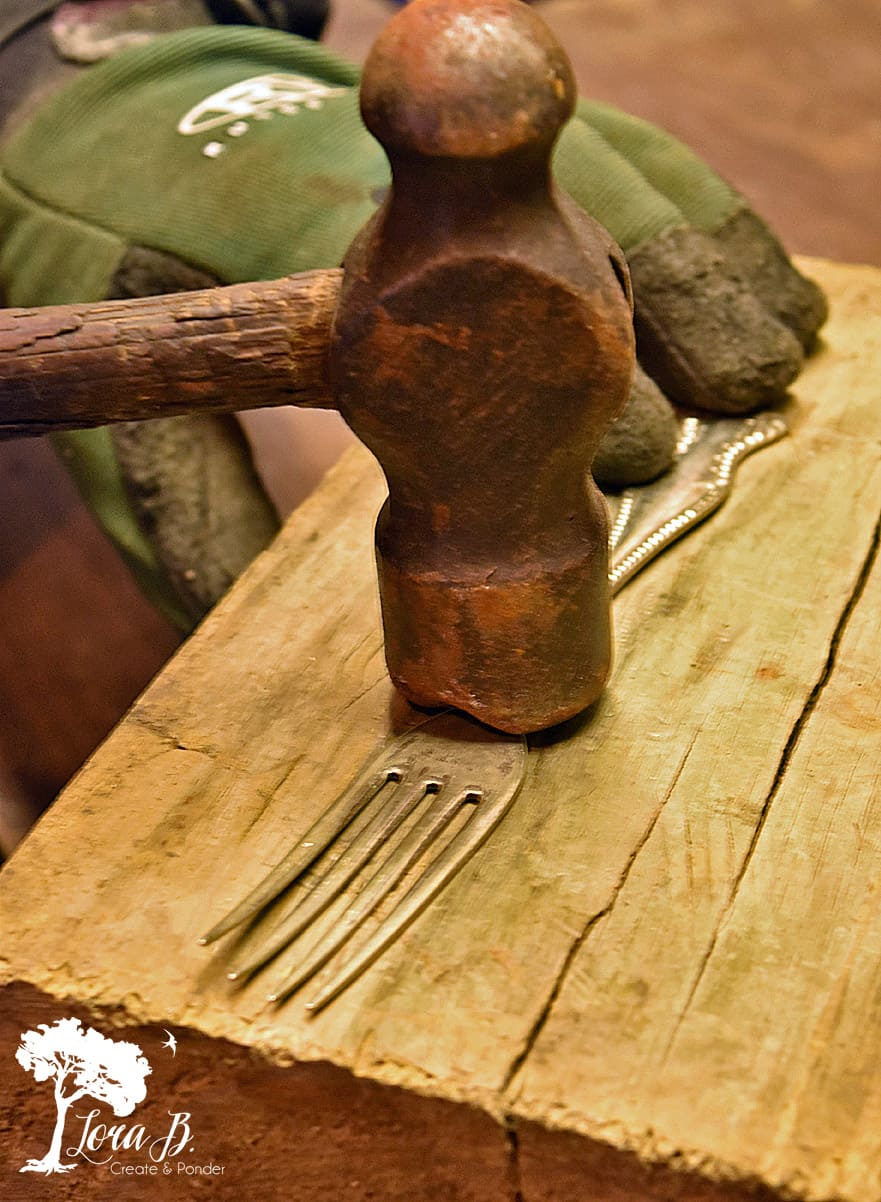
(sorry for the fuzzy pic; garage does not have good lighting)
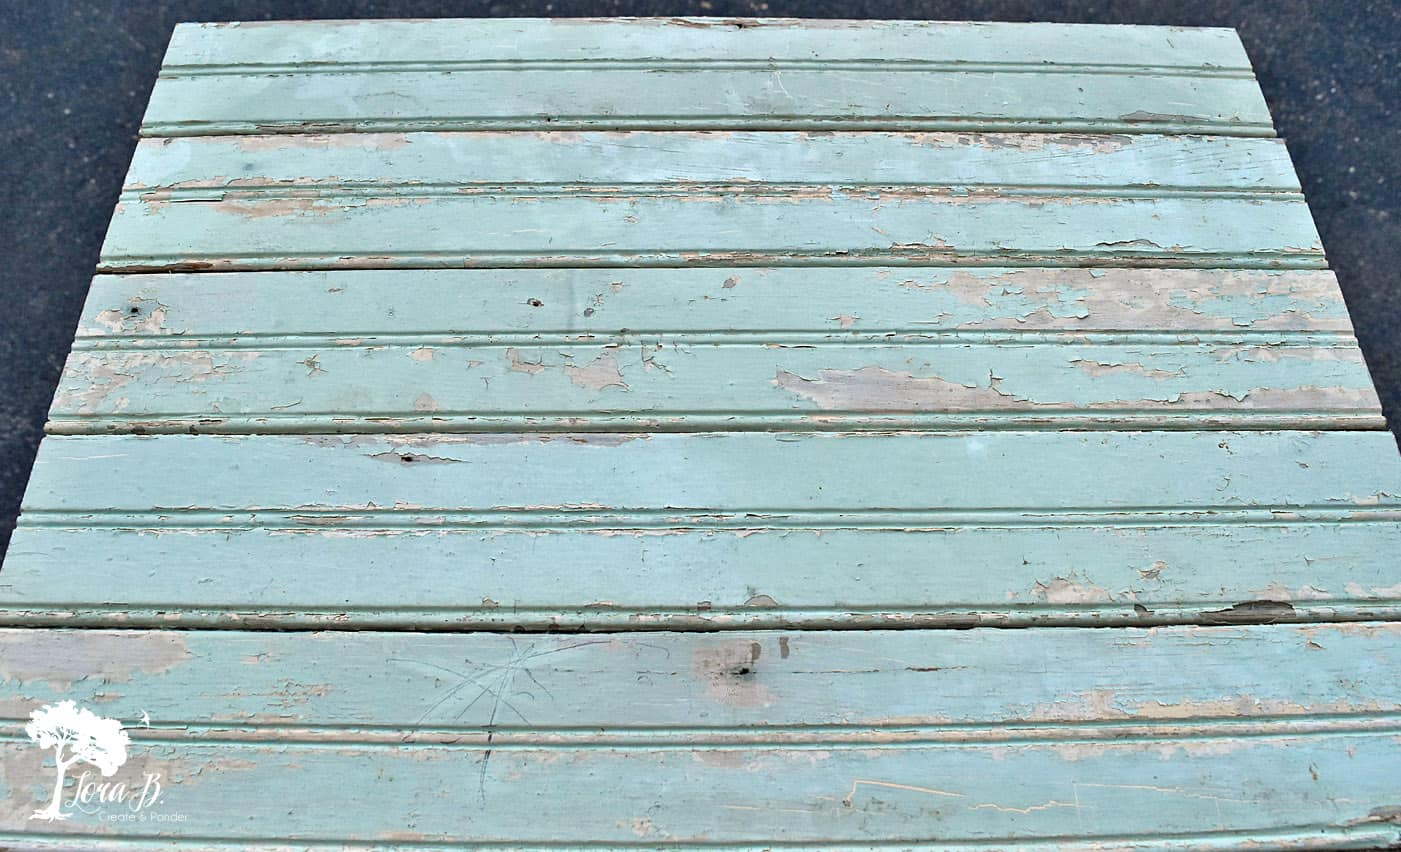
Decide a Foundation for Your Silverware Art
The background of your silverware art will give you the overall style of your finished piece. A darker background could be more dramatic and really make the silverware shine. Ultimately, you want to find a foundation that will work with where you’re going to hang it.
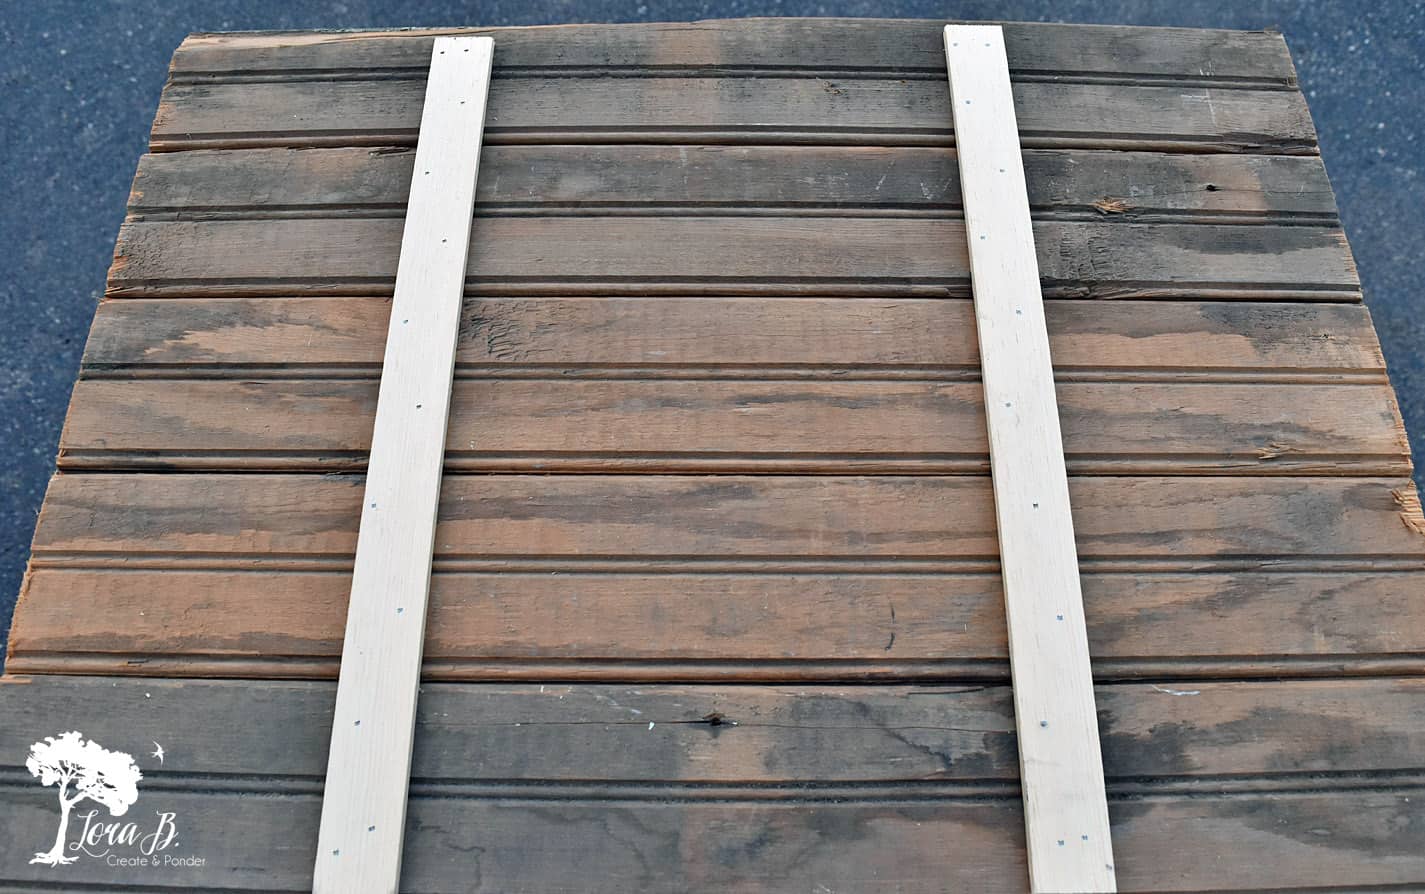
Our kitchen has vintage green accents throughout, so I decided to use some old beadboard we had pulled out of a tear down house. I loved the chippy green paint. We cut the beadboard in 22″ lengths and fit the pieces together to create a 16″ heighth. To hold the pieces together, we nailed 2 strips of wood to the back. I sanded the chippy paint a little, scrubbed it up and once dry, added 2 coats of my favorite polyurethane (you can get it HERE) to seal.
Attach Silverware to Foundation with Old Screws
Using the drill press (you could also use a regular drill), Mr. Fix-it drilled holes in the silverware where we would attach it, trying not to disrupt the pretty patterns. The knives were tricky. We couldn’t make holes in the spreader part, so had to resort to the handles. It’s good to have a stash of older looking screws for this type of project. Next time you’re at an estate sale or garage sale, definitely buy some old handyman’s stash; always good to have some old hardware on hand! We used rounded head screws for this project.
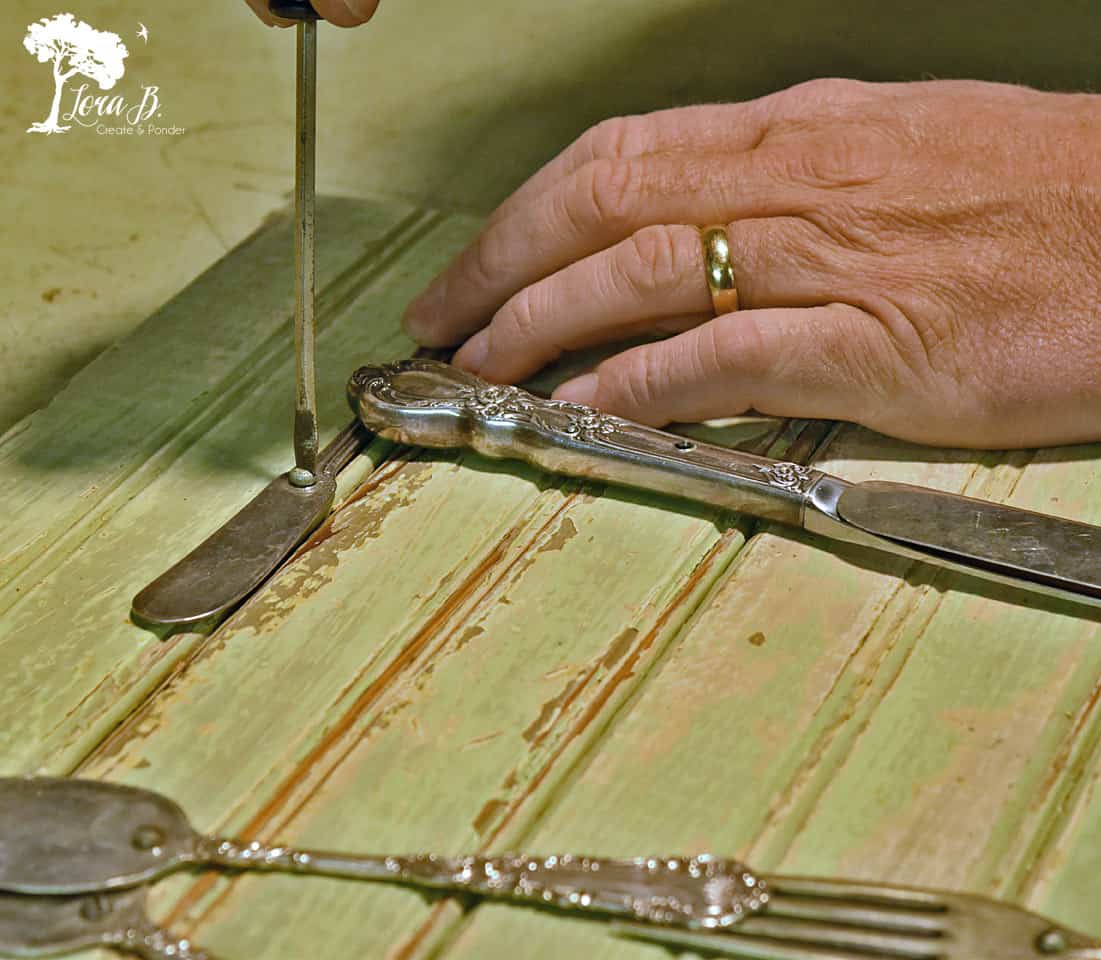
Let me mention, you could glue your silverware pieces onto the board, also with a strong adhesive like E600 (get it HERE). I just like the junky, hardware look of the screws; gives it all a little more industrial look.
Once the spoons and forks are flattened, it’s much easier to overlap them and get an appealing look to your letters. This really is an easy DIY project, and the results are a perfect vintage re-purpose, fitting for the kitchen!
Hang your Repurposed Art!
Now all those pretty silverware designs can be enjoyed everyday, artistically! This project could look totally different with another styled silverware and a more sleek backdrop. You can always pick another word, if you don’t want to be encouraged to eat, but try to pick one with fairly straight letters.
Get a FREE “5 Ways to Boost Your Re-purposing Ideas” by becoming an Insider!
Do you want to challenge yourself to see potential so you can create the unique? I made a list with the exact questions and steps I go through to spur my brain and come up with new ideas! You can download it in my FREE Insider’s Resource Library today!
I stock the Resource Library regularly with tips, tricks and seasonal printables. My Insiders love the FREE access anytime. (I’ll send you the password;) You’ll also stay creatively motivated & keep up with the latest in my weekly email!
Shop to Create the Look: click on pics for more info (*affiliate links)


I hope you enjoyed this Vintage Silverware Art for the Kitchen project! If you’ve got an old stash of flatware hibernating somewhere, this is a great way to enjoy it. Re-purposing items is so satisfying! You get to make something totally unique to decorate your home, and you accomplished it yourself!
If you’ve got extra silverware, definitely check out all the Thrifty Chicks Silverware Challenge projects below!


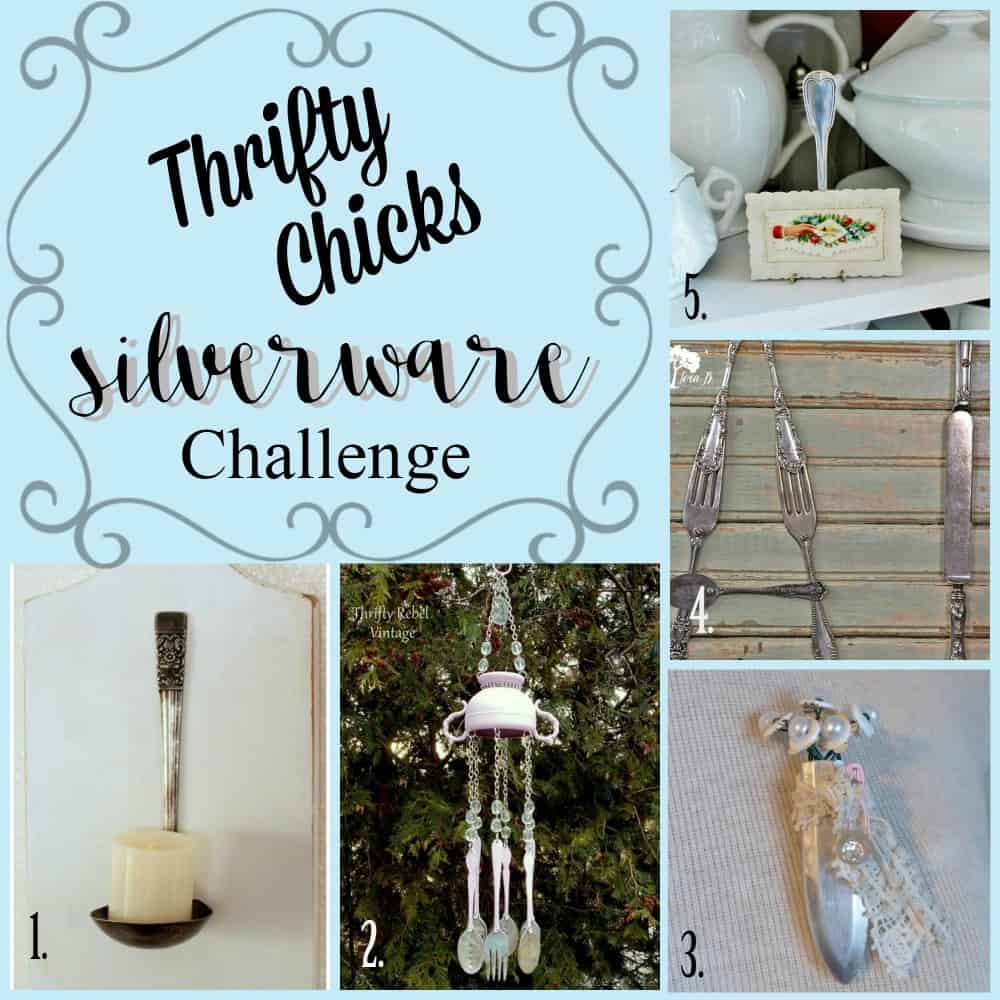
Shoppe No. 5, “How to Make a Candleholder Using a Serving Spoon”
Color Me Thrifty, “DIY Spray Painted Silverware Windchime”
Little Vintage Cottage, “Upcycled Silverware Lapel Pin”
Me;)
Adirondack Girl@Heart, “DIY Vintage Fork Easel”
Sharing at these lovely parties:
Great idea!! I think I will build it this weekend.
Have fun!
This is super fun! And the first pic definitely says this makeover means business!! 😉
Thanks, Sheila!
So fun, Lora! Thanks for sharing at Vintage Charm!
Your welcome, Cecilia! Just gotta remind myself it’s Wednesday…;)
Such a great idea using silverware for an EAT sign – love it Lora! Pinned 🙂
Thanks, Marie!
Your silverware stash looks like mine. lol. I love your sign, and the beadboard is a perfect backdrop for the silverware.
Thanks, Tuula! Yes, I can make plenty more silverware projects!
I love this idea! What a great way to use cast off silverware pieces.
Thanks, Paula! I’m enjoying all the beautiful designs, too!
Such a creative idea, Lora! Great tutorial too, I feel like I could replicate this project whenever I’m ready 🙂 I LOVE that green bead board–nice choice–
Thanks, Diana! I’ve been planning out what I’m using that beadboard for next…I’d kinda forgotten that stash in the rafters of the garage;)
I love it. Cant wait to see it on the finished wall!
Tania
Thanks, Tania! A little more painting…;)
I love this idea. The flatware you chose is really stylist. Plus you got to get your hammer out!!! TFS . Di
Thanks, Di! Always feels good to bang something up;)
I love how this turned out. It is so appropriate to spell out “eat” with silverware. Very cute.
Thanks, Debra! I was just glad the letters didn’t have any curves; that would have been a real challenge;)