
Easy Upcycled Yardstick Wheel Flowers
Upcycle old wheels and a yardstick to make cute DIY Repurposed flowers. here’s the easy how to.
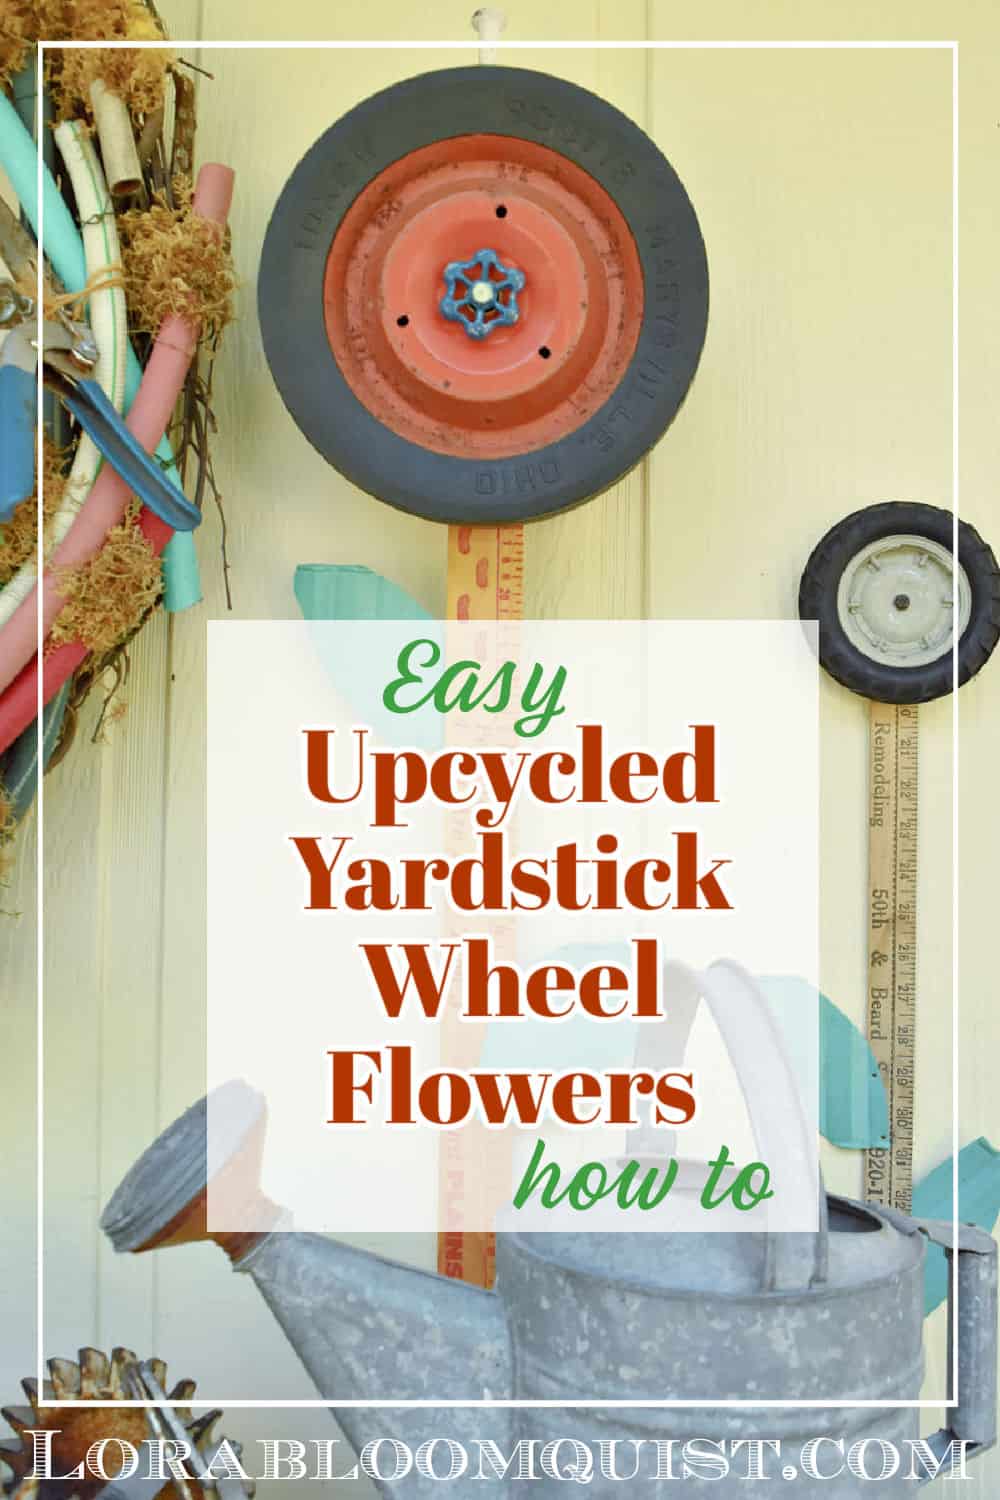
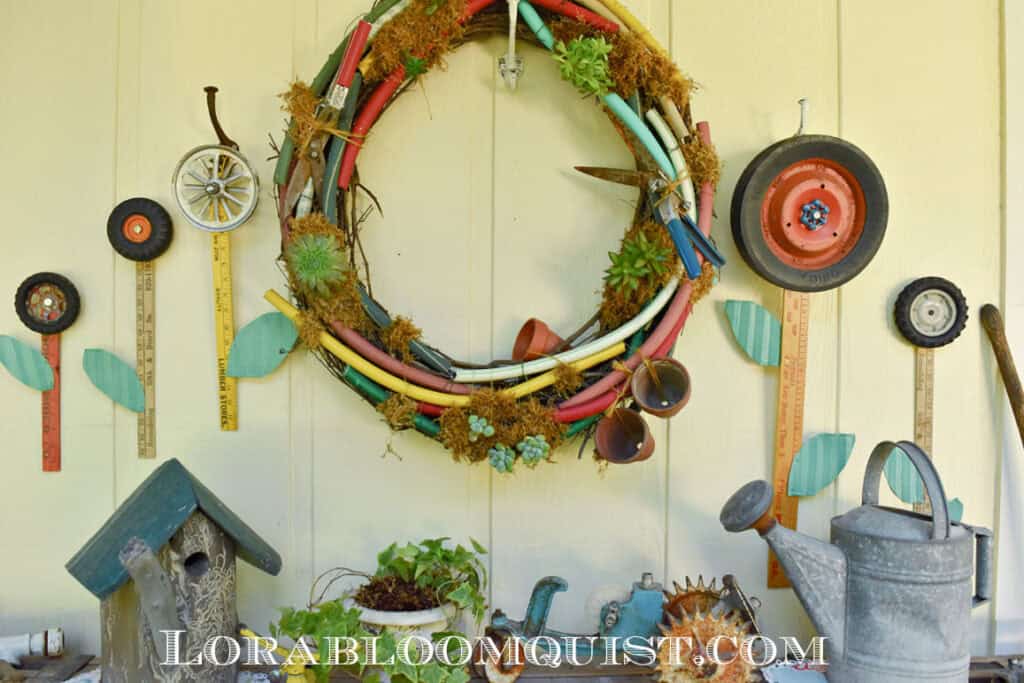
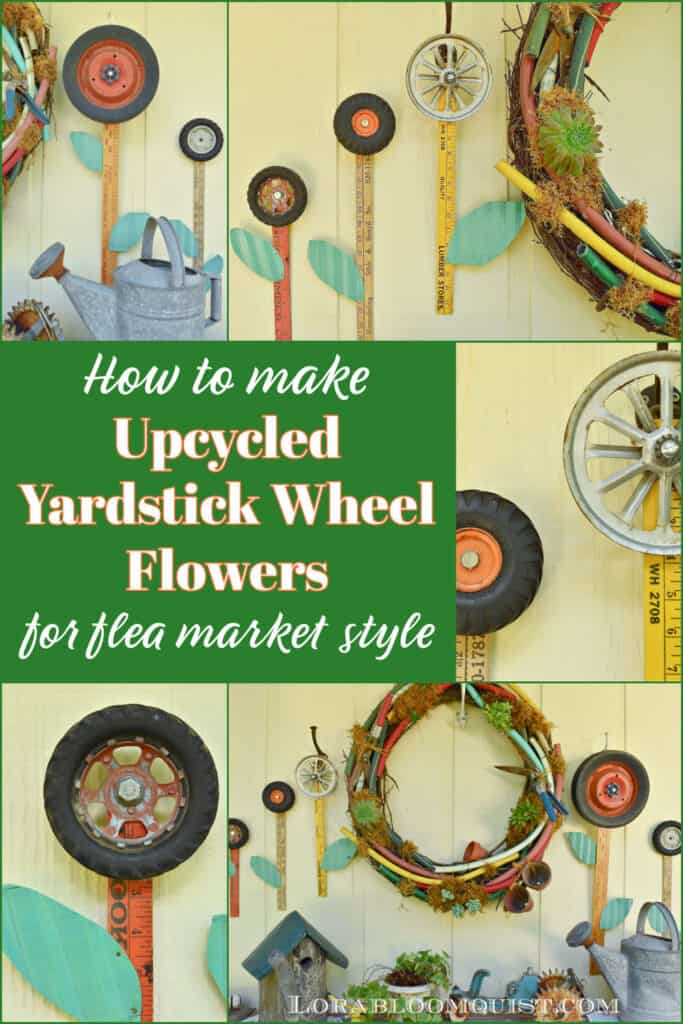
If you love hunting for old junk and breathing new life into it, this project is for you! Old wheels that have come off of toys, wagons, and strollers can be upcycled into charming garden-themed repurposed art. See how easy it is to make these Easy Upcycled Yardstick Wheel Flowers with this simple how to.
Upcycled Yardstick Wheel Flowers
For your convenience, this post contains affiliate links. If you make a purchase, I may receive a commission. There is no additional cost to you. “As an Amazon Influencer, I earn from qualifying purchases.” My full privacy policy is here.
Materials Needed:
You can find old wheels to make flowers HERE.
Vintage yardsticks can be found HERE.
Find old faucet handles HERE.
Misc bolts, screws and wire to hang.

Gather Vintage Items
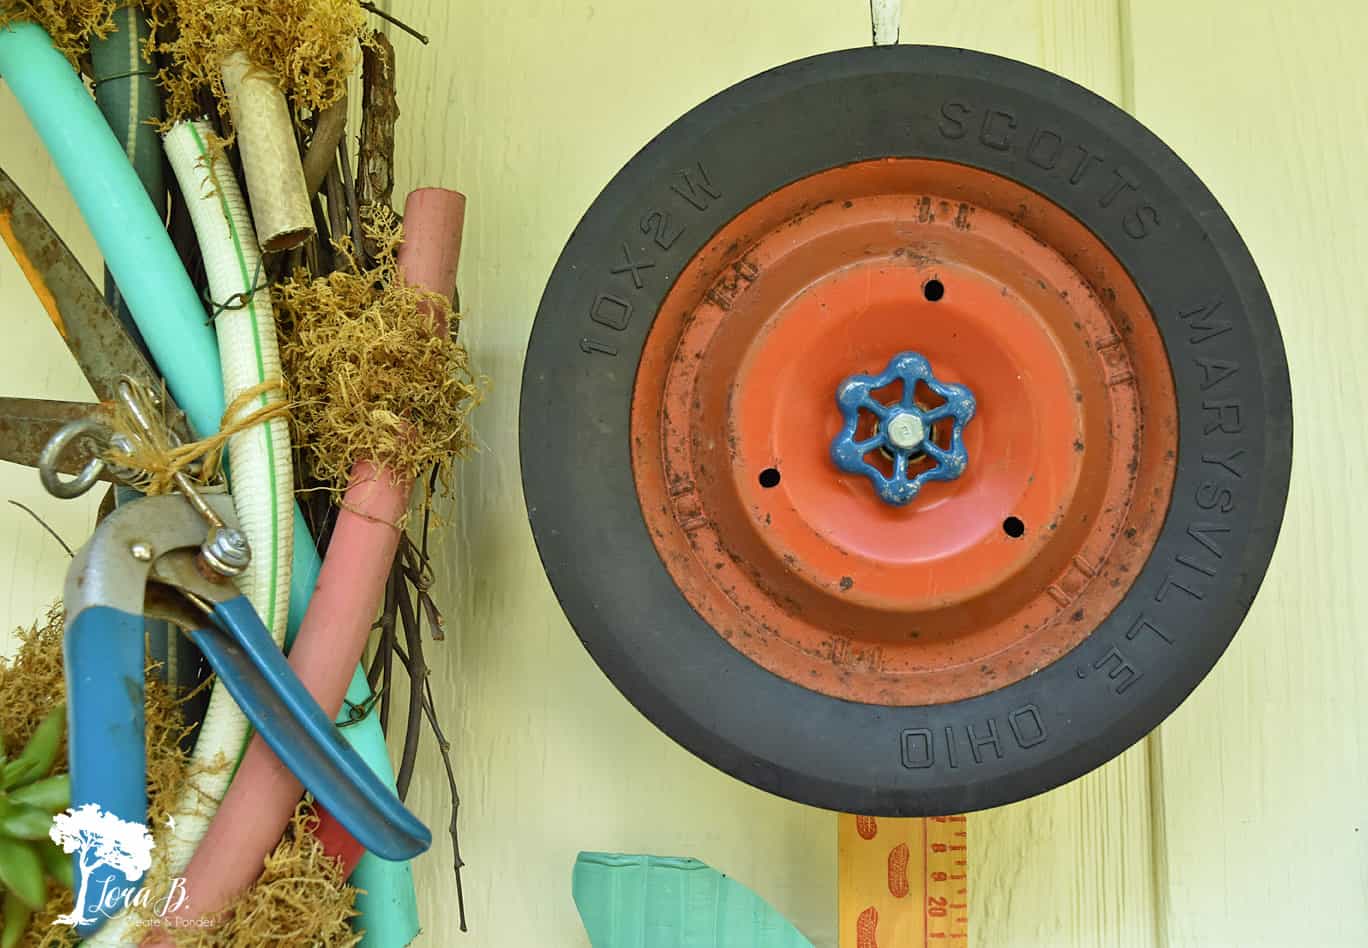
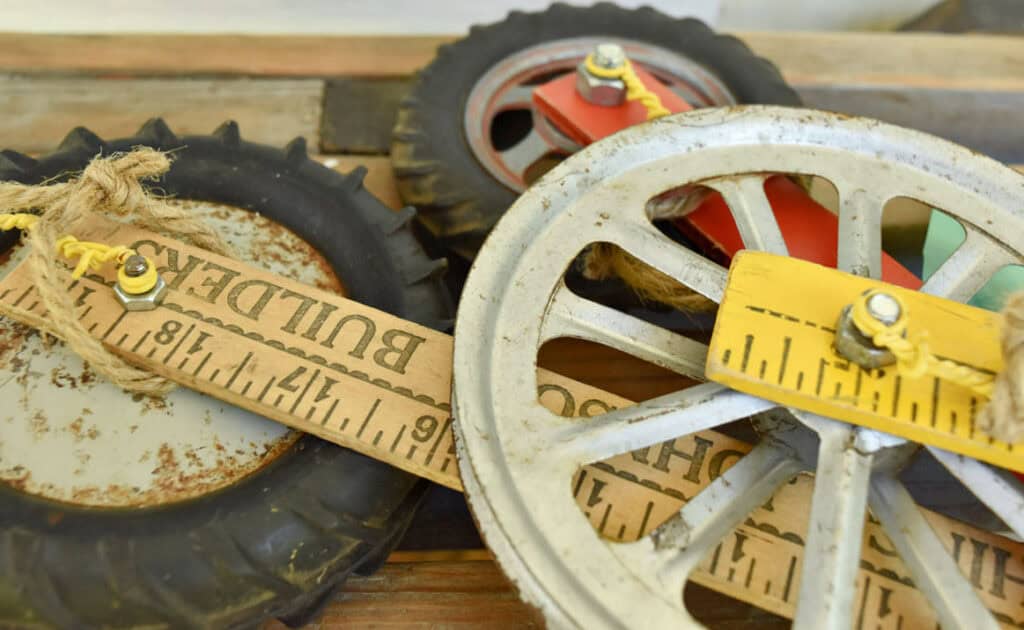
Gather vintage wheels from old strollers, children’s toys, and garden carts and wagons The more colorful the better. If all you can find is boring white, give them a coat of fun-colored chalk paint.
Also grab whatever fun hardware you can find: hex bolts, washers, springs, hose handles, etc.
You’ll also need yardsticks or rulers for the stems.
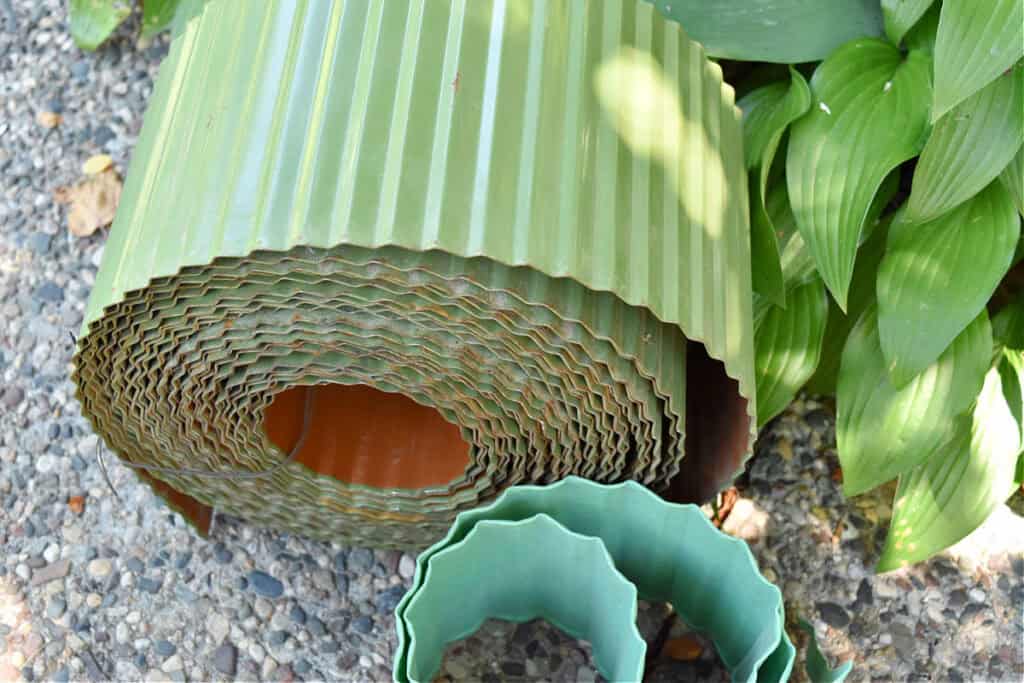
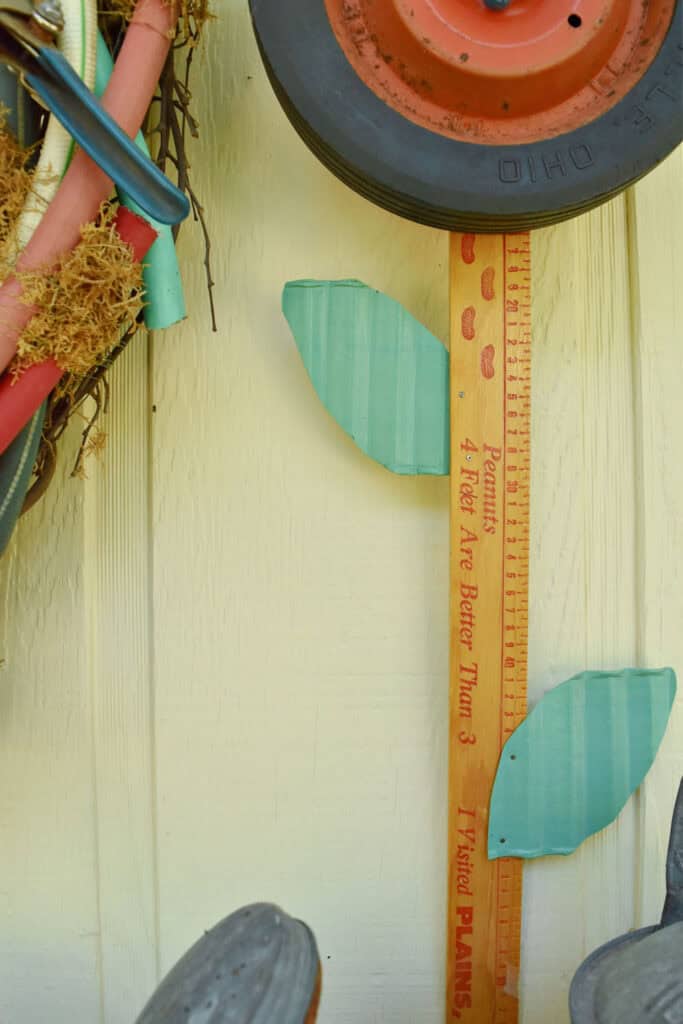
Green garden edging makes the leaves. These wheel flowers have the plastic version on them. The vintage metal type is much more desirable if you can find it.
How to Make Upcycled Yardstick Wheel Flowers
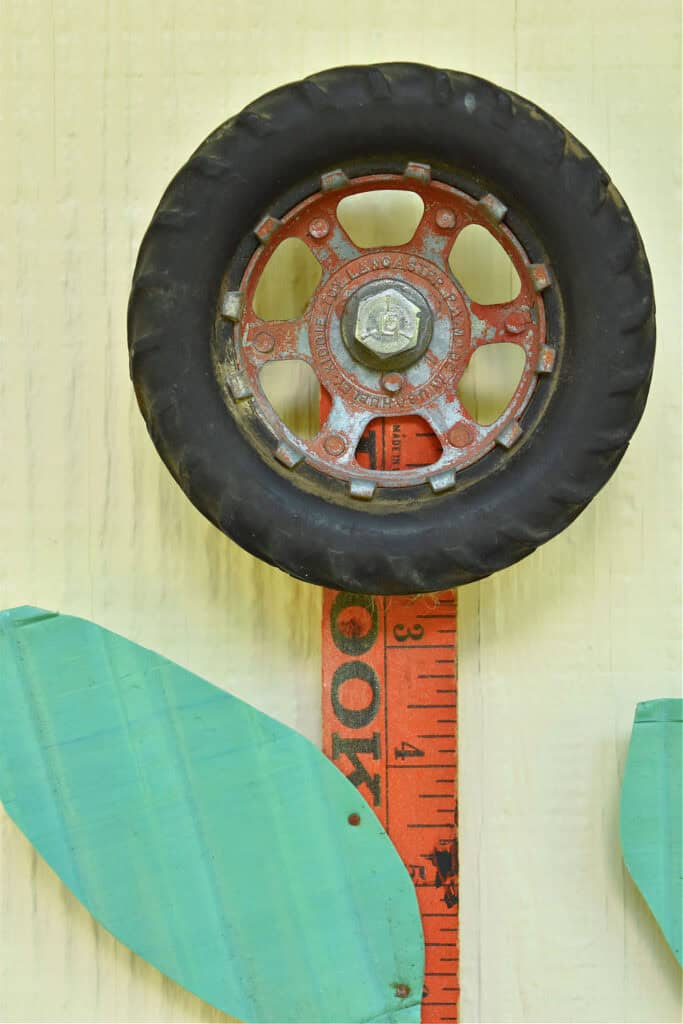
- Choose a screw or bolt that will perfectly fit through the hole in your chosen wheel.
- Cut your yardstick to the desired length for your flower. Larger wheels, longer stem; smaller wheels, shorter stem.
- Drill a matching size hole 1″ from the end of your yardstick.
- Place your bolt or screw through a faucet handle or two layered, then your wheel, then your yardstick. Finish it off with a nut to hold it all together tightly on the back side.
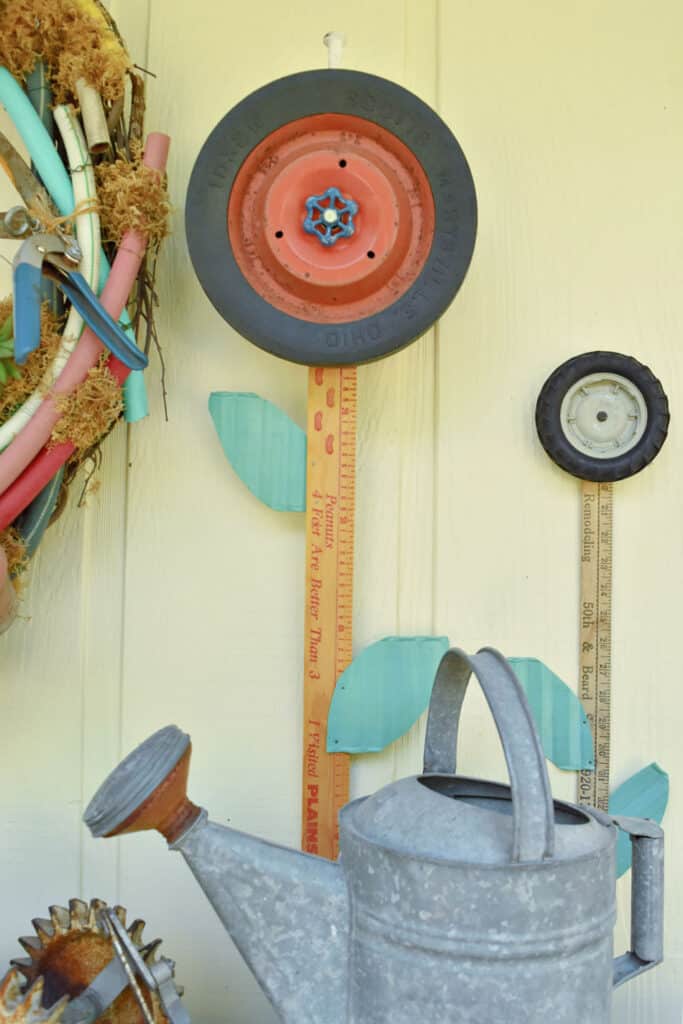
5. For leaves, use a tin snip to cut out leaf shapes from crimped garden edging.
6. Use small nails to nail one or two leaves onto ruler stem. Have some leaves come from behind and some on the front. Hammer down nail ends. Leaves could also be glued on with a strong adhesive.
How to Hang Upcycled Flower
To hang your upcycled yardstick wheel flower, simply tie a length of twine around the wheel. We first tried to go fancy with some electrical wire, as you could see in the pic above, but good-old-twine worked better! You could also give the whole flower a nice spray of poly to bring out the colors of the metal and the yardstick.
These upcycled yardstick wheel flowers are fun to hang on the porch, a picket fence, the garage, or even inside your home!
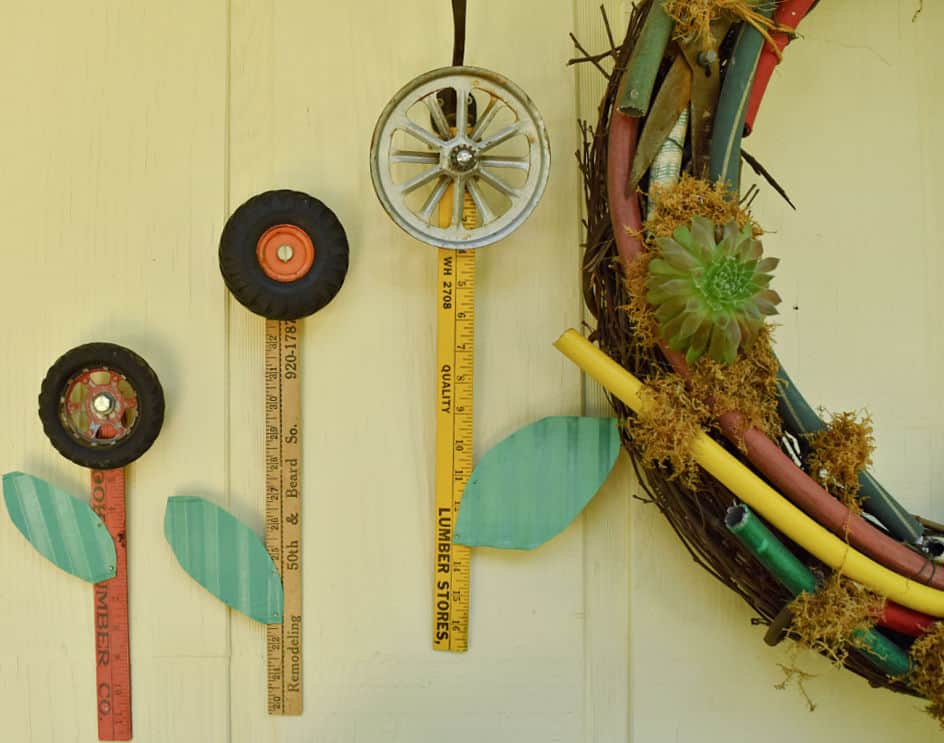
Don’t you just love when a few vintage, junky items can be brought together to create unique and fun home decor? These items can easily be found at the flea market or an estate or garage sale (or in your garage, if you’re a junk hoarder, like me;) Or grab them online.
For more creative upcycling ideas:
“16 Vintage Repurposed Junk Projects with Garden Style”
“16 Best Vintage Repurposing Junk Projects to Make Now”
“12 Vintage Repurposed Junk Ideas for Christmas”
Thanks for reading Easy Upcycled Yardstick Wheel Flowers. If you enjoyed your visit, be sure to Become an Insider so I can send the ideas right to you! You can Sign Up HERE.
Follow Me: LTK | Amazon | Pinterest | Instagram | Facebook
pin, save and Enjoy the rest of the inspiration

This DIY project is part of our monthly Thrifty Chicks challenge. We’re a group of creative, DIYers who love to create upcycled projects inspired by a theme. This month we are crafting with yardsticks/rulers. Enjoy all the great projects below.
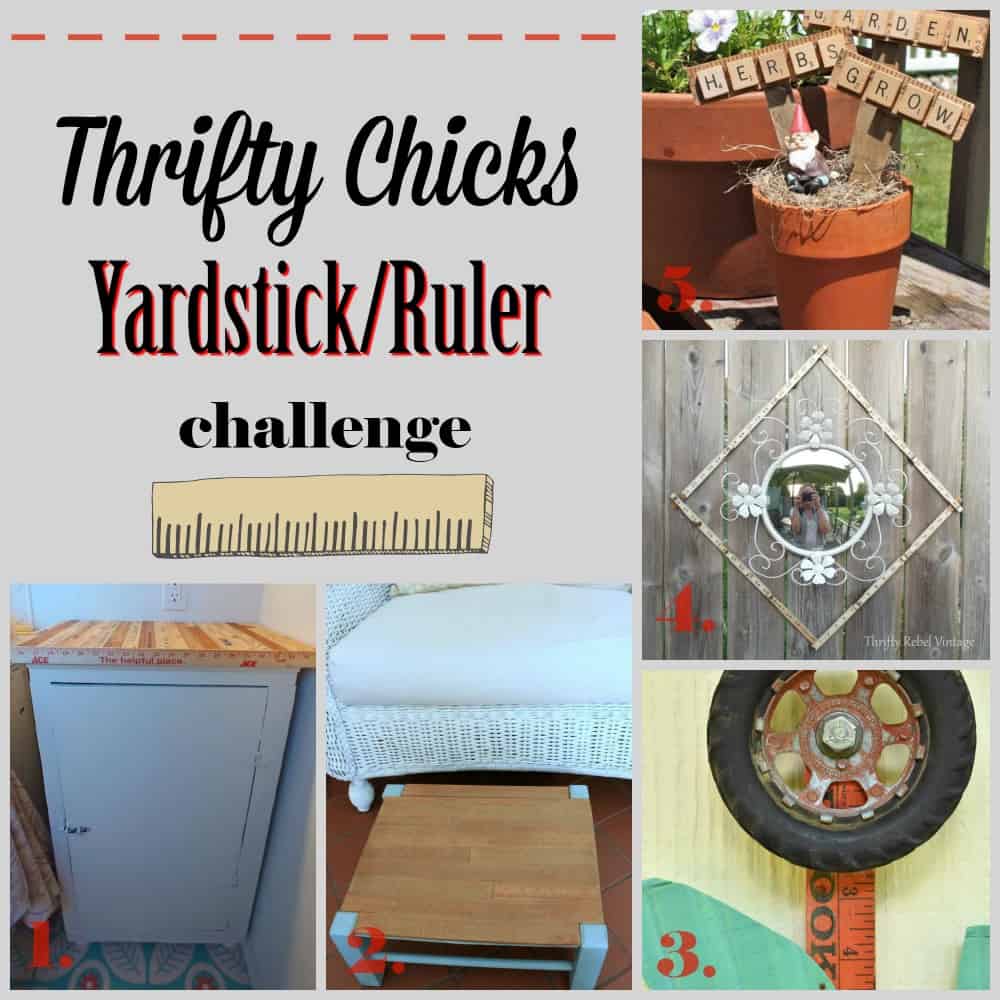
- Little Vintage Cottage, “Re-purposed Yardstick Counter Top”
Shoppe No. 5, “How Yardsticks Gave New Life to a Stool”- Me;)
- Thrifty Rebel Vintage, “Re-purposed Vintage Folding Ruler Frame”
- Adirondack Girl at Heart, “Vintage Yardstick Scrabble Tile DIY Garden Marker”

What an amazing idea to re purposed wheel. Thanks for sharing such a nice thing.
Thanks, Mary!
SO cute! Thanks for sharing at Vintage Charm–pinned!
Thanks for pinning, Cecilia!
You always make the most adorable garden flowers, Lora. Love these! Pinned 🙂
Thanks, Marie!And thanks for pinning!
Love, love, love these flowers Lora. They are fabulous!
They totally remind me of you, Tuula! Junky flowers forever!
Oh my goodness, those are SO cute!
Tania
Perfectly junky; and I don’t even have to water them;)
LOVE these gorgeous, junky flowers, Lora–great way to incorporate yardsticks into the project. You nailed it!!
Thanks, Diana! I’m definitely a yardstick lover like you:)
Well, aren’t these flowers the cutest things. So easy for a sweet piece of artwork.
Thanks, Debra! They smile at me each time I walk in the door;)