
How To Clean Galvanized Metal and Revive the Vintage Patina
Learn how to clean and revive vintage galvanized metal so you can enjoy decorating with your vintage finds
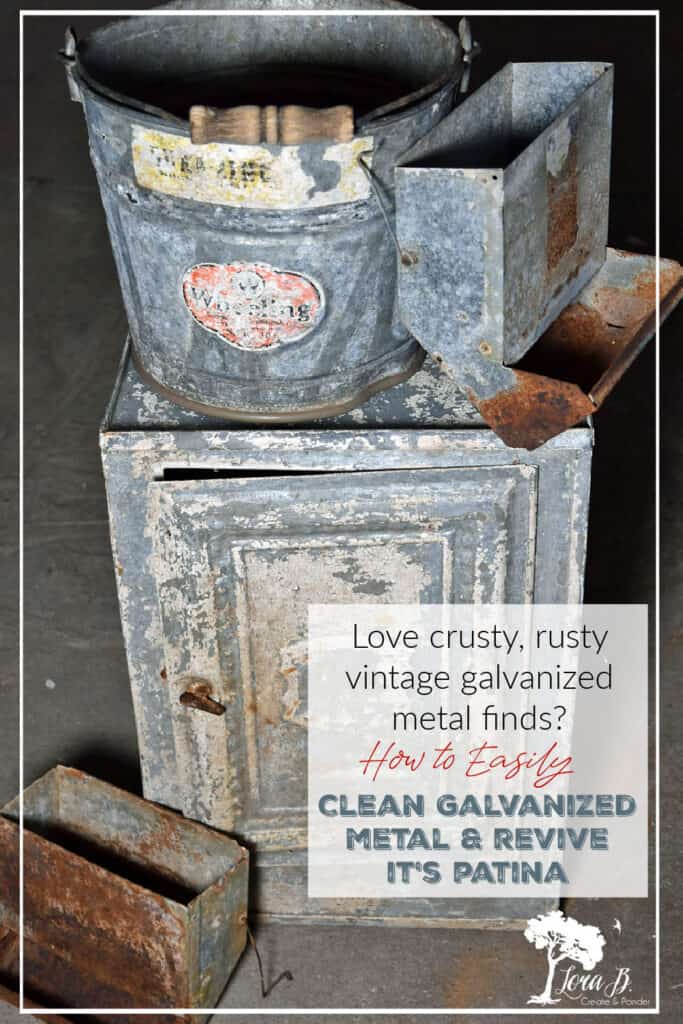
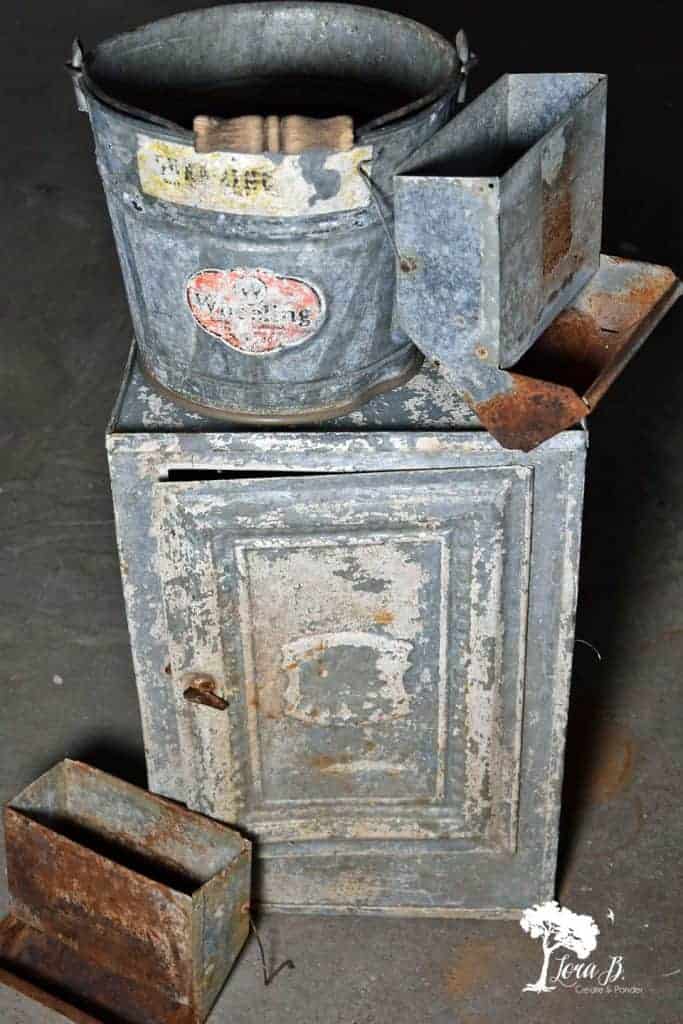
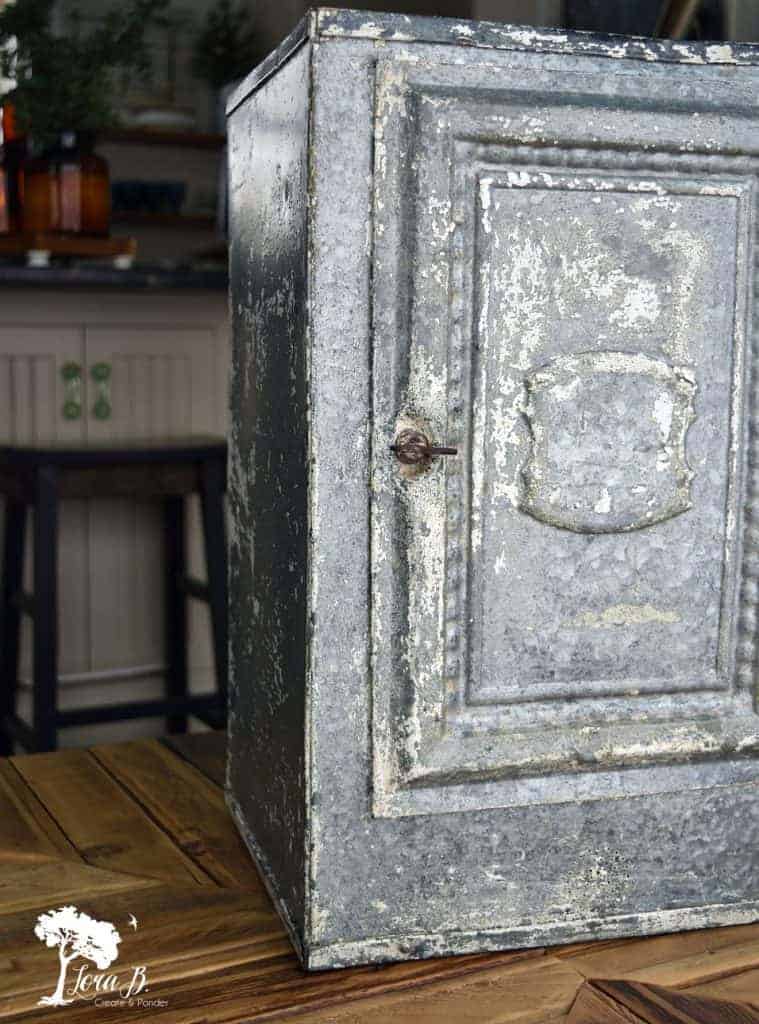
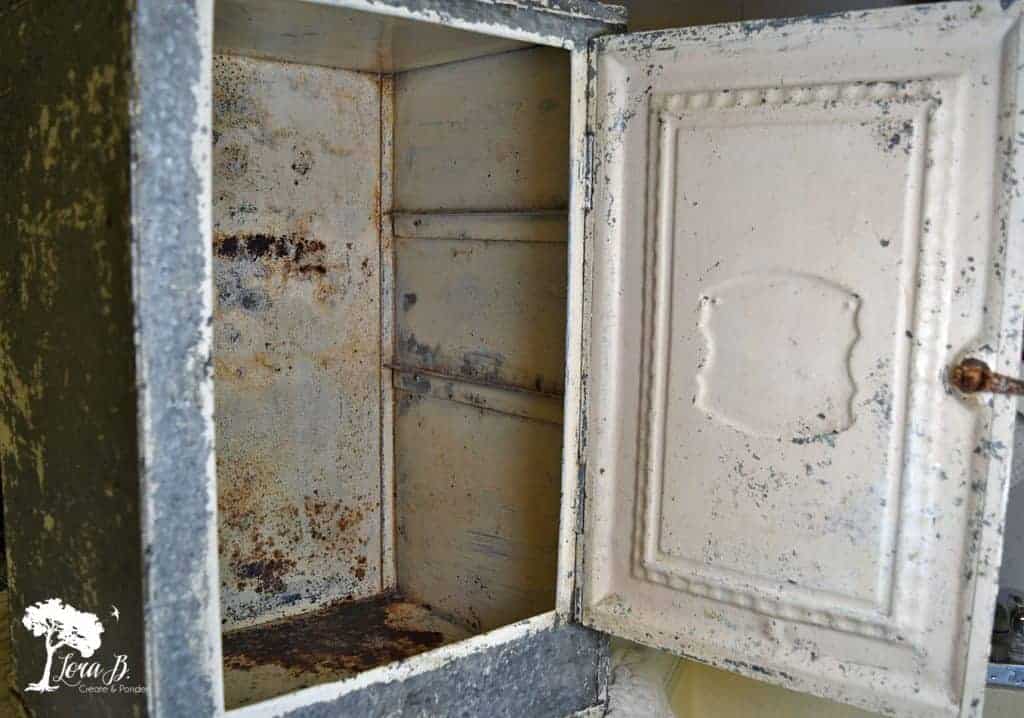
Vintage galvanized farmhouse items have earned their character. Their rusty, crusty selves can be a little scary when you find them at a farm auction or in the basement or garage of an estate sale. Sometimes you even need to shake out whatever’s been living inside (or what it’s left behind;) Yes, they would be fine to plunk into the garden in this state, but I like to enjoy their worn beauty inside my house! I’ll show you How to Clean Galvanized Metal and Revive the Vintage Patina so you can enjoy decorating with farmhouse finds indoors or out!
How to Clean and Refresh Vintage Galvanized Metal
For your convenience, this post contains affiliate links. If you make a purchase, I may receive a commission. There is no additional cost to you. My full privacy policy is here.
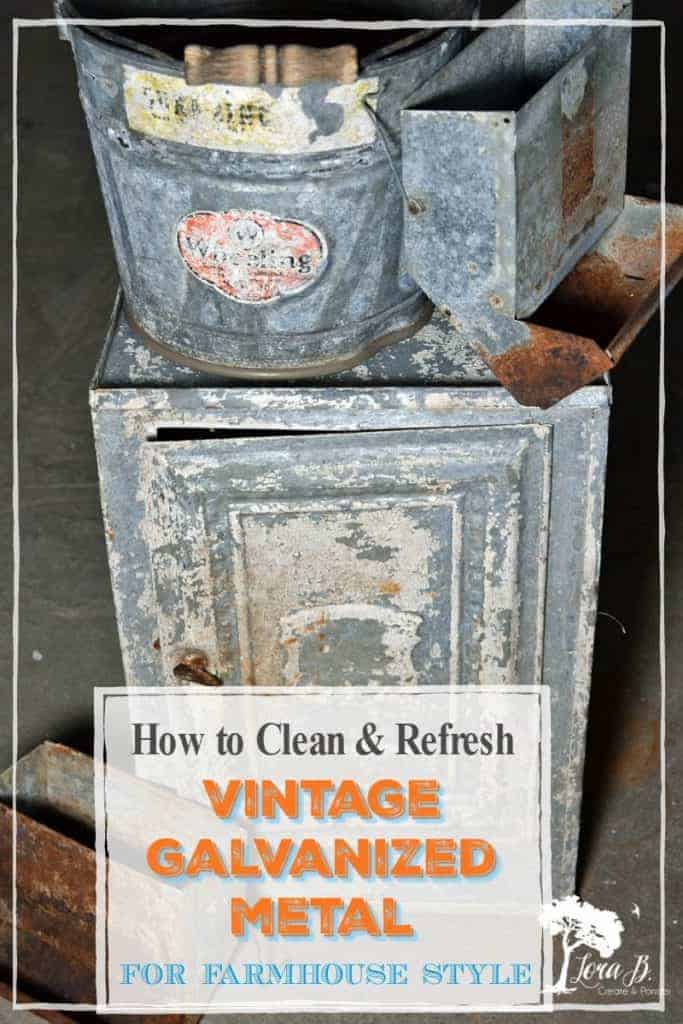
Rust is Beautiful! Especially on galvanized metal!
Some may want to get rid of the rust, but I think it adds to the beautiful patina of these old pieces, especially when you give them the beauty treatment I’ll tell you about;) For years, my biz partner and I scrubbed up every old galvanized metal piece we could get our hands on and gave them this treatment. Old metal tool boxes, chicken feeders, galvanized buckets, old garden tools, trays and trugs…we’d fill the backs of our vehicles with the treasures we got for a couple bucks. We’d spend hours in the driveway scrubbing our metal junk and letting it dry in the sunshine. Then we’d spray or brush on the magic to bring out the patina. {“How To Spray Polyurethane”}
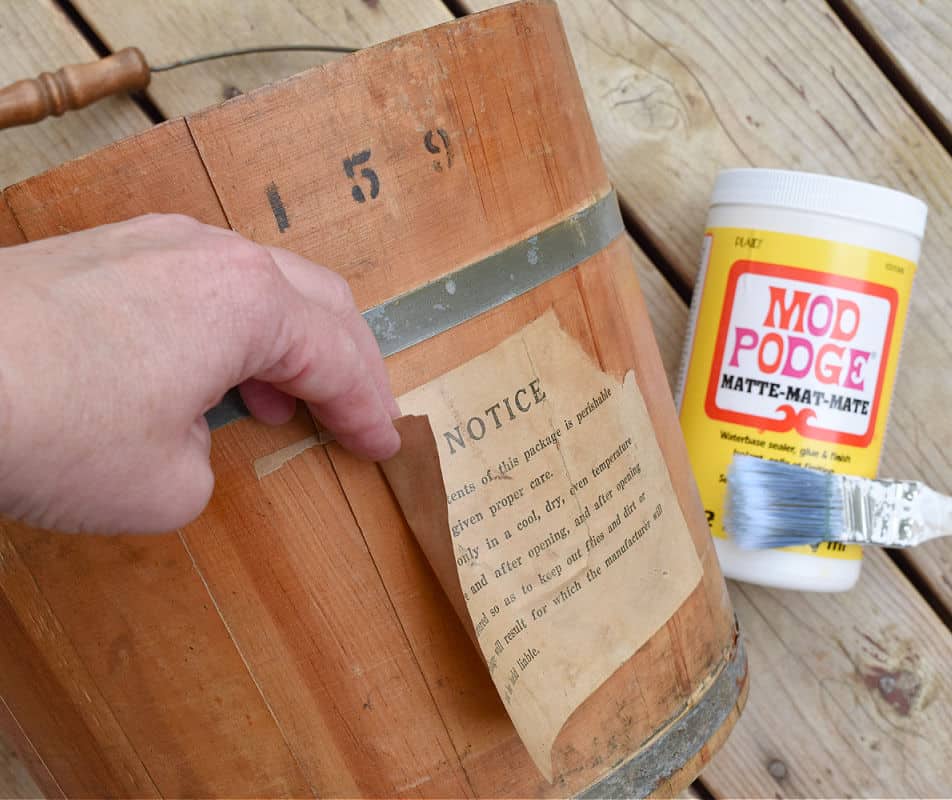
Before Cleaning, Seal any Vintage Labels
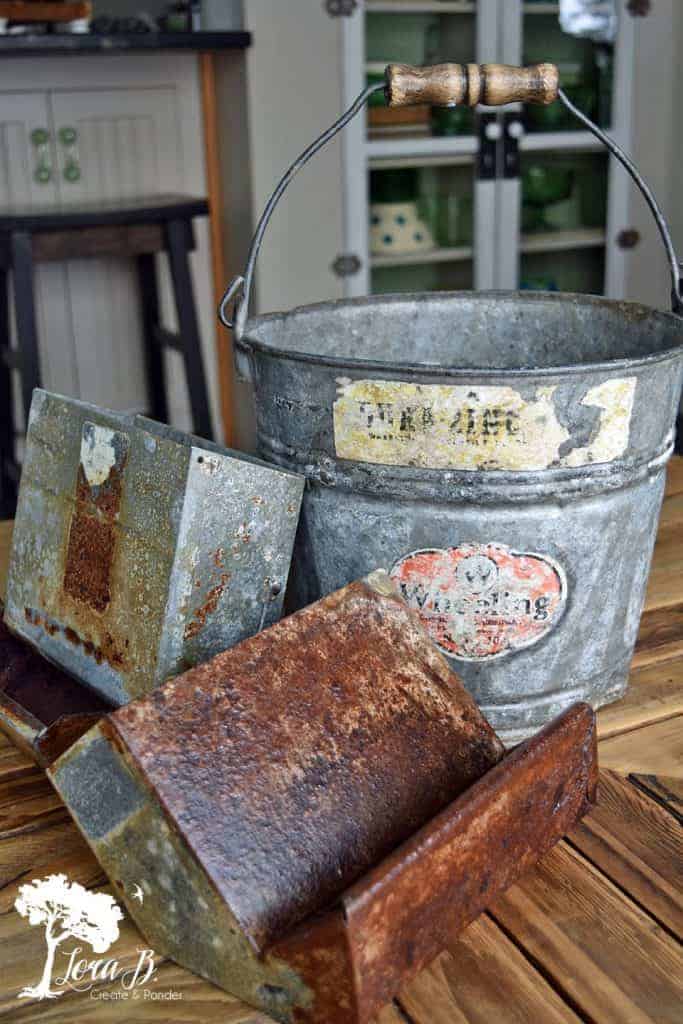
If your vintage piece has a graphic label, seal in that bit of history first. The Wheeling label on this bucket was still well adhered, but sometimes the labels are loose and falling off. If you don’t care for the label, you can probably get it off with some goo gone. But, if you want to keep all those cool graphics, do this first:
Brush Modge Podge (get it HERE) on the underside of the label (and/or it’s pieces) and adhere in place. Let dry. Wipe the label clean of surface dirt with a mild soap and damp cloth. Once dry, coat with more Modge Podge. Let dry. If you want to be really safe, you could put a coat of poly over the label now, otherwise try not to get the label too wet while you’re scrubbing the rest of the piece.
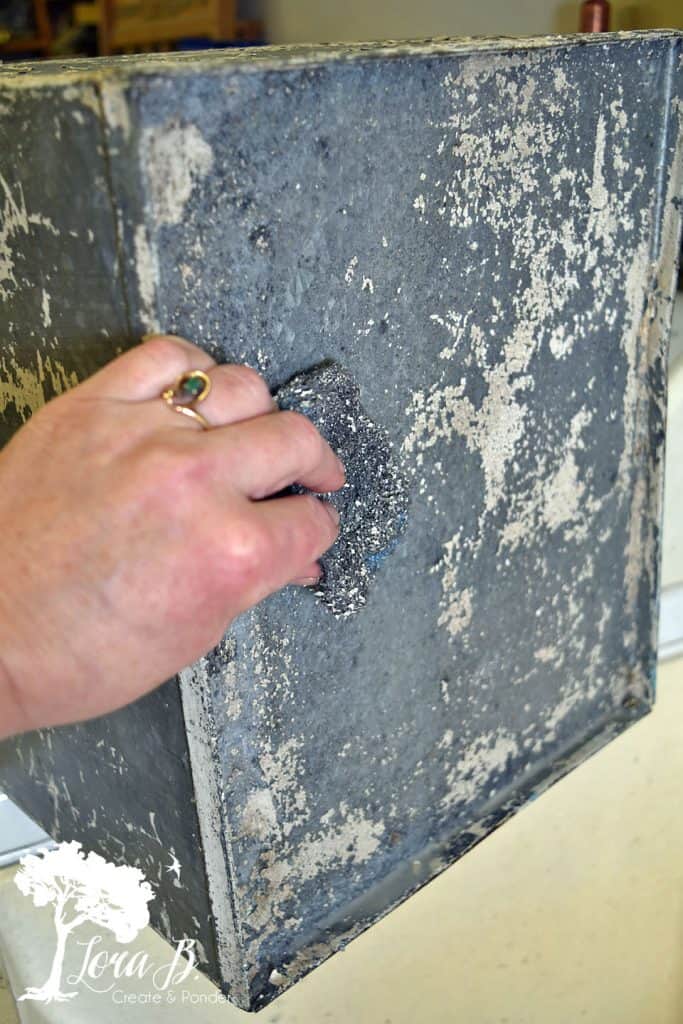
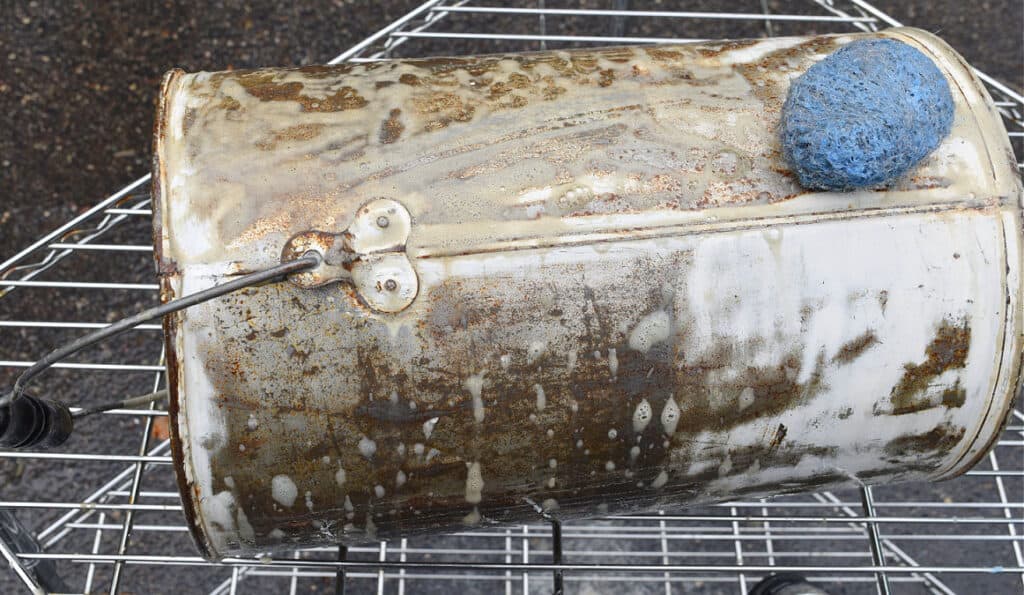
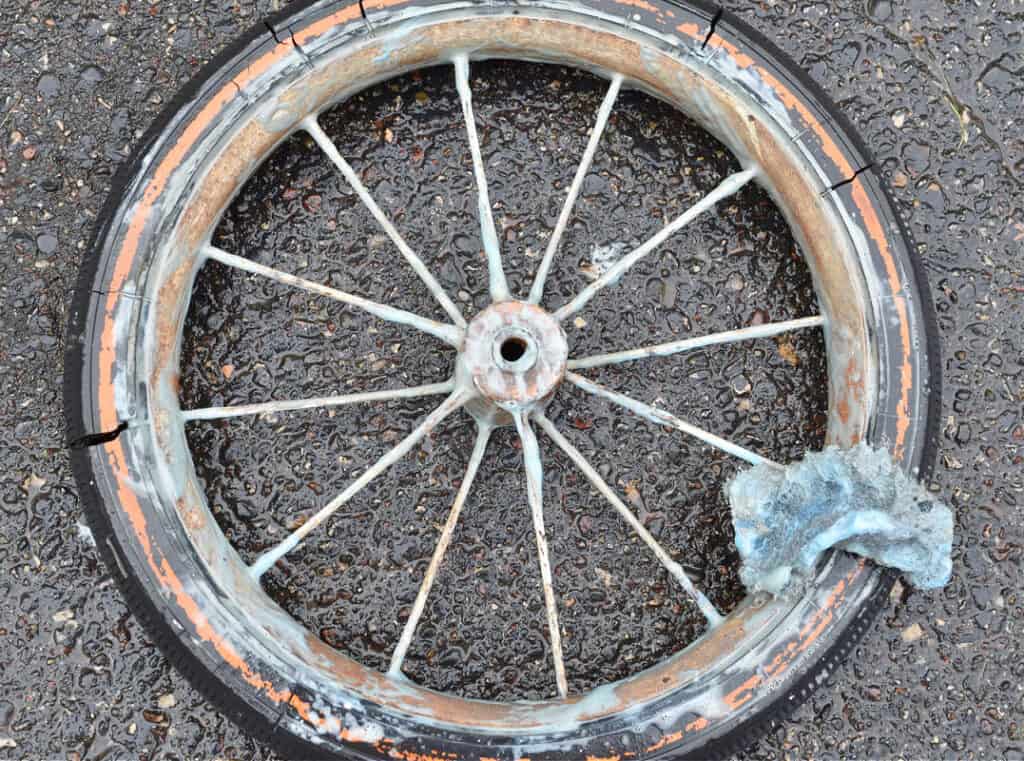
Clean Galvanized Metal with a Steel Wool Cleaning Pad
Clean the vintage galvanized metal with soapy, blue-foaming S.O.S. pads (get them HERE). You could use Brillo pads also. The rough steel wool sloughs off the loose paint and rust bits and smooths out the surface. Go over the whole surface inside and out. Rinse with hot water, getting off all the soap.
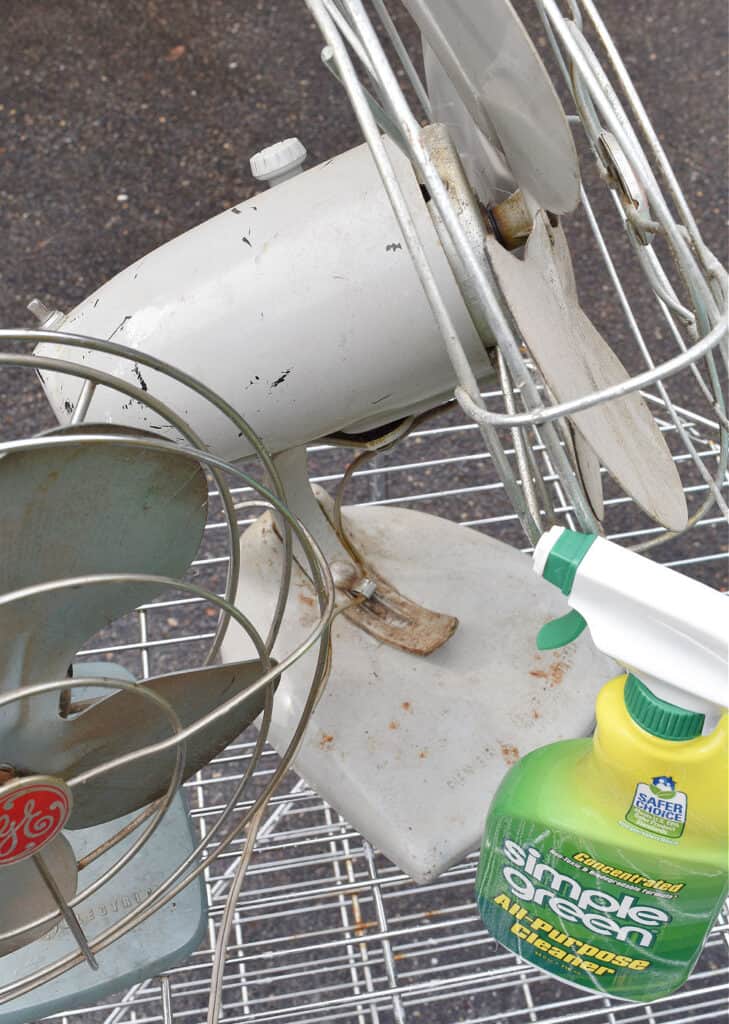
How Do You Clean Greasy Metal?
If your vintage find is full of greasy lubricant (like these old fans were), a degreaser can easily clean it. Just spray on THIS, which will cut through the grease quickly. Rinse with hot water. Then scrub with the soapy metal pad.
Thoroughly Rinse and Dry Vintage Metal Before Sealing
Let the pieces dry well before giving them the final stage of their beauty treatment. If possible, drying out in the warm sunshine is best and gets them ready for the next step.
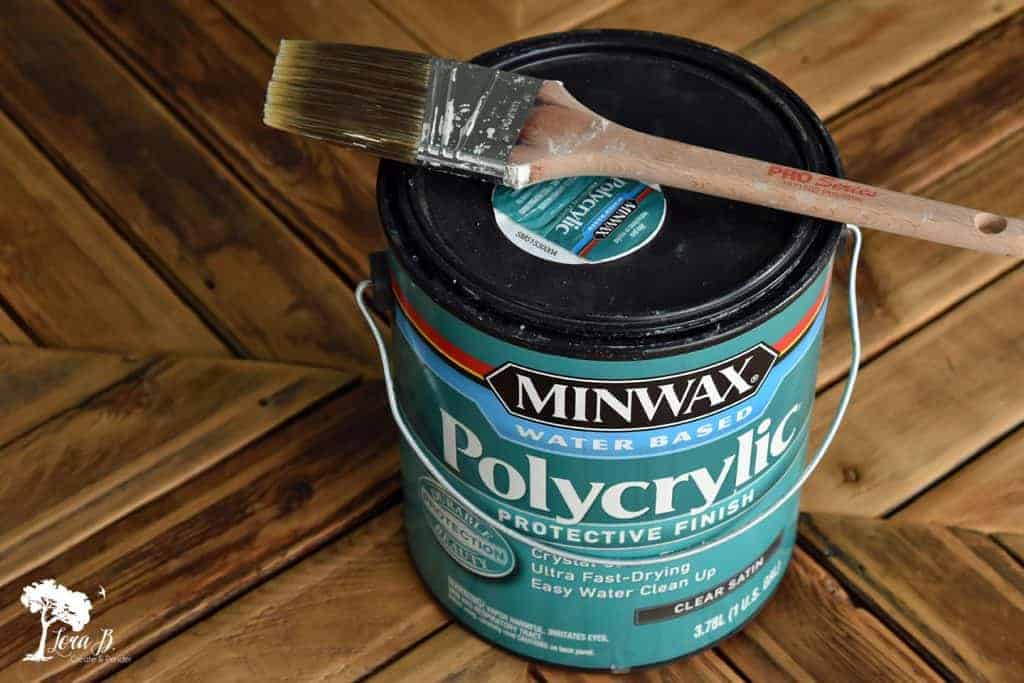
Seal Vintage Galvanized Metal with 2+ Coats of Poly
Brush (or spray) on 2 coats of water based poly (THIS is my favorite) in the clear satin finish, being careful to smooth out any drips. Let dry. If you’re sealing pieces that are not solid, like a bedspring, or something wiry, use the spray can version (get it HERE). If you’re working on a bunch of pieces at a time (like I used to for the store) spraying several layers with a sprayer LIKE THIS is the way to go! (It will be your new best friend, seriously;)
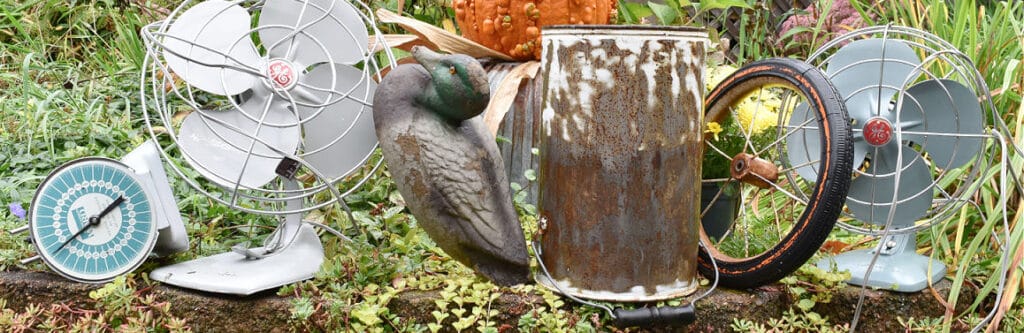
When you get done, your vintage galvanized metal pieces will have beautiful, well-earned patina! You’ll know they’re clean and sealed, and you can use them anywhere in your home.
If you pick up vintage galvanized metal at a shop, it most likely won’t have this kind of treatment. Because honestly, it is time consuming and poly isn’t cheap. But if you love the patina and style of these old farmhouse workhorses like I do, you can see they’re much more beautiful and functional for indoor use if you give them a refresh! And if you’re the one who has cleaned them, you’ll know they’re clean enough to be used anywhere in your home!
You may also enjoy these posts:
“Creative Ideas for Galvanized Buckets and Vintage Containers”
“Great Ways to Use Old Tool Boxes (all through the house)”
Find my favorite Vintage Reviver’s cleaning Products HERE.
Hope this How to Clean Galvanized Metal and Revive the Vintage Patina will help you enjoy decorating with your old finds! If you enjoyed this post, become an Insider to keep the ideas coming!
Please Pin and share!

Sharing at these lovely parties:
As a vintage lover, this is great. I loved that you added to cover the label. I often times feel that is an overlooked step in the process of refreshing galvanized metal. To me, it is one of the most vital steps of preserving the quality of the piece.
Definitely; love the labels!
Wow!! They look so good!! I never knew any of these tips…very helpful, Lora!!
Glad you liked them, Rachel!
I’m loving this post, Lora. I can’t wait to try some of these ideas. I would love to feature this on my Saltwater Sounds this Sunday.
Glad you enjoyed it, Kim! That would be great:)
Hi! I’m trying to restore my grandmothers pie safe. i’m not sure how old it is but it looks as if it’s from the 18 or 1900s. I’m trying to figure out how to clean it, it’s just a regular wooden pie safe with the tin on the front with the little holes poked through it. Do you have any advice on how I could clean it without harming the wood or metal? It’s one of the only pieces I have left of my grandmothers so I want to make sure I take good care of it. Thank you !! 😊
How fun that you have such a special piece! I would clean the wood with a gentle mixture of vinegar and warm water to start. It kind of depends what type of condition it’s in. If there are just some surface scratches in the wood, check out this post: https://lorabloomquist.com/refreshing-and-replenishing-wood-pieces-quickly-and-easily/ As you probably read, this post is a great way to revive the tin. Once clean, you could spray the tin sections with polyurethane to deepen the patina. Good luck!
I found an old galvanized metal drawer that I would like to use as a sink vessel. If I clean it as described here and coat with poly – do you think that would work? I’m trying to figure out best way to clean it and then protect it since as a sink it will be getting wet.
I would love your suggestions or thoughts? This is all new to me!
I can’t say I’ve ever tried doing it to a sink, Angie, so I can’t give you a definitive answer. Maybe you could clean it and apply several coats, drying thoroughly between each so you build up the surface. But think I’d try it first before I installed it permanently as a sink. I guess it would also matter what kind of sink you’re wanting to use it for. If you’re washing dishes in it, it would get much harder usage than in a guest bath, for example. Maybe try leaving some drops of water on the surface after it’s sealed and see what happens? Sorry I don’t know for sure; my pieces are used decoratively. Sounds very cool, though!
Thank you for sharing. Great tips.
Your welcome, Rebecca!
This is great, Lora! I really liked the tip about sealing labels. That’s genius and makes so much sense. Thank you for sharing!
Your welcome, Sheila! Those old labels are gold; gotta save them:)
Fabulous tip, Lora. Thanks for sharing at Vintage Charm!
Glad you liked it, Cecilia!
Great article! Galvanized stuff hasn’t come in my way–yet! Now that I know what to do with it, it just may! I, too, am itching for some yard sales–Maine doesn’t have much for estate sales. We had MORE snow, then rain here today. I am NOT a winter person! Been keeping out of GW as I have enough ahead for my booth, but, boy is it hard! Toured through the place where I have my booth today and found enough treasures for ME to keep me happy for a while.
Galvanized pieces always sold well for us, Kathy. Plus, they’re bigger so you are making more. And if you give yours this kind of beauty treatment, they’ll sell so much quicker and for more than your fellow dealers! Winter is kind of a dry spell for vintage finding and selling; I used to hit the online auctions this time of year for fresh stuff, although I’d much rather find goodies in person! Glad you enjoyed the info!
Your galvanized piece looks really nice, thanks for the information on how to clean them. When I go to an estate sale I always go to the garage
and sheds first, then kitchen. I have found some wonderful old galvanized pieces.
Me, too, Marlene! I head to the basement or garage where stuff is cheaper and more grungy;) I do love the kitchen, too. If there’s a craft room, I make a beeline for that too, because I love old buttons and trims! I’m craving a good estate sale right now!
How do you handle the pieces with labels, i.e. the bucket? Do you just scrub around the labels? Do you keep them from getting wet? So glad to know what to do with dirty galvanized pieces now. Thank you!
Such a good question, Bergundy!!! My label on this bucket was intact, yes, but I’ve had some that have been torn and falling off. Before I begin any scrubbing, I will attach the labels (sometimes it’s pieces) back on with modge podge. When that dries, I will lightly wipe the label off with a mild soap and damp cloth to get any surface dirt rubbed off. Then I will do a coat of modge podge over the top of the label, so it stays intact. Let it dry well before you scrub the rest of the piece. Then you can poly it all to really seal that cool, old label on! Your question was so perfect, I’m going to add this info to the post! Thanks for asking!
Awesome, very helpful! Thank you so much. Really enjoy your blog!
So happy to hear, Bergundy!
I love your old galvanized finds and you did a beautiful job. They would now grace any home. Thanks for all the tips.
I’m working on finding the perfect spots for all this awesome metal, Vikki!
Why had I never thought to use an SOS pad on galvanized metal pieces? This is a great tip as is to add a few layers of poly to seal.
Yay! Glad you’ve got a new tool in your toolbox of tricks now, Paula! You can scoop up some galvanized at some spring sales!