
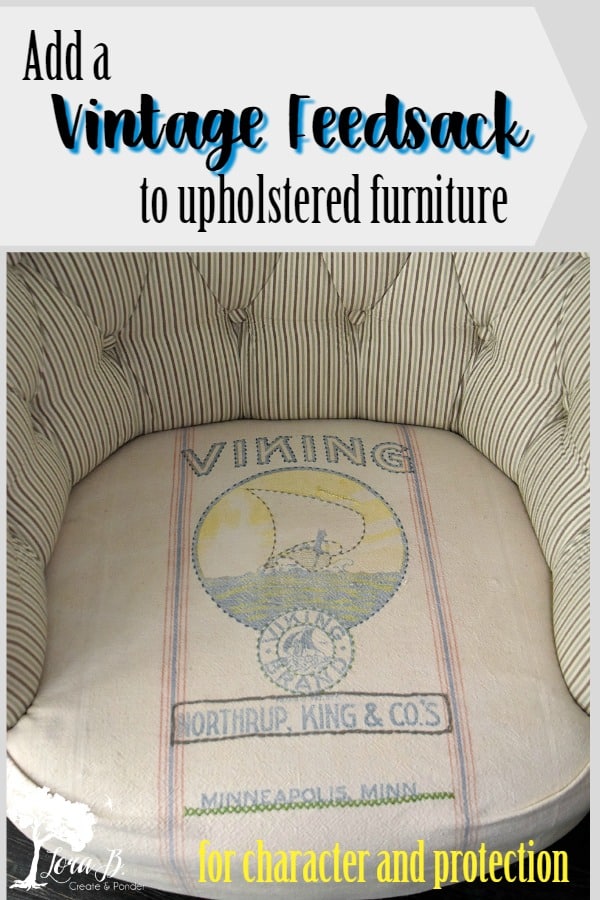
How to Add Vintage Feedsack Slipcovers to New Furniture Seats
Protect your upholstered furniture with feedsack seat slipcovers. Here’s the easy how to.
I always seem to fall in love with light-colored furniture! But when that pretty new furniture is in the most-used room of your house, there’s a problem. I don’t trust myself or my family to not wreck the pretty fabric! So I came up with a DIY solution. Remember my fun Feedsack/Grainsack/Floursack collection I shared the other day {“Feedsacks, Flour Sacks, or Grain Sacks? Is there a difference?“}? Today I’m going to show you How to add Vintage Feedsack Slipcovers to New Furniture Seats, so we can enjoy our new furniture, without the worry!
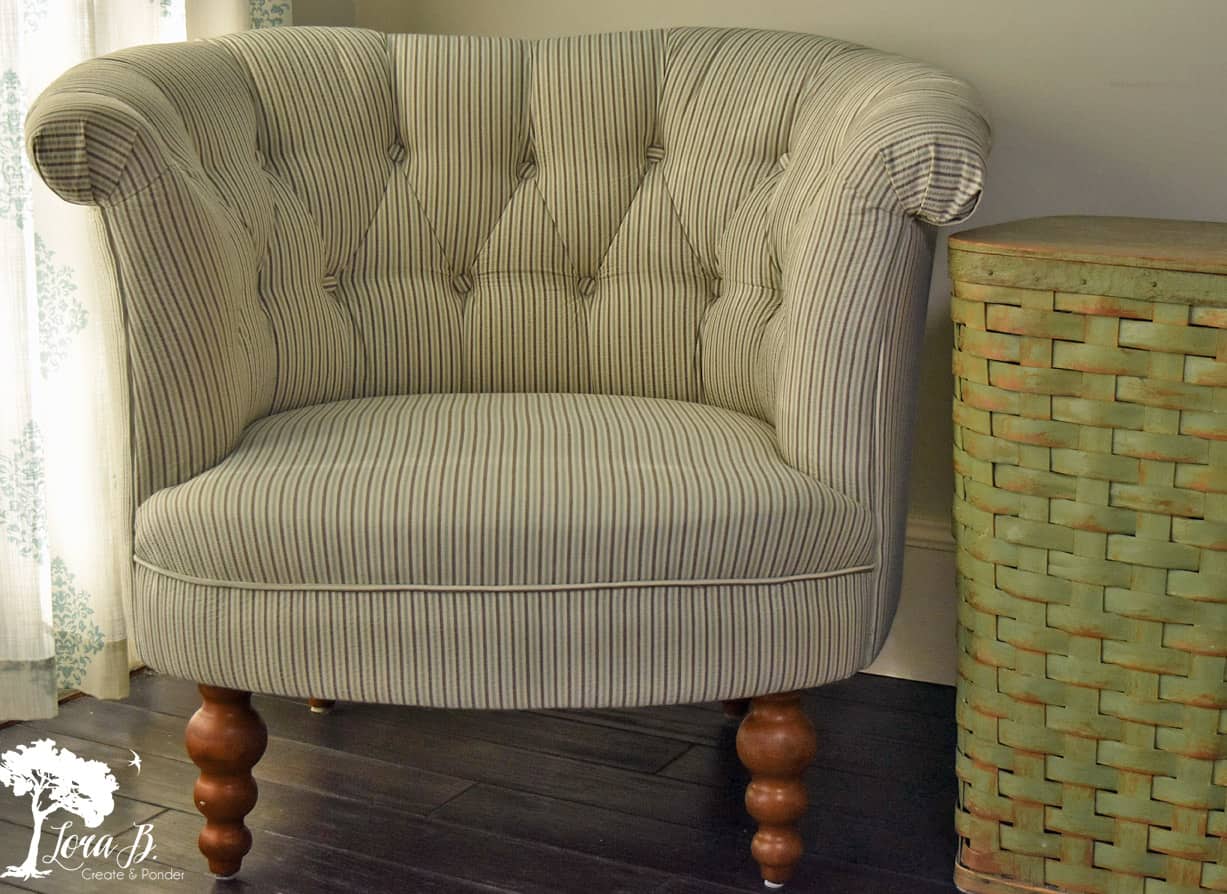
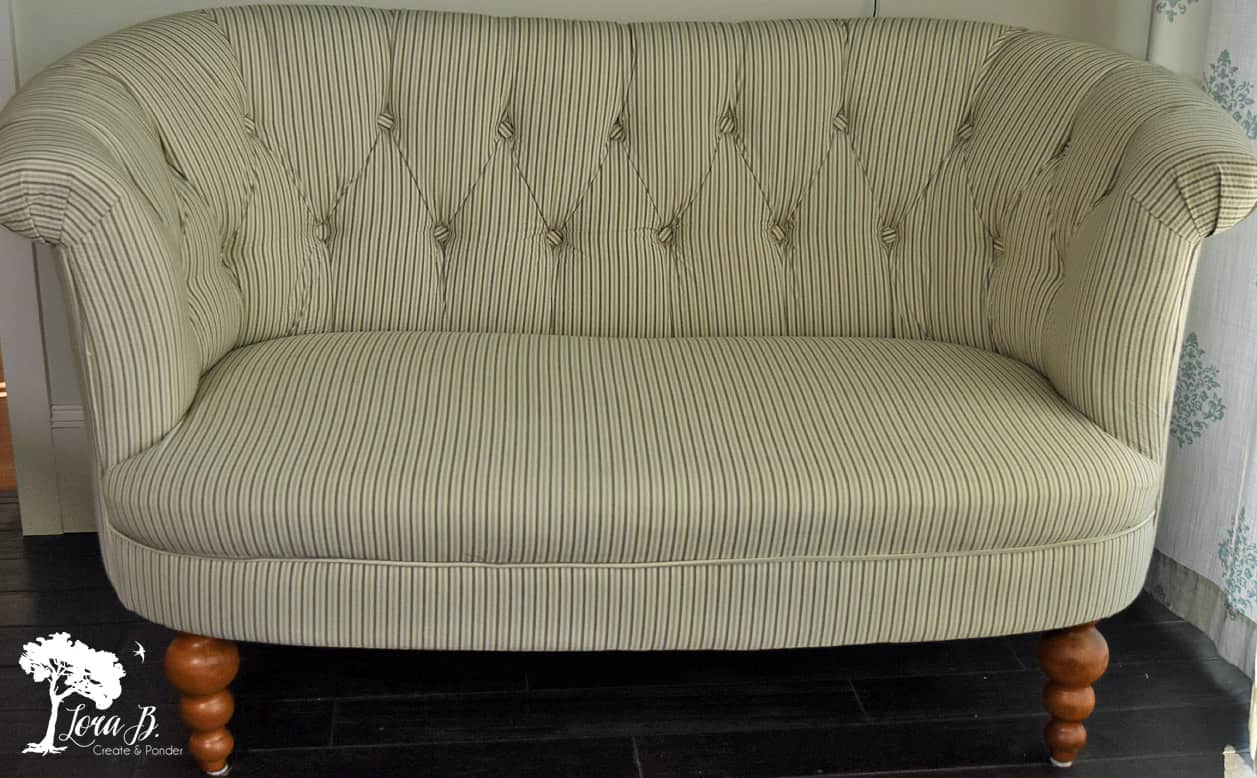
If you’ve been reading for awhile, you may have spied our new button-tufted chair and loveseat behind the trunk in my “Antique Trunk Refresh”. Even though we purchased them back in October (for our 25th), I’ve been keeping them a secret until I could get this little project done.
These cuties have been on my “I want” list for over a year, and I’d gone and visited them at Pier 1, keeping track of the ever-lowering price. I’d measured this sitting area at the end of our kitchen and knew they were the perfect petite size for the space. Skinny arms and lots of seating space would be a welcome, after the over-sized arm chairs I’ve had in here for many years.
When they finally hit clearance price and I heard they were discontinuing the perfect-for-my-house gray and aqua pinstripe fabric, I pleaded asked Mr. Fix-it if we could get them. Since the 25 year anniversary trip to Europe didn’t happen, he decided to make his design-loving wife happy! I love how these pieces fit this little corner perfectly, with our awesome Roof Rack Coffee Table in between {“From Vintage Roof Rack to Cool Coffee Table“}.
But…the lack of ability to turn the seat cushions over if we got a spill made me nervous, and I didn’t want to always have a blanket on the seats. So when Happy Girl was home from college for a couple days, I enlisted her wonderful sewing skills to tackle the project.
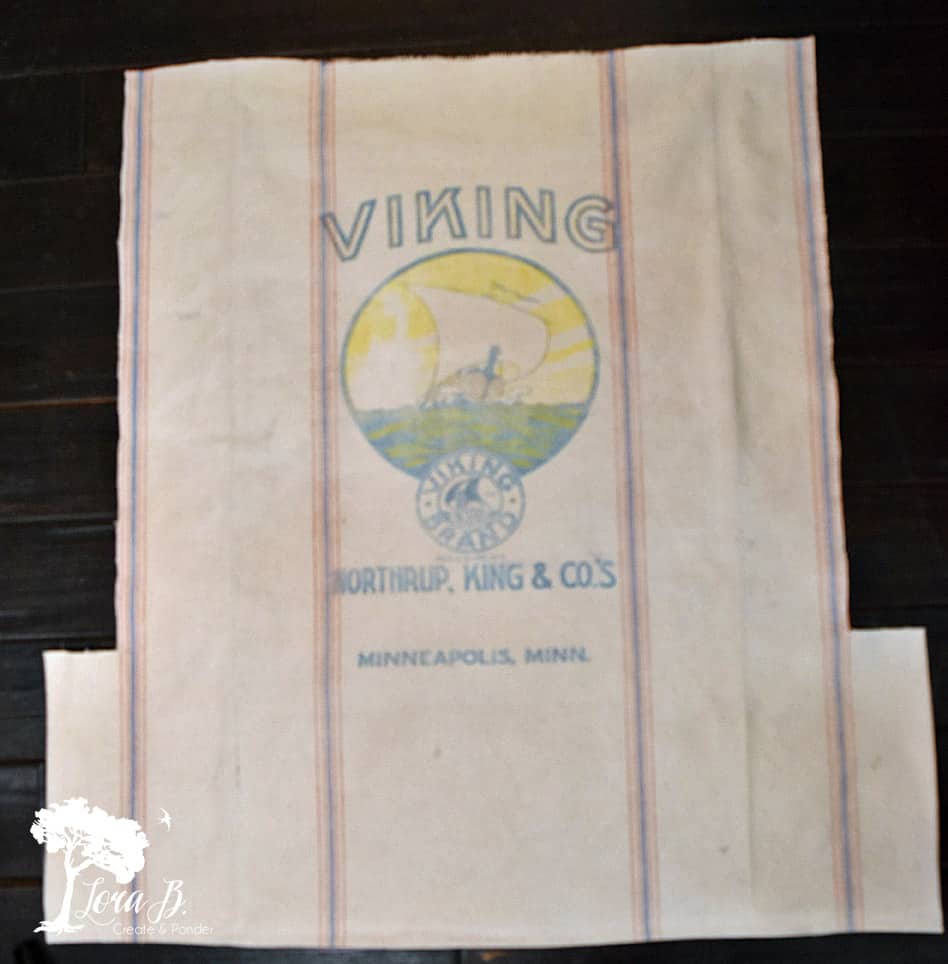
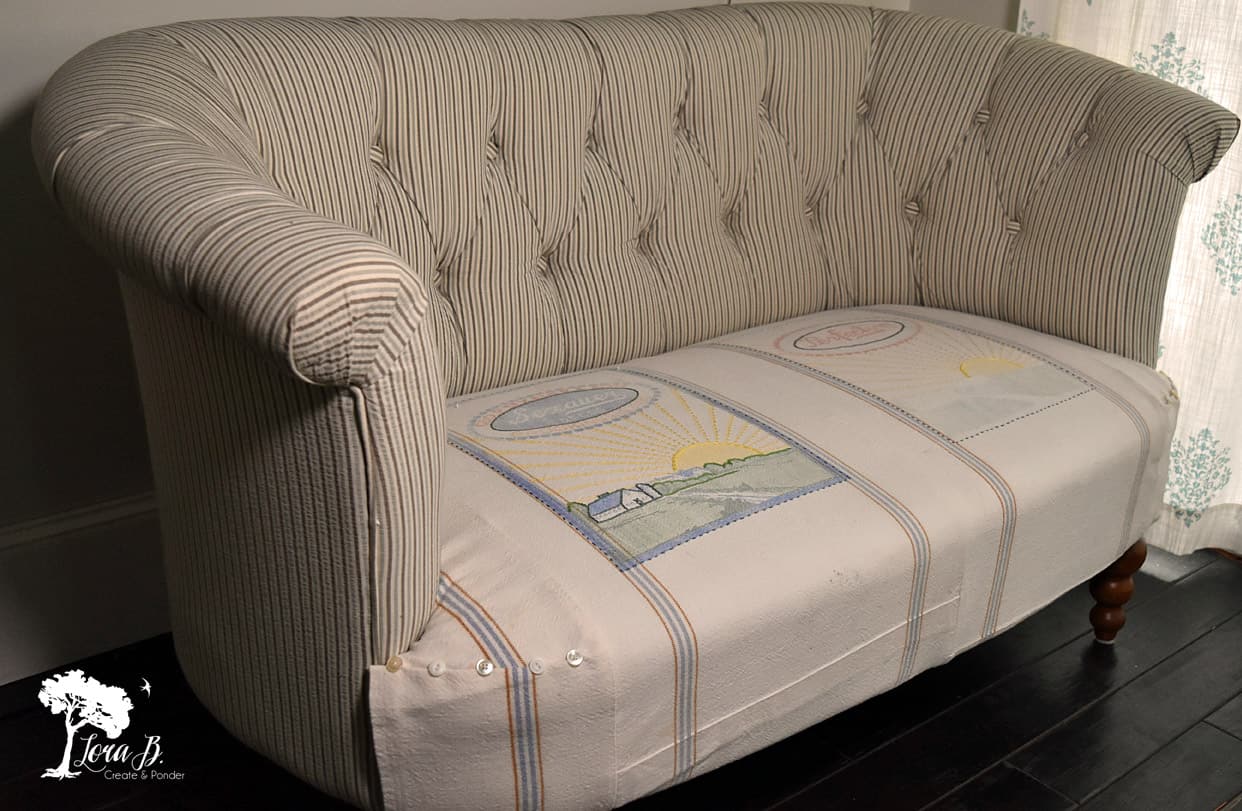
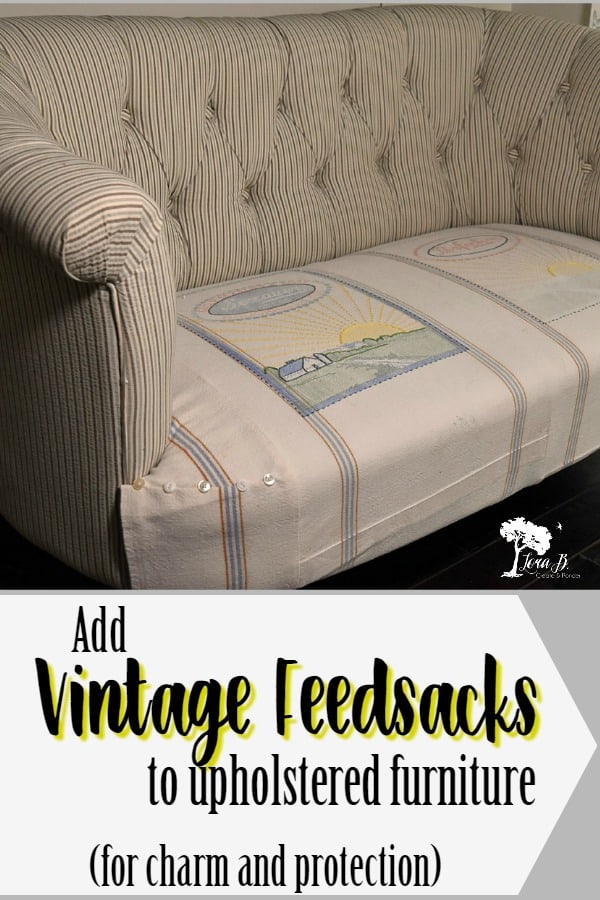
Adding some seat protection and some unique vintage style to my new furniture began with the Feed Sack stash! I chose 3 of the Beamis and Fulton seamless bags for their pretty graphics and their sturdy, canvas fabric.
Happy Girl and I talked over the design I’d been developing in my head. She brought the cutting confidence and pattern-making skills that make me nervous! Two heads are definitely better than one!
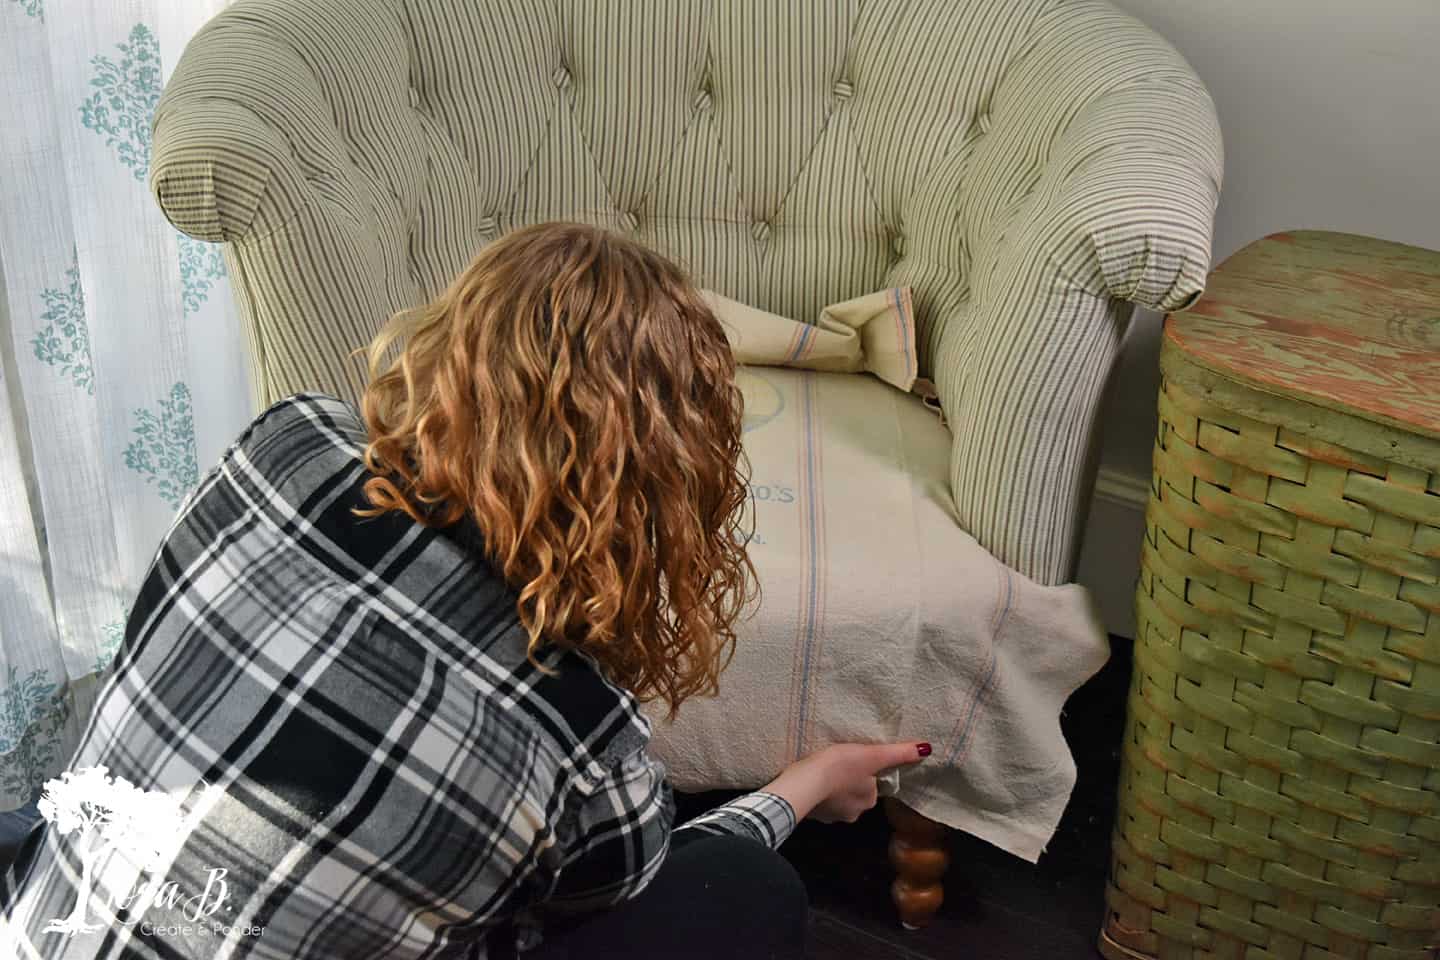
We started with the chair, since it would be easier. We centered the pattern where we wanted it on the chair seat. We were going to have several inches to tuck into the chair back, but needed to cut off some of the slack. We needed to cut a T shape for the front of the chair sides. We also needed a couple inches to tuck under the front, so I could staple it under.
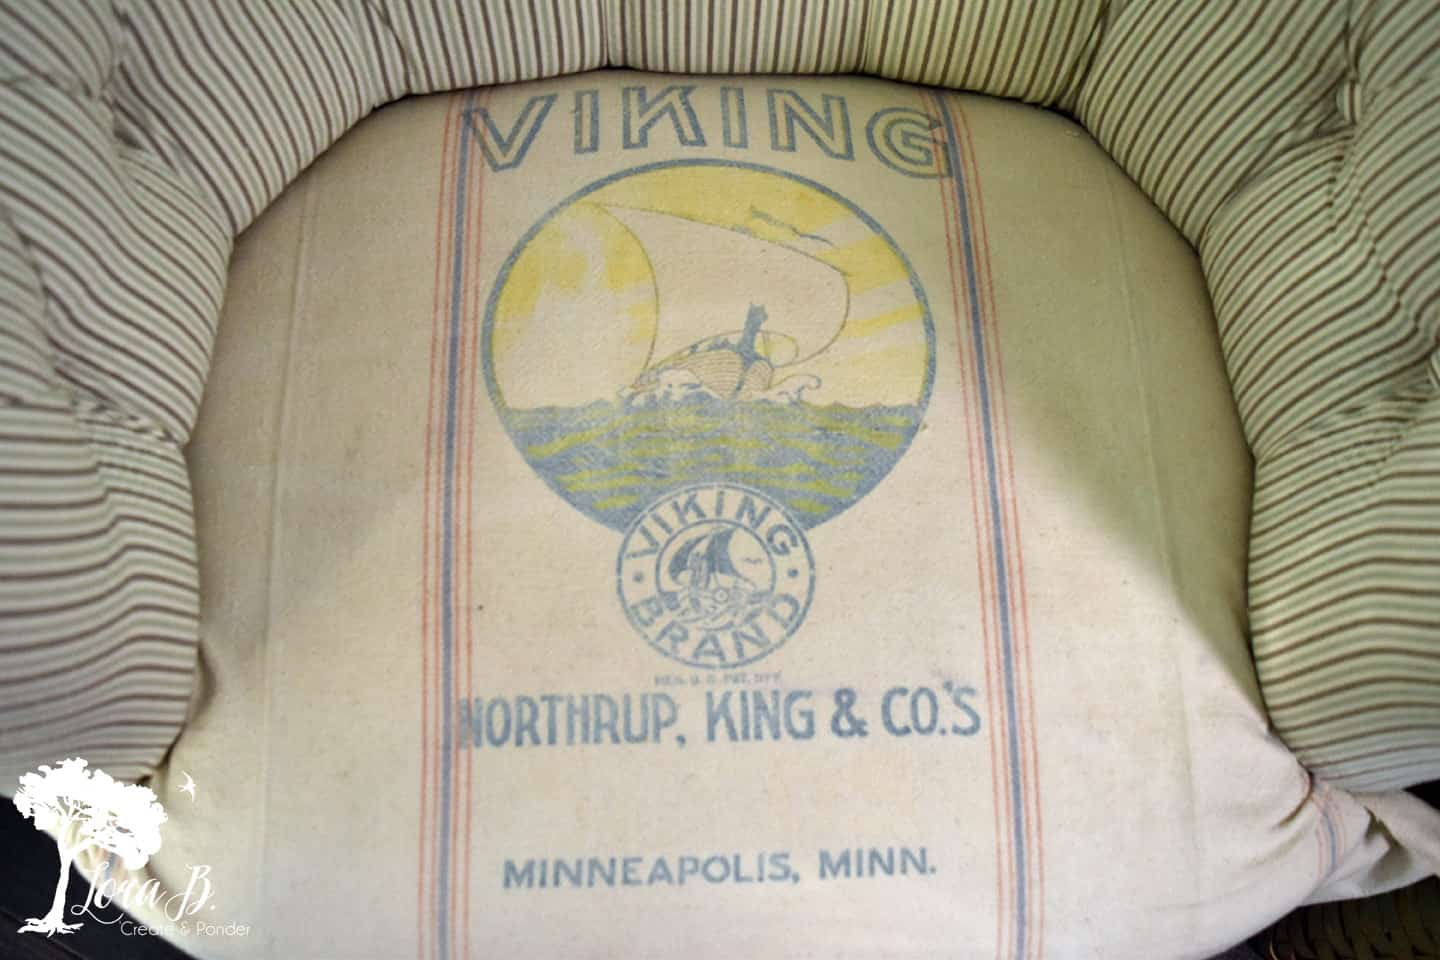
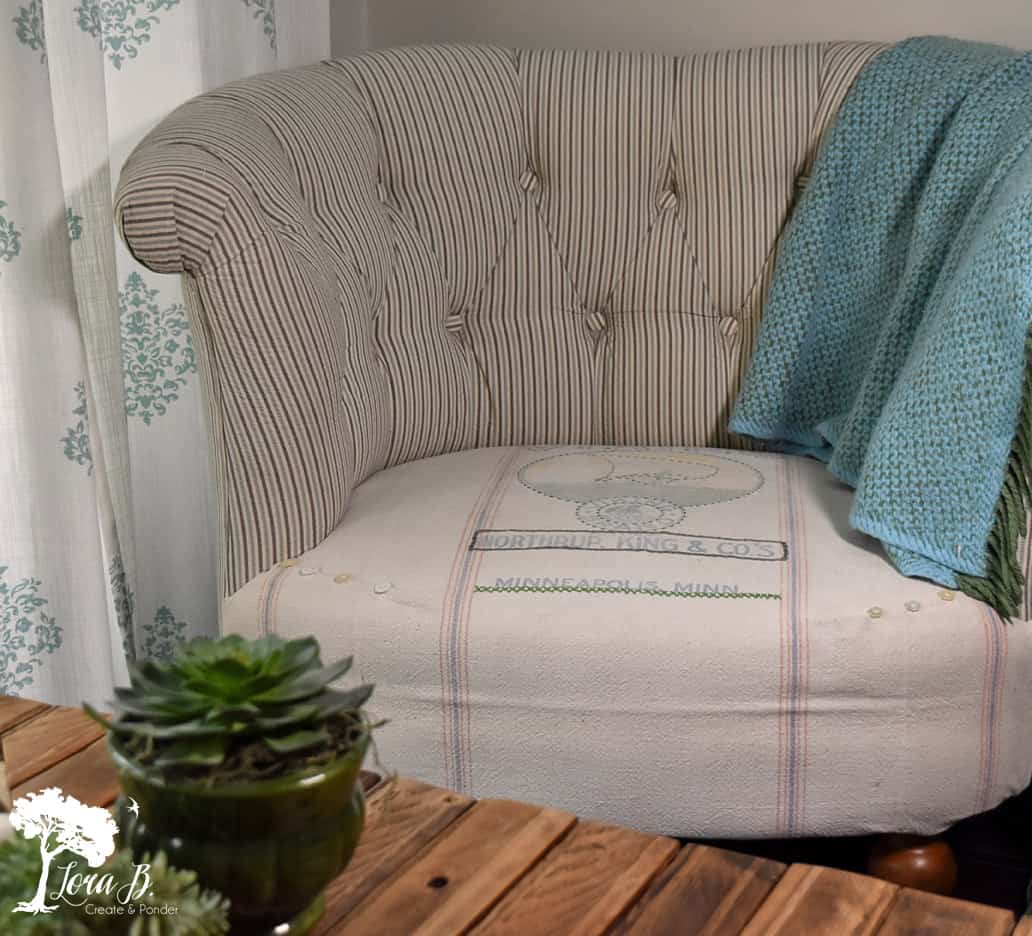
Here’s the cute bag I chose for the chair (I love that it says Minneapolis at the bottom) and how our piece ended up looking after we cut it. We She edge-stitched with a zig-zag stitch all around to deter raveling. We also turned under and stitched the bottom and the T sides, to have a finished edge.

Then on to the loveseat fabric:
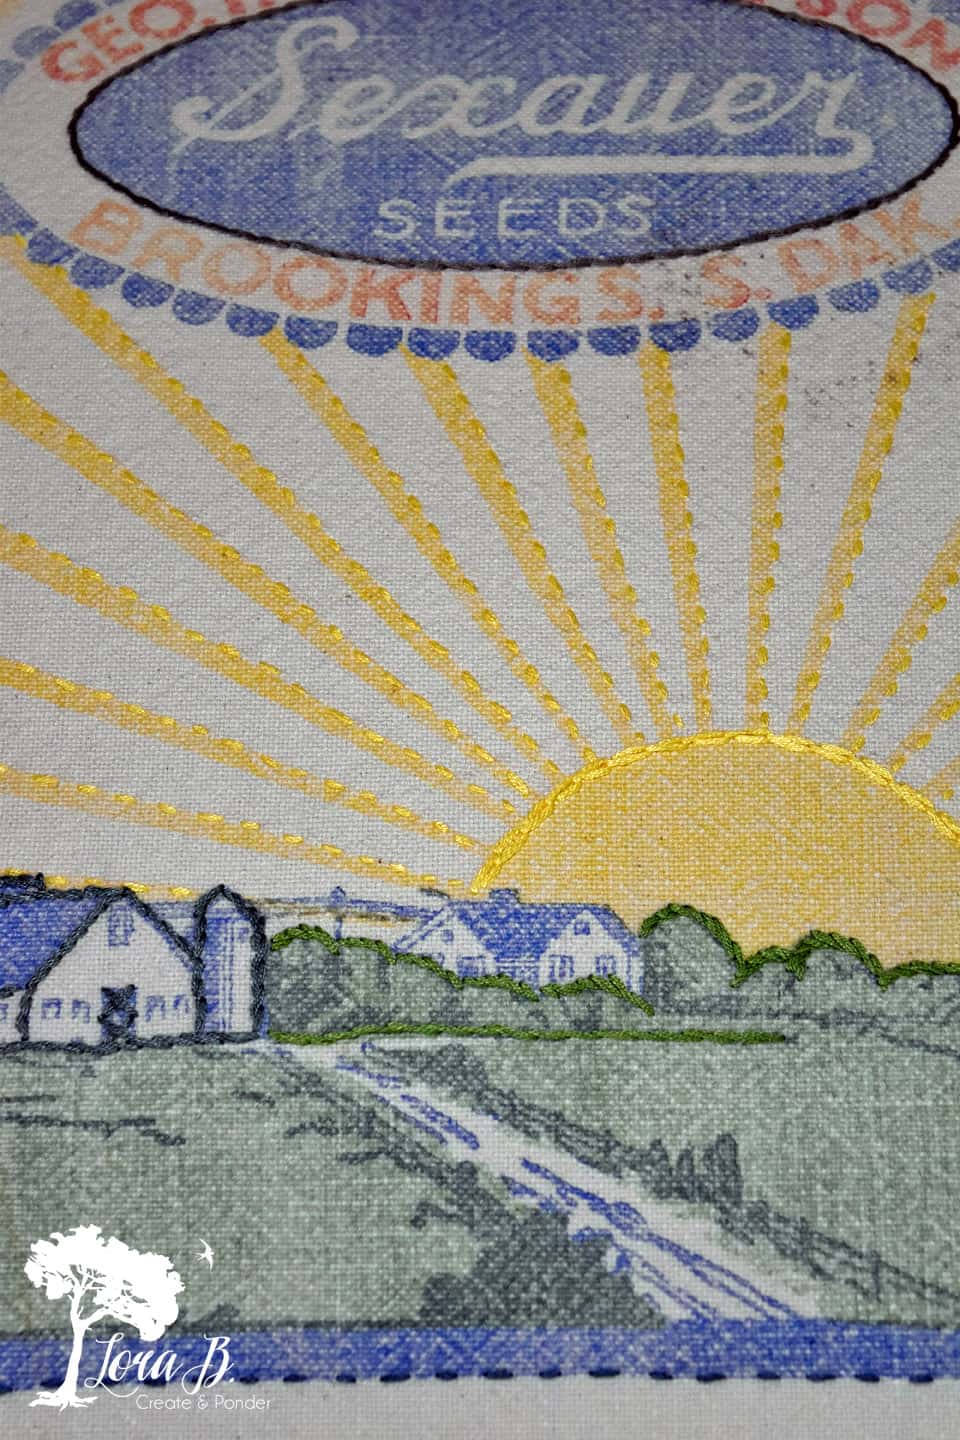
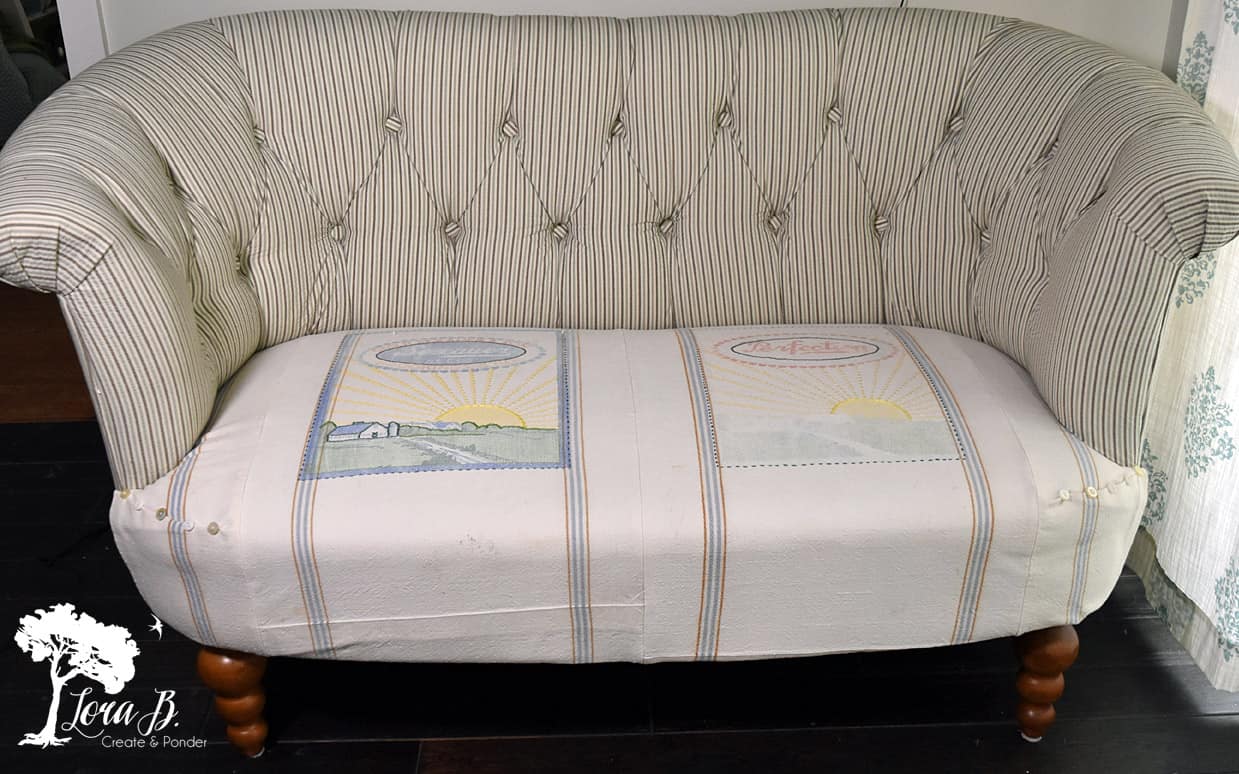
The loveseat required 2 of the feedsacks and I chose the 2 with the cute, scalloped company name graphic and the sunshine farm scene. Sadly, the farm scene was faded on the one, but there was still enough cuteness for my taste! Happy Girl cut the sides open and opened up the bottom seams. She then sewed the 2 bags together, making sure they lined up nicely.
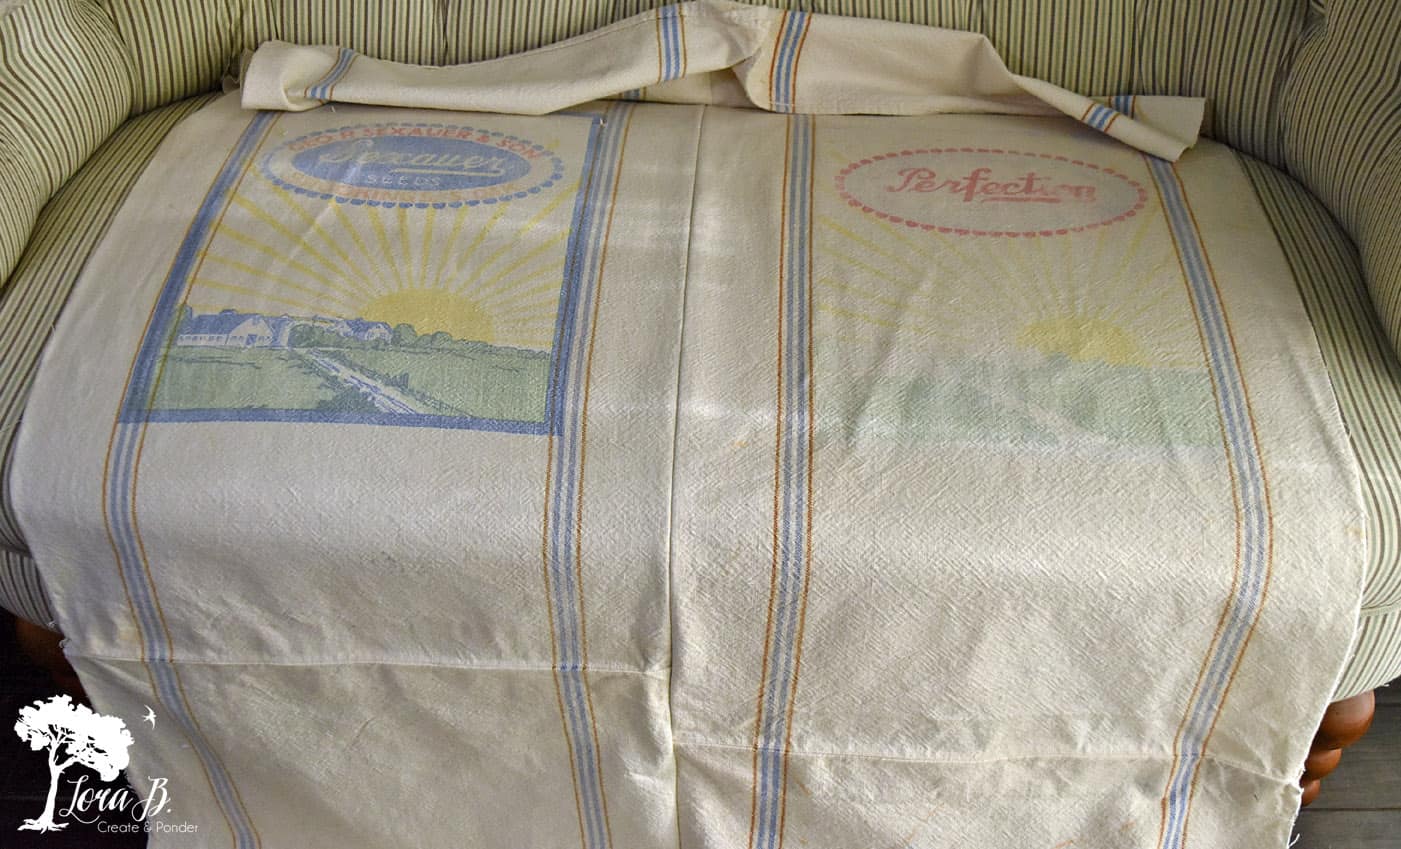
Using the back of the bags and trying to keep the circle graphics intact (for another project), she added the couple more inches of width needed on either side.
Then she went back to school and I got to work adding some needlework to really pop all the beautiful vintage graphics!
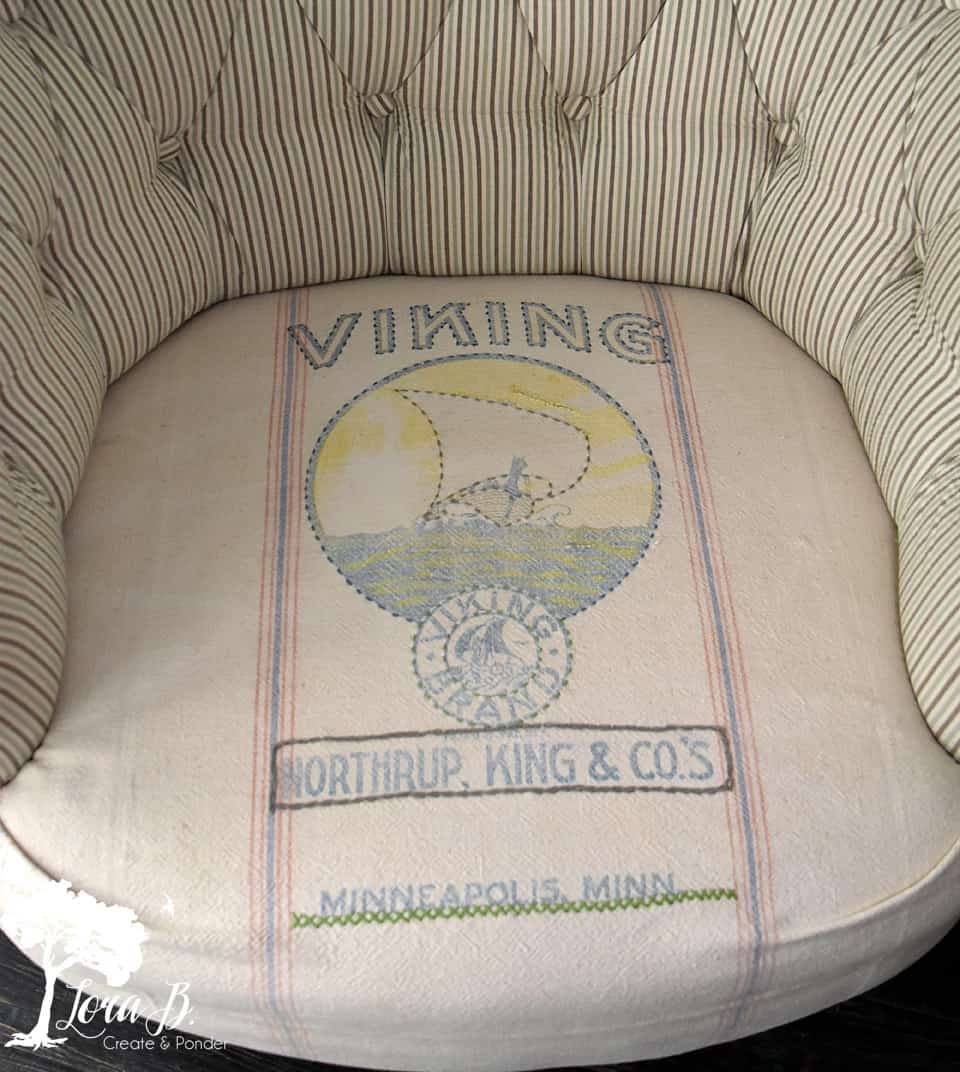
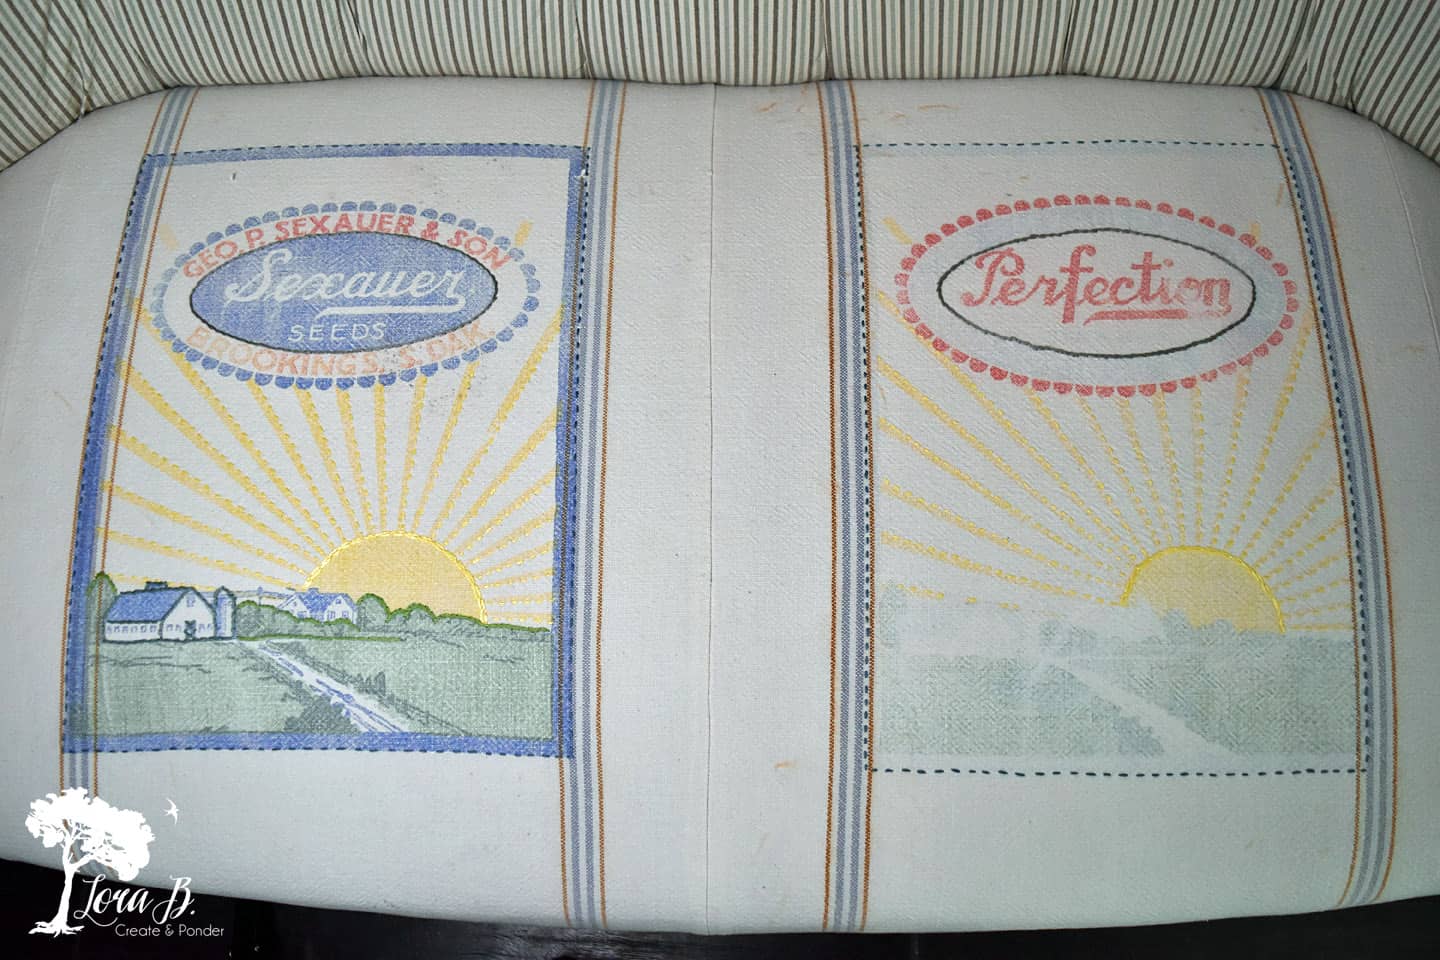
It’s been many years since I’ve done needlepoint, but it all came back! I was reminded how much I love this classic art form. I used embroidery floss to coordinate with the kitchen-green, blue, yellow and gray. I simply outlined some of the graphics features, trying to keep a balance overall and not get too fussy.

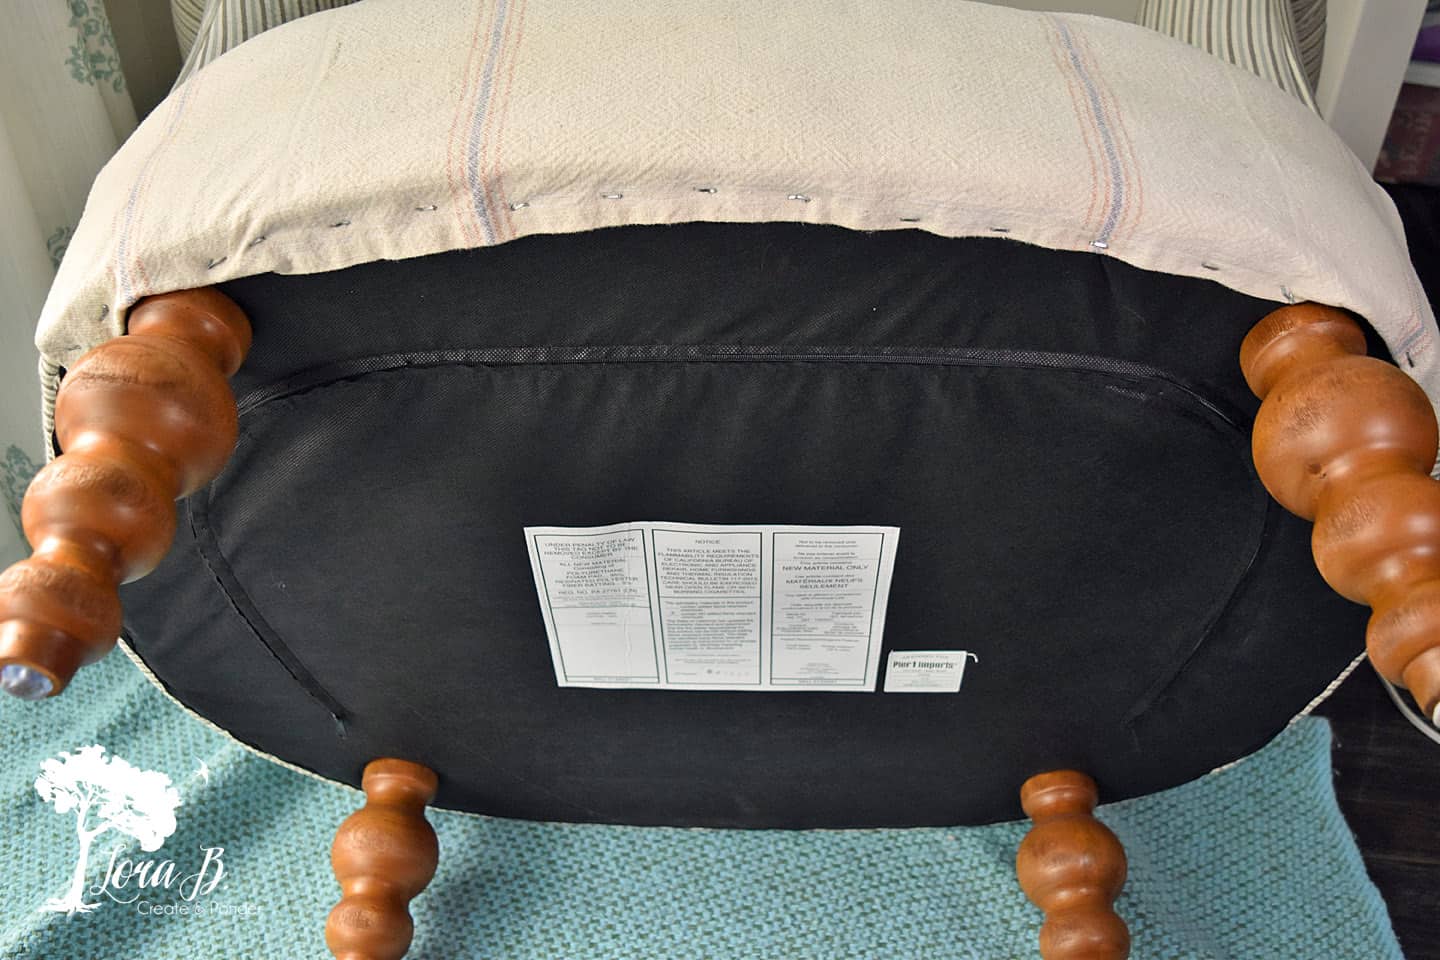
After a quick machine wash on a cold, delicate cycle and an air dry, I ironed the feed sacks and placed them on the seats, tucking in around the backs. Then I tipped the chairs on their backs and stapled the extra fabric underneath the front edge. If we ever get a spill or stain on these, I’d like to be able to get them off to wash them; getting the staples out is not that difficult.
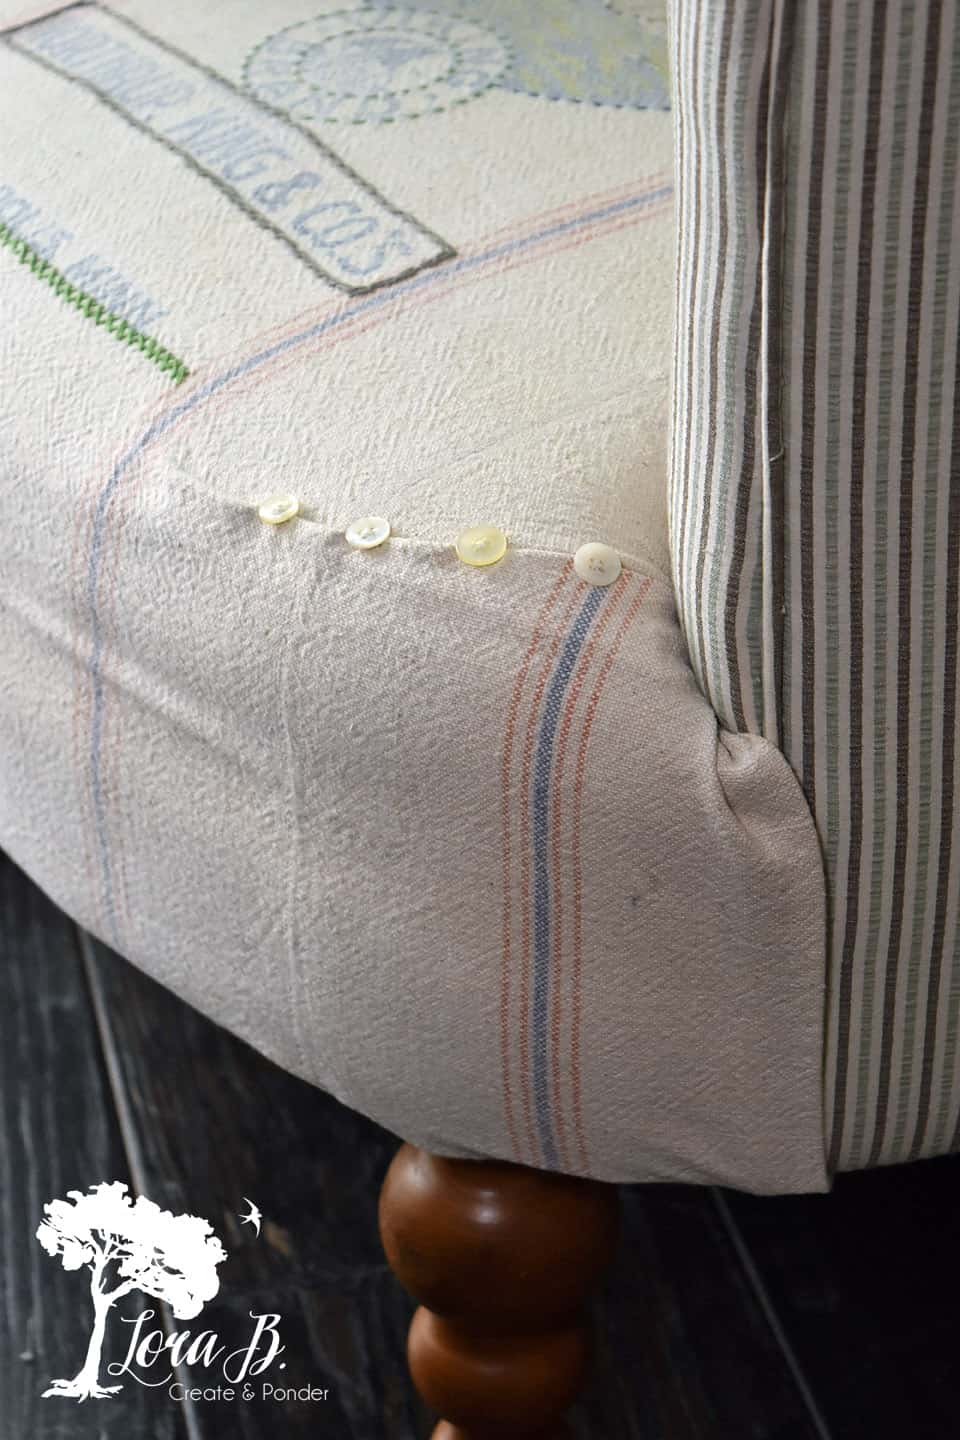
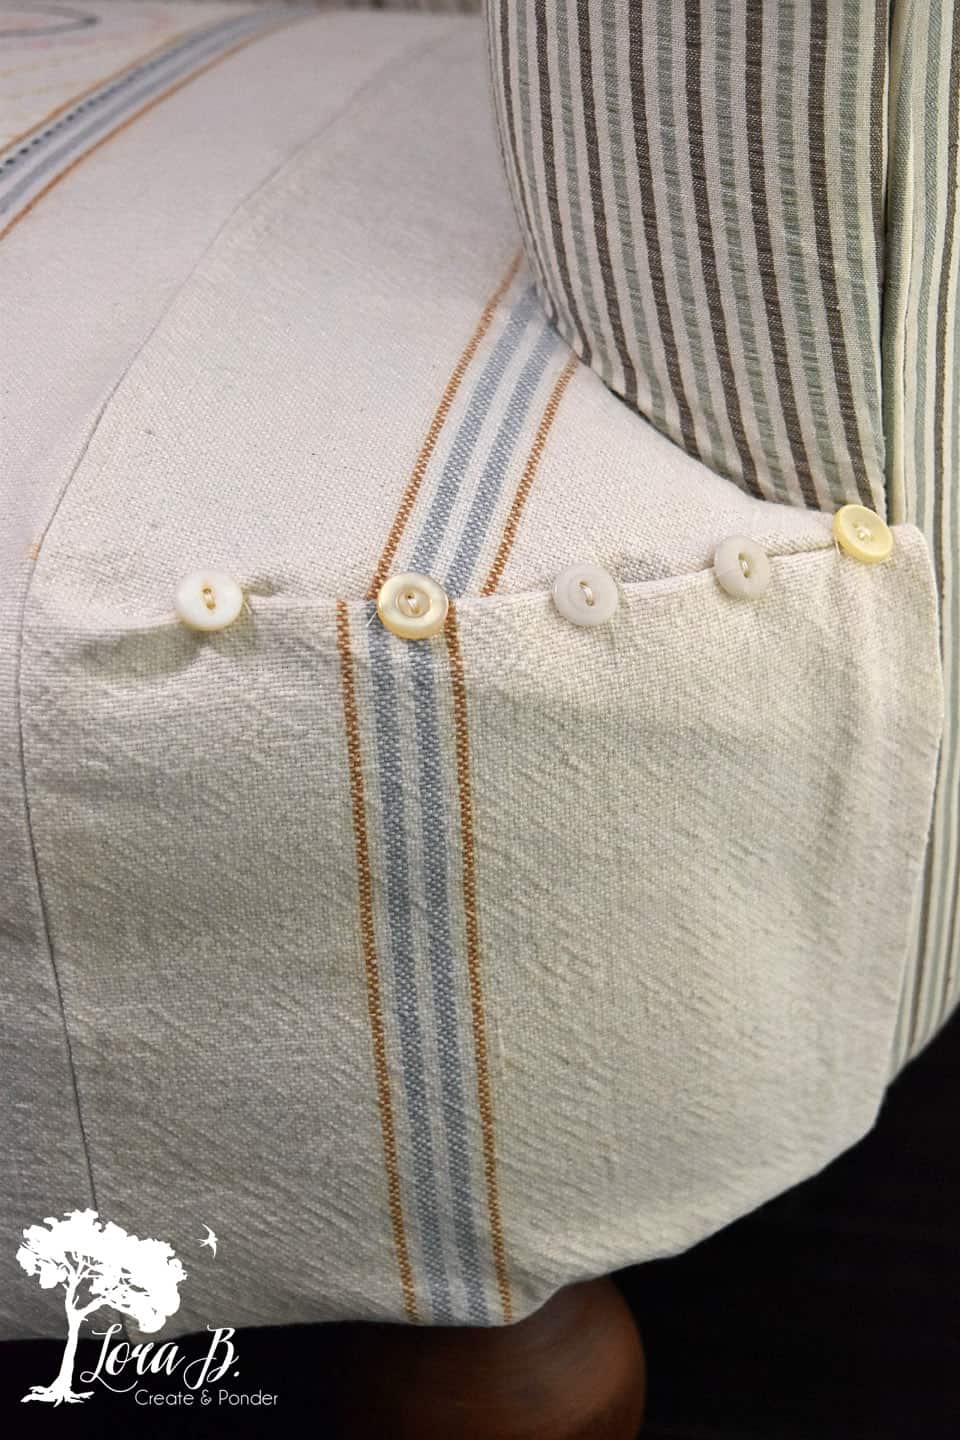
The sides were tricky. We had tucked under the raw edge and sewed. I wanted the grainsack lines to keep going straight down the front of the chairs, therefore a fold needed to happen with the extra fabric. I didn’t want the fold to always be catching, so it seemed like it should get sewn down somehow. Vintage buttons are always a great detail, and gave the cute seats even more of a slipcover feel. I tried to not sew into the chair fabric, but simply tacked the fold shut by sewing the buttons on.
I love little details, can you tell?
By giving these newly purchased furniture pieces some vintage charm, they became truly unique pieces! And by adding the feed sack seat covers, they will wear much better in a high traffic area. Function and unique beauty is always the best combination!
Will this creative solution help you be more bold with your furniture choices? If you don’t have vintage feed sacks, another complimentary fabric could also work. And if you’re thrifting and find a chair that is awesome, but whose seat has seen better days, this fix could breathe new life into it!
I’m just so excited this project is done! I’ve had this one in my head for several months. It always feels good to accomplish a task you’ve been dreaming about for awhile, and then be just as satisfied or more when it finally happens! Hope you enjoyed this How to Add Vintage Feedsack Slipcovers to New Furniture Seats.


Sharing at these lovely parties:

Just gorgeous! You are a girl after my own heart……love farmhouse. Would love to buy some feedsacks but they are outraigeously priced. Would you have a source that is feasible? Much appreciation for your reply. Many blessings to you and yours.aa
Thanks, Alice! Can’t say I’ve got a good source for feedsacks, sadly. I think finding them in rural area garage sales or auctions is probably the best bet. I checked Ebay and it looked like they were about $20 each (and up), which isn’t bad. Remember there’s usually graphics on both sides, so you get double the cuteness out of them if you split it apart! Good luck!
Thanks, Alice! I haven’t come across any feedsacks for years, but there were quite a few on Ebay for $20 and up. Not bad if you consider you can usually use the graphics on both sides if you split it. Hope that helps. Good luck!
Hello Lora, your chair and loveseat turned out great! I love the creative use of the buttons over the pleating creating a nice accent on the loveseat. Really like the grainsacks with the stripes ~ very nice! I’ve pinned several of your photographs to my DIY Projects, Drop Cloths and Grainsacks and Crafts to Make boards for you and for everyone to see. I had fun making some chair slipcovers this summer, if you’d like to check them out: http://www.frenchethereal.net/2017/09/drop-cloth-grain-sack-slipcover-reveal.html. The three link back to big settee and a sofa cover I made while we were still living in our last house in California; we’ve since moved with Hubby’s job change to Texas. 🙂 Hope you like them!
Have a great weekend and it’s nice to meet you!
Barb 🙂
p.s. Coming over from Farmhouse Friday. <3
Thanks for letting me know, Barbara;)
Barbara, They are beautiful! I love how they turned out! And I’ve been pondering a Cricut too, so it’s good to hear someone’s first experience figuring it out, since I’m not techy either! I’m planning on making some slipcovers for my chrome stools next with the other sides of the feed sacks…when I get my sewing machine back out again! Thanks for the comment!
Such a neat idea! I love the stitching you added to give it an extra personal touch!
Thanks, Cherryl! It was fun to do some needlepoint again and it really popped all the graphics! Thanks for the comment!
Another great post Lora! I can’t resist featuring you again at TFT tomorrow. Thanks for linking up!
I love this look and I adore this project Lora, perfect fix for the upholstery. The added embroidery lends the perfect finishing touch. Your project os this weeks feature at #fridaysfurniturefix! Thanks for sharing.
Awesome, Brenda! Glad you enjoyed it! Kind of a challenge for me to do upholstery, but it was fun! Gotta always be pushing ourselves out of our creative comfort zones, right?
This is a fantastic idea. So cute.
Thanks, Debra!
That is just awesome Lora, I love the embroidery stitches on the feed sack designs!
Tania
Thanks, Tania! I had so much fun with this one!Can’t wait to do some other projects with them!
How fabulous! This takes your already wonderful furniture to an even better place! Great job!
Thanks, Linda! I’m definitely more at ease when we sit on them! And I love how unique they look now!