
Spruce Tips 101
how to create your own beautiful outdoor Winter container pots that you can enjoy for months
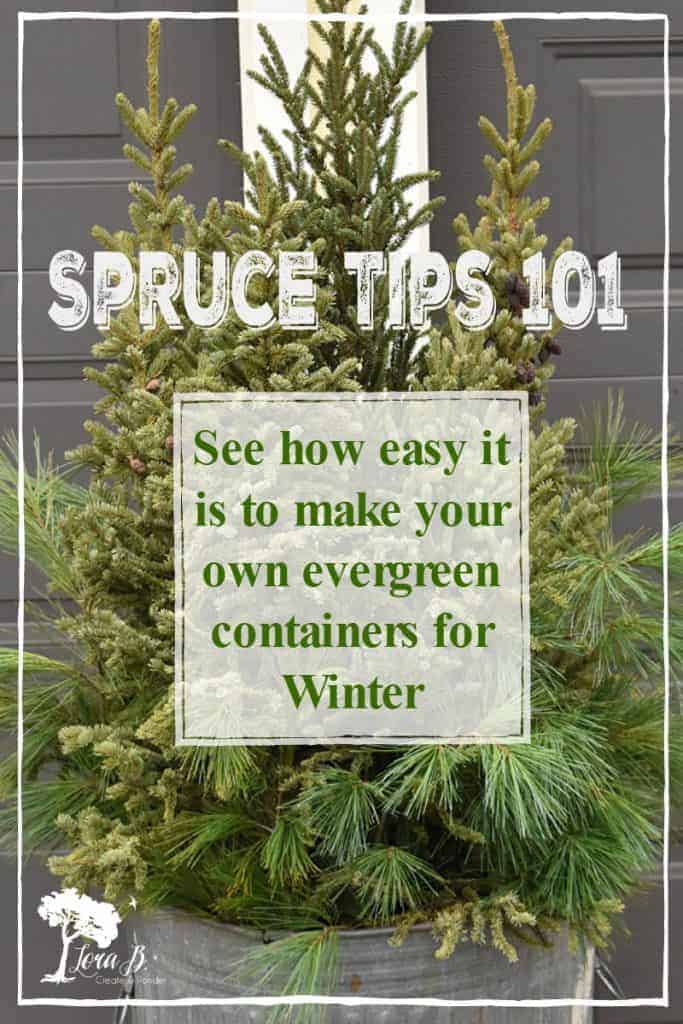
As soon as the pumpkins of Halloween have cleared the shelves, the Spruce Tips are filling up their spot in the outside garden area of your local store. Before the dirt freezes (at least in my area), it’s time to get your outside pots all pretty for the holiday season! If you want to create beautiful, custom winter pots outside your home, here’s a primer, Spruce Tips 101.
Spruce Tips 101
For your convenience, this post contains affiliate links. If you make a purchase, I may receive a commission. There is no additional cost to you. My full privacy policy is here.
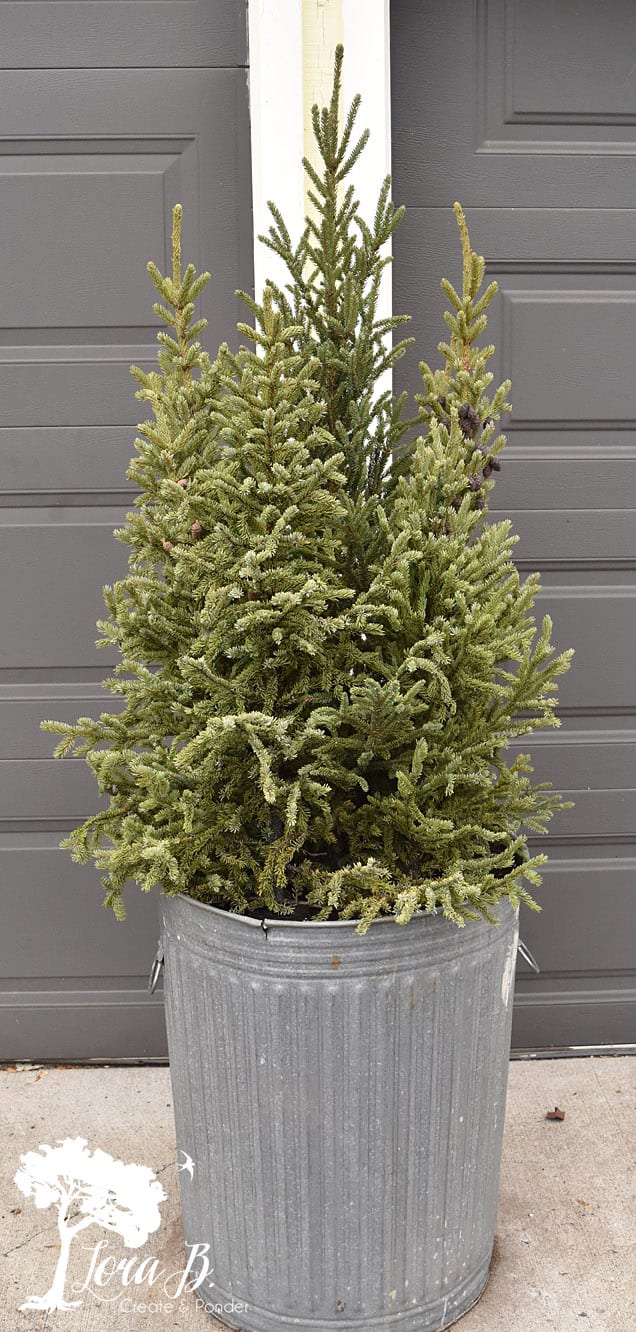
Choose Your Outdoor Spruce Tip Container and Fill with Dirt
For my outside containers this year, I’m bringing new meaning to the term “trash to treasure”…
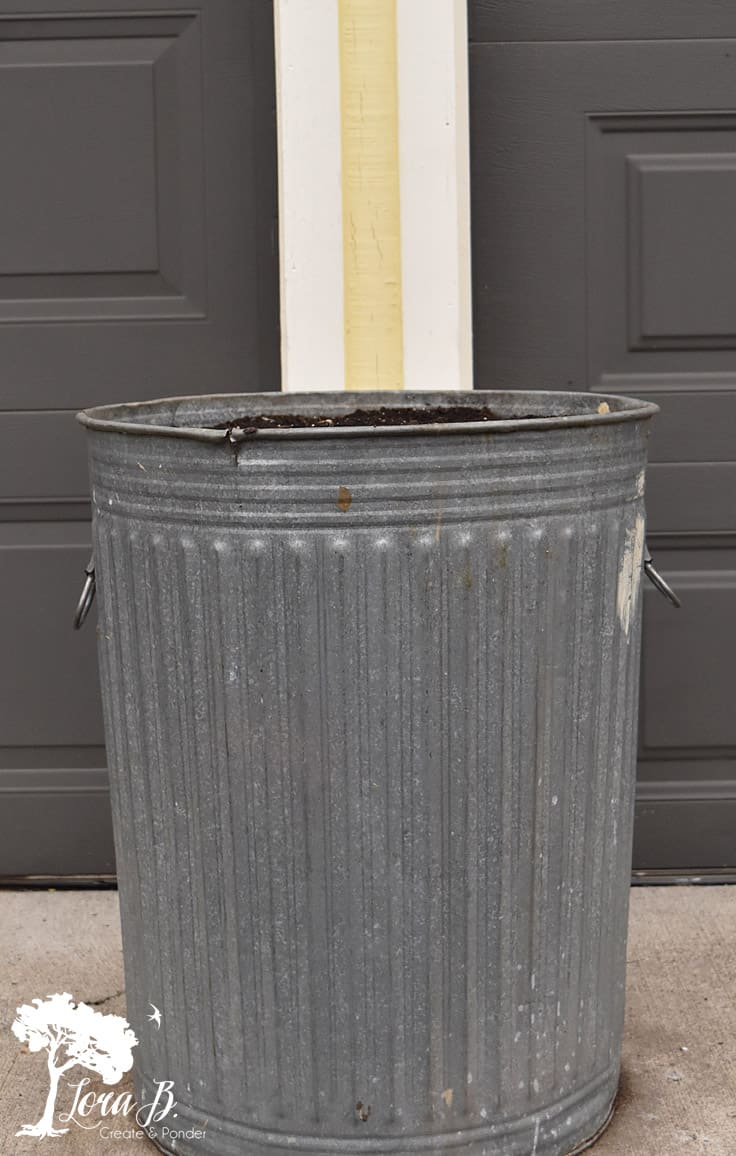
Yep, I’ve been hoarding old metal garbage cans while curbside junking. I’ve wanted to turn these old garbage cans into industrial flower pots for awhile, and this winter season it’s time to give it a try!
Instead of filling these huge containers up with dirt, put upside down plastic flower pots in them to fill up the space. You could also use plastic milk jugs or some other filler. Then top them off with potting soil. Less dirt and less heavy;)
Now to fill them with lots of wintertime goodness!
Organize Your Evergreen Tips by Length
Once you’ve purchased your spruce tips, open your bundle(s) and organize them by size, tallest to shortest. Give them a good shake also, to separate the needles from being squished together.
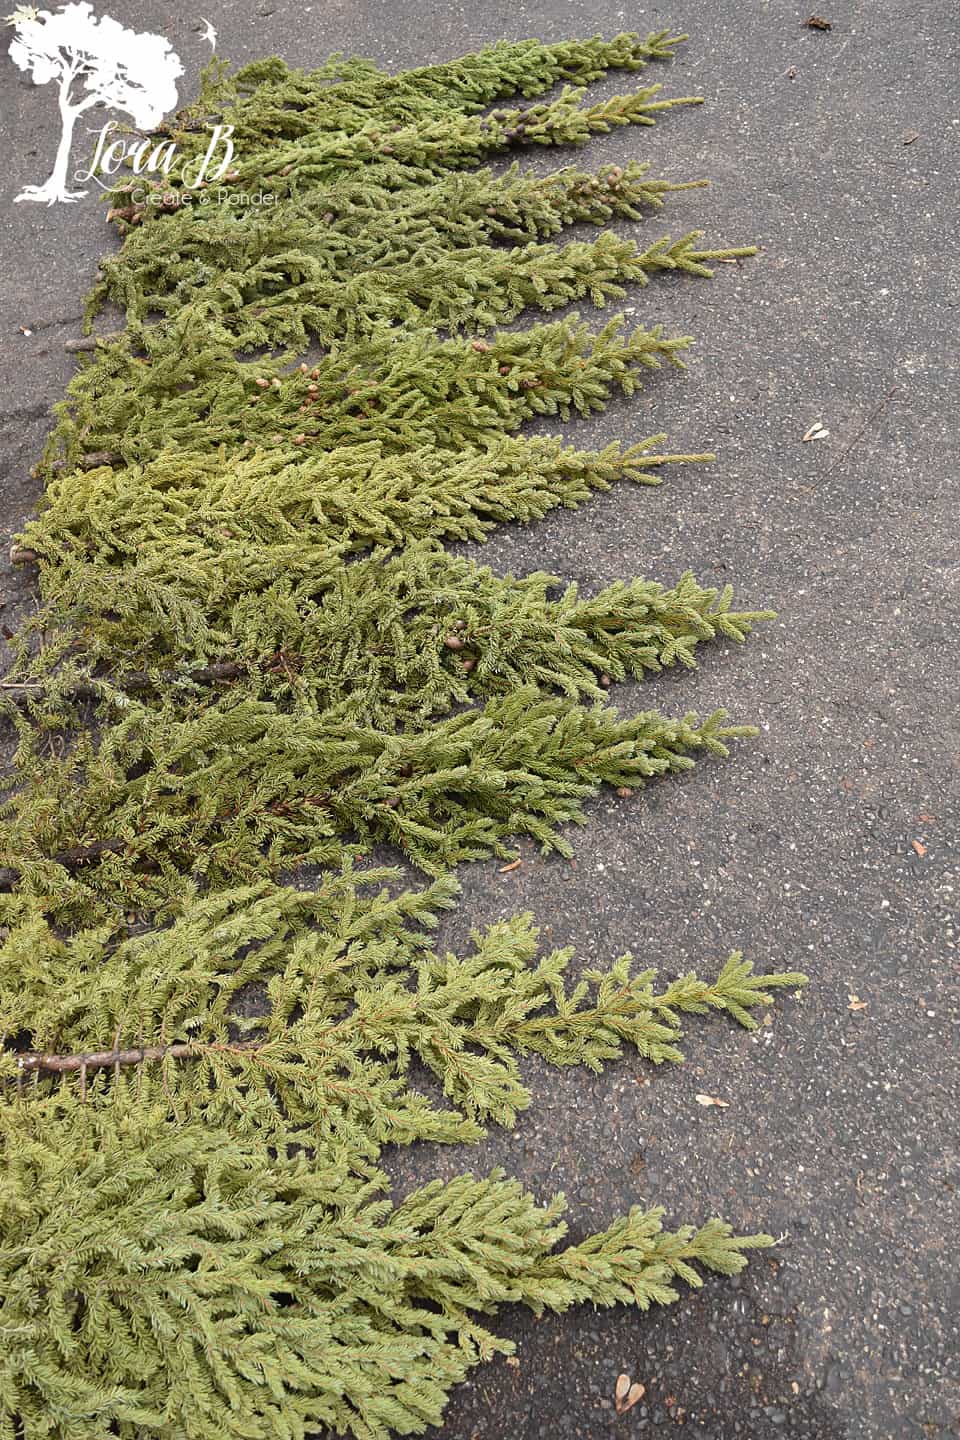
Take note if some of them have a nice point at the top, or if some are more mangled looking; you’ll want to arrange accordingly.
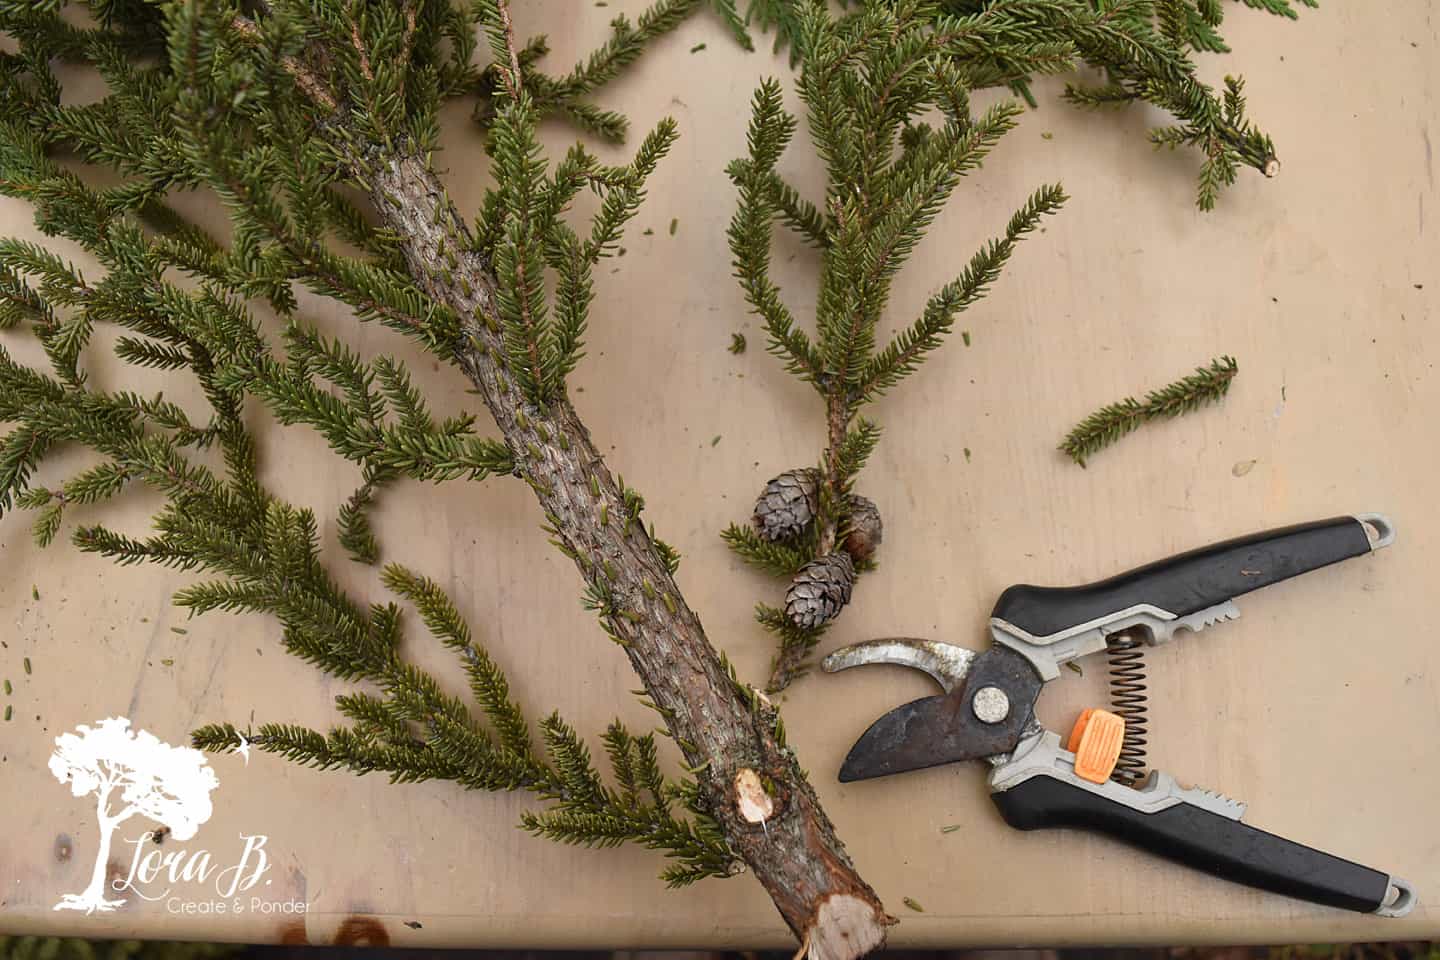
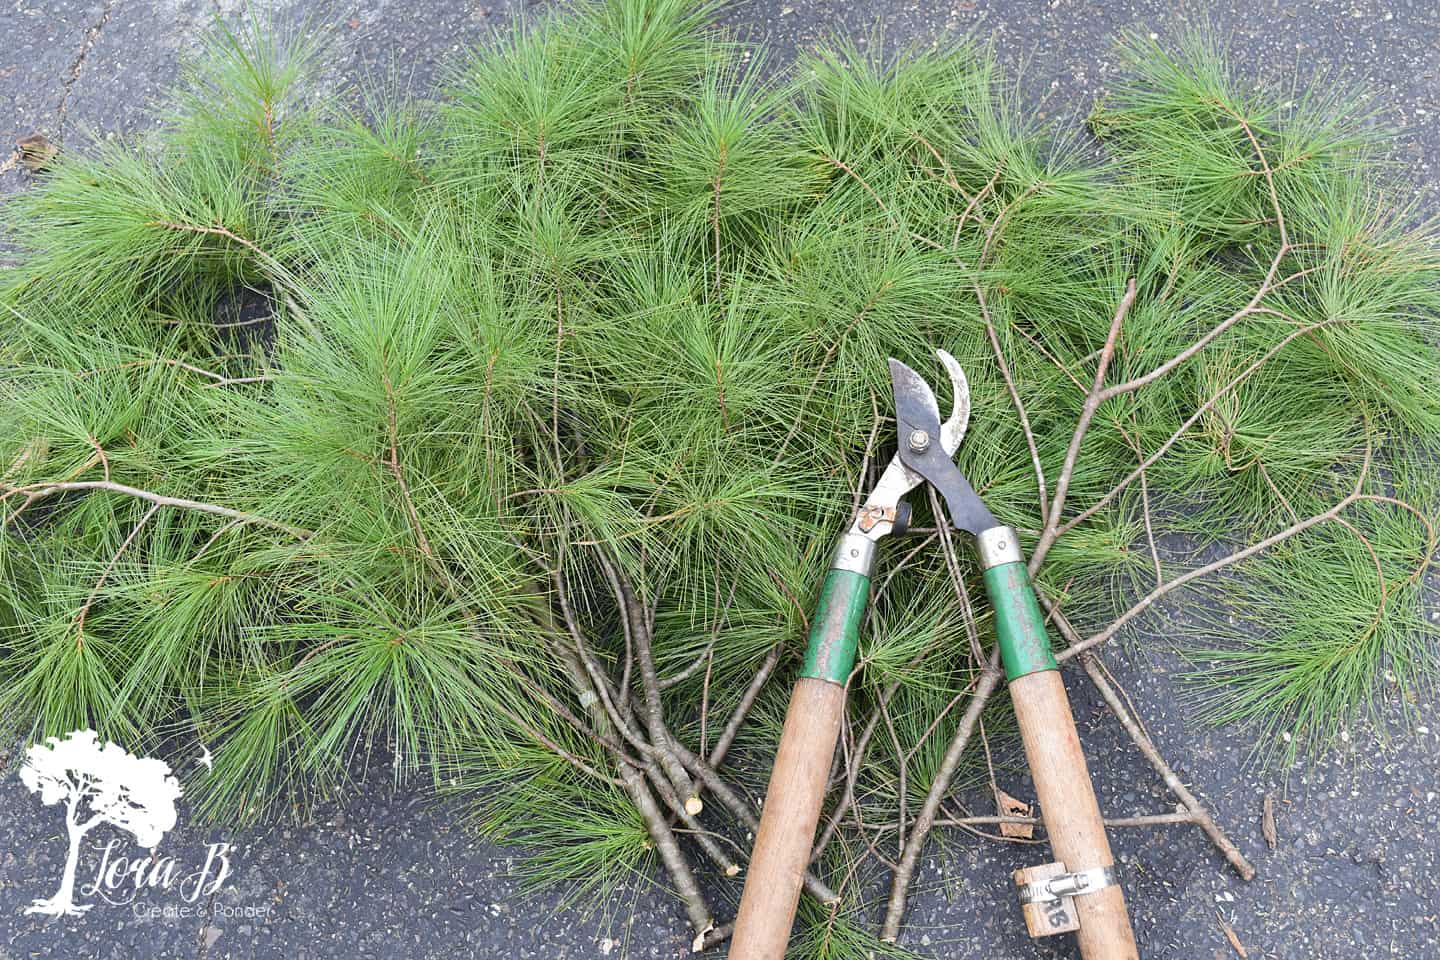
Before placing them in the dirt, clip off the bottom branches (about 4-5″) with a sharp pruner {you can get one HERE} so they will stick in securely.
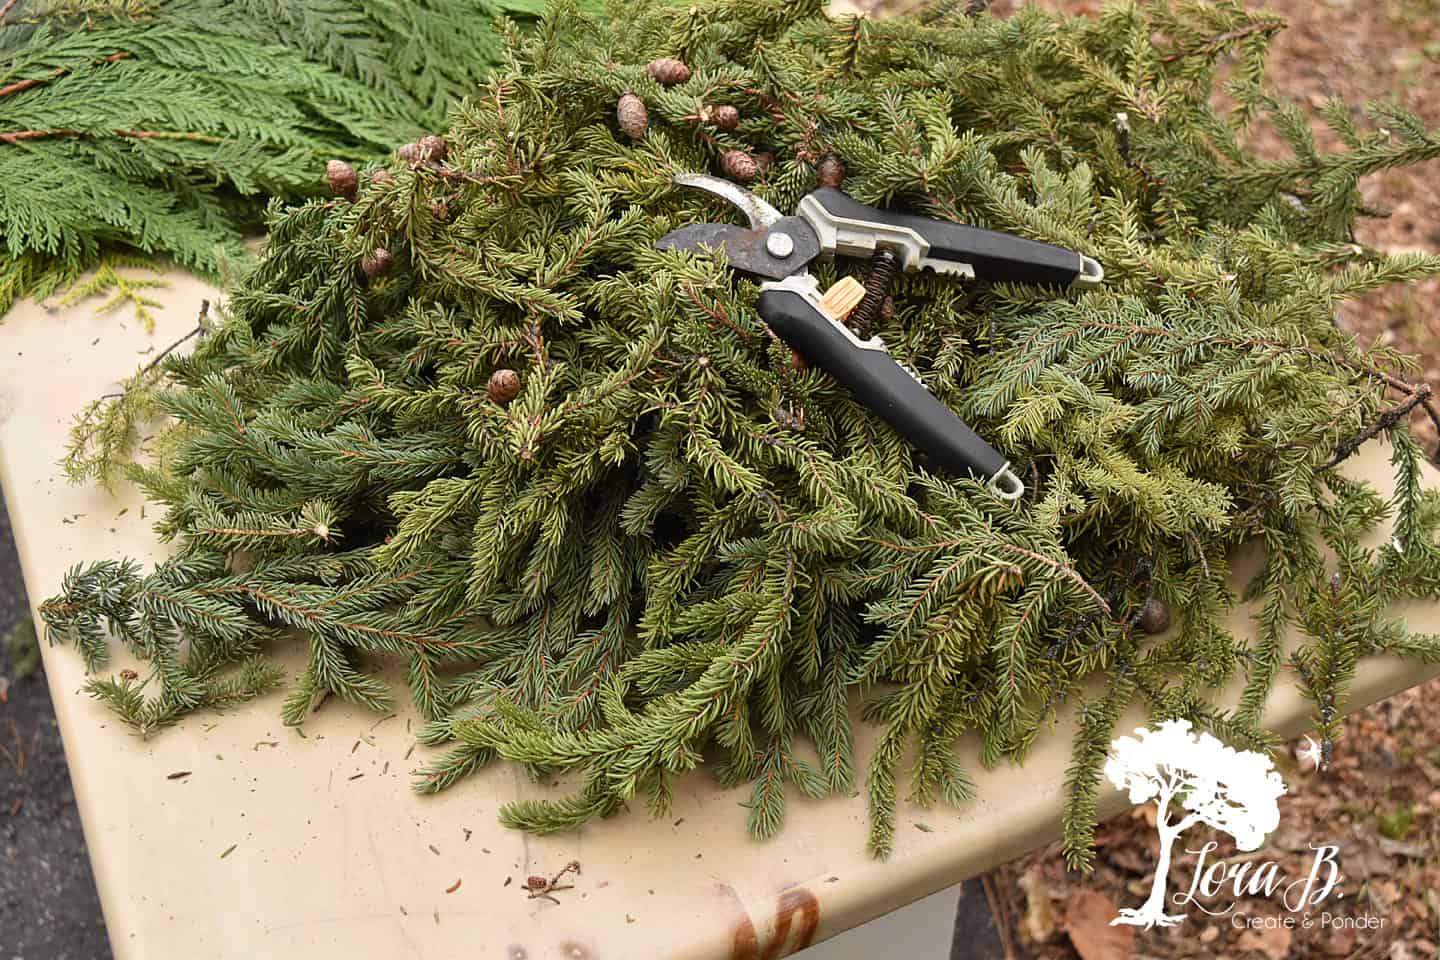
Don’t discard the scraps ; you can use them to add to other outside vignettes!
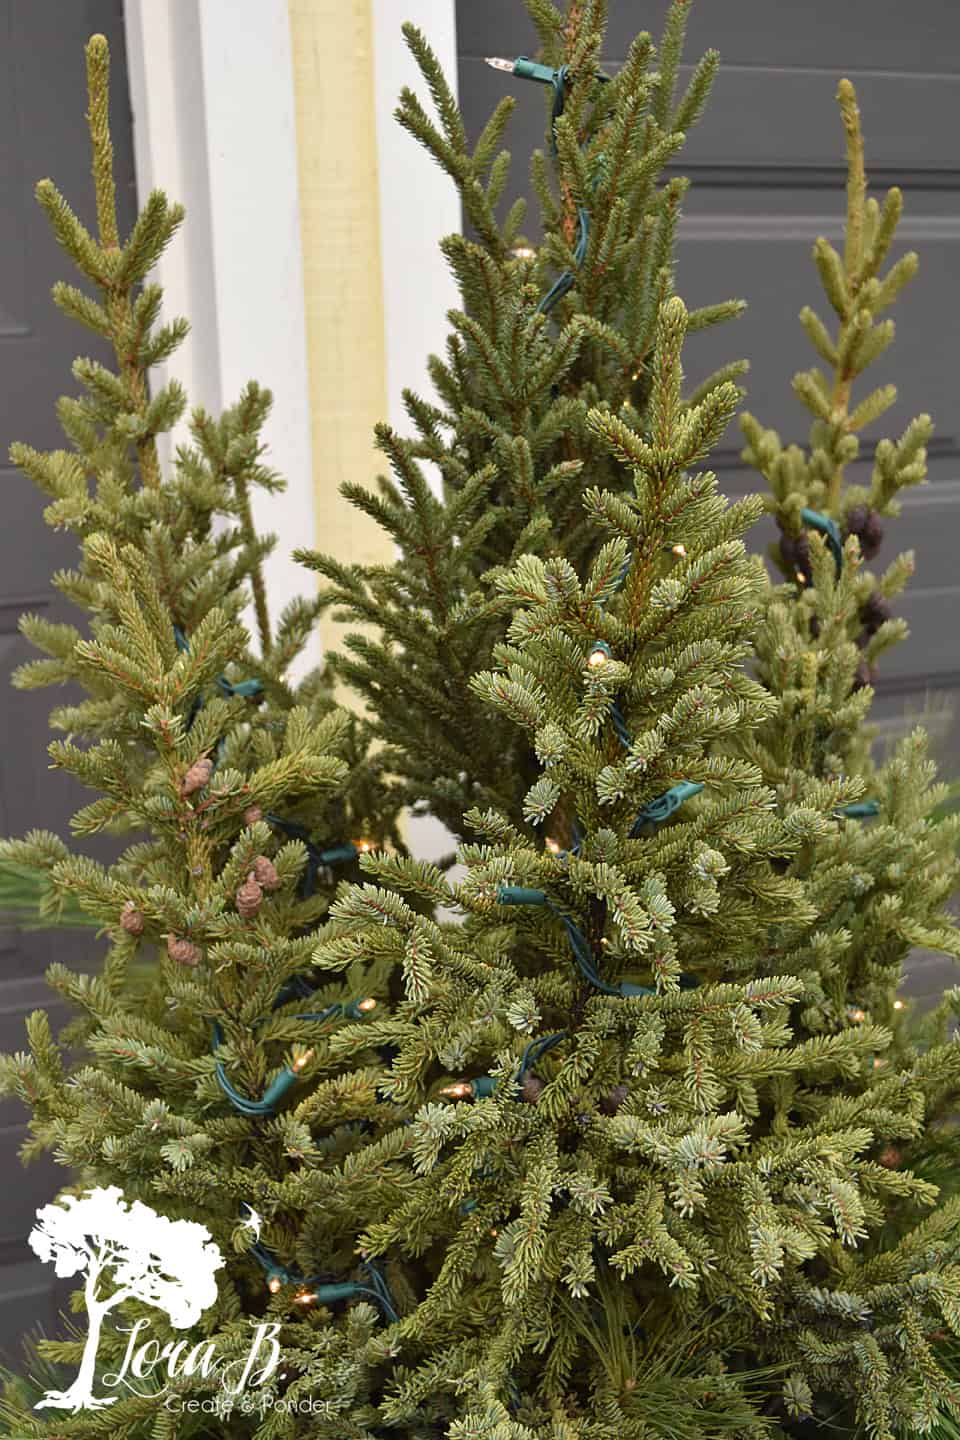
Arrange the Spruce Tips in Your Planter
Arrange your spruce tips in your planter. I usually begin with the center and work my way out. For these large garbage cans, I purchased a taller branch for the center to give more overall height and then arranged the other tips around. Usually an odd number works best. Arrange the tips standing straight; they will bend once they get a layer of snow on them.
If you have other evergreens in different varieties, clip them and add to your container. The more variety of different textures you add, the richer it will look. I like to clip our White Pine trees with a lopper and add their feathery, long needles for softness. {you can get a bypass lopper HERE} I add the softer branches around the base of the spruce tips and tuck some into the upright spruce tips.

Before Adding Any Decorations, Add Lights
Before adding any more decoration, now is the time to add lights if you desire. I love the nighttime glow of my pots all lit up when the blanket of winter snow is covering everything. I try to disguise the wires as much as possible, but once we get a dusting of snow, the green wires blend right in.
Add Decorations to Your Outdoor Winter Containers
Once the lights are on, you can add all the fun decorations you can come up with, depending on your style. I like natural items from my garden: hydrangea, sedum, red-twigged dogwood, black seed heads. Pinecones and feathers are a nice addition, too. Last year I featured black and white houndstooth ribbon and some silver leaves I’d purchased. { “Porch Decorating Fun“} This year, I’ve picked up some cute scarves and am going to try a “wintertime fun” theme.
Use the Extra Scraps for More Outdoor Decor
Remember all those scraps I clipped off from the bottoms of the tips? I like to tuck them here and there to add extra seasonal prettiness to all my “regular” yard items.
I add them to my birdbaths and top them off with a vintage birdcage. I’ll add a candle or glass candleholder to the center for a little nighttime glow.

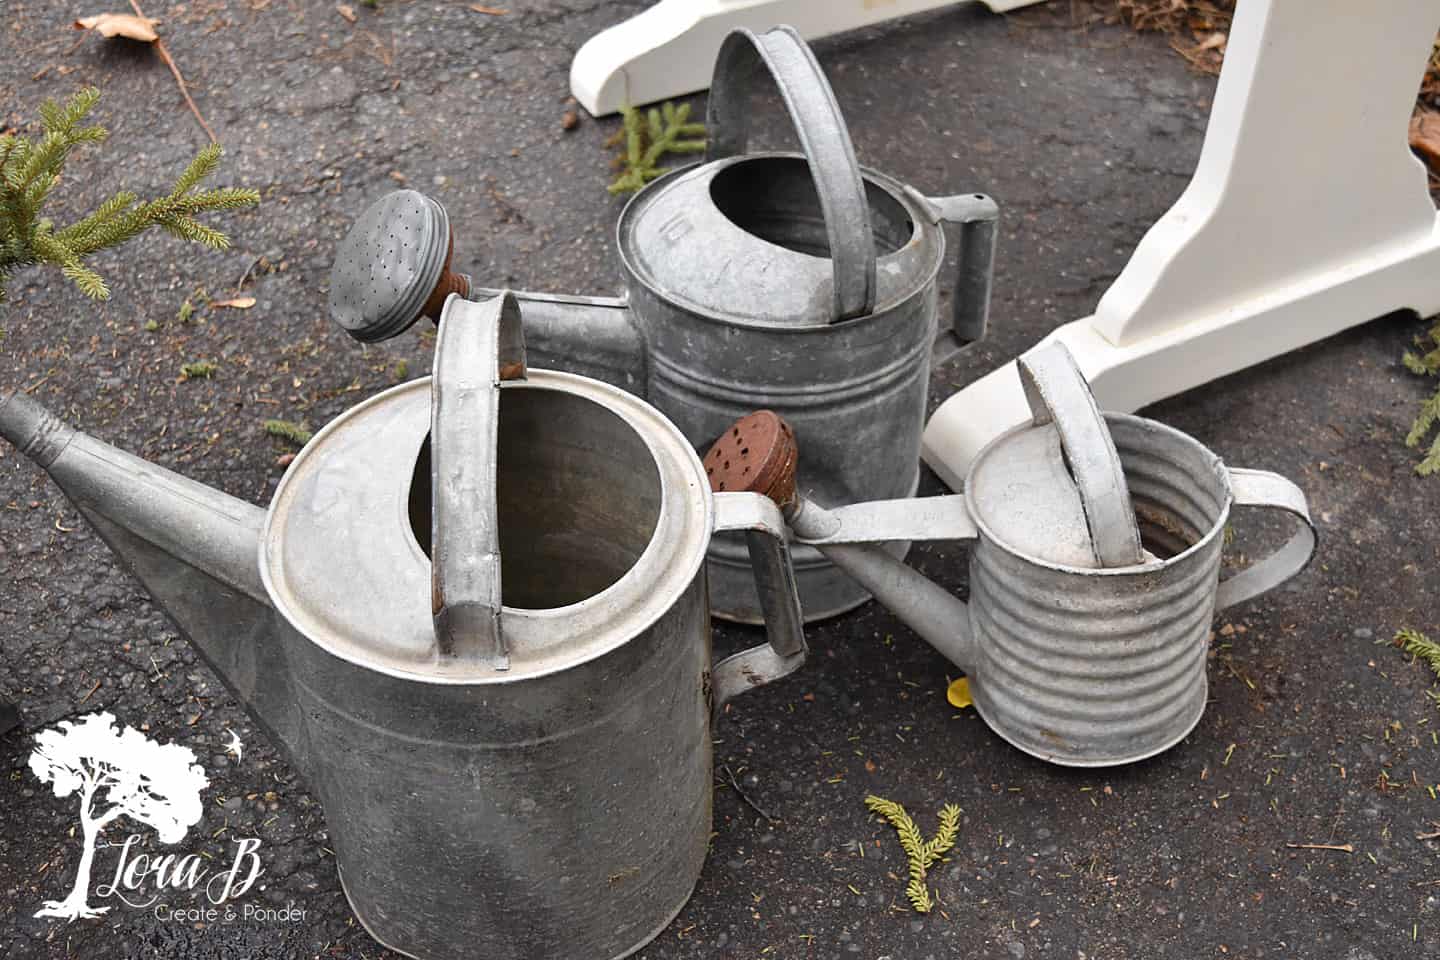
My vintage galvanized watering cans get arranged with winter bouquets to set around the porch.
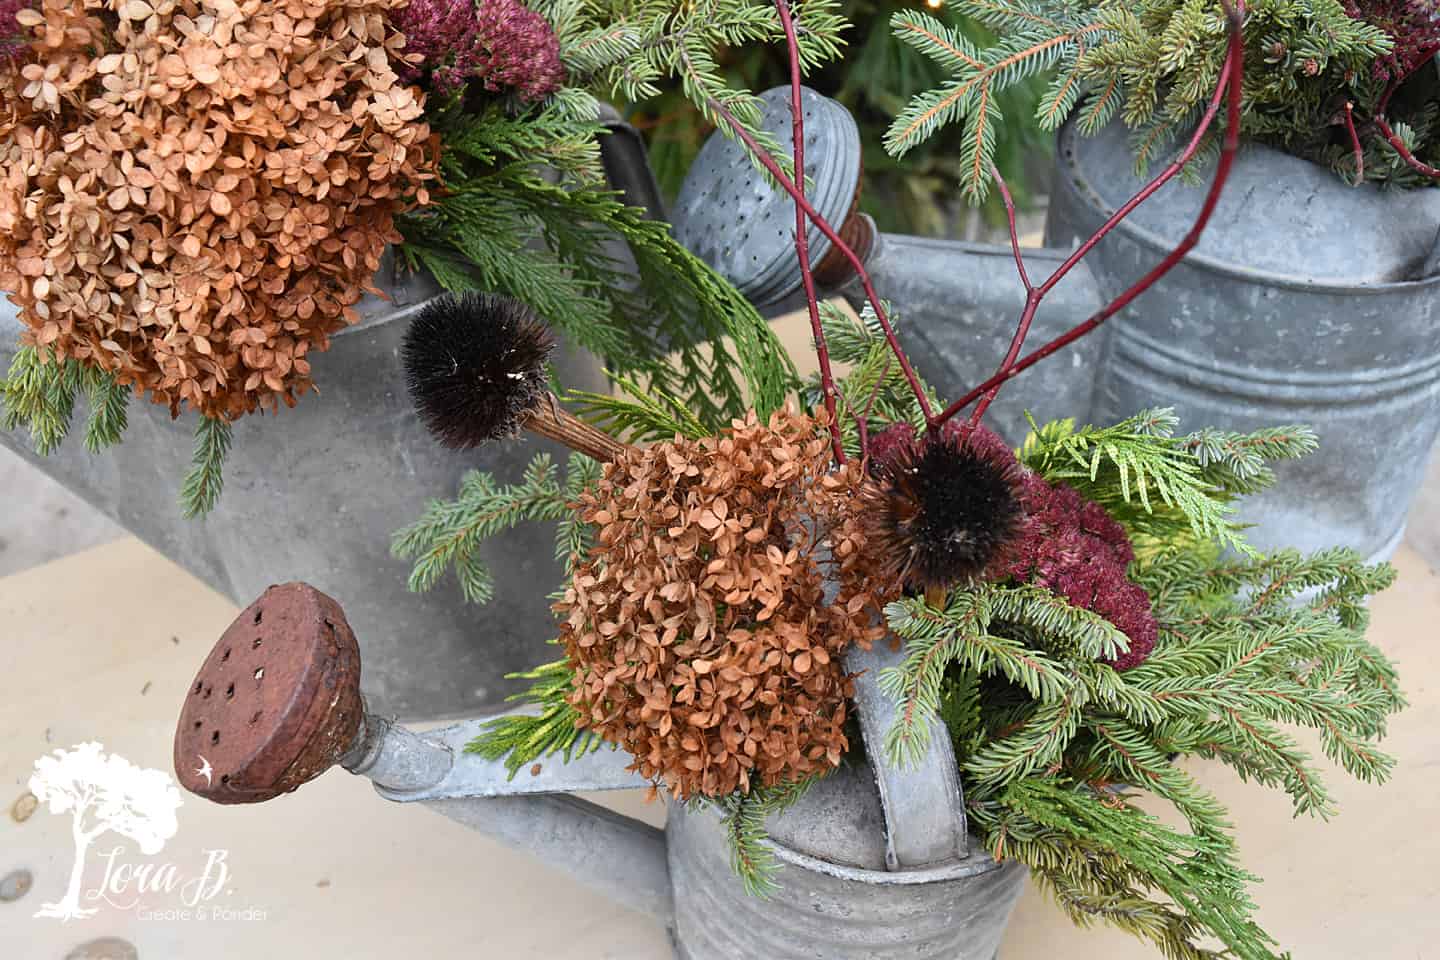
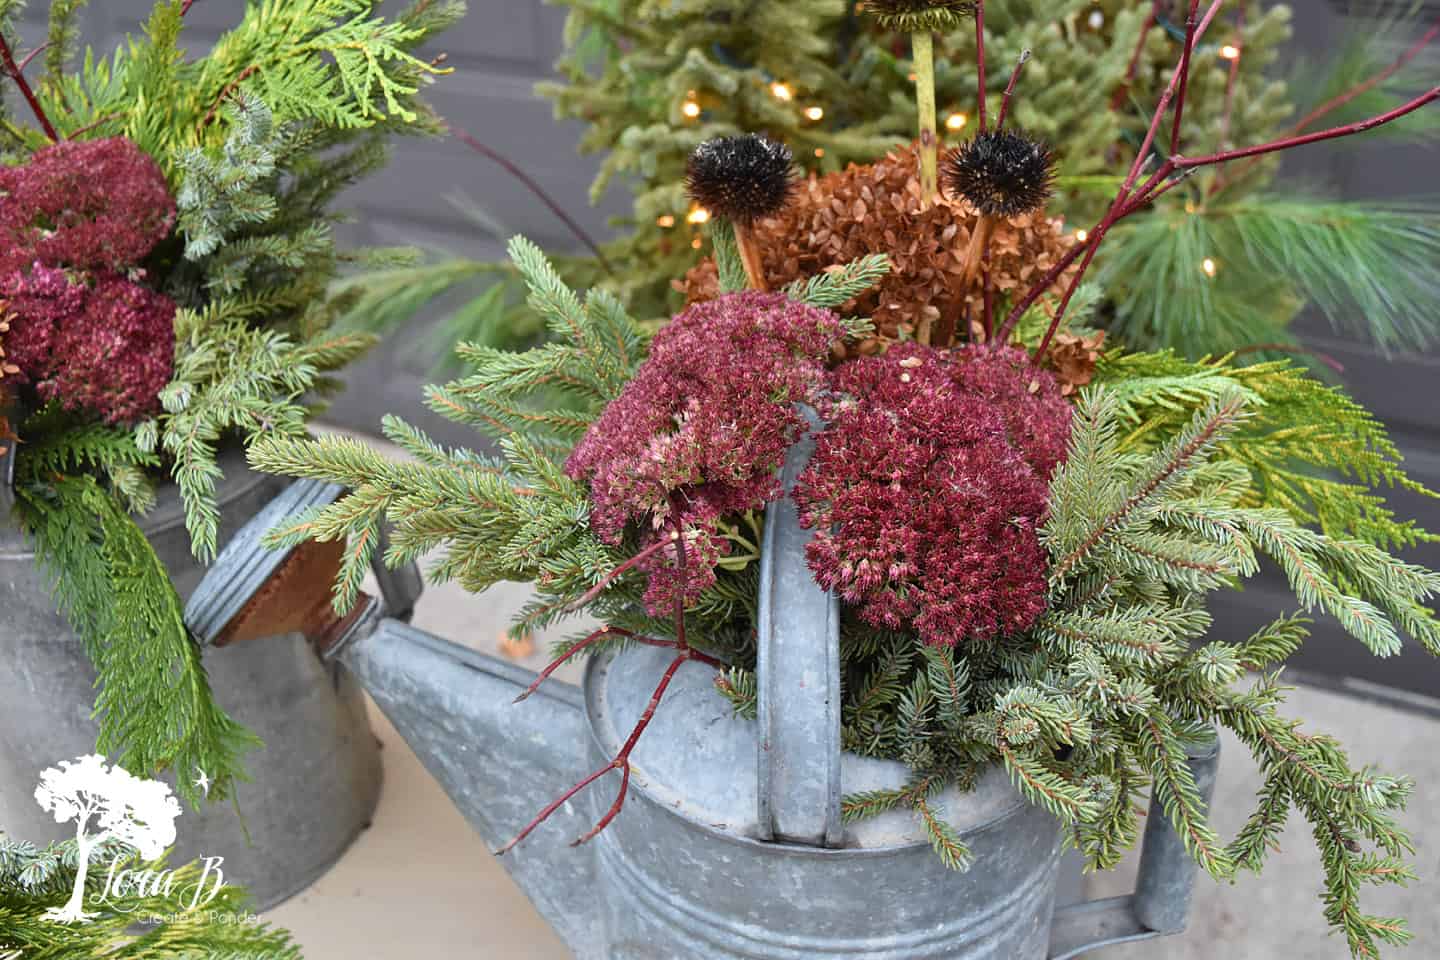
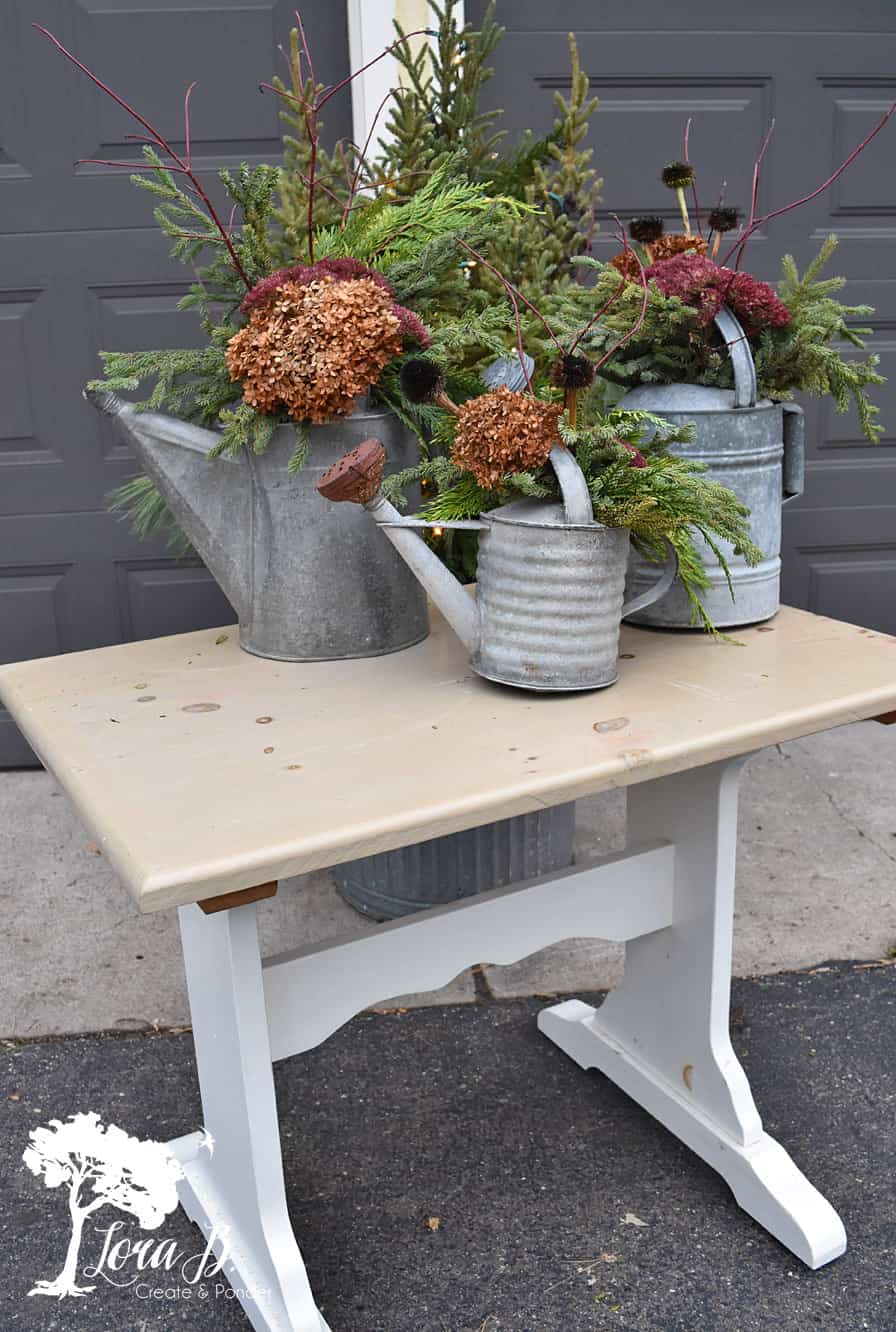
I purchased the pretty golden cedar when I bought the spruce tips, but all the rest of the foliage came from my yard! Even after their prime, garden flowers can be enjoyed for a new season in a whole new way!
You know what I absolutely love about big pots of spruce tips in the winter? I can make them beautiful and not have to water them for about 4-5 months! Beauty without maintenance…now that’s what I’m up for! So much easier than flowers that need watering and dead-heading! And these big pots of green can have lights for night-time glow, too! They look beautiful when the world is quiet and white!
Read “5 Ways to Make Your Outdoor Winter Containers Beautiful” for more Winter container styling ideas.
For more outdoor Winter decorating ideas:
“10 Ways to Decorate a Vintage Sled”
“Our Vintage Farmhouse Christmas Porch”
Big pots of spruce tips and evergreens are definitely worth the investment for the holidays and winter season. Every time you and your guests enter your home, there will be something seasonally beautiful to welcome! I hope this Spruce Tips 101 convinced you to create some beautiful custom arrangements for yourself!
Pin and Share!


Would you water your pot before it freezer? So your greens stay fresh?
You could if you do fresh cuts on the ends, but I don’t usually because we’re in a cold climate.
I love your “industrial planters.” You get the best ideas! I’m envious of your old watering cans–those are beautiful.
Thanks, Vikki! I do love galvanized metal-in any form;)
I use mine for storage, i need to find something else for storage now that you have shown me a beautiful way to use it. Thanks Lora.
I’m sure you’ll find something else for storage, Marlene…like a plastic one! The galvanized ones are too cool to be hidden away!
What a great idea! Thanks for sharing at Vintage Charm–pinned!
Glad you appreciated it, Cecilia!
It’s times like this, that I wish I didn’t live in the south. I would LOVE to decorate with real greens. But they just don’t last here. I love your ideas and I may try something similar anyway.
🙂 gwingal
Thanks, Nikki! I’d be sad if I couldn’t decorate with fresh greens outside, too! I’ve lived here my whole life & don’t know anything different!
The garbage can is such a fun idea, Lora! Your planters are beautiful! I really need to get going on mine!
Thanks, Linda! I just love that I can make them pretty & don’t have to do anything to them for 5 months;) And maybe I’ll save some great old trash cans from the scrap pile!
This is sooo great!! Love these tips. (Haha, see what I did there?) But for reals.
Always so gifted with words, Julie!
I LOVE the garbage can! However, I don’t think my husband would be excited by it. Those old watering cans are adorable…
I totally understand, Cheyenne! Think my husband gave up years ago!
Ha! THERE’S HOPE! ?❤️
Very clever way to use those old garbage cans! When someone sees the car/ van screech to a halt & that kind of treasure being loaded up, sure more than a few eyebrows get raised—?. If only they knew! Thanks for the inspiration !
I told my kids years ago I had no pride, Shelly;) If the junk is calling…