
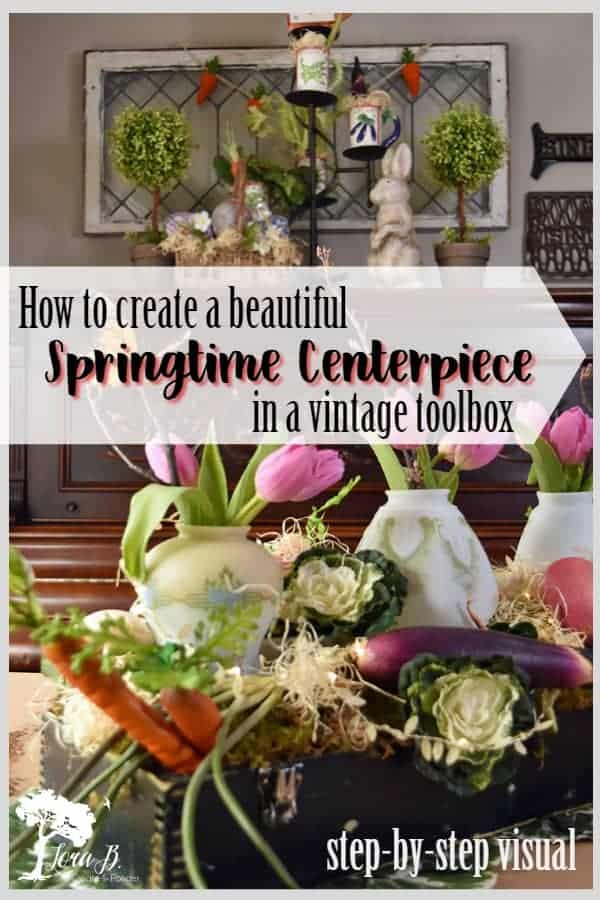
How To Build a Centerpiece

Every centerpiece needs a launching point. Some piece or pieces that begin the creative process. This trio of vintage light fixtures I was given years ago inspired my Easter centerpiece. The perfect base for the whole scene became a refreshed vintage toolbox. Today I’ll show you How to Build a Centerpiece that is perfect for springtime celebrations.
I also made a printable to walk you through the steps, so the next time you’re needing some centerpiece or vignette inspiration, you can have my quick walk-through to prompt your ideas! I’ll share how to grab the Free resource down below!
Start Your Centerpiece With a Foundation
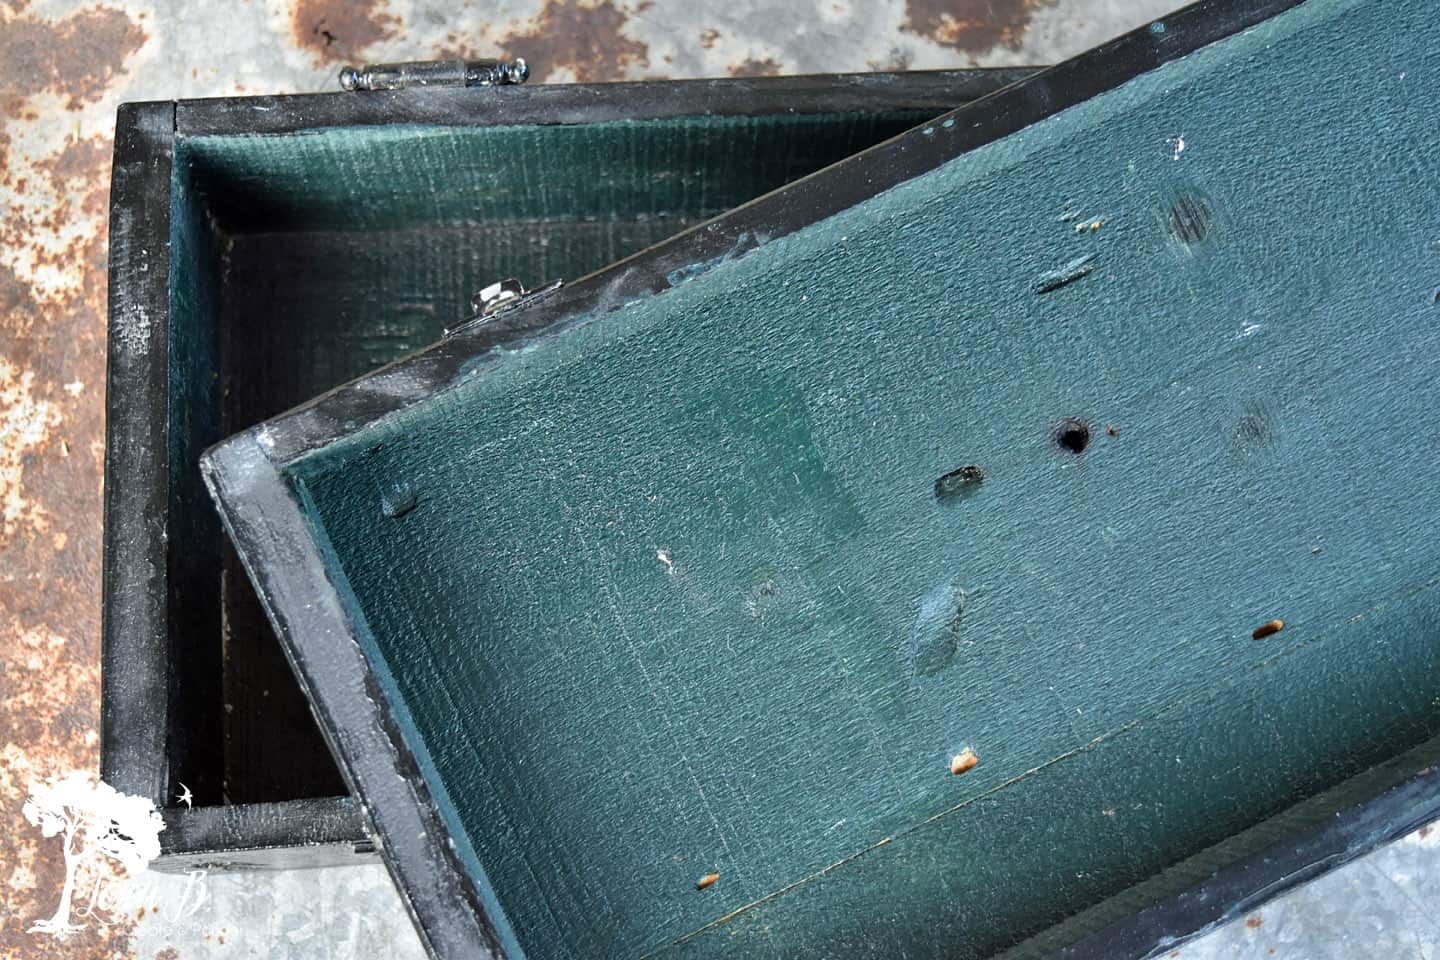
Start with a foundation. I decided to use an old dovetailed, black toolbox I picked up curbside {“Curbside Junking Adventures and Tips“}. I had poly’d it years ago, but decided it needed a little more distressing. My thought was to separate the top from the bottom, so I can have 2 coordinating arrangements on my two Easter tables. I just love the old clamshell hinges-especially when they’ve got old, chippy paint on them. {To see the repurposed top half, check out “Toolbox Half, Re-purposed“}.

Incorporate Fresh and Faux Elements in Your Centerpiece
Here are the other elements I will add to the light fixtures and the toolbox:
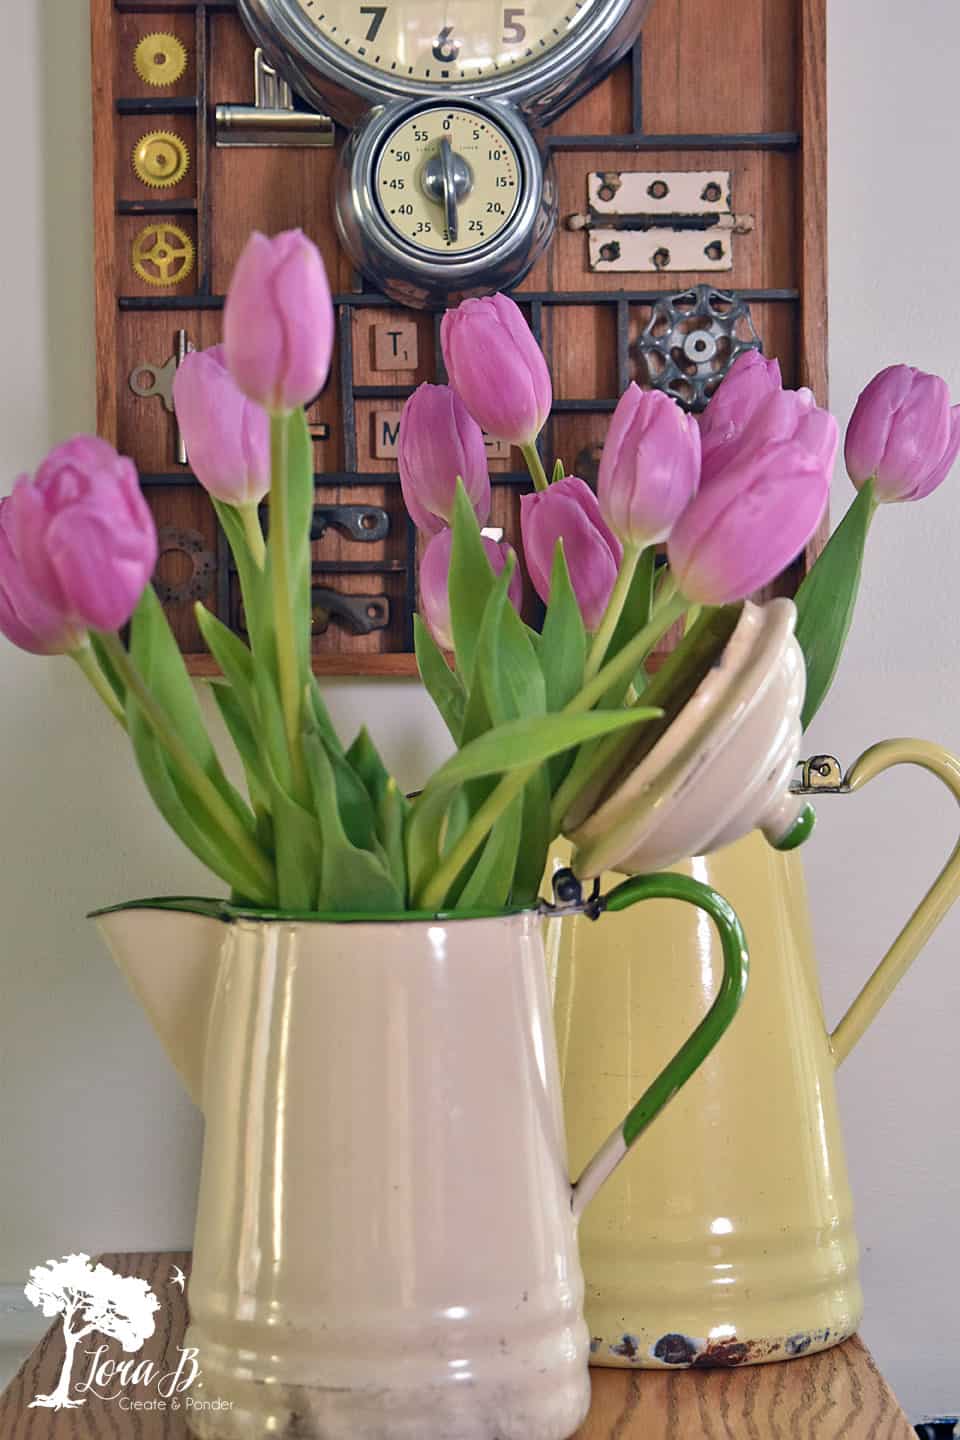
A tulip bunch from Costco:
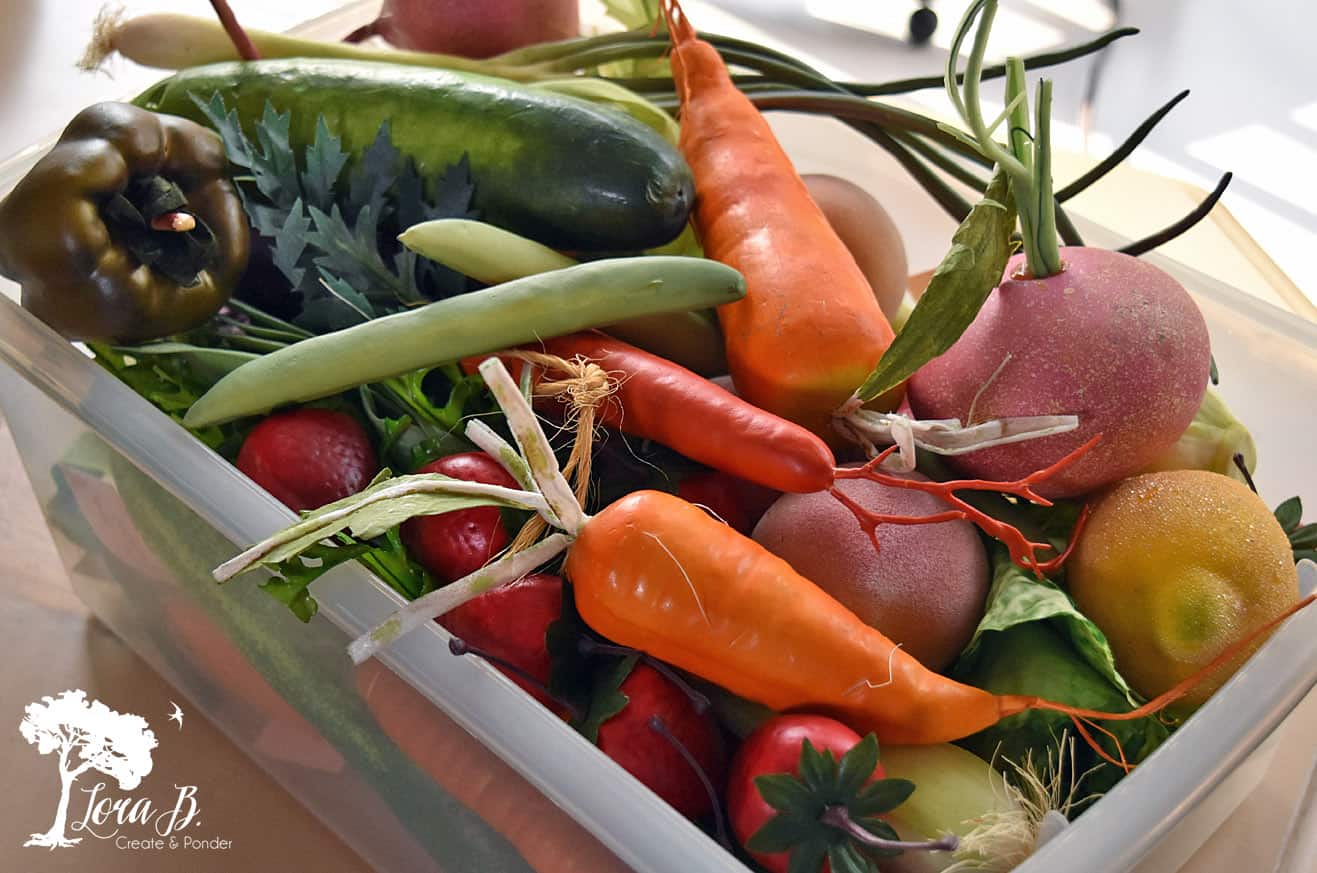
My faux veggie stash:
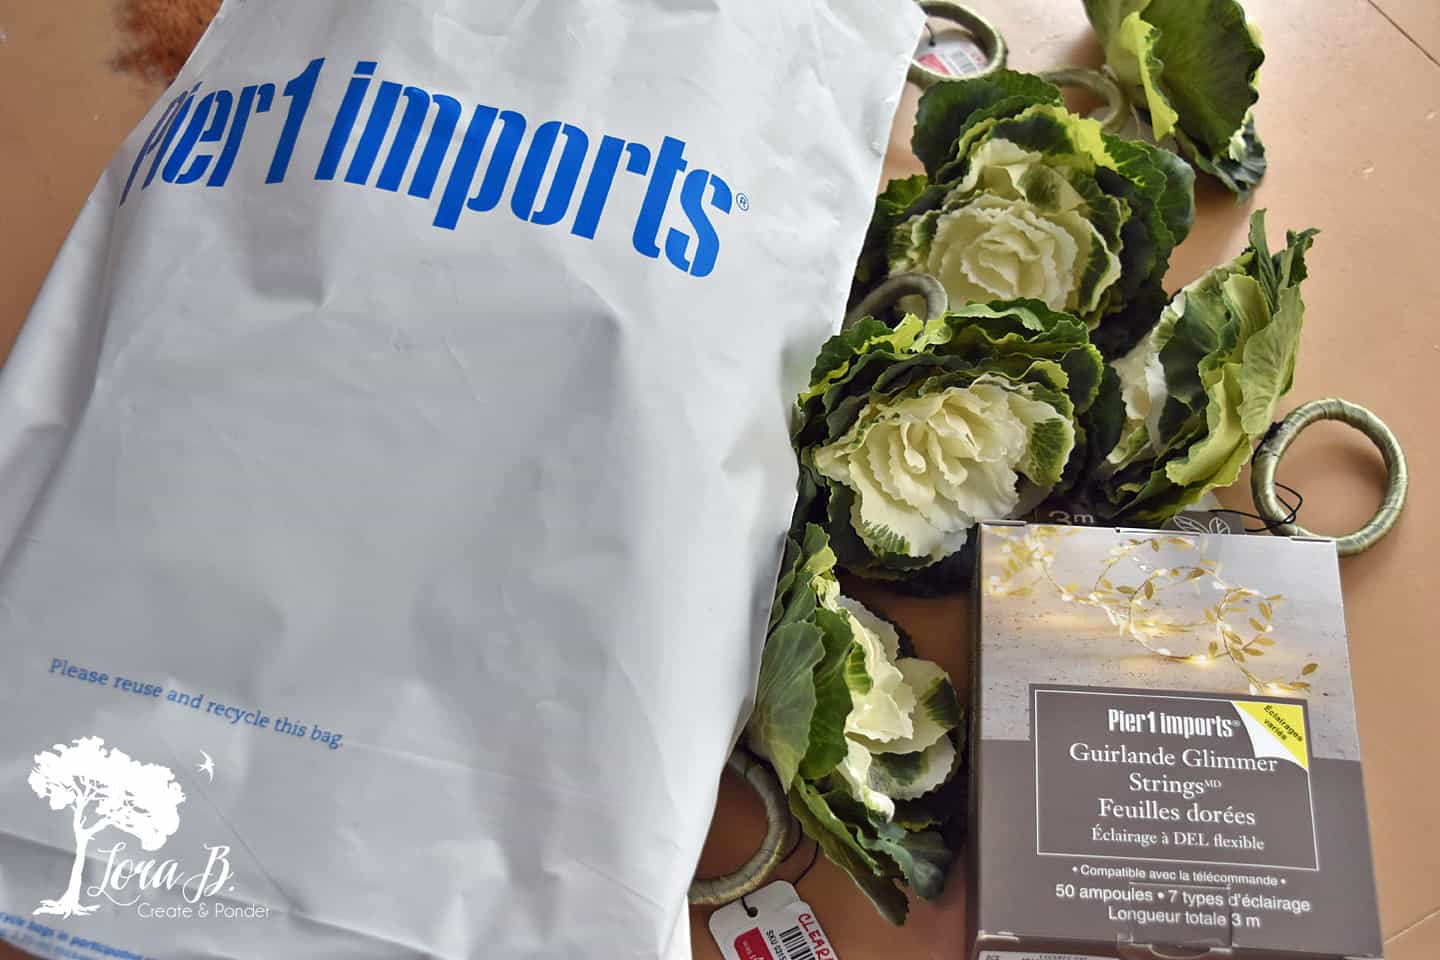
Clearance cabbage napkin rings from Pier 1 and a mini string of accent lights:
Lastly, some moss, some natural grass and some styro.
Use the Magic Number of 3 Items
Let’s get started with this springtime centerpiece!
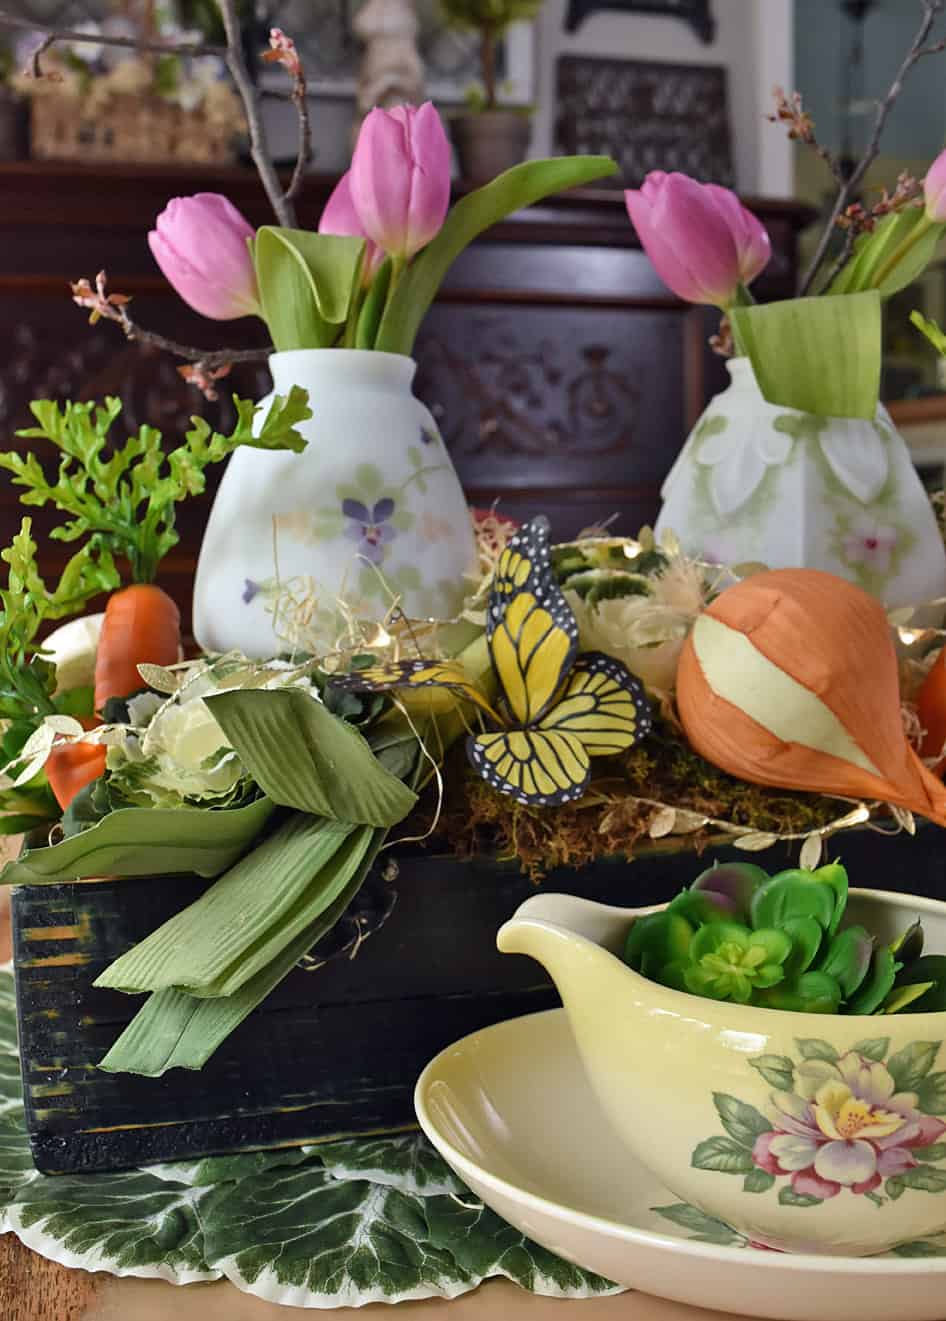
First I filled the toolbox 1/2 with enough styro blocks to get the light fixtures high enough. I wanted the base of the fixtures to be at or above the toolbox edge, so we’ll still see the pretty designs, even with other textures all around them.
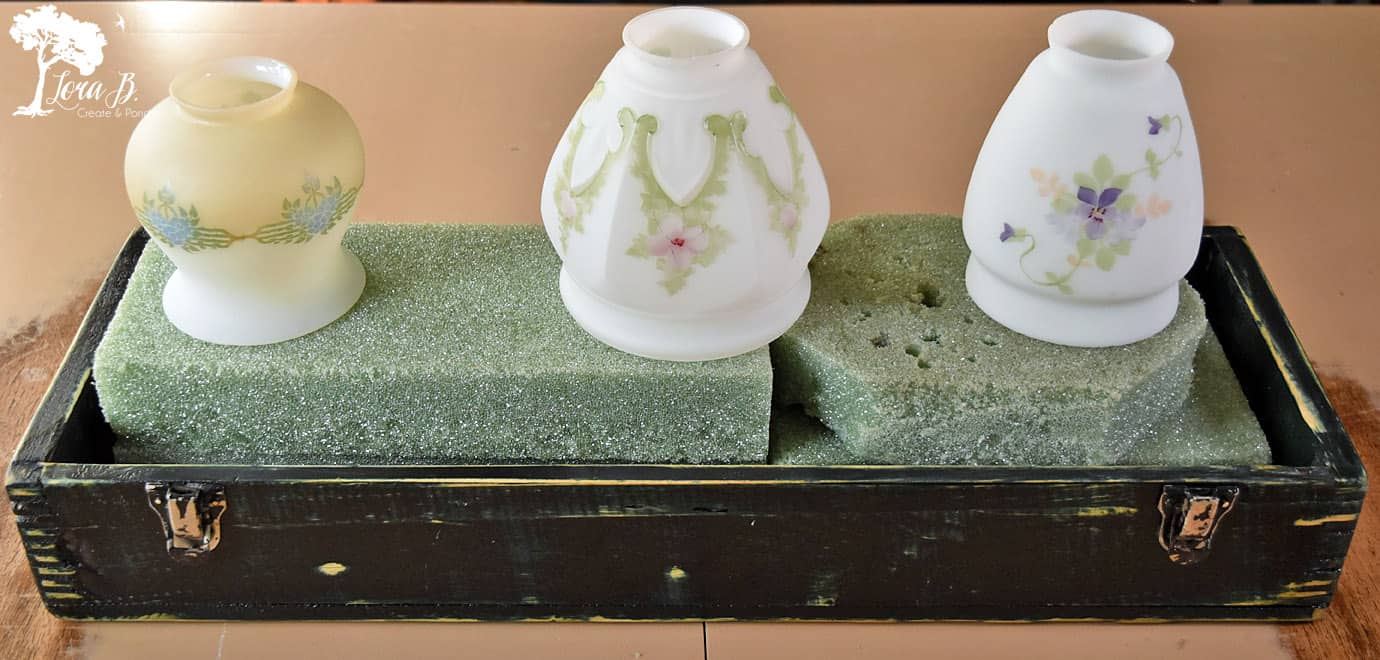
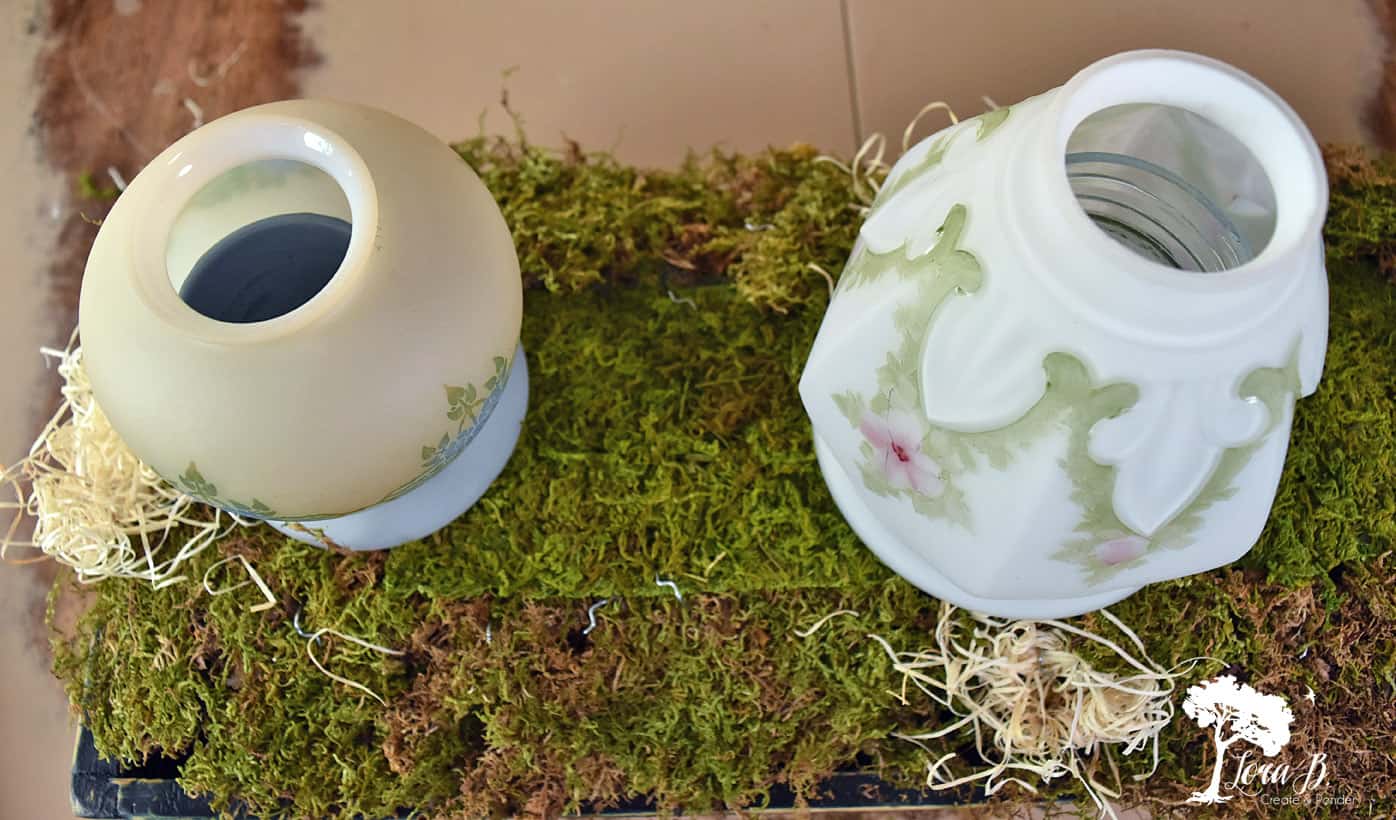
Once I had the right height, I covered the syro with a variety of moss and natural curly grass. I used U-pins to anchor the moss into the styro. I’m going to pile veggies all around, so the coverage doesn’t need to be to intense.


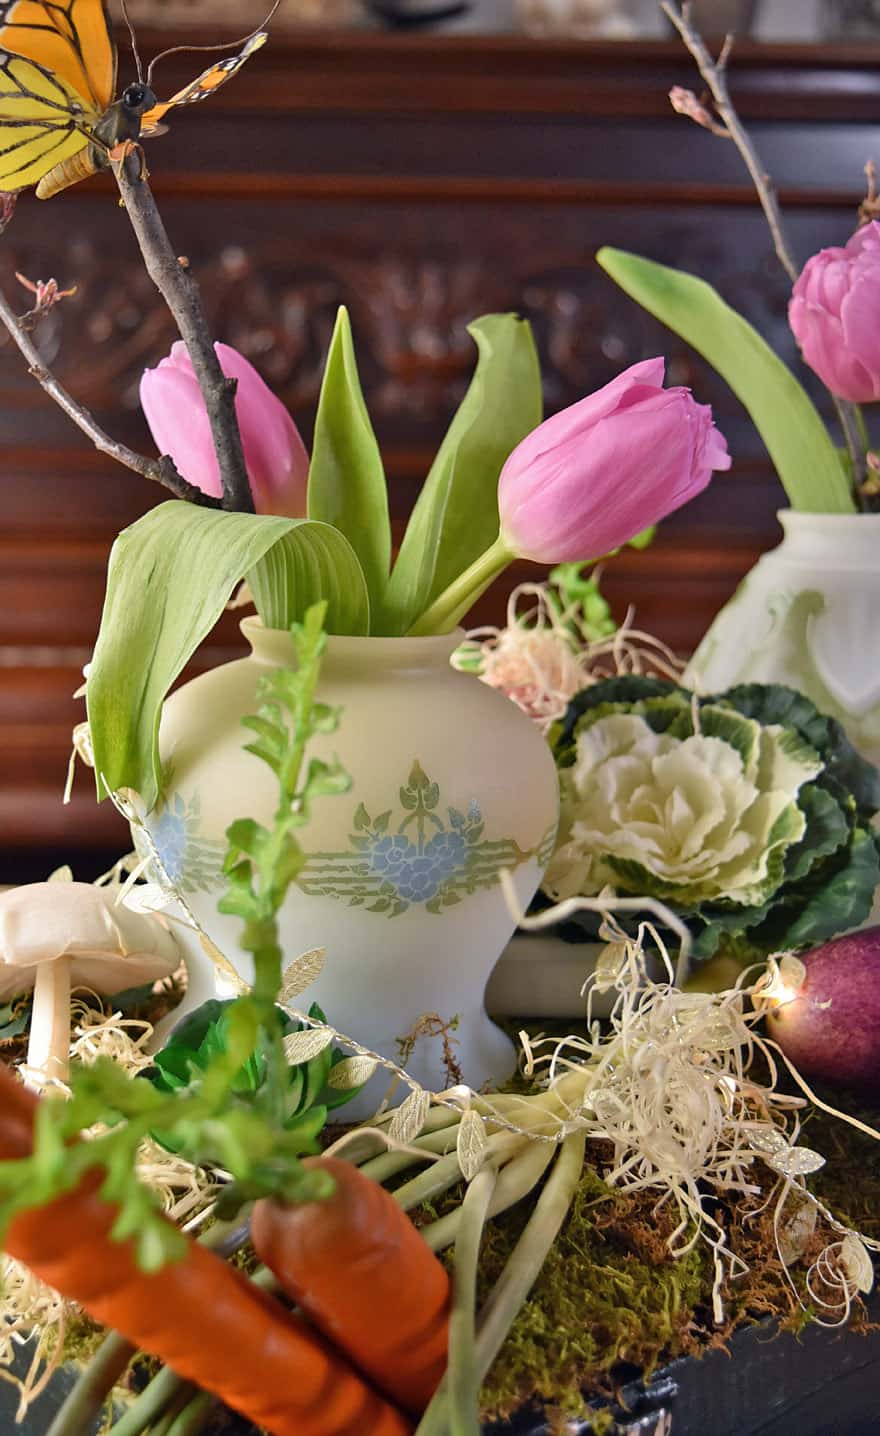
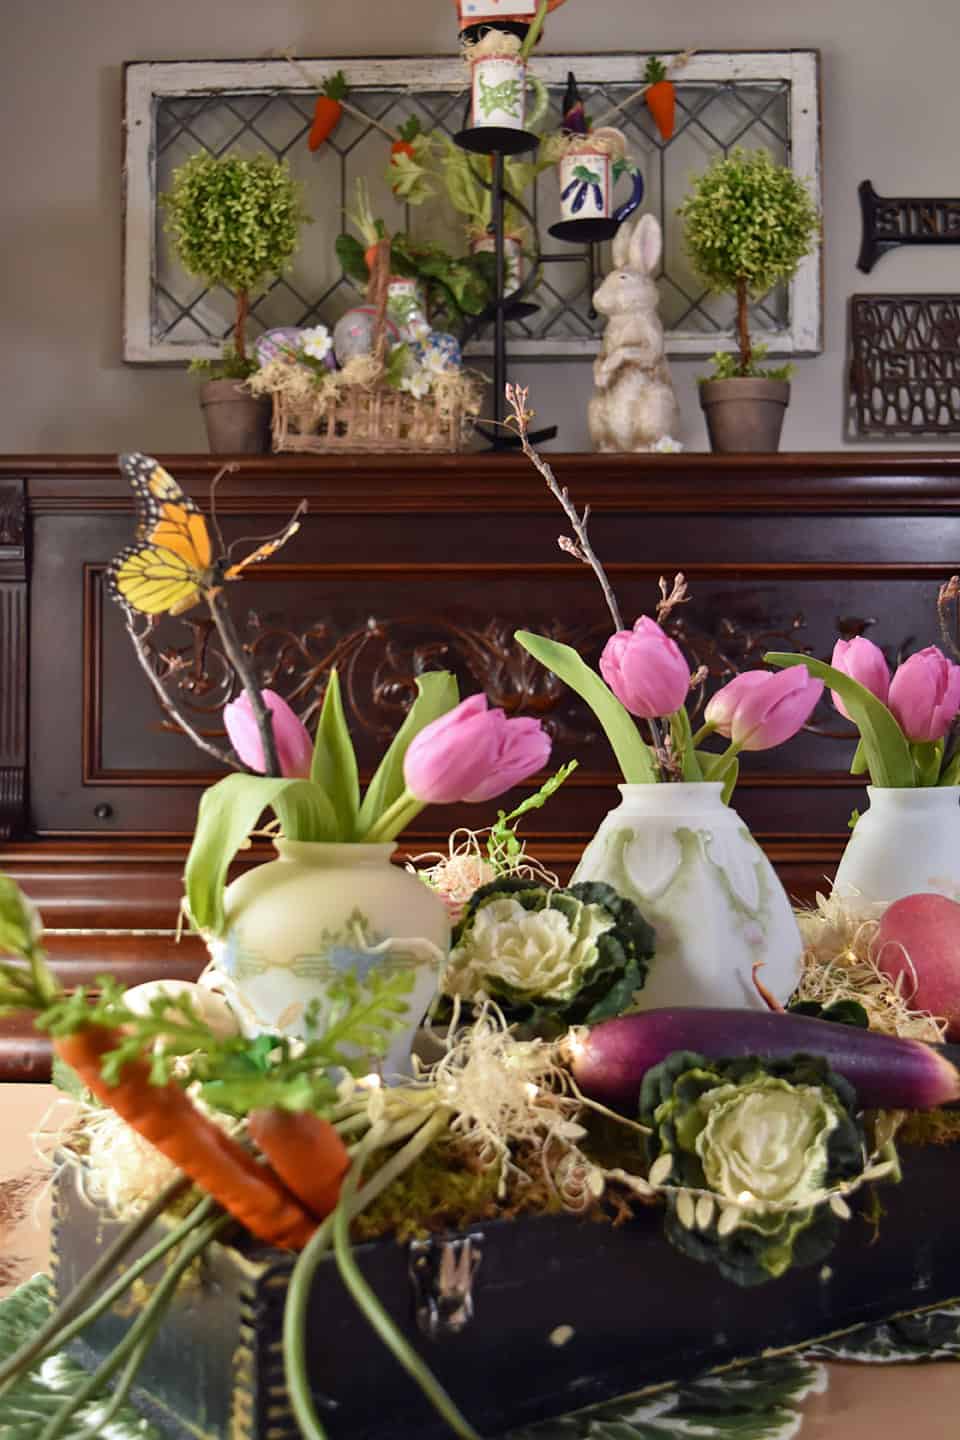
Next, I found some small vessels which would fit under the light fixtures to place water in. I placed several tulips and flowering crabapple branches in each.

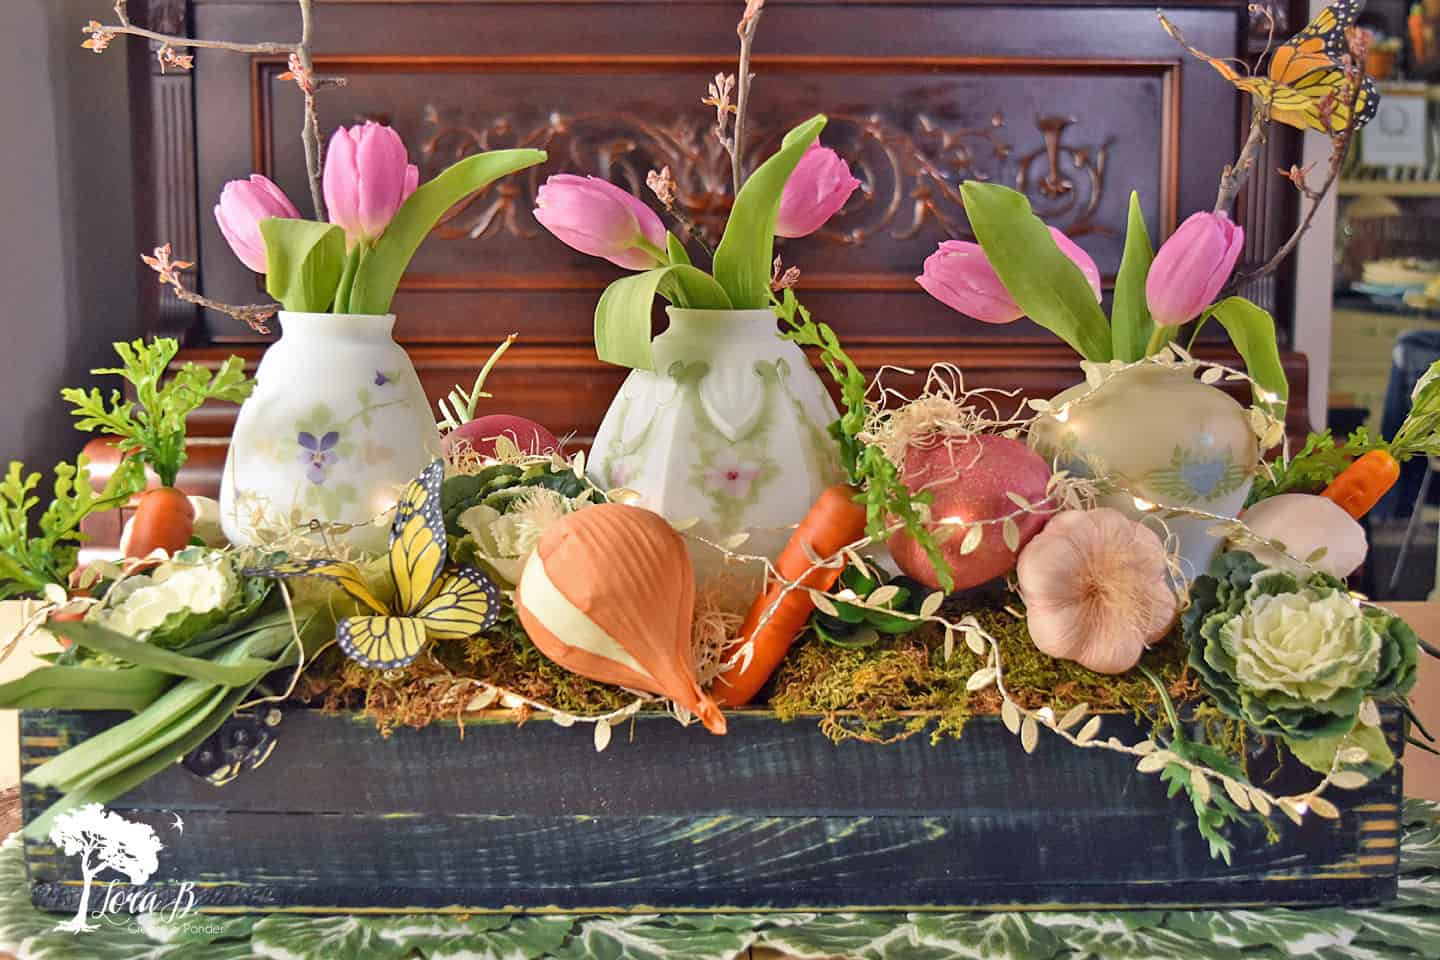
I like it already! But I want this to have an organic garden vibe, a.k.a. Peter Rabbit style for Easter, so I need to add veggies!
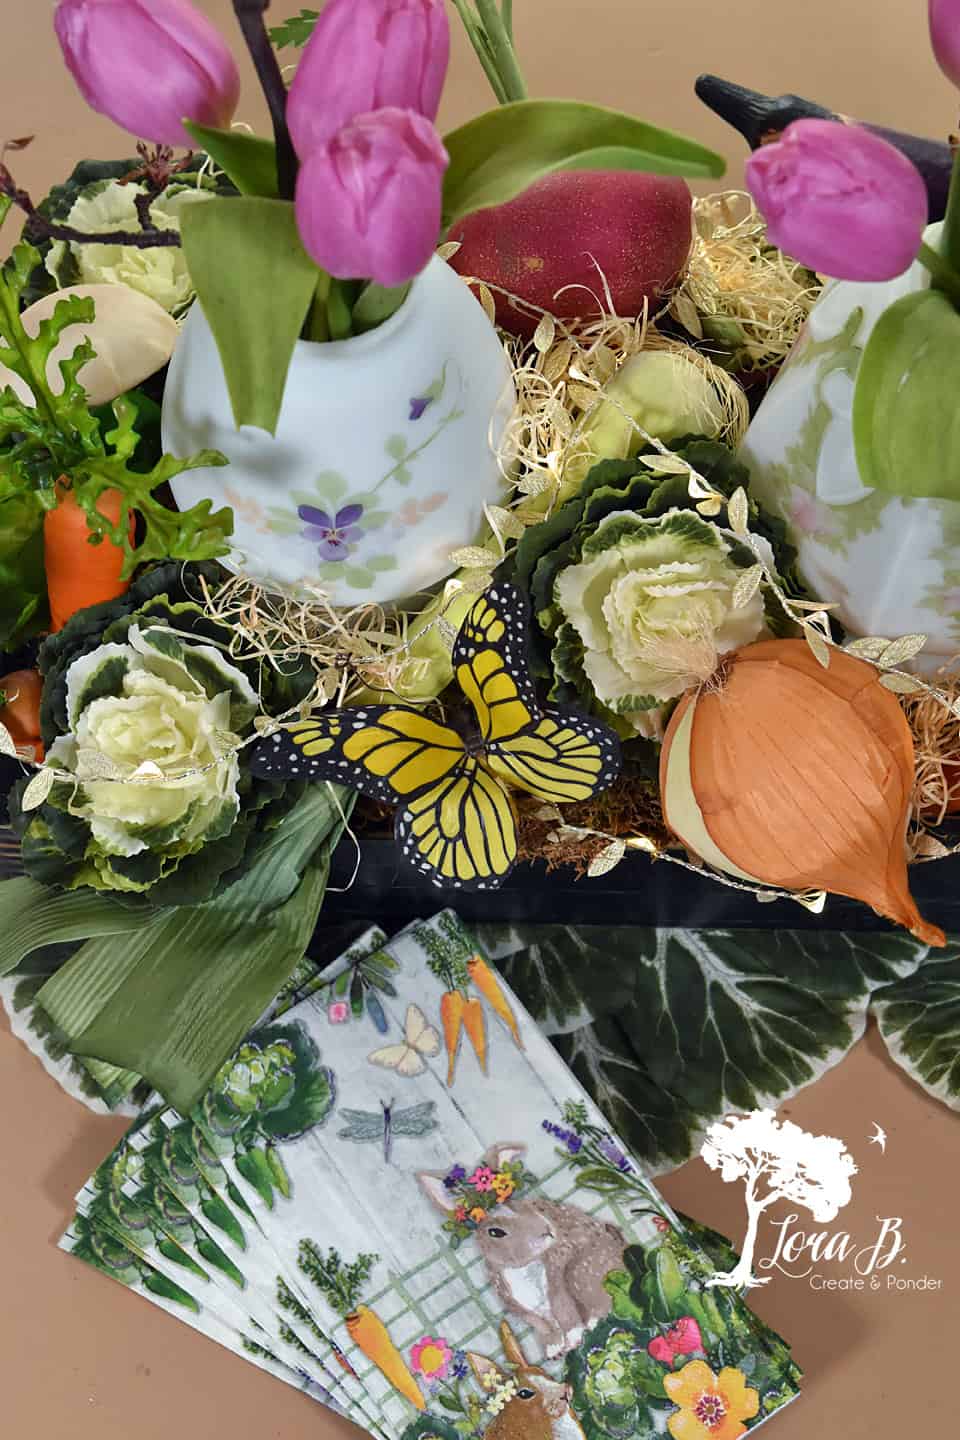
Use the U-pins to secure the veggies all around. I started with the cabbage napkin rings, taking off the ring if it fit better; sometimes tucking the ring in the recess between the styro and the side. I also used those little empty spots-see the corner, above?-to tuck in carrots, as though they were popping out of the ground.
Create Visual Interest on All Sides of Your Centerpiece
Work all around, since this arrangement will be in the center of a table. Add some more curly grass wherever you don’t want to see the U-pins.

Add Lights!
Lastly add the glimmer lights and a couple butterflies! I should have planned a little better where I was going to put that little battery pack for the lights. Luckily I was able to tuck it under one of the fake cabbages in the middle.
Become a Lora B Insider!
The steps I’ve walked you through are written out in my “5 Steps to a Perfect Vignette”, which you can download and print for FREE by becoming a Lora B Insider. Once you subscribe, I’ll send you a password to access all my free helpful and decorative resources that go with blog posts!
If you’re already an Insider, check your weekly email for the password to the Resource Library!
Now for some beauty shots;) I love how all the other textural elements add to the prettiness of the vintage light fixtures. The rustic wood of the toolbox, the earthy texture of the moss and curly grass, the freshness of the tulips and the organic feel of the veggies and butterfly all contrast with the smooth, delicate glass. The little glimmer lights just set everything off!
Continue Your Centerpiece Theme Throughout the Table and Room
Once you have your centerpiece arranged, you can coordinate the rest of the table and room elements around it! I repeated the garden theme throughout the room and on the rest of the table. You can see the whole table decked out for Easter in “An Organic, Vintage Easter Table”.
Make sure you grab your free “5 Steps to a Perfect Vignette” above, so you’ll have it when you’re decorating your home!
Do you have something vintage that could be the launching point of a centerpiece? I hope seeing my process will give you the confidence to be creative with your own styling. Re-purposing some character-filled vintage items and adding some texture and life to them will bless you with a beautiful, festive centerpiece for your special party! Hope this How to Create a Centerpiece inspired you to try your own!


Sharing at these lovely parties:
Wall to Wall DIY Wednesday
Share Your Style
Great tutorial, and great use of those shades!
Thanks, Julie! I just had to use those delicately flowered lamp shades for something special!
Well Peter Rabbit will feel right at home Lora. It look so lovely and what a brilliant idea to us light fixtures inside, so unique
Thanks, Michelle!When the tulips die, think I’ll tuck candles underneath;)
I absolutely love your spring centerpiece, Lora! Thank you for the excellent tutorial too – pinned. I signed up AGAIN just so I could get your 5 centerpiece ideas 😉 Wishing you and yours a very Happy Easter!
You’re too kind, Marie! Thanks;) If you’re already a subscriber, you can return to my Resource Library any time with the secret password!!
Your centerpiece is so creative and fun! Thanks for sharing at Vintage Charm! Pinning!
Thanks!
SO pretty Lora–love your creativity!! I never would have thought to use those pretty globes as faux vases. Nice work 🙂
Thanks, Diana! I’ve been thinking on how to use them for awhile! They’re just so sweet and pretty for springtime! Especially springtime that still had snow:(
OMG Lora, I love this! Those light fixtures are so pretty! It would be pretty to put candles inside too when your tulips die, the light showing through the pretty glass would look so nice!
Tania
Yes, I was thinking that would be pretty for a nighttime dinner, Tania! I should try it to see how the candlelight would shine out from the glass…