
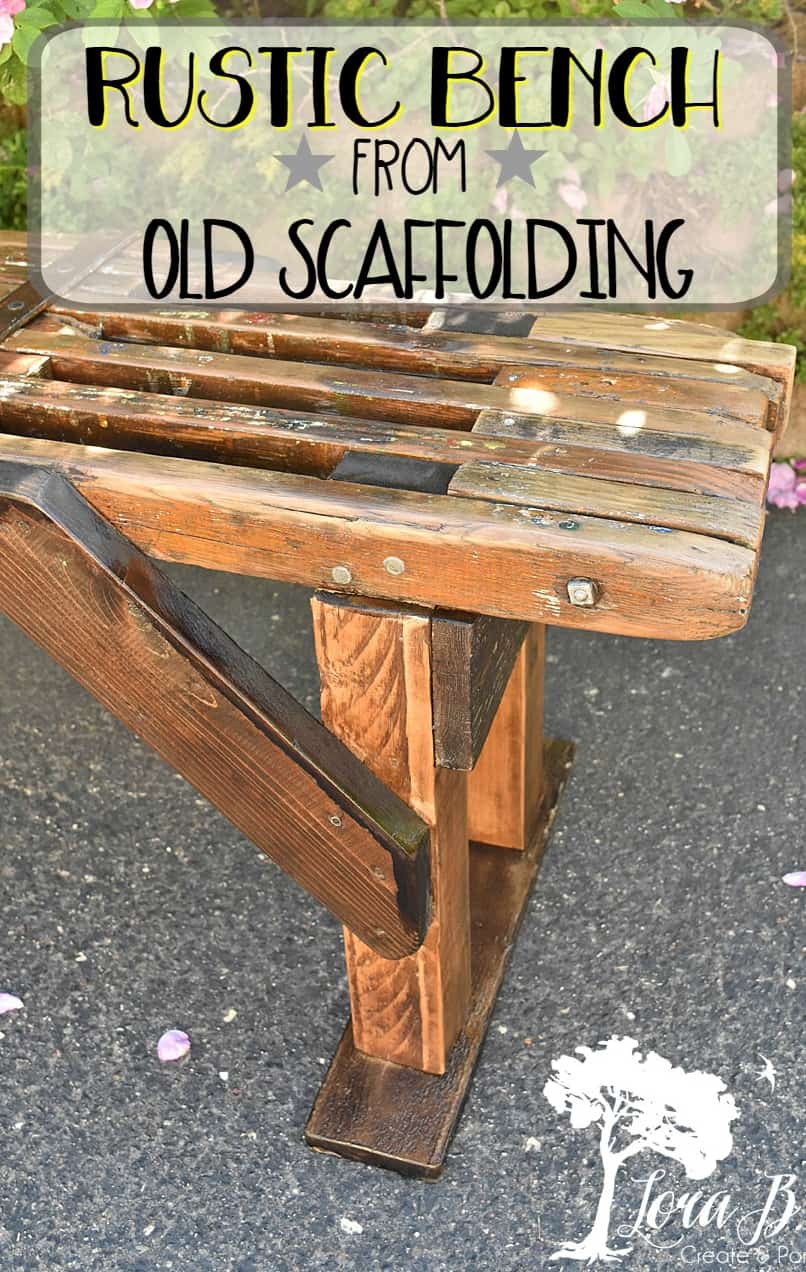
From Painter’s Scaffolding to Rustic Bench
Camps and churches learned long ago that benches can seat a lot of people. And they’re a lot easier to store and move than the amount of chairs it would take to seat the same number of persons. So as I’ve been strategizing as to how we’re going to seat the crowd for our impending grad party outside, I decided we should enlist the couple of painter’s scaffoldings we’ve had for years, along with the one I most recently picked up junking (“Curbside Junking Adventures and Tips”).
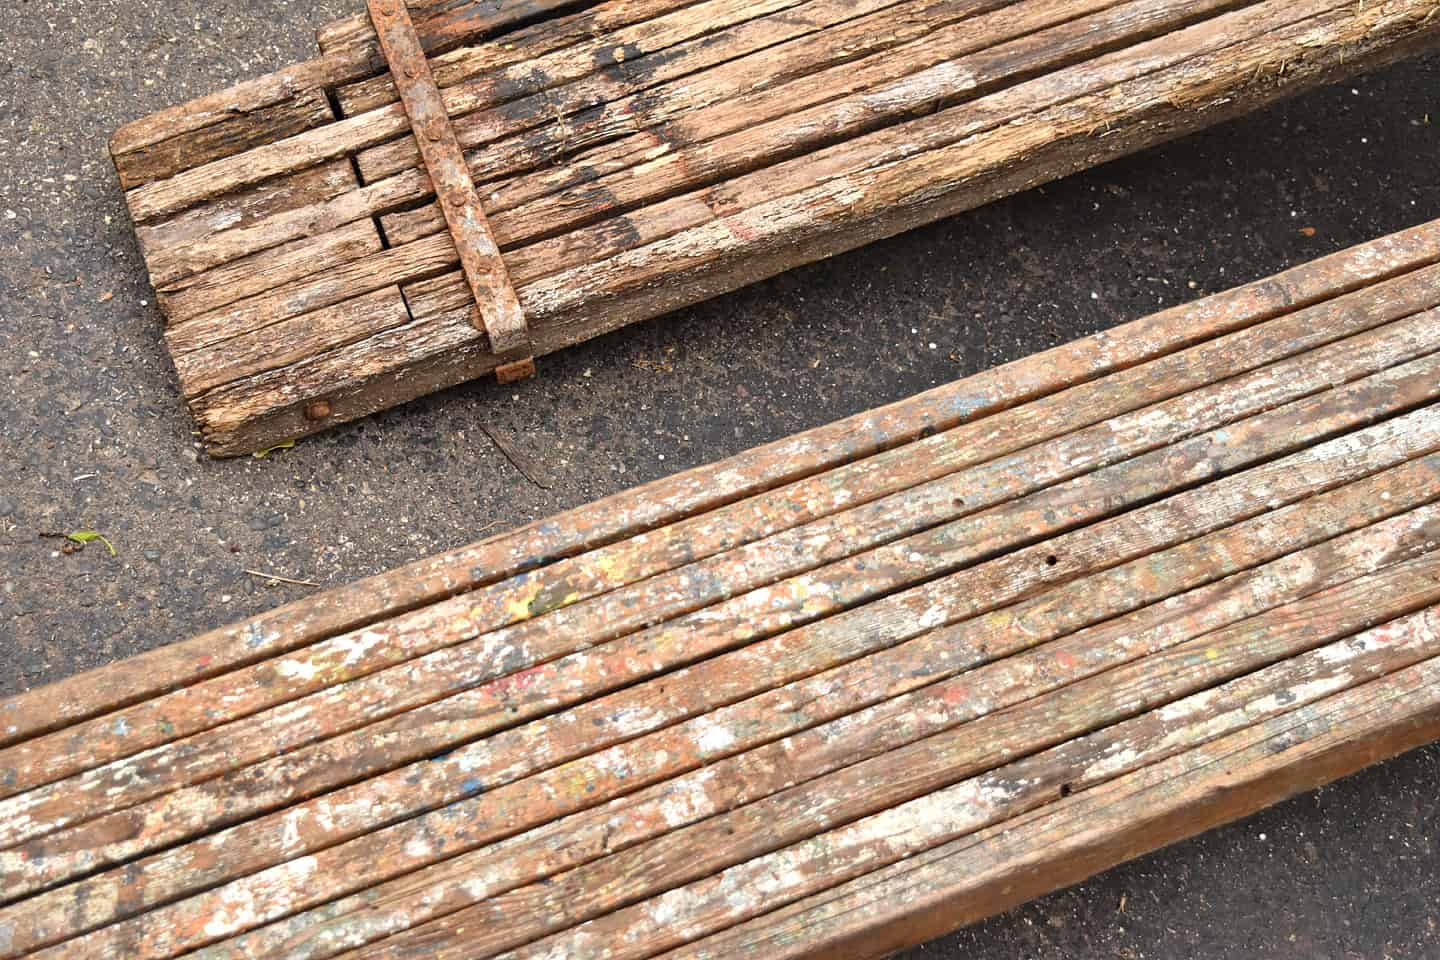
Old scaffolding is made of hardwood and has earned beautiful character over it’s years of service. I think they make the perfect industrial cool shelves and benches. I’ve got one hanging in my living room as a shelf (which you can see in “Styling a Shelfie Tips” and “Christmas Map Display“)
I challenged Mr. Fix-it to come up with a design to make a couple of benches using whatever free materials we had laying around. He rose to the challenge and came up with a sturdy design that would not be tippy, since the scaffolding are heavy.
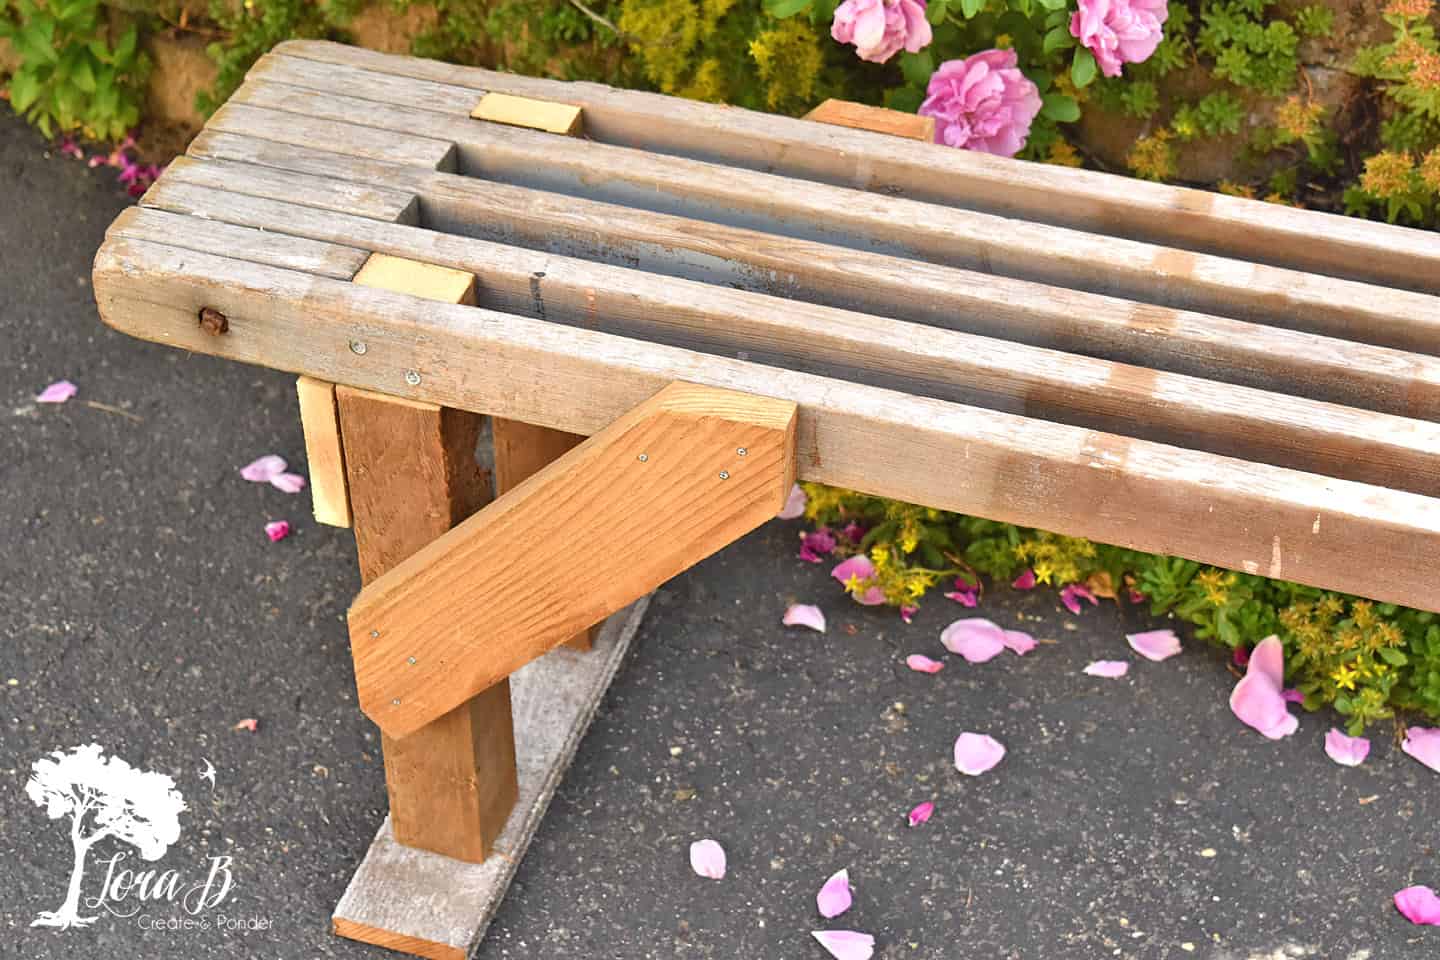
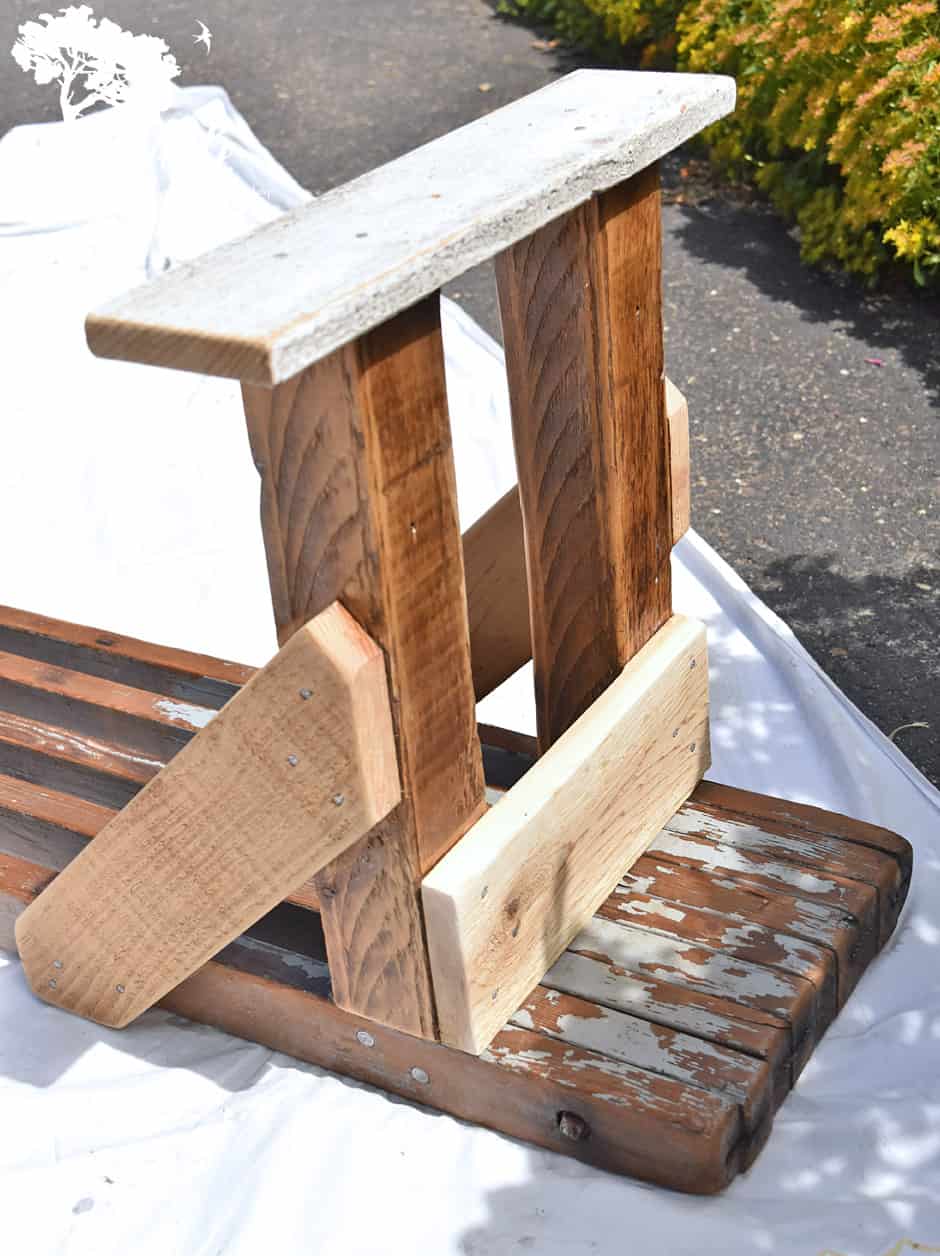
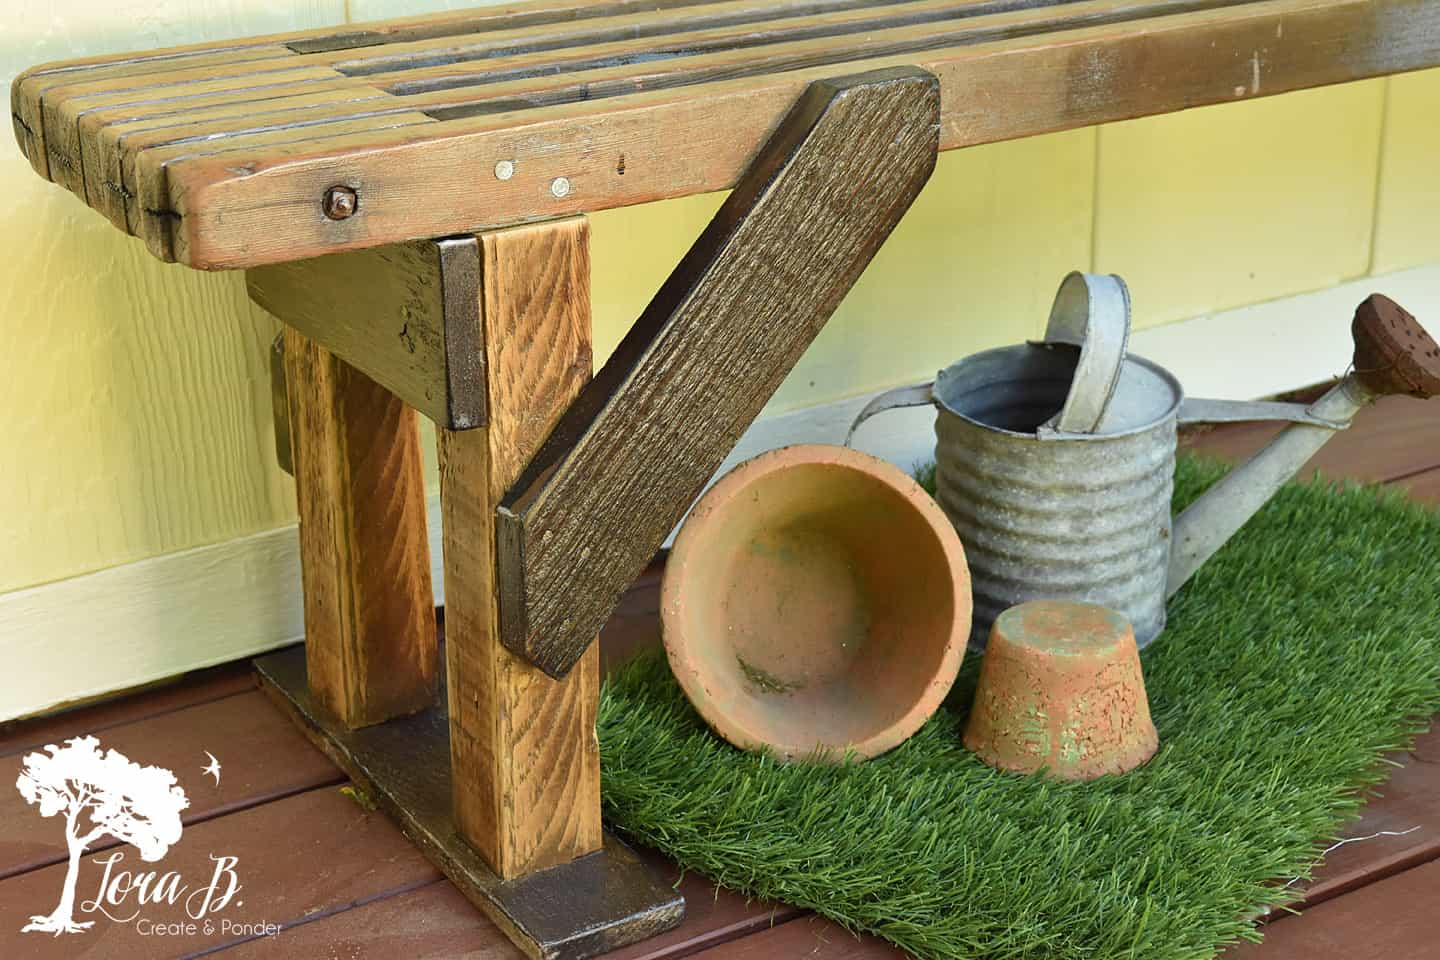
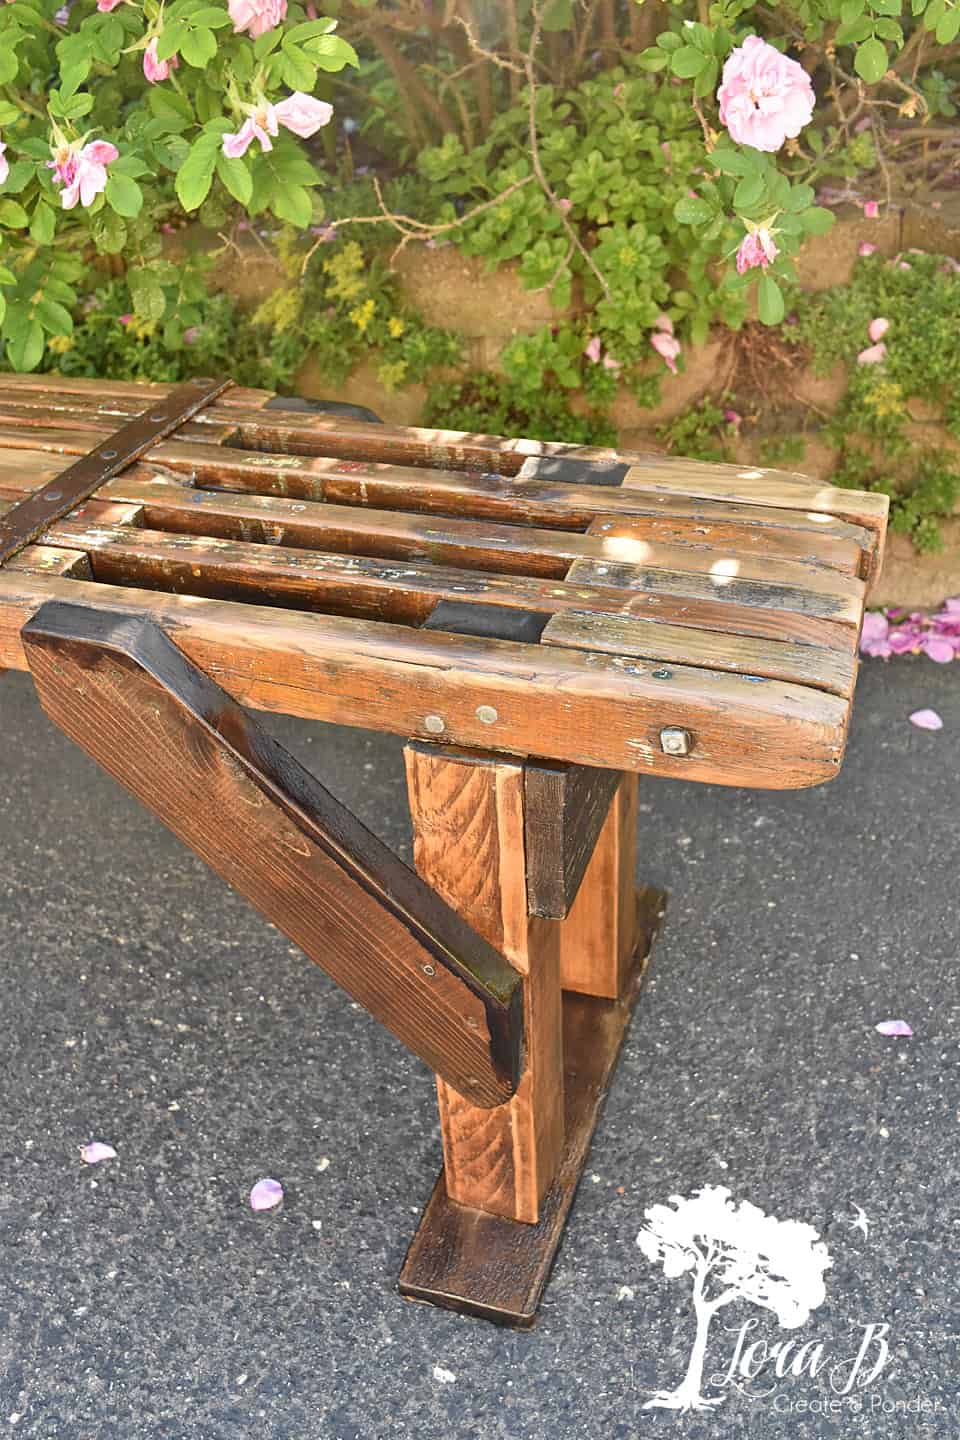
He used a notched vertical board for the legs that was leftover from the ceiling of our garage and fit it between the scaffolding boards. He braced the legs with a cross member and some angled boards. Lastly he placed a board on the bottom of the legs that expanded beyond the width of the scaffolding to prevent tipping. He also added an extra leg in the middle for stability.
Can you tell he’s an engineer?
Then it was up to me to do the finishing.
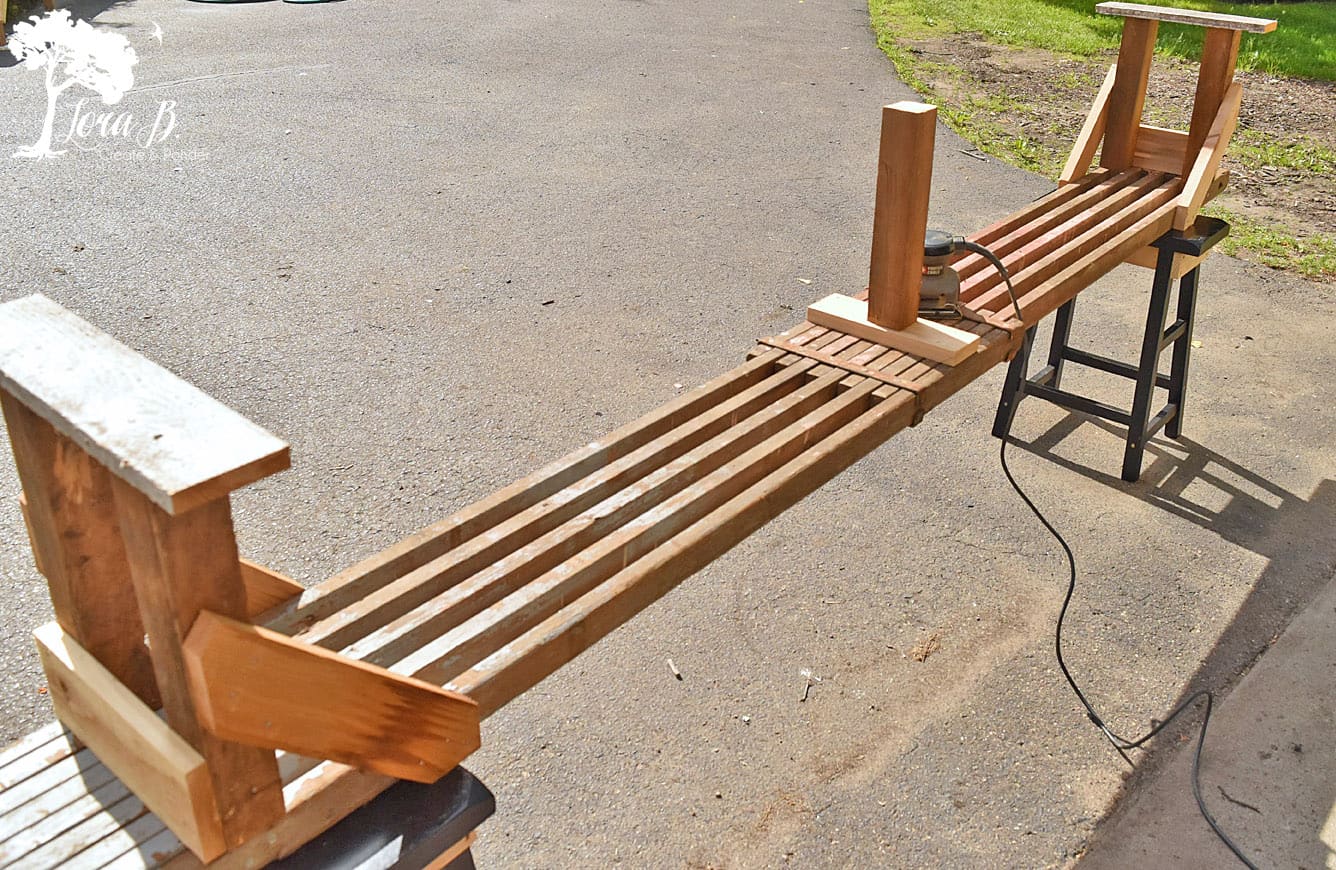
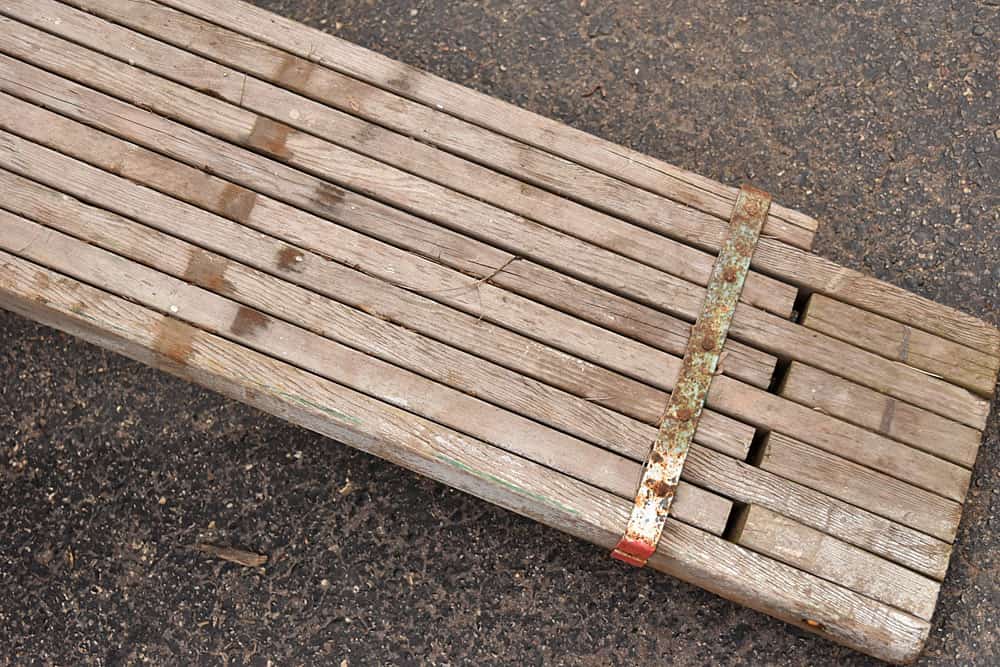
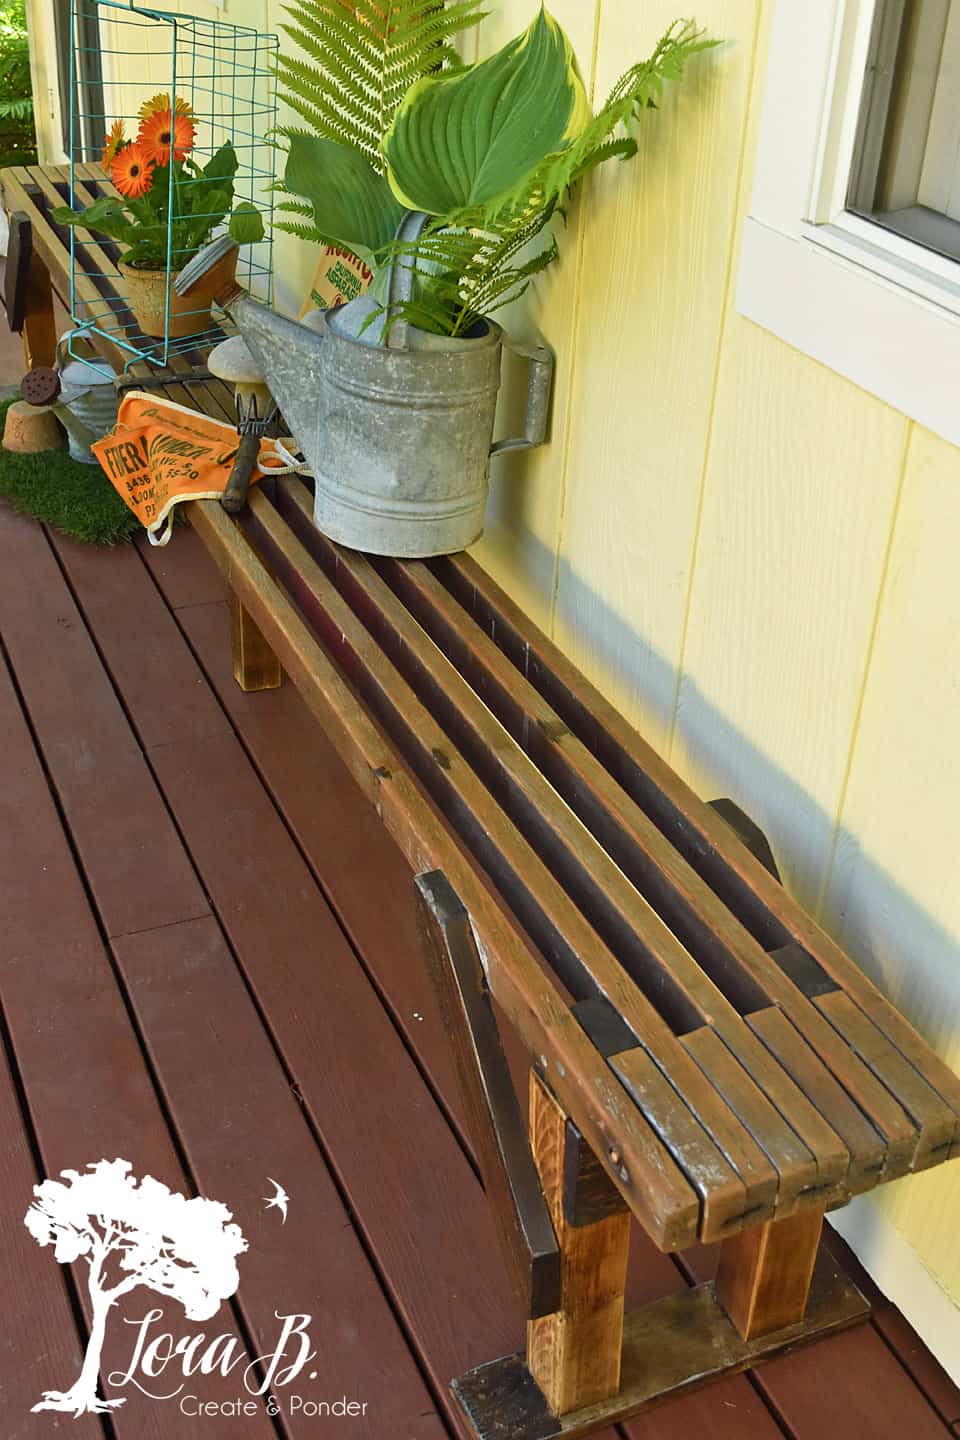
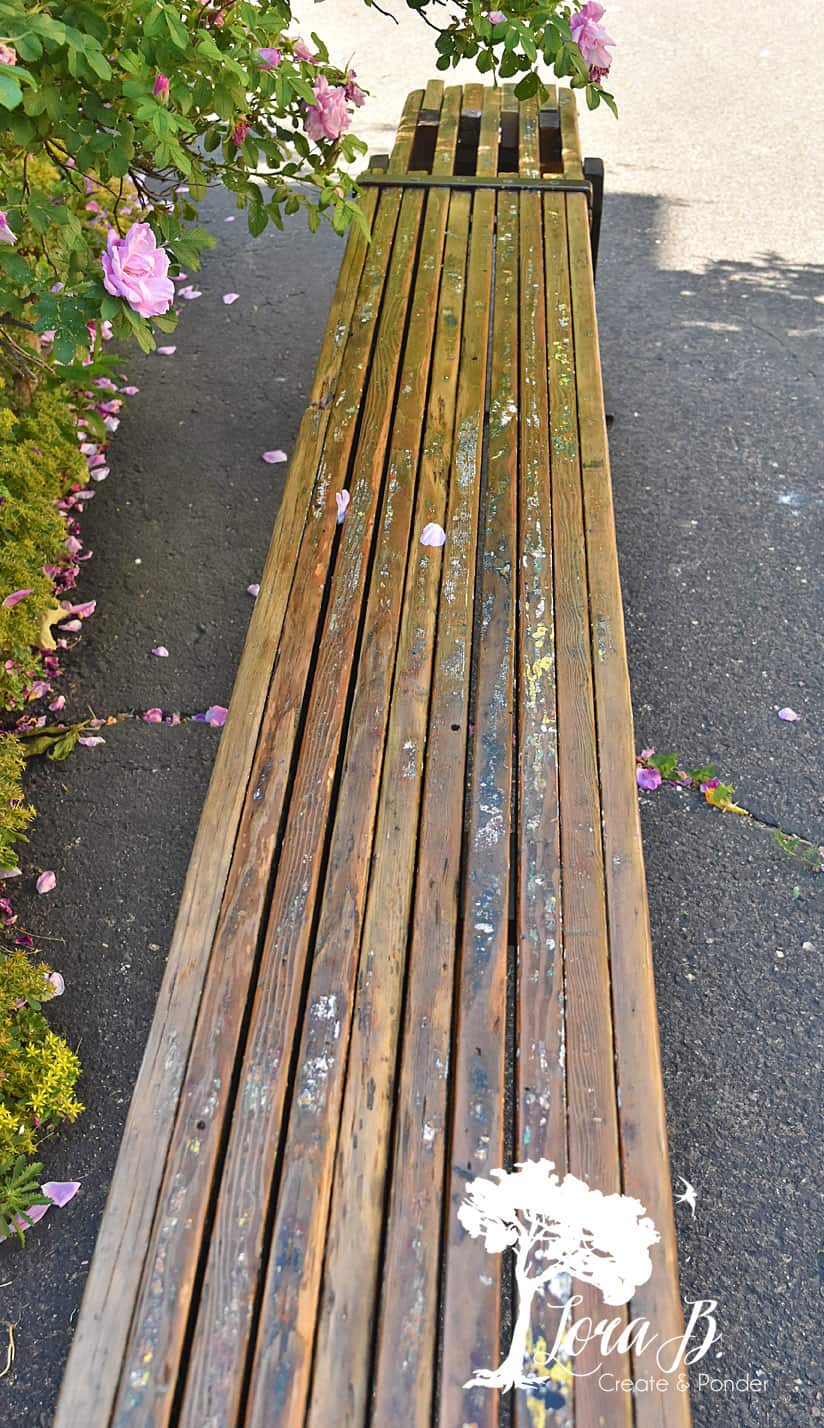
I got to work sanding both benches. My newest scaffolding was in pretty good shape, so this bench will be able to be lengthened and shortened. The older one had been laying around the yard for quite a few years, unfortunately, and he needed to use the third one for sacrificial pieces. The wood on the older version was in rougher shape and therefore needed to stay together for strength. But they’re still 10 and 11 feet long and can handle a lot of butts!

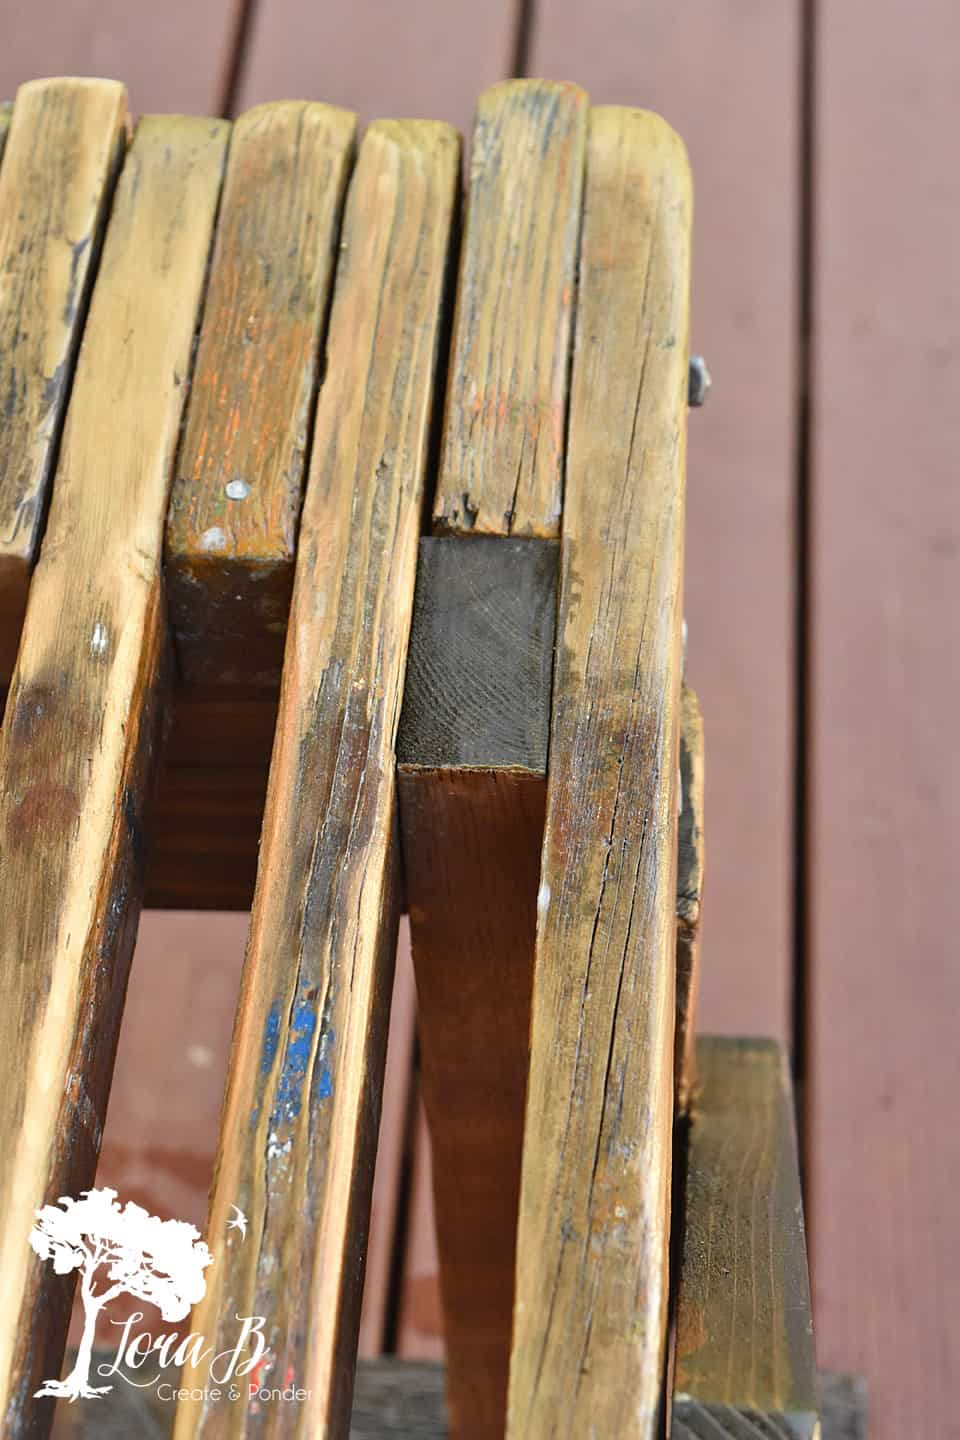
I knew that the old garage perlins that he used as the legs would look beautiful with some simple poly, as would the old scaffolding, but the new boards that he used for bracing could not look…well, new:( I decided to stain the new boards and the painted white board at the bottom with a brownish/black stain called Jacobean. From the looks of the can and the strong odor, it had been around my basement for a long time.
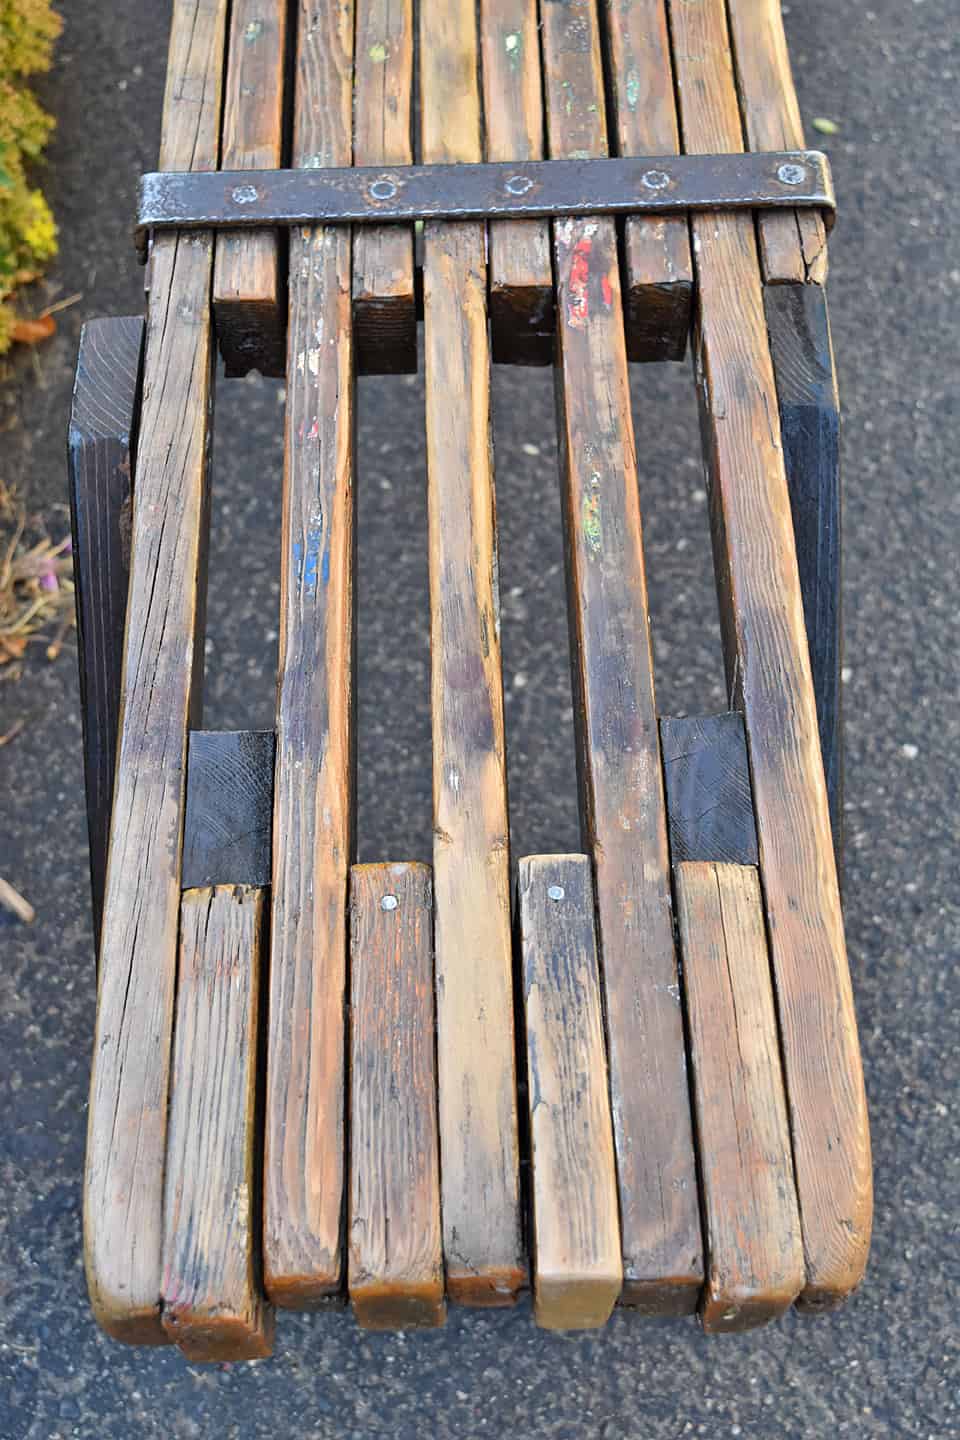
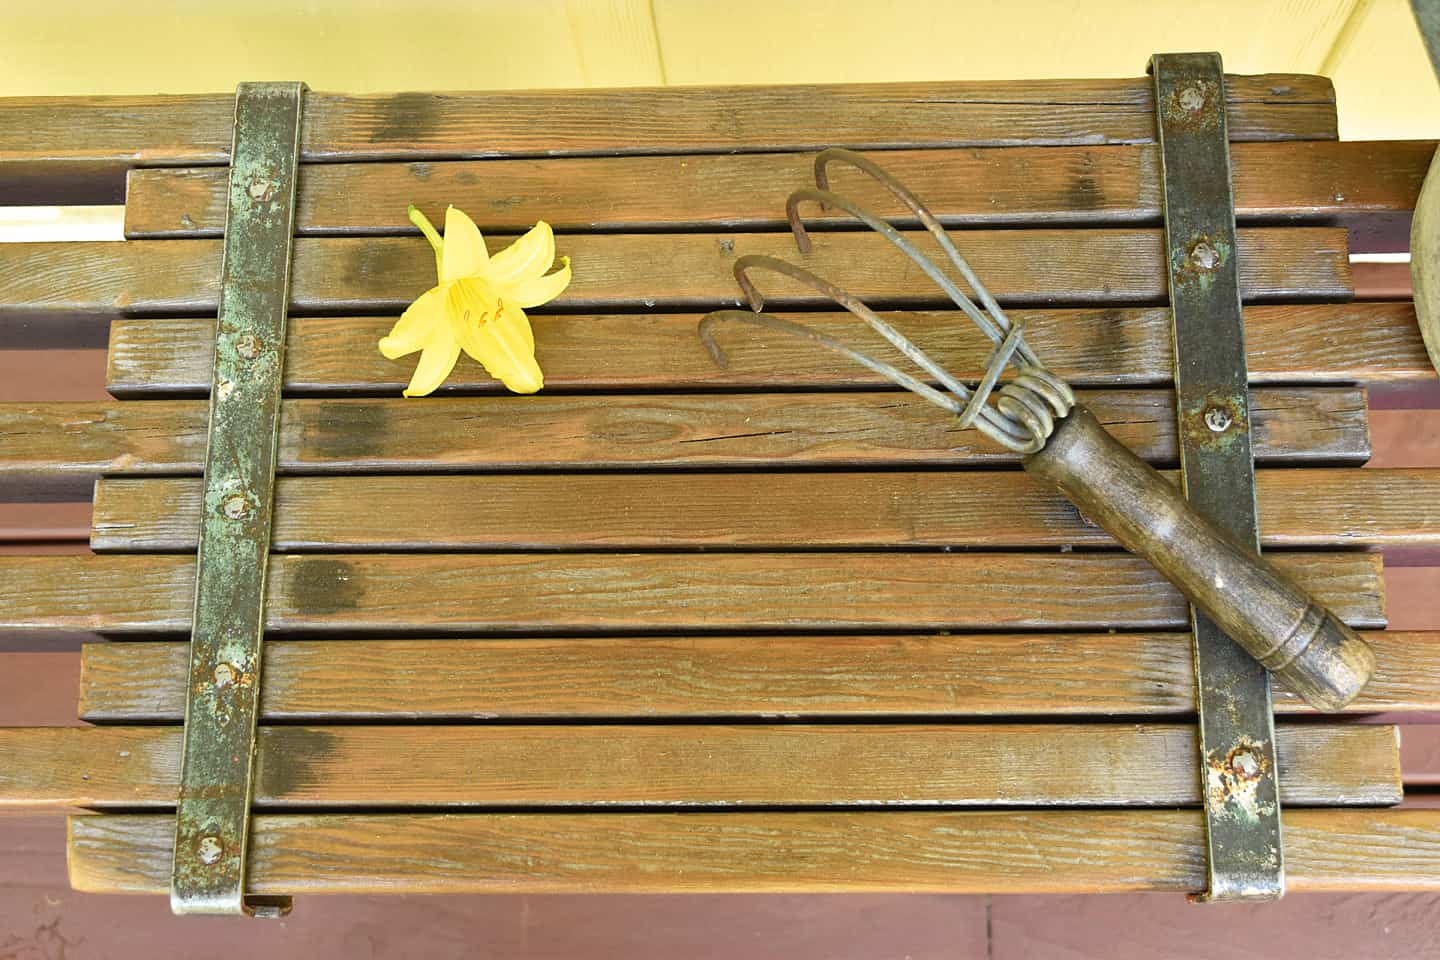
I brush polyed all the old wood with two coats first. I was hoping it would all be sealed when I stained, in case I slopped any drips around. I didn’t want the old wood absorbing any black stain. I loved how the old metal brackets looked once they were treated to some poly.
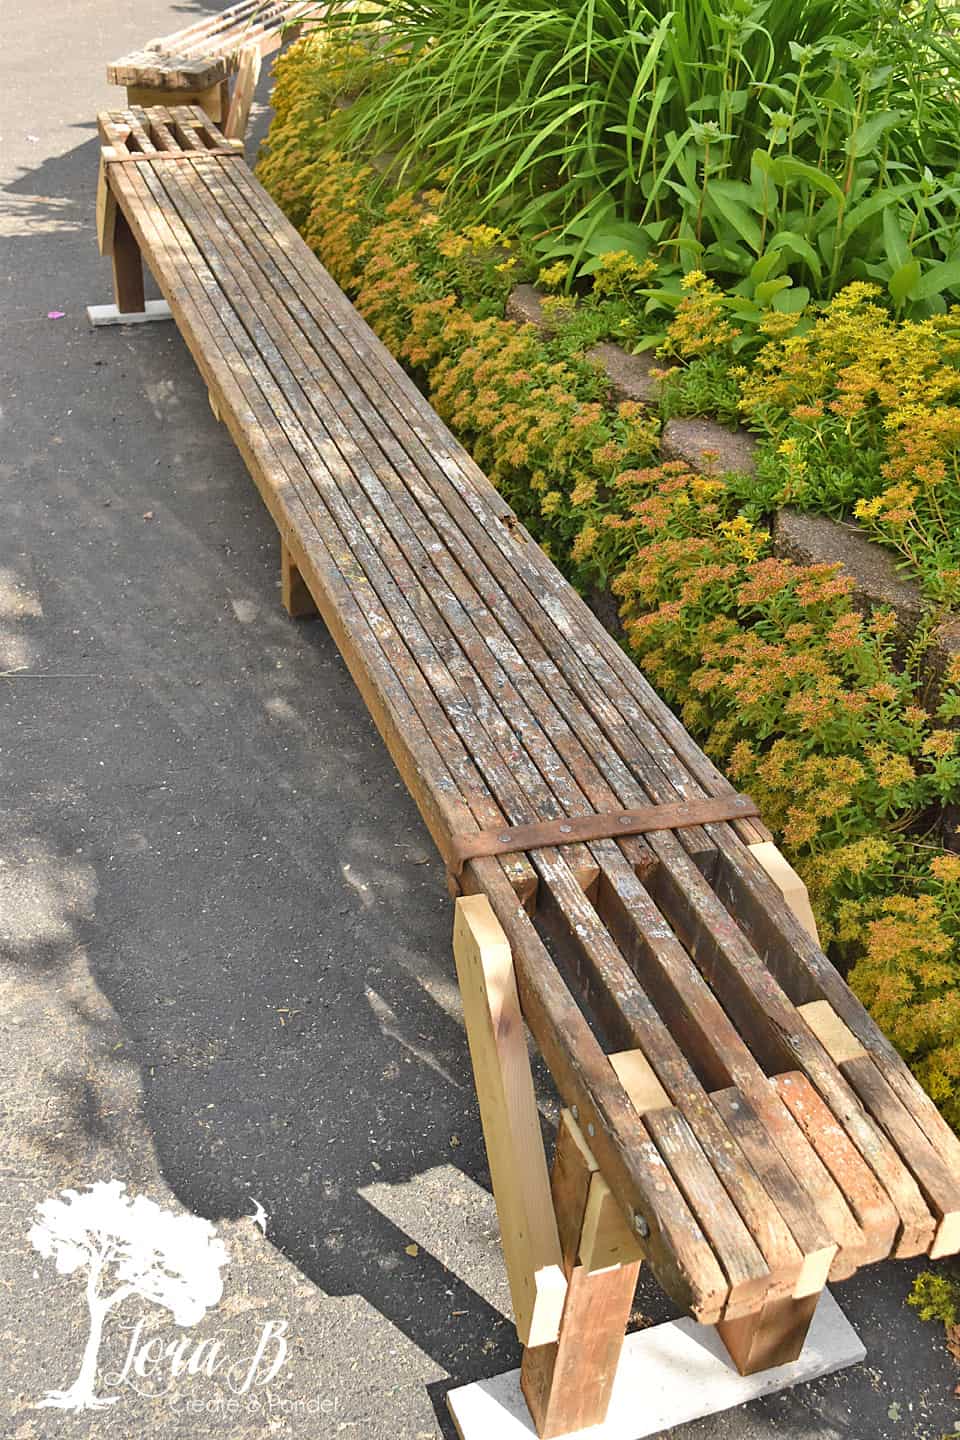
Perfect combination of rustic old wood in varying hues! Aren’t they just handsome? I’m pretty happy I don’t have to sell these; think I want them around for a long time.
I placed the lighter/expandable one up on the deck for it’s photo shoot:
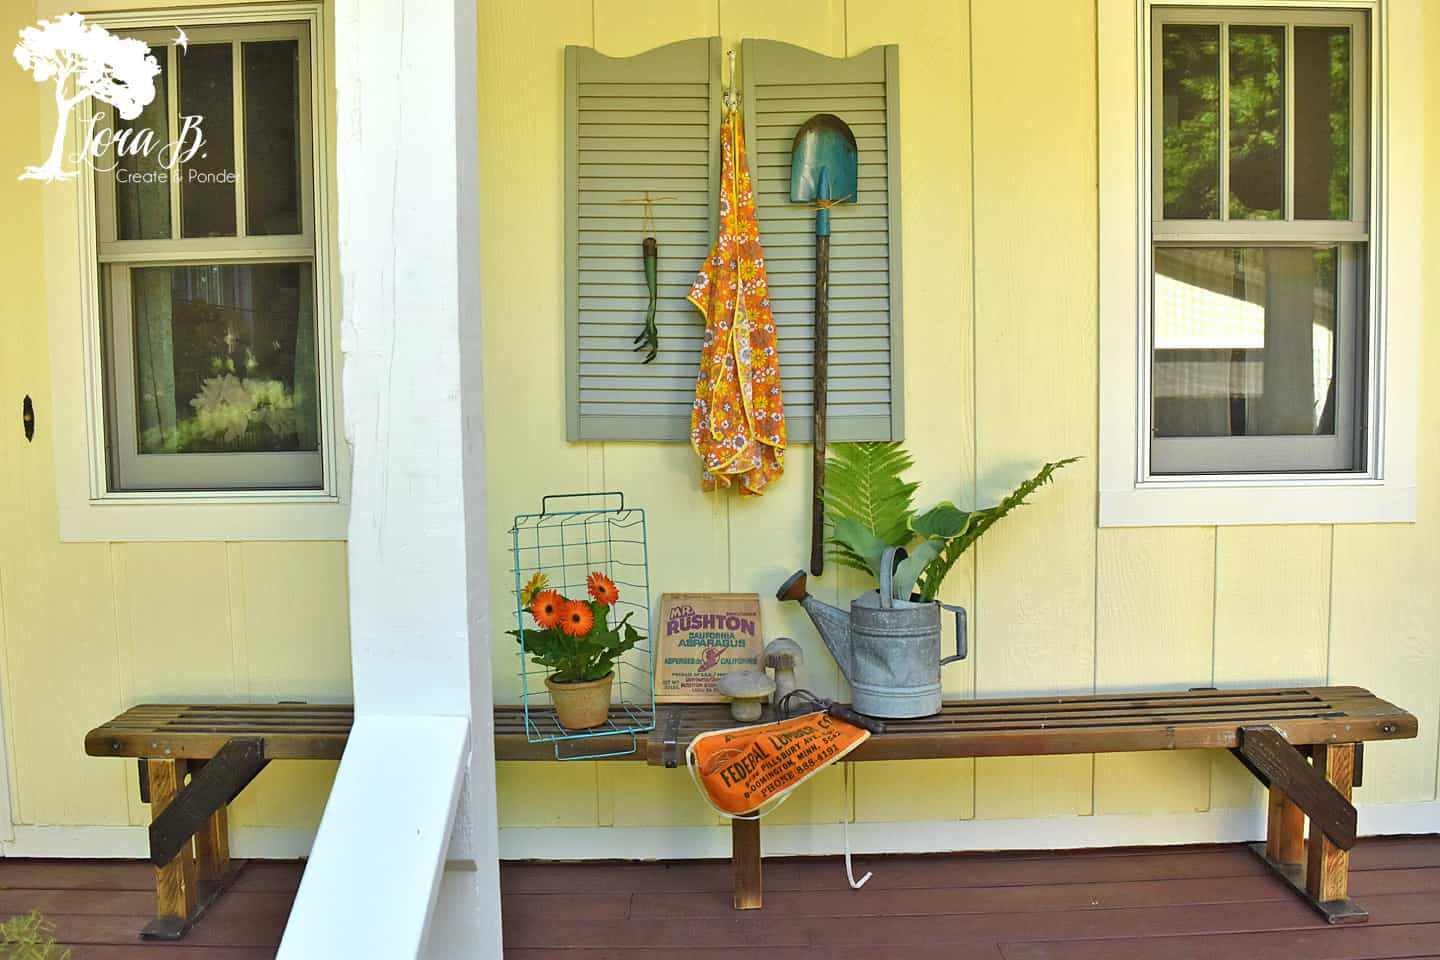
I think it might like to stay here after it’s grad party role.
The older, heavier one posed next to the blooming rose bush for it’s vanity shots:
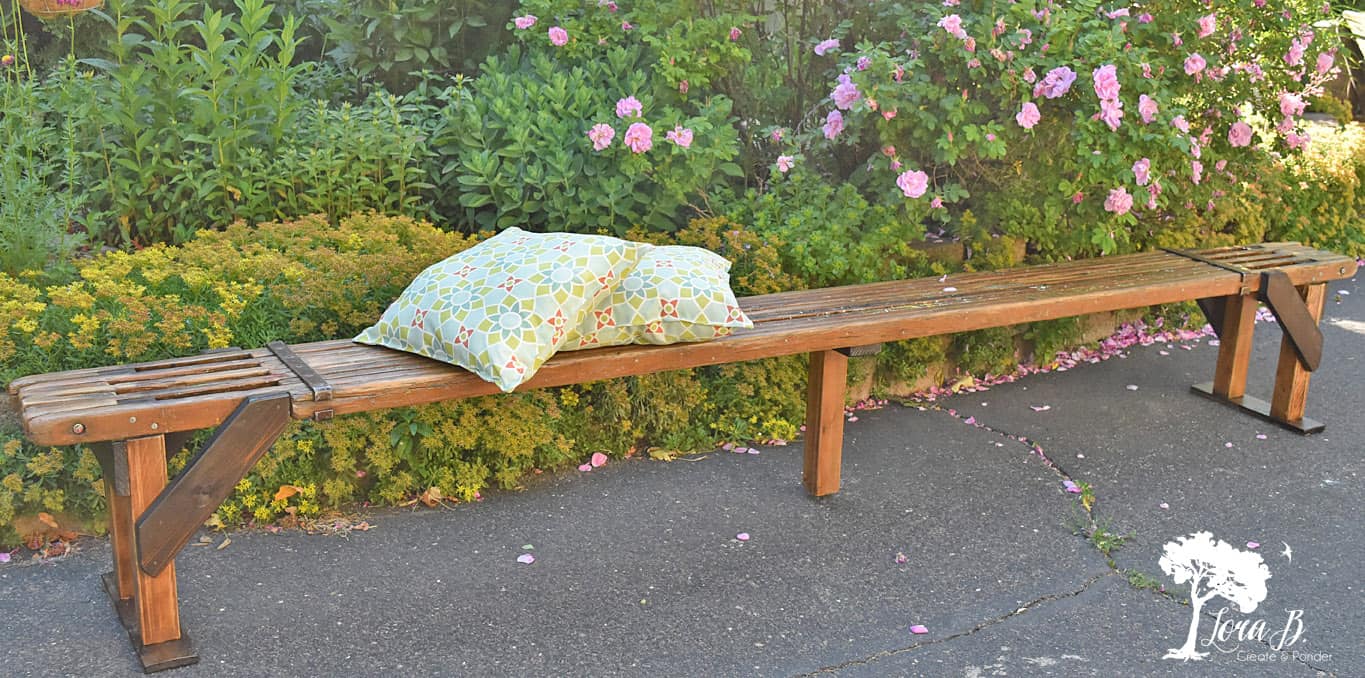
Yea…10-12 more seats for the grad party! And they’re rustic beauty will fit right in with the metal lawn chairs (“How to Refresh and Enjoy Vintage Metal Lawn Chairs”)
If you ever happen to come across some old painter’s scaffolding, now you can know what to do with these character-rich beauties! Use them as a shelf, or use them as a bench!


Sharing at these lovely parties:
Sundays at Home

Those benches are freaking amazing! Love that you let all that rustic goodness shine through. They are super cool!
Thanks, Tuula! Mr Fix-it just made me another one (since he’s got the system down now). I’ve got to figure out where all these benches are going to go!
I sure hope construction sites lock up their gates tight, because this scaffold bench idea is AMAZING. Those legs are genius. Saving this post for when I find something to revamp into a bench!
You’ve been featured this weekend on DIY Salvaged Junk Projects 384! Thanks for linking up! 🙂
Thanks, Donna! Had a feeling this project was right up your ally! Love getting featured on Funky Junk! Just found another hiding behind some chairs, so think a third will get built, now that we’ve got the design down.
If you’ve figured out the kinds of projects I love featuring, prepared to be blatantly shared all over the place! haha Thanks again for sharing! LOVE it!
I’ve never seen these in my area, and yet this is the second scaffolding project shared this week at #FridaysFurnitureFix, I love the patina they have and the repurpose too. A very cool project, pinned and thanks for sharing!
Thanks, Brenda! Yes, I saw the other scaffolding bench too…must be catchy!
Lora I love these benches! I wonder how hard it would be for me to make one from scratch?? These are too good not to share – I’ll be featuring your benches at this week’s party 🙂 xx
Thanks for the feature, Kate! I’m sure you could try & make them from scratch, but there may be some expense involved, and I’m all about junky and free!
Awesome upcycle. Added to my Pinterest queue. Thanks for sharing at the To Grandmas House We Go link party.
Thanks, Stephanie!
Love it, Lora! Pinned ~ thanks for sharing @Vintage Charm!
Thanks, Cecilia!
I like that idea! They look nice, and are very functional!
Thanks, Cheryl!
The benches look great, and they are super-functional for seating or for displaying plants in pots. I love the idea that the bench has a history as painters’ scaffolding. You know, they’ve got to be very sturdy.
Thanks, Mimi! They are sturdy and I’m just so glad I finally completed a project I had in my head a long time!
Now to make a 20-foot cushion. Just kidding! I love this idea, and you and your husband did such a nice job re-purposing the scaffolding. Thank you for sharing.
Your welcome, Fonda! They were a fun project!