
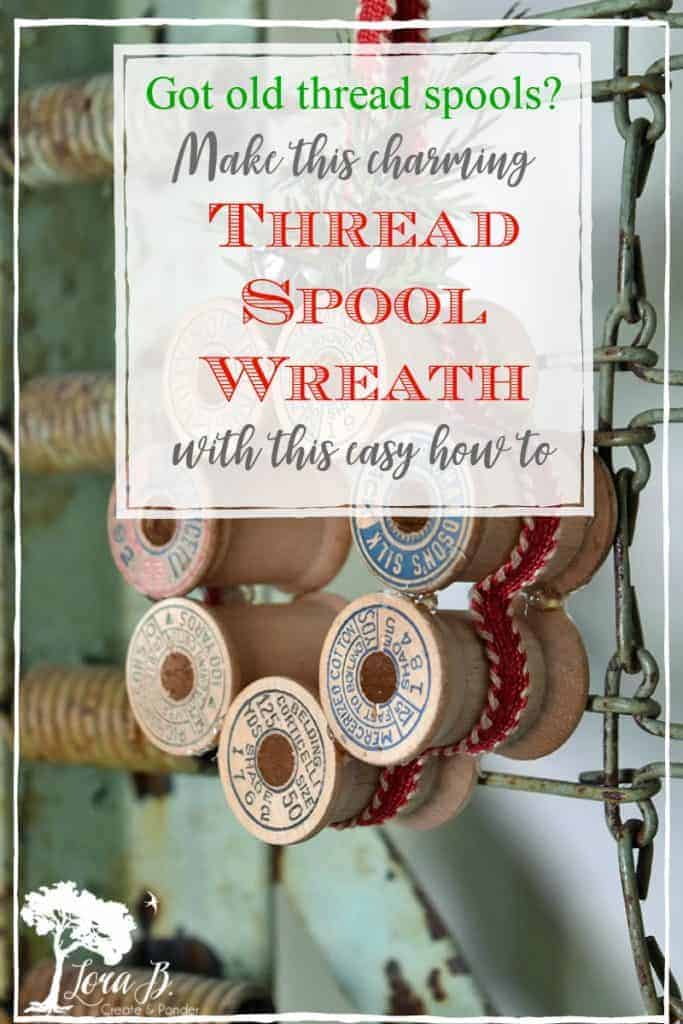
Vintage Thread Spool Mini Wreath How-To
Got old wooden thread spools? This easy repurpose is a fun Christmas craft or a unique gift for a seamstress!
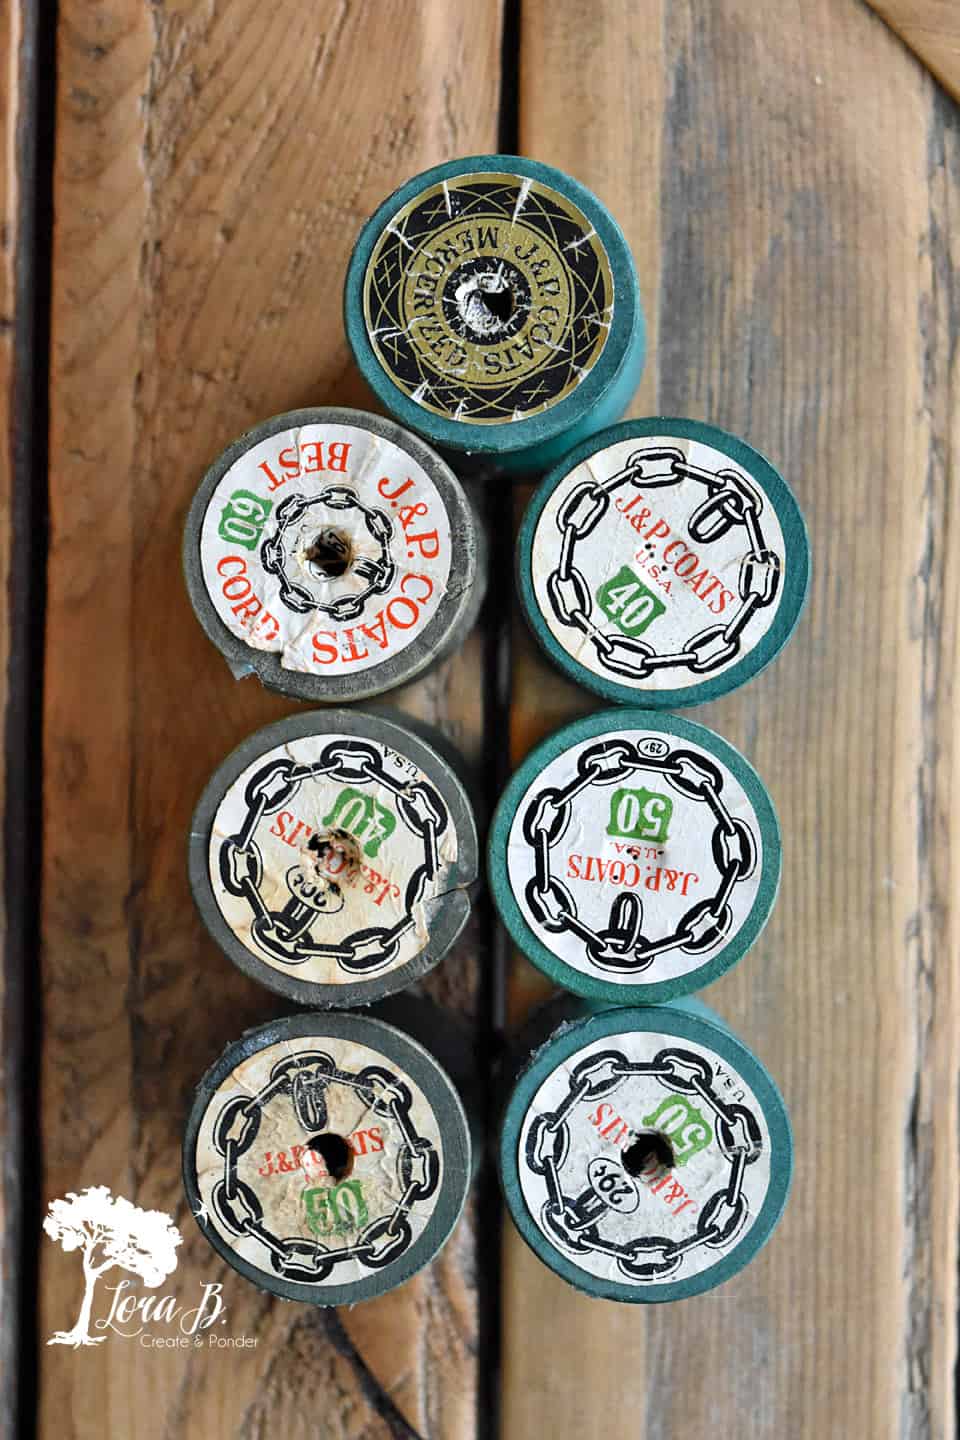
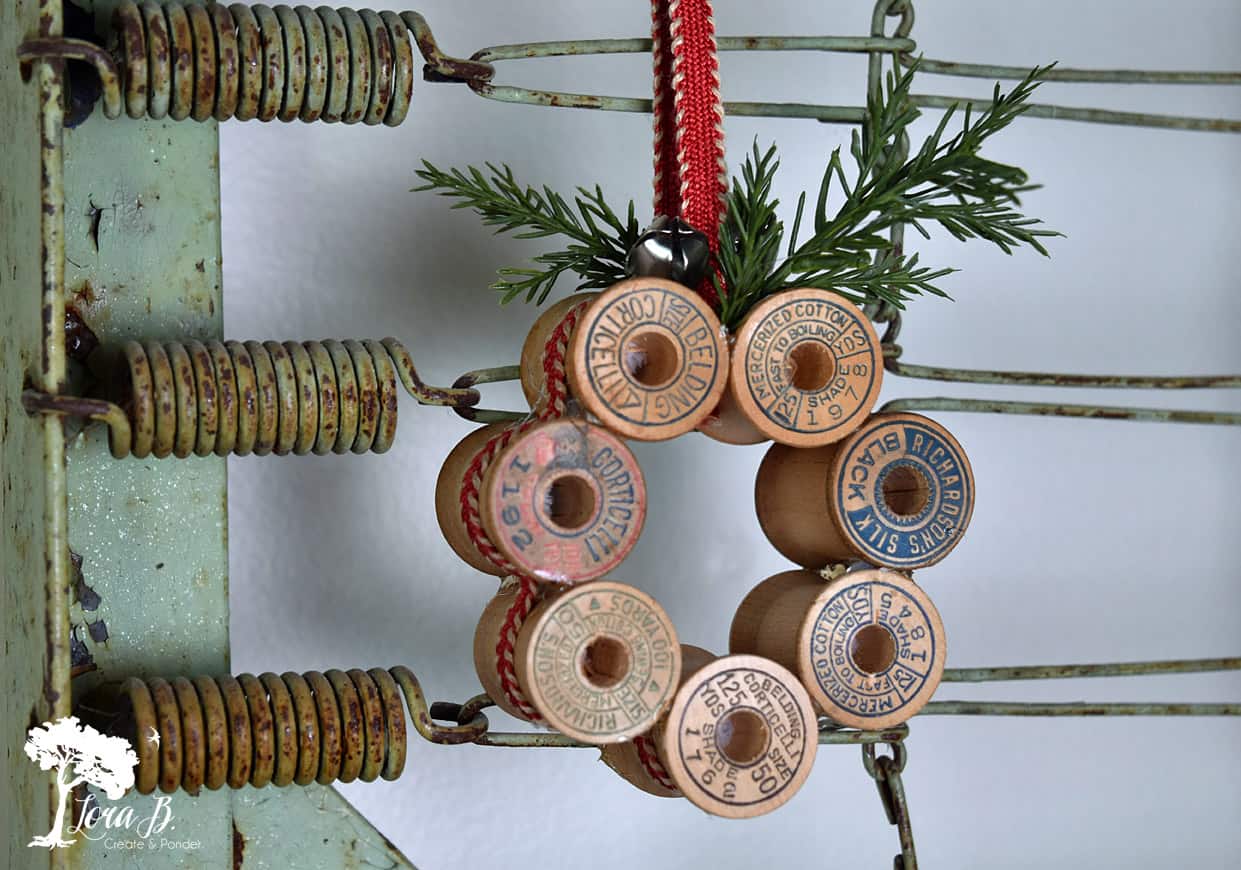
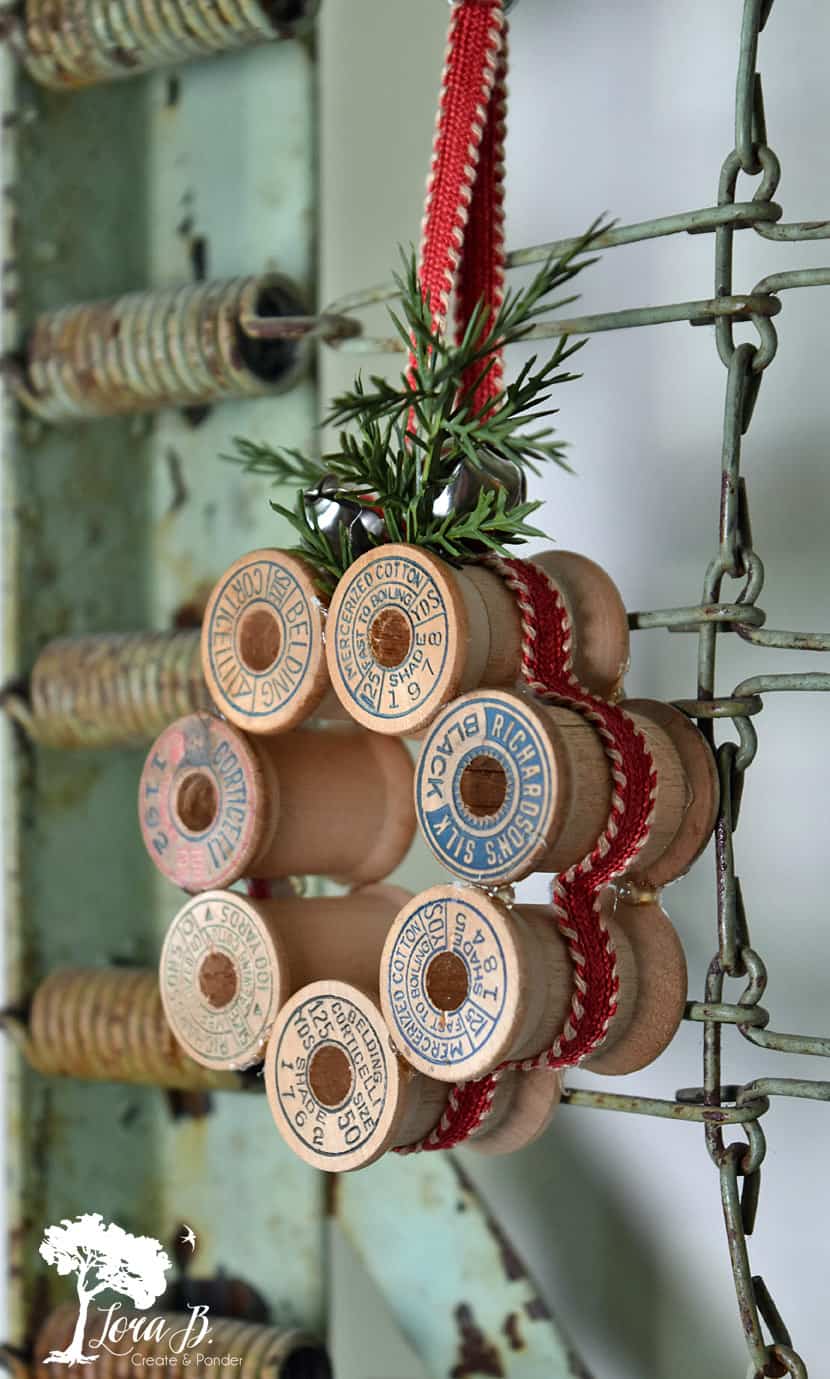
The graphics on the ends of vintage wooden thread spools have always intrigued me. Guess I just love the old font styles, pictures, and even the colors. Vintage graphics always call to me; I’ve even developed a collection with my hometown name {“Create a Memorable Collection with Vintage Graphics“}. I refilled my stash of old wooden thread spools recently at a church sale and wanted to make something to enjoy these old graphics. Here’s a Vintage Thread Spool Mini Wreath How-To that could be enjoyed as an ornament, or crafty decor any time of the year!
I’m joining my Thrifty Chicks friends today for this Thread Spool Challenge. I can’t wait to see what these talented ladies have come up with for this theme. I’ll have all their post links at the end.

Vintage Thread Spool Mini Wreath How To
For your convenience, this post contains affiliate links. If you make a purchase, I may receive a commission. There is no additional cost to you. My full privacy policy is here.
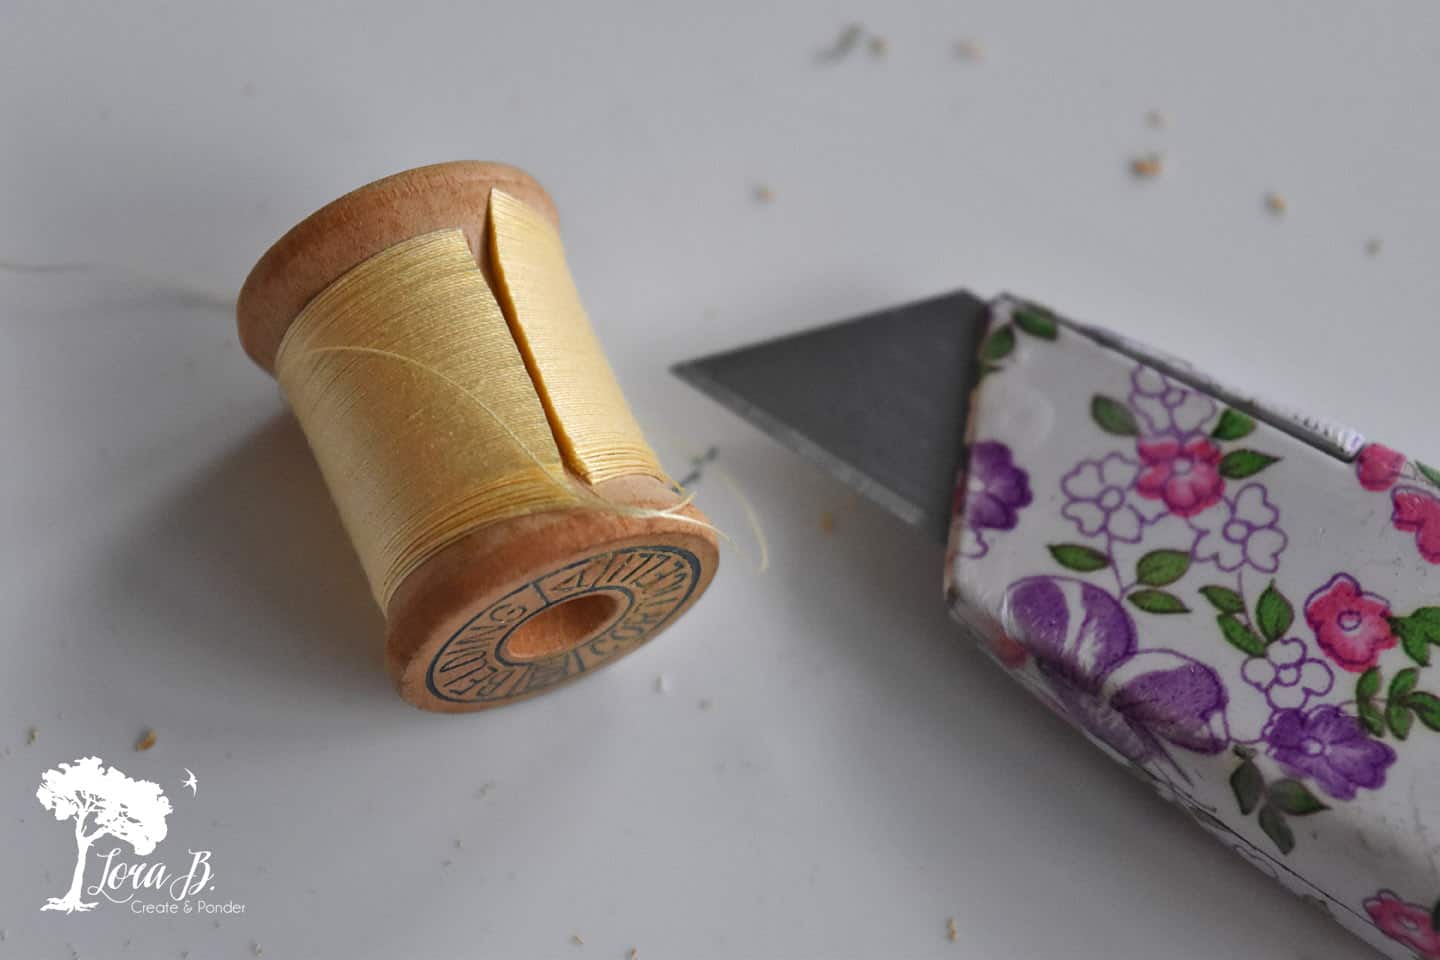
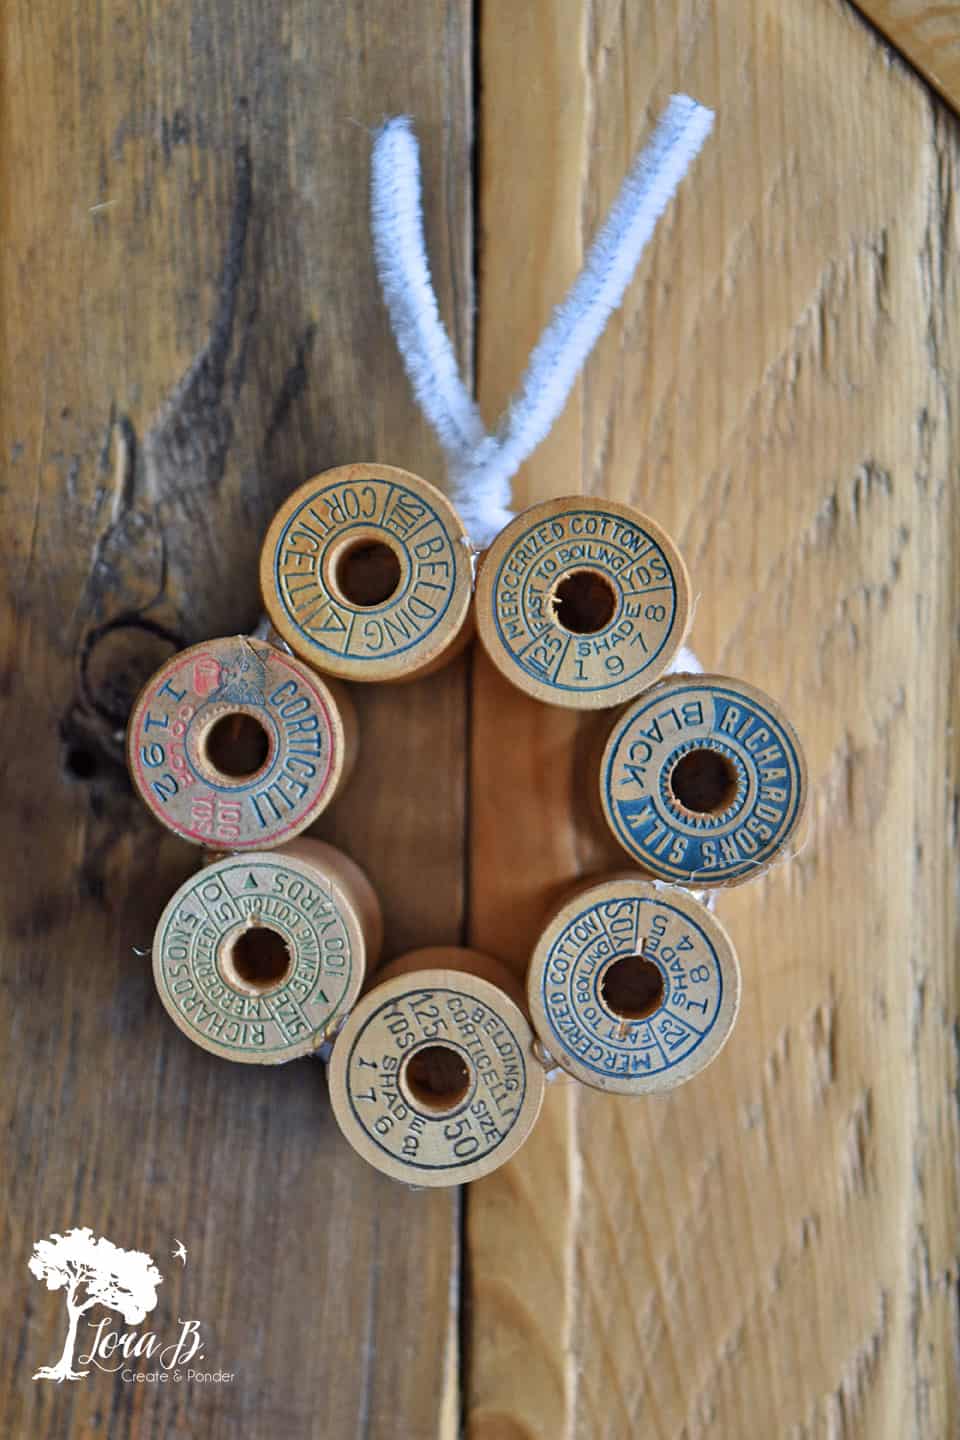
To Start, Gather 7 Wooden Thread Spools
Gather 7 wooden spools the same size that have good graphics. Begin by cutting off the original thread. You can easily do this with a utility knife {you can get a cute floral one like mine HERE}.
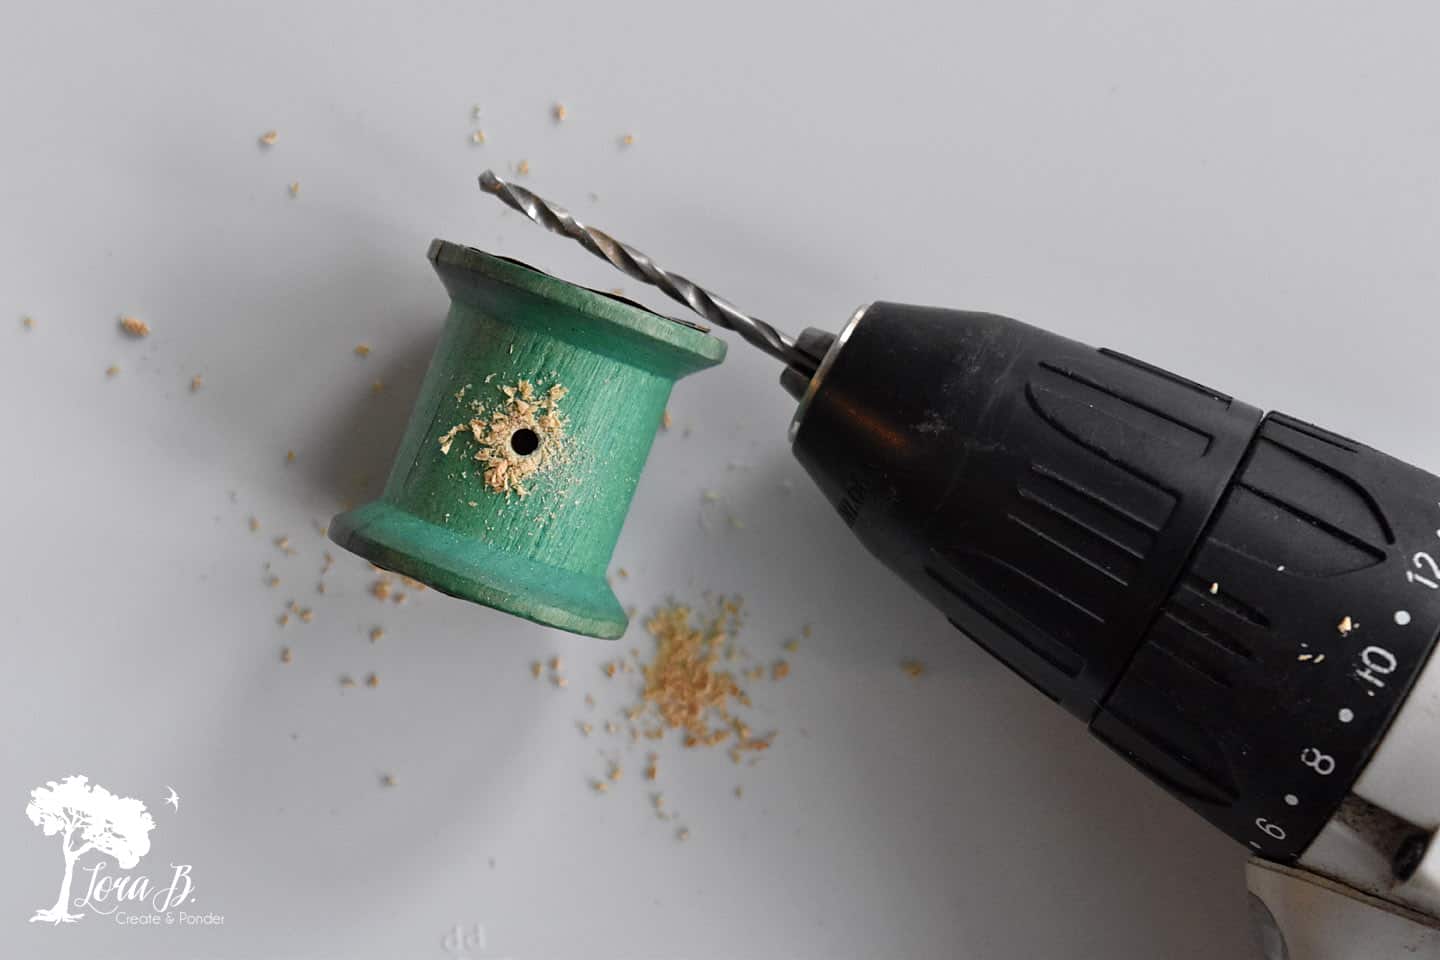
Drill Holes in Thread Spools
Next, drill a small hole in the side of the spools. {if you’ve never used a drill before, start with an easy-to-learn one for ladies’ hands like THIS ONE}.
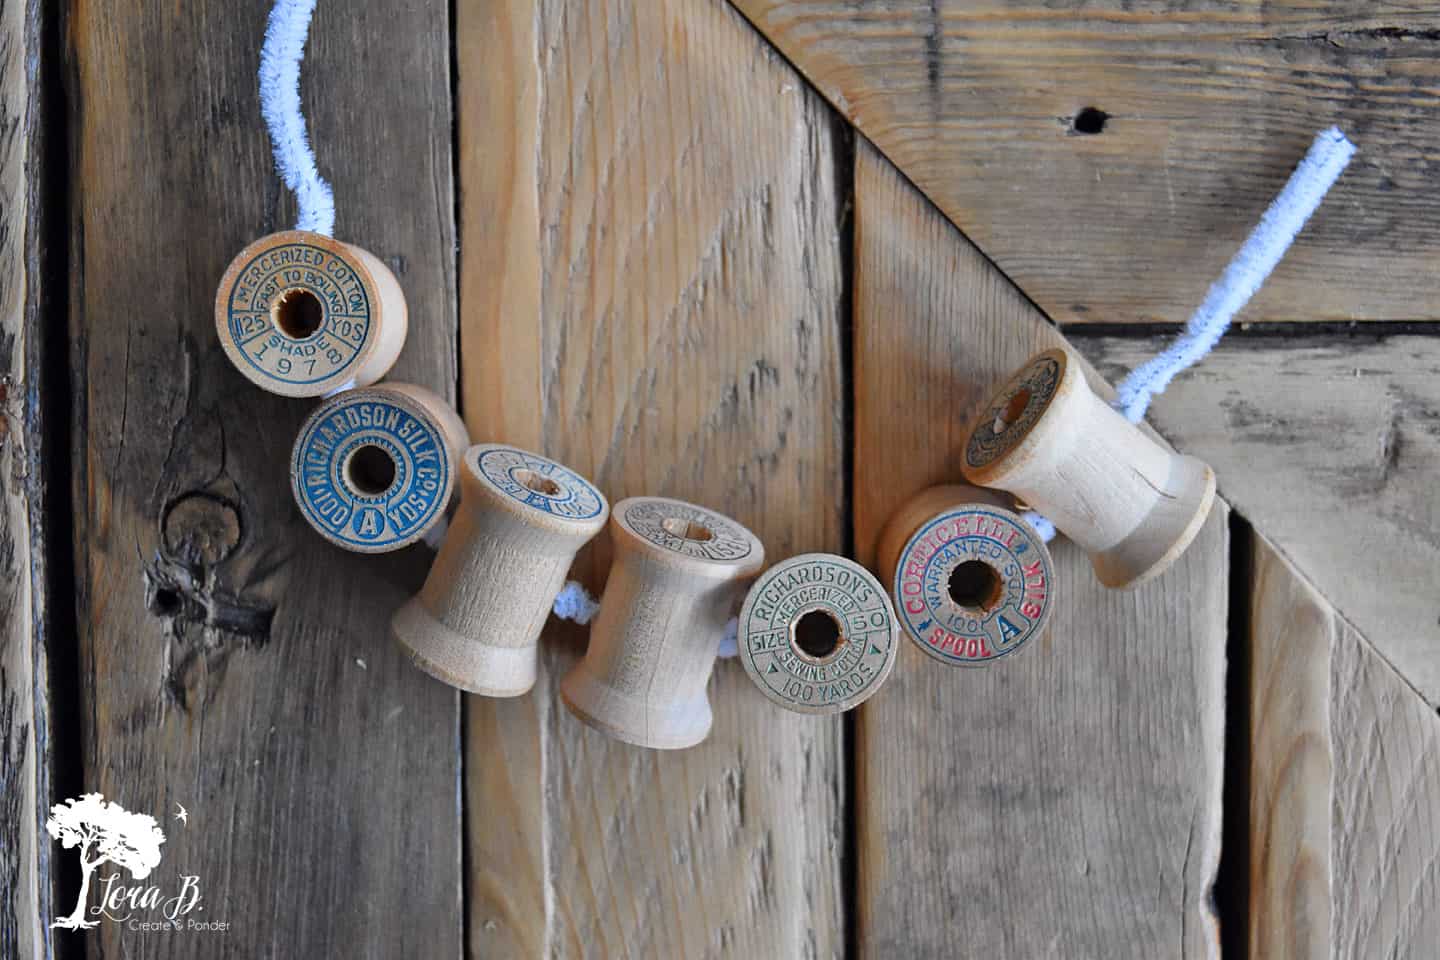
Use a Chenille Stem to Create Wreath
Thread the 7 spools onto a 12″ chenille stem {get them HERE}. Create a wreath by twisting the ends together.
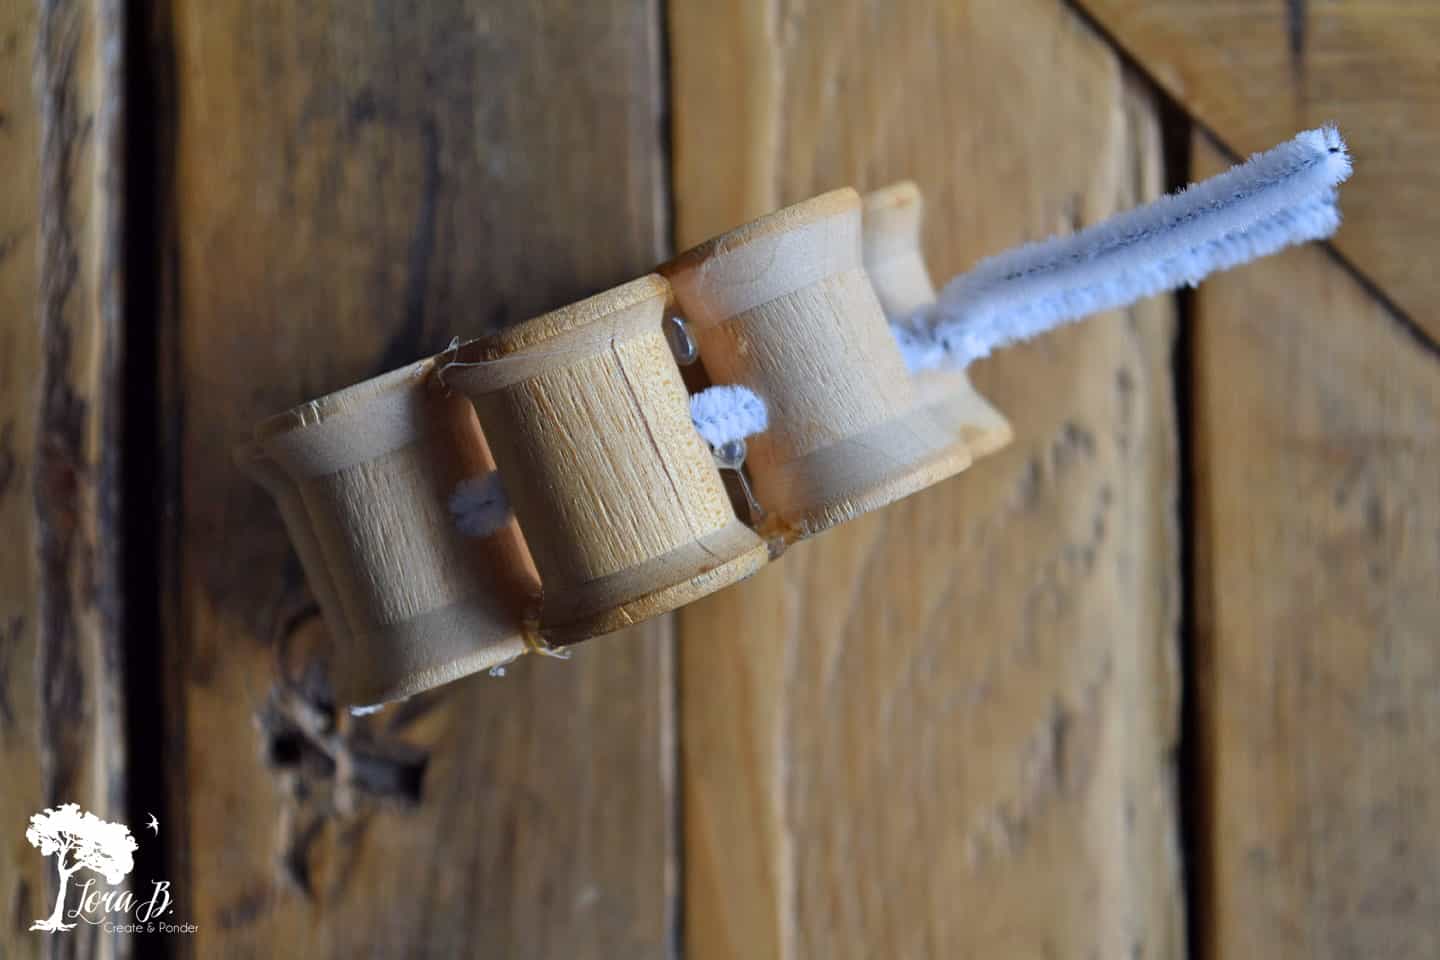
Glue Connecting Points on Thread Spool Wreath
With a hot melt glue gun {use one with stronger glue LIKE THIS}, add a small dot of glue where the spools touch each other at the tops and bottoms. Aim the glue gun from the underside, so as to not see too big of a glob of glue on the graphics.
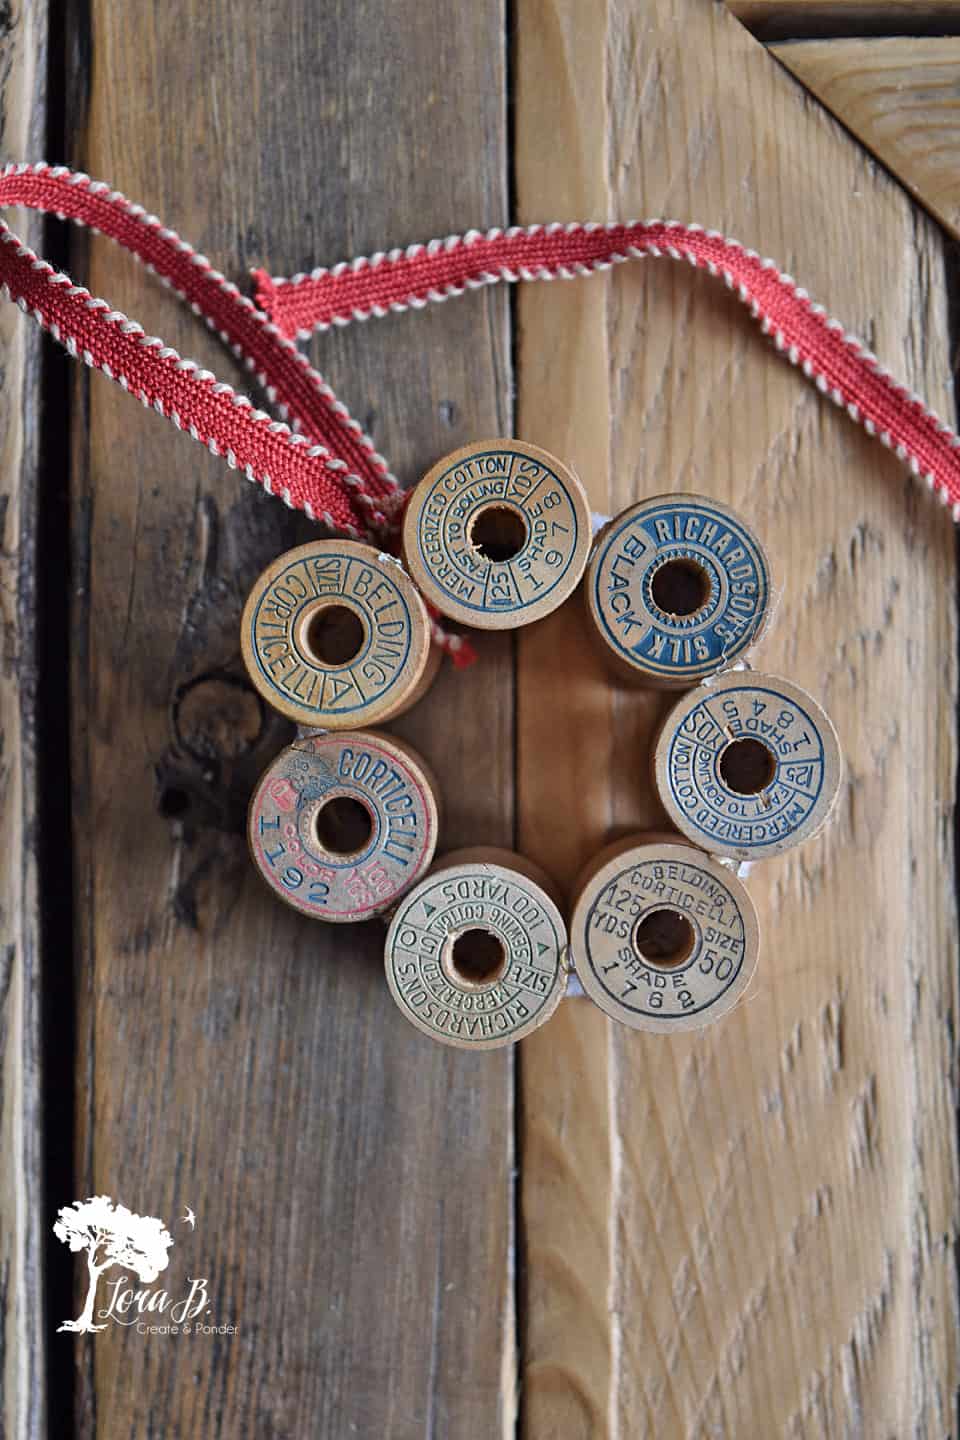
Add a Ribbon, Greenery and a Little Jingle
To finish off your vintage thread spool mini wreath, add a skinny ribbon at the top for the loop. Add the knotted loop first, hot gluing in place, hiding the knot at the bottom. Then wrap the ribbon around the whole wreath, tucking the ribbon between each spool and gluing on the chenille stem peeking through:
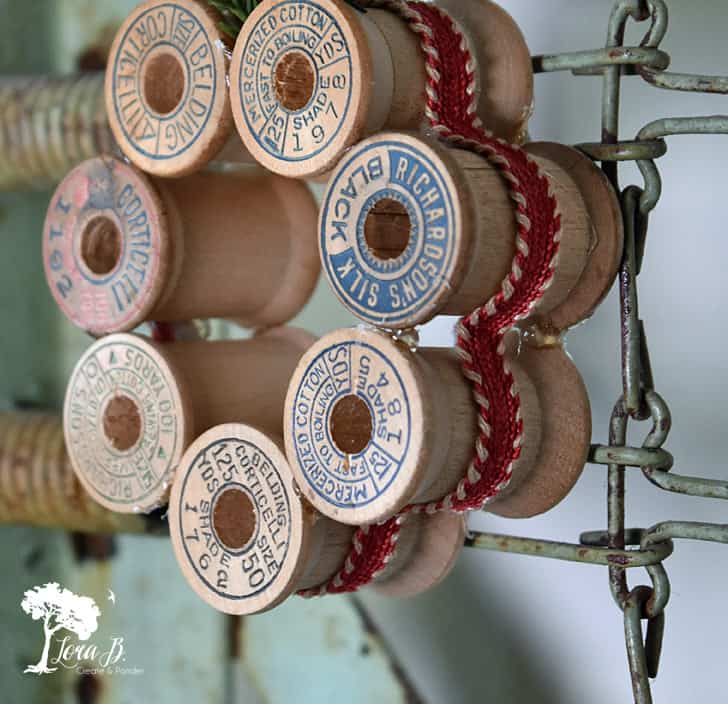
Glue on a little bit of greenery at the top and some jingle bells for extra cuteness and to cover your ribbon ends:
Finish by Removing Glue Strings (Expert Tip)
Always finish off hot glue projects with a hair dryer to remove those pesky strings!
These mini wreaths could be cute on the top of a gift, an ornament on the tree, or anywhere around your home!
Don’t you just love those graphics?
Do you love bringing new life to old things? Hopefully all the Thrifty Chicks junkover projects will inspire you today! Check out this month’s challenge down below. If you want to see more, check out our previous challenges:
Hope you enjoyed this Vintage Thread Spool Mini Wreath How-To! Become an Insider to keep the ideas flowing, HERE!
Pin, Share, and Enjoy the Rest of the Inspiration!

Thrifty Chicks Thread Spool Challenge:

Sharing at these lovely parties:
Wall to Wall DIY
These are just fabulous, Lora!!! I LOVE how these wooden spools look used on that pretty wreath. I’m featuring this post at the Home Imagined link party next week!! Thanks so much for sharing…happy Thanksgiving to you and your family!
Thanks so much, Rachel, and thanks for the feature! Happy Thanksgiving to you, too!
Lora, what a cute idea! I love old thread spools. Growing up my mom had her own business making custom bridal shop and I use to play with all her pin cushions and spools. Thanks for sharing on the Home Imagined link party.-Meagan
Wow, your mom sounds like a very talented lady!
What a cute idea! I have a bunch of old spools sitting around.
Have fun creating!
I liked the old bed springs better;
Had made the spools wreath years ago in homemaker’s club
Proves there is nothing new under the sun;) I think I would have liked homemaker’s club!
Your wreath is so adorable. The art of sewing will always have a special place in my heart. Definitely have to make one of these.
Me, too, Joselyn!My Grandma was the main person who taught me to sew, and she was a true creative artist:) Have fun creating!
I just love your ornament! Gorgeous photography too! I will be featuring you tomorrow at TFT!
Awesome, thanks Amber!
I collect wooden spools so I am in love with idea. I think I will make one too, but I will keep it on display all year. Happy Holiday Season, Kippi
It could totally be on display all year, Kippi! And if you collect them, it will be a perfect way to enjoy them!
Lora, I adore these fun vintage wreaths! Thanks for sharing at Vintage Charm–pinned!
Thanks for pinning, Cecilia! Glad you enjoyed them!
This would be so cute in my sewing room. Just the touch it needed. You are so inspirational. Thank you for sharing.
Yes, it would be perfect in a sewing room, Terrie! Have fun!
This is so adorable! What a treasure. I’m pinning now! 🙂
Thanks for pinning, DeeDee!
This is lovely, I like the red ribbon touch.
Thanks, Claire! I almost went black, but it told me red was the way to go;)
Such a cute project, Lora! And I like the hair dryer hint, too!
Thanks, Linda! Have you not ever heard of that one? Secret weapon against glue strings;)
What a cute idea!! Why didn’t I think of that. Such a good size to tuck anywhere.
It is the perfect size for so many uses, Vikki! Think I need to make some more;)
I love how you showcased the graphics of the spools Lora. Really pretty!
I honestly didn’t even know you could buy new spools, Tuula. I’m just such a vintage girl and love me some old graphics. I actually thought this was kind of a Diana project;)
I love the vintage charm of the wreath. I miss the old wooden spools and treasure the ones I have. This is a nice way to show them off.
I just can’t stand to let them hide in a drawer somewhere, Debra! Now I can enjoy them, at least at Christmas time;)
Oh! I love this idea Lora! So cute!
Tania
Thanks, Tania! Now I need to make a couple more…