
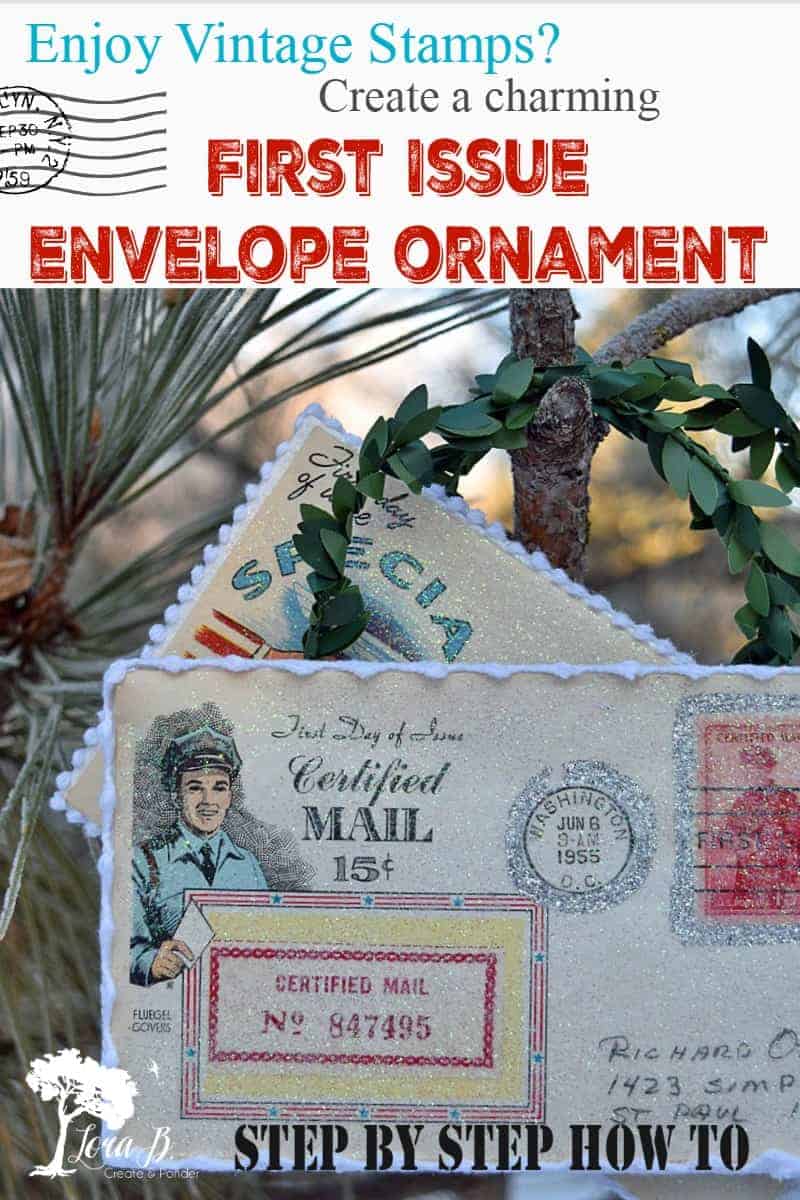
Vintage First Issue Postal Stamp Ornament How To
Postage stamp collecting has been a hobby for a long time! It was especially popular with postwar grade-school age children in the 50’s. My dad had albums full of stamps from all over the world. He had an advantage over his friends finding stamps because his mom was a post mistress. I’m sure her influence got him into the hobby! As I looked through Dad’s collection, I could just imagine his boyhood excitement when one of these First Day of Issue envelopes would arrive in the mail. The mid-century illustrations were charming and I thought it would be fun for my dad to re-live his childhood hobby. That’s how this Vintage Postal Stamp Ornament How To came into being!
Today’s project is a part of our monthly Thrifty Chicks challenges, where a talented group of DIY bloggers focus on a theme each month. Since it’s December, it’s time to be creative with ornaments! I can’t wait to see what my friends came up with! All the links to their projects will be at the end!

Vintage First Issue Postal Stamp Ornament How To
For your convenience, this post contains affiliate links. If you make a purchase, I may receive a commission. There is no additional cost to you. My full privacy policy is here.
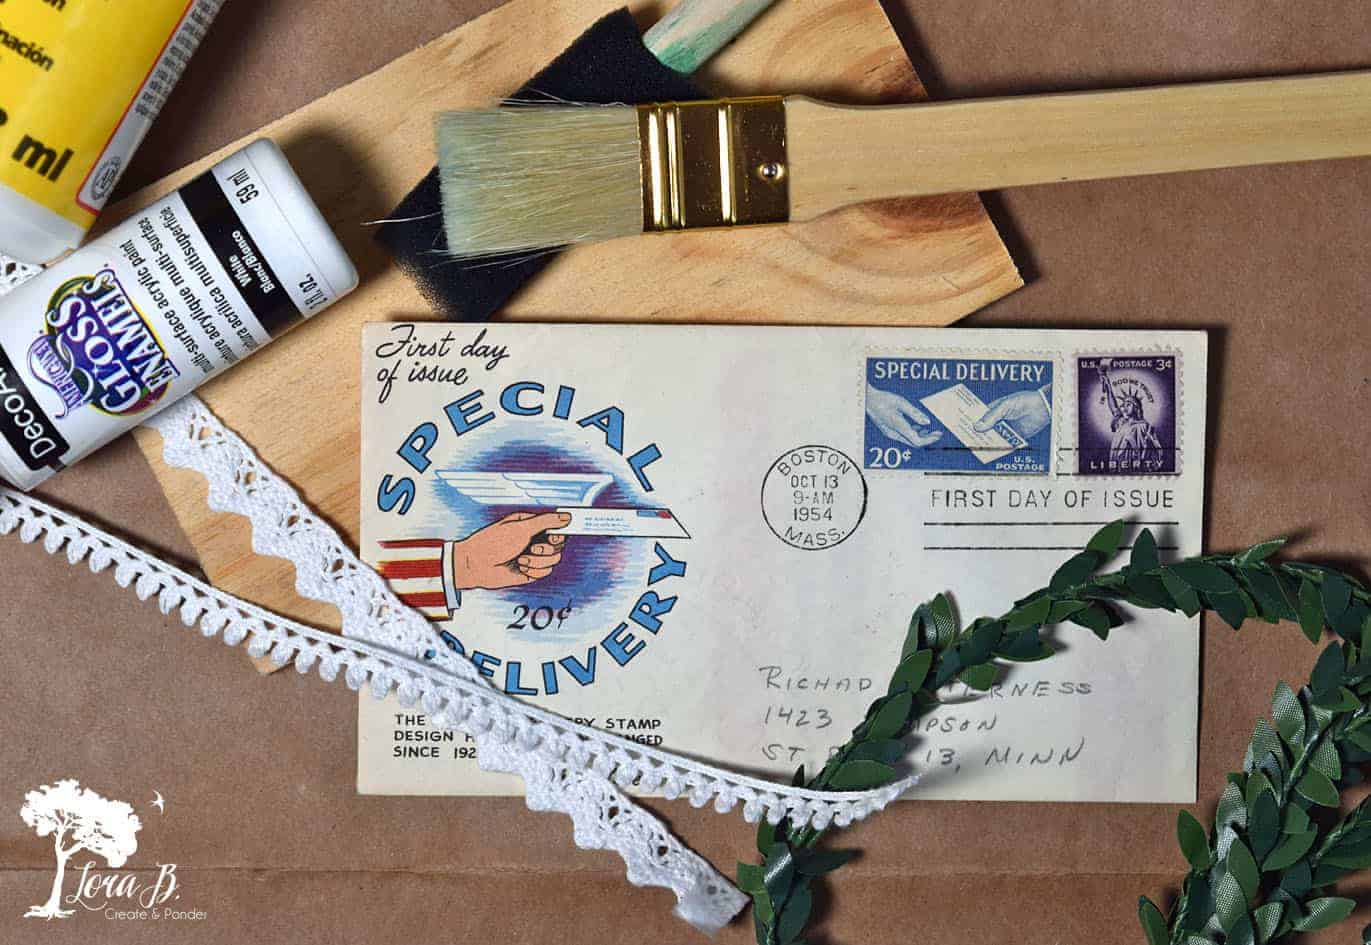
Materials Needed:
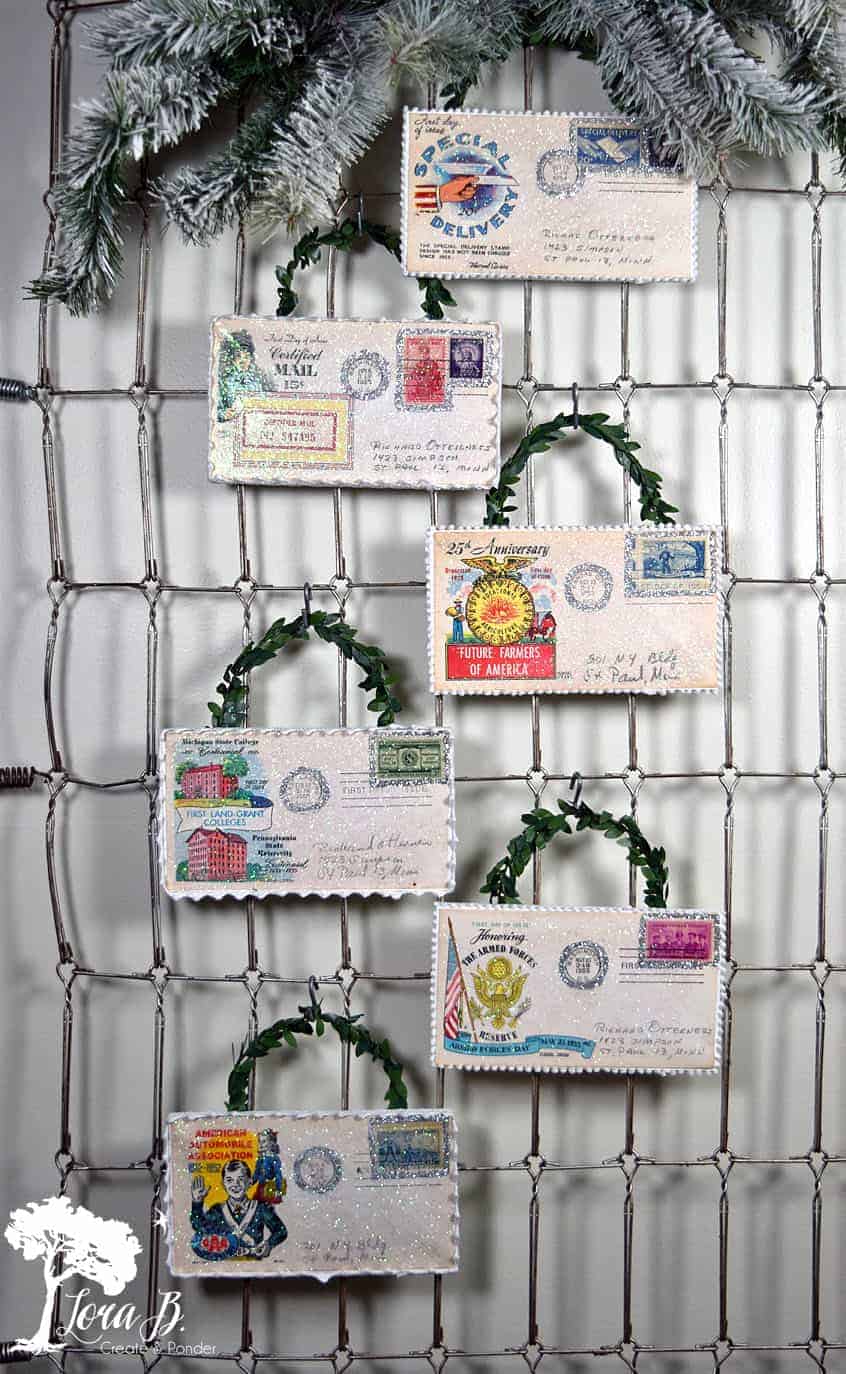
- Vintage First Issue Postal Envelopes or scanned copies.
- Plywood squares ( I used beadboard) cut the same size as the First Issue Postal Envelopes
- Decoupage medium
- Foam brush or small paintbrush
- White acrylic paint
- glue pen
- silver glitter
- spray adhesive
- crystal glitter
- scallop or rickrack-type trim to go around the whole ornament
- tacky fabric glue
- wired leafy garland
Where to Find First Issue Postal Envelopes
First off, if you aren’t a stamp collector yourself or have any of these laying around, First Issue envelopes can be found at local antique stores or on Etsy or Ebay. (you can find them HERE) They’re usually only a couple dollars, so it’s not likely you’ll be wrecking something worth millions with this project! But you may want to use a copy to have more of your favorite images! (Ask me how I know)
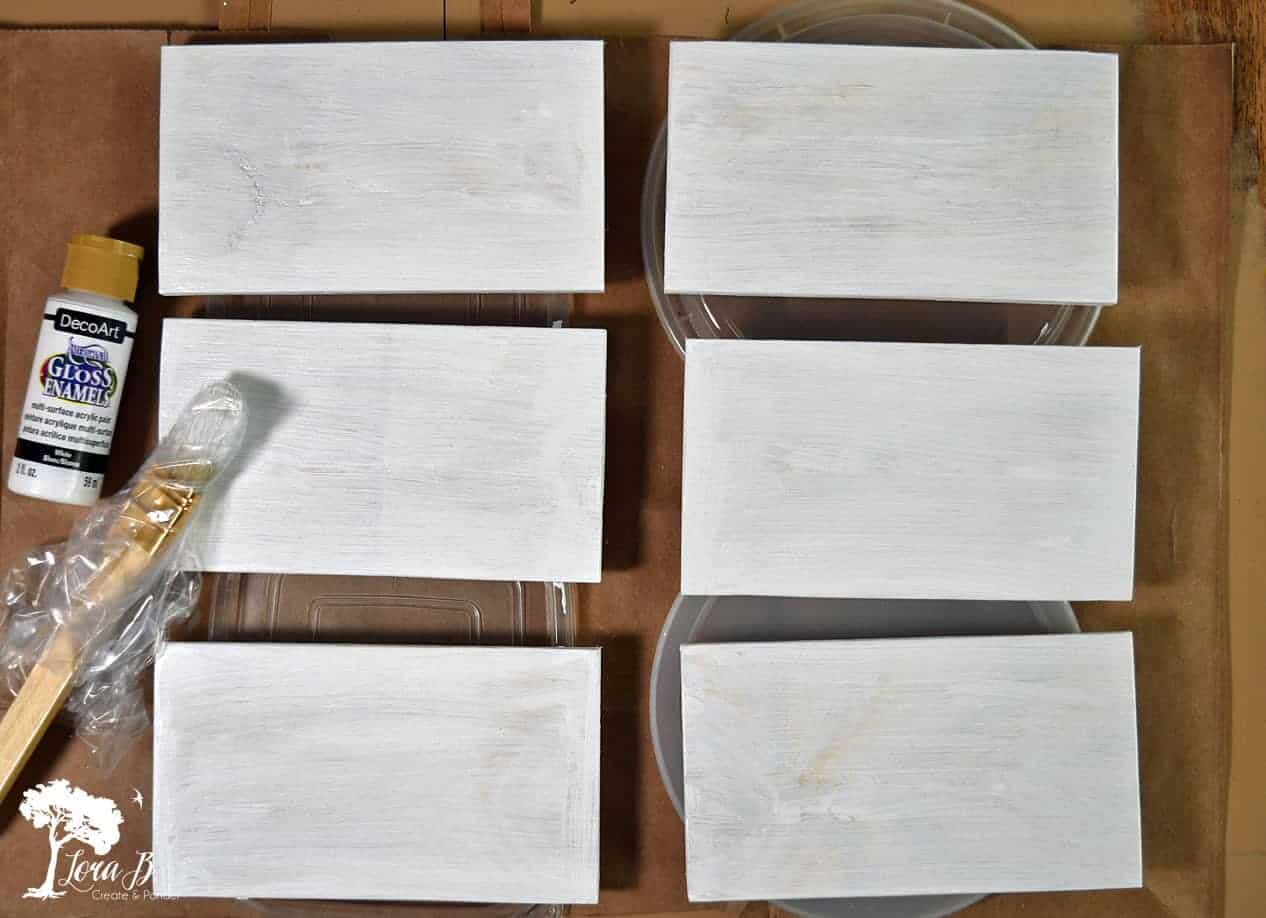
Cut Scrap Boards and Paint White
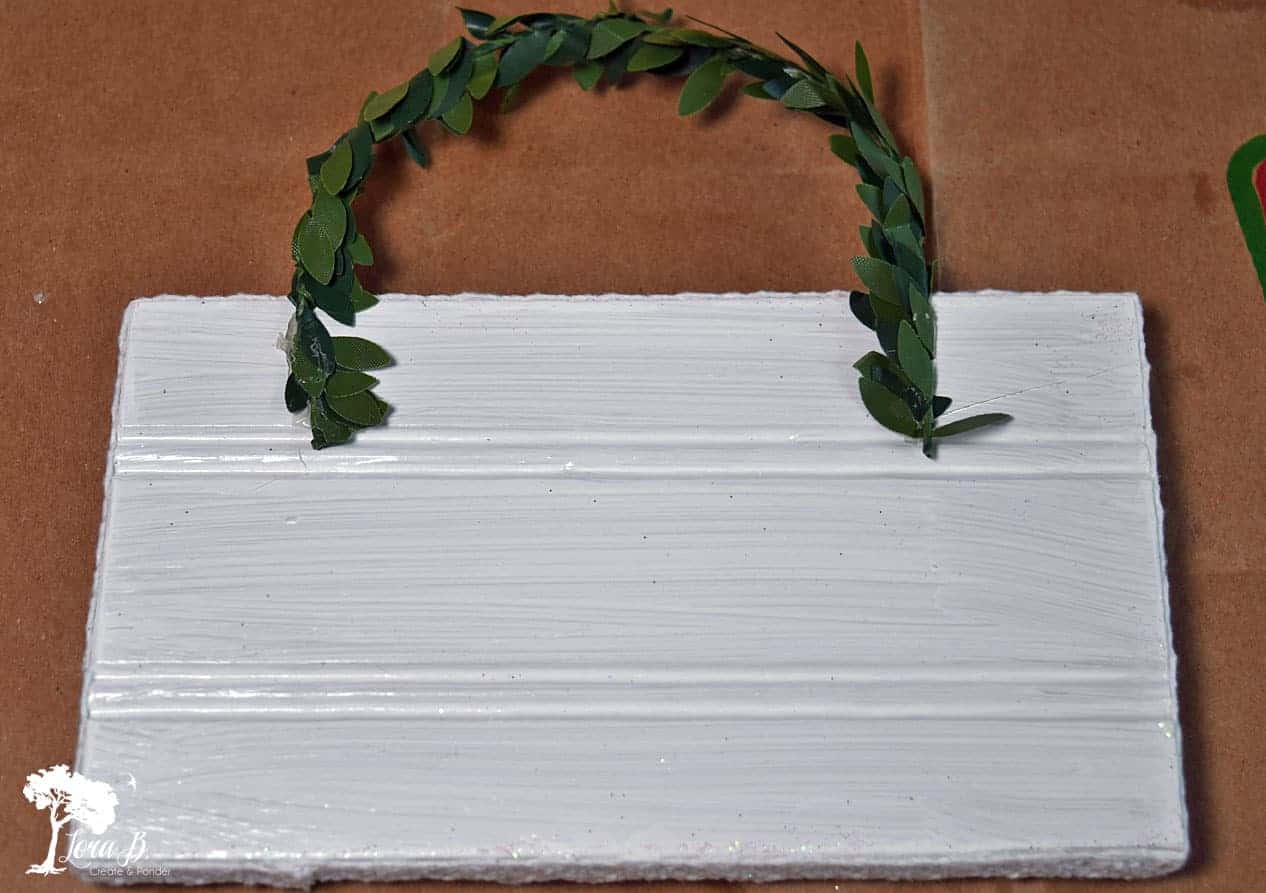
First, cut thin boards the same size as the First Issue envelopes. I used beadboard plywood, so the back of the ornament would have a vintage vibe (it’s also because I usually have pieces laying around).
Paint both sides of the boards white, 2 coats on the back (beadboard) side. 1 coat is fine on the front, since you’ll be attaching the envelope.
DIYer Tip>> Plastic containers or take-out covers work great to dry freshly painted projects;) Also: Place your brush in a ziplock bag so it won’t dry out while waiting for the paint to dry (between coats).
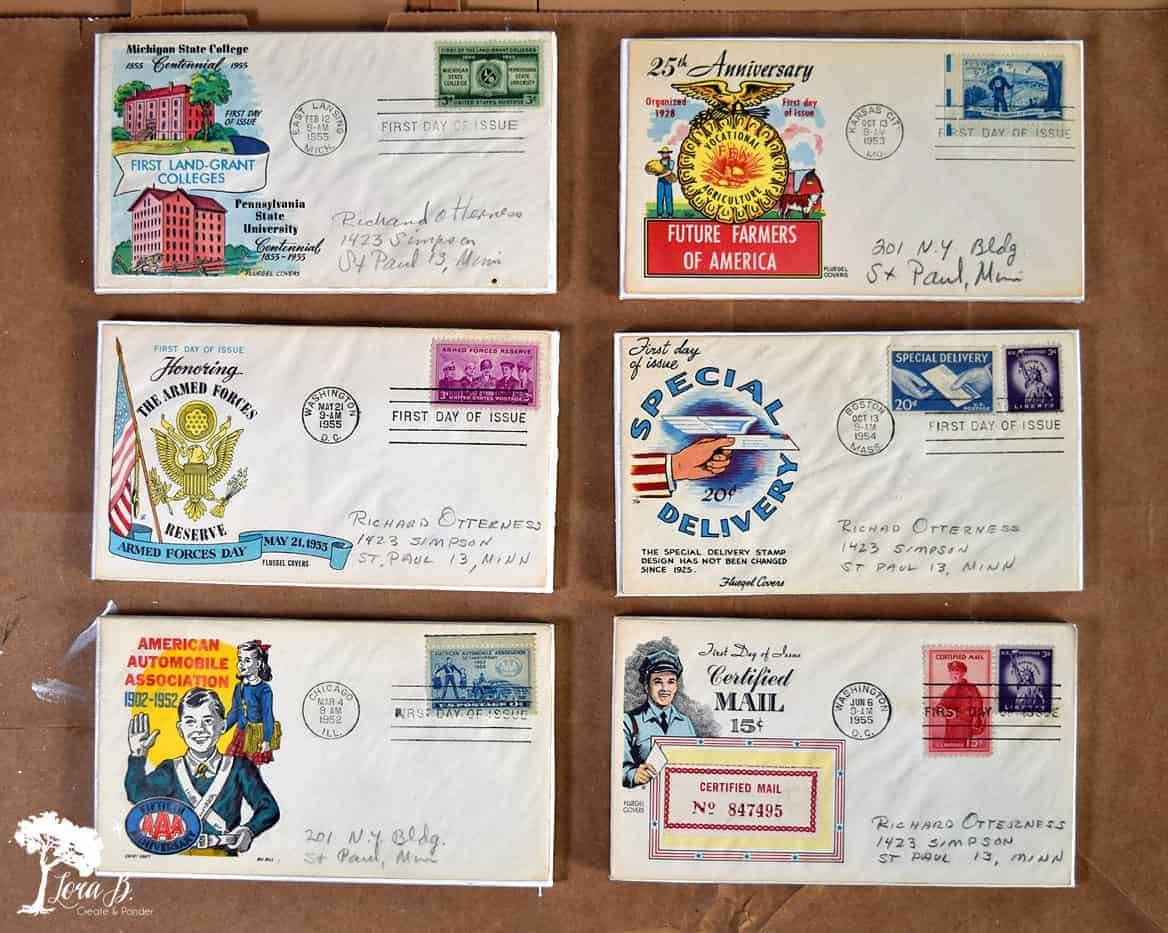
Decoupage Envelopes to Painted Boards
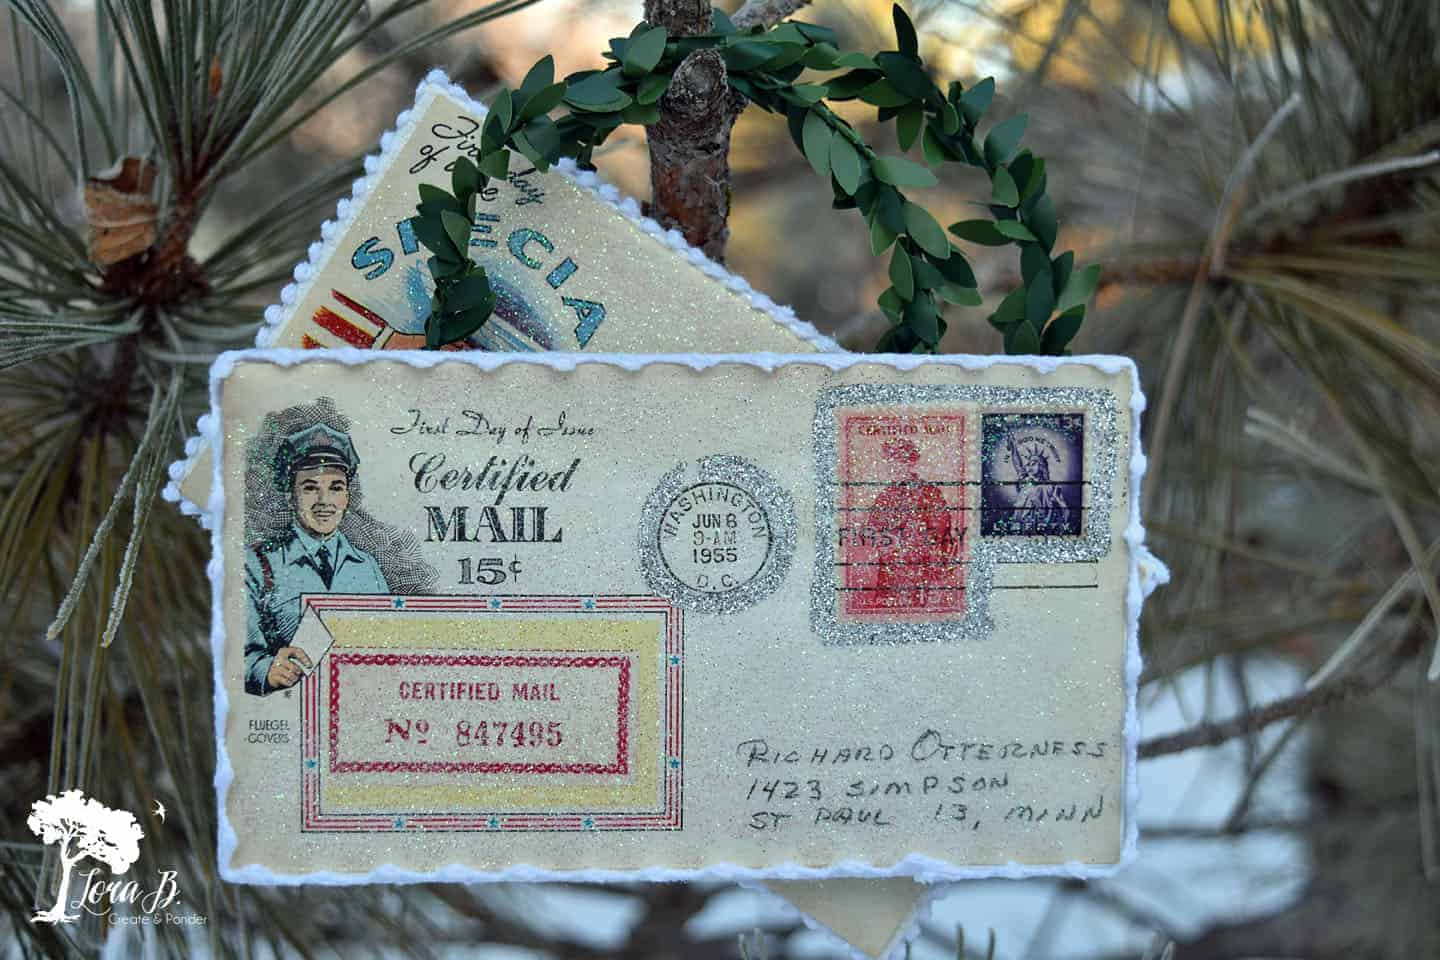
Decoupage the First Issue envelopes or the copies to the boards (brush the glue to the back and stick on, just like white glue). Smooth from the inside out, but it can bubble as it dries. My envelopes were a little bubbly; you could cut off the back and just decoupage the front for possibly a smoother look. But as you’ll see, glitter makes everything look o.k. anyway!
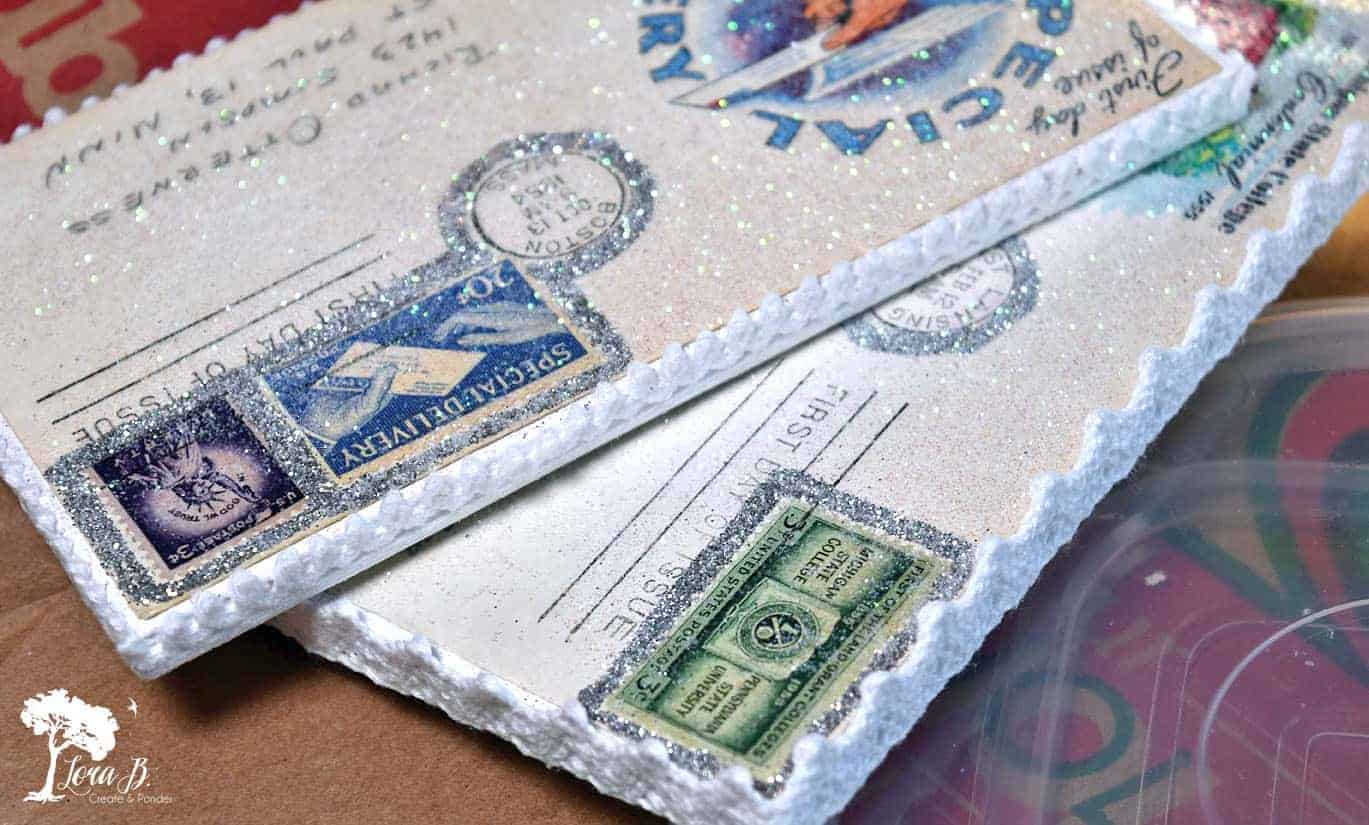
Frame the Postal Marks and Stamps with Glitter
To highlight the stamp and the postal mark, use a glue pen and add silver glitter. Let dry. The glitter elevates it to Christmas ornament status!

Add Iridescent Glitter to Front
To give the ornament an iced effect, use a spray adhesive and add iridescent glitter. I dug out my old heat tool from my scrapbooking days and dried everything; you could be more patient than me and just let it dry naturally;)
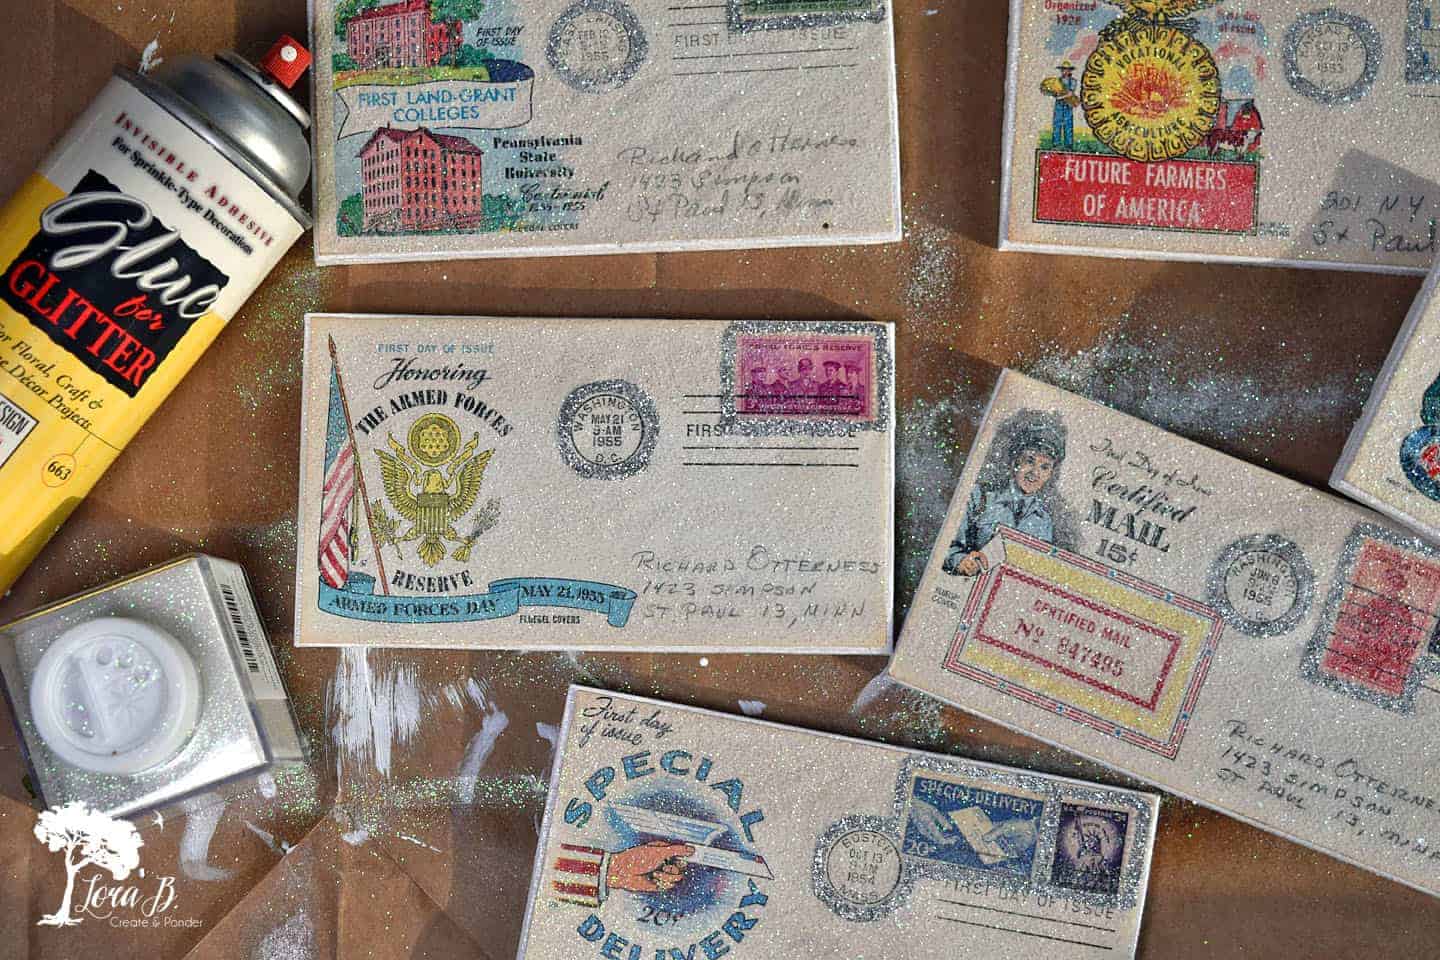
Looking pretty special, right? Glitter just has a way of adding bling to everything!
Finish Off Edges with Fabric Trim
To finish them off, I bought some trim that looked like the zig-zag edging around stamps. I glued it all around the envelopes perimeter using tacky glue, seaming at the bottom.
Make Hanger from Wired Leafy Trim
To hang the postage stamp collector’s ornament, hot glue a section of leafy wire to the back. I remember Martha Stewart once saying the back of your project should look as good as the front. Don’t you love how crisp and vintage the white beadboard looks on the back?
Ready for the cute reveal?
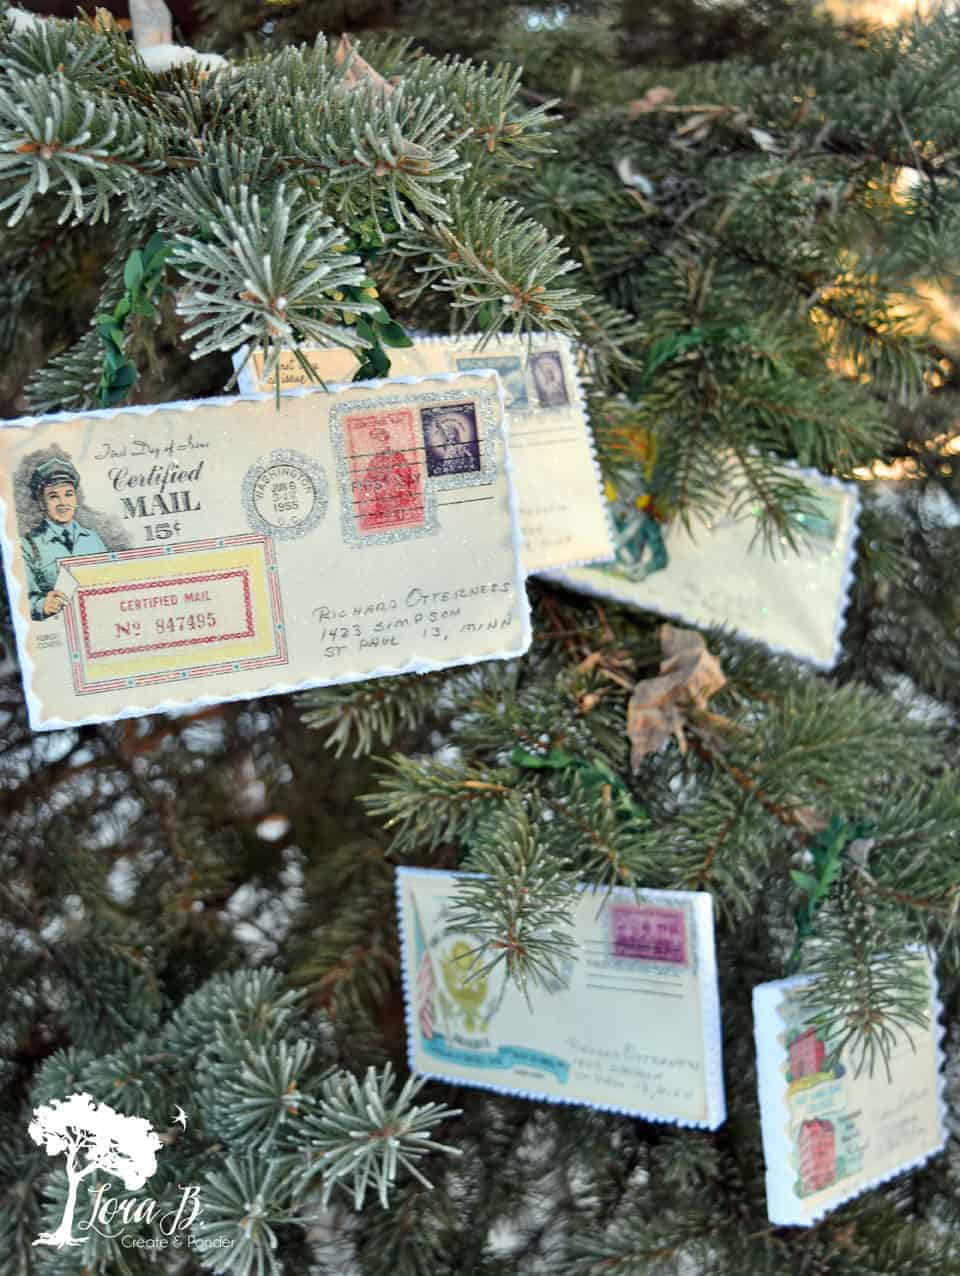
Enjoy or Gift your First Issue Postal Ornament!
These ornaments will hopefully bring back wonderful childhood memories of a hobby that’s mostly extinct for schoolboys now. The vintage graphics and stamps can be enjoyed in a whole new way! These ornaments could be a wonderful, special gift to someone you know who collected stamps, and could be enjoyed by any vintage lover.
Dealers Tip: If you’re a dealer and have some of these, you could probably increase your profits by turning the First Issue envelopes into ornaments. They would look so cute on a tree in your booth, and your customers would love them! Definitely make scanned copies of the cuter ones. A great way to make some money on kind of a sleeper item;)
Christmas is a great time to enjoy your vintage collections. What could be better than using something that’s just been sitting in a drawer? This project is a great way to revive a childhood hobby. I can’t wait to see my Dad’s face when he sees what his old collection has become! (Shh, mom…no telling;) Hope you enjoyed this Vintage First Issue Postal Stamp Ornament How To!
Please Pin and Share and then enjoy the rest of the Thrifty Chicks Ornament Challenge!
Thrifty Chicks Ornament Challenge
Sharing at these lovely parties:
Wall to Wall DIY
What do these first day cover ornaments sell for already made?
Sorry, I actually don’t sell them. These were made to inspire others to make them for themselves.
These are really great. They feel nostalgic and festive, perfect for an ornament! I had a very brief hobby when I was younger collecting stamps, but I never kept it up once I left home, and the stamps I collected were never worth much, it was just a fun thing for me at the time.
I think it’s pretty hard to find stamps in a collection that are actually worth much, Sheila! But I still love their typographical charm. I’ve got my dad’s huge collection and would like to come up with some other ways to enjoy them.
These are just adorable, I will be pinning to make next Christmas.
Glad you liked them, Claire! Thanks for pinning!
Oh!! Those are wonderful!! I will pin this and keep an eye out for some of those envelopes. Thanks so much for sharing at Thursday Favorite Things!
I’ve featured these lovely ornaments at Thursday Favorite Things today. Have a wonderful Christmas.
Thanks for the feature, Pam!
So fun, Lora! Thanks for sharing at Vintage Charm!
Your welcome, Cecilia!
These are really a great way to keep old memories alive and so pretty too.
Thanks, Marlene! I hope my Dad enjoys them; I know I love how they turned out!
What a fun project! I have my dad’s stamp collection in my attic. I’ll have to see if there are any first issue stamps in his collection. The graphics are great and this is a way to enjoy them for years to come.
I’m keeping my dad’s collection safe, too, Paula. Trying to think of how to enjoy their beauty the best.
These are just wonderful Lora! I agree that the back of the ornament should look as good as the front. I love the beadboard. These have true distinctive vintage character. Love ’em!
Thanks, Amber!
I loved your ornaments. However, as a former stamp collector, I couldn’t bear to add glue and glitter to a first day cover, even if it was only worth a dollar or two. BUT, I would photocopy one onto cardstock and proceed from there! The beautiful backside of your ornament was just screeching for something to be added to it; a reversible Christmas ornament; now there’s another idea!
I totally understand that, Kathy! And actually, I love your idea to photocopy them! Don’t know why that didn’t occur to me (holiday mania, maybe?). Think I’ll add that idea to the post, because I’ve actually been wishing I had more of these 6…they were my favorites! Thanks for the improvement!
This is a wonderful idea. My Dad had a nice collection and of course I had to start a collection also. Mine are long gone but at least stamps are available to make these adorable ornaments.
Yes, stamps and these envelopes are readily available for cheap! I’d love to say my Dad’s collection is worth something, but so far I think they’re more valuable for crafting! My brain’s still churning…
Absolutely beautiful Lora. I would love some of these on one of my trees.
Thanks, Tuula! You’d have to find ones with pink and green graphics, of course;)
Those are so cool and special Lora. My grandpa collected stamps but i’ve not seen any of those envelopes like that.
Thanks, Tania! I’ve got a ton of stamps, too. Trying to figure out how to enjoy them, also…
Lora, I think these are the most adorable DIY Christmas ornaments that I’ve seen this year! Not only is the idea of decoupaging the vintage postal stamp envelopes into Christmas ornaments brilliant but how you decorated them couldn’t be more perfect. Especially with the trim and the glitter frost. Well done!
Thanks for your kind compliments, Marie! They were a really fun project to do! I hope my Dad enjoys them:)