
Trash to Treasure: Reviving Salvaged Built Ins
See How Old Salvaged Built Ins Get New Life with simple DIY in this trash to treasure furniture makeover
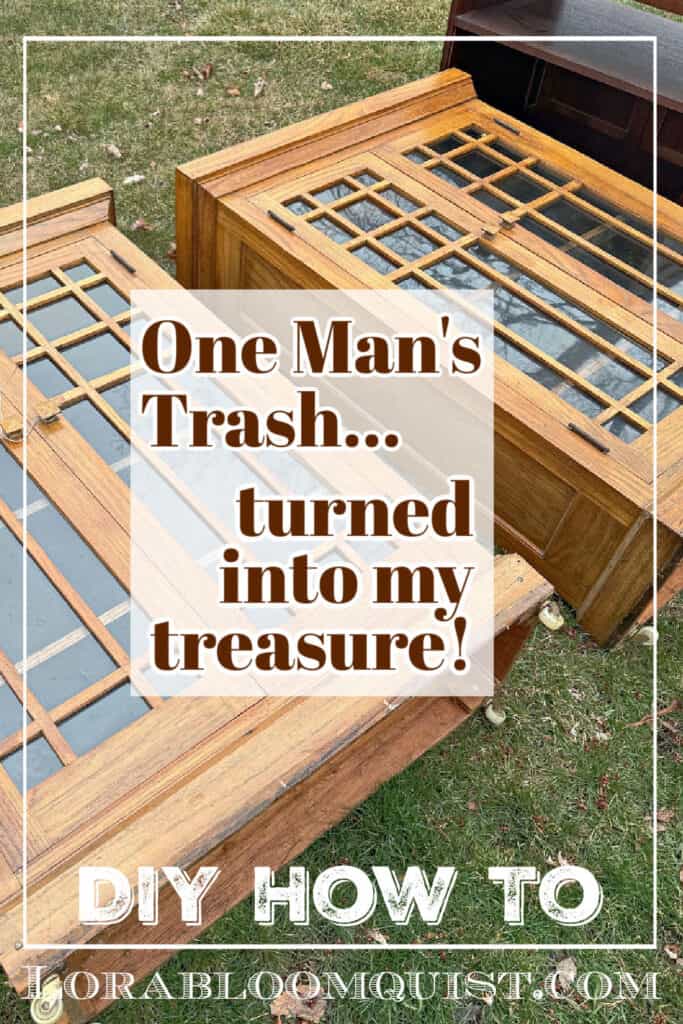
Remember all the amazing finds I found last Spring on curbside cleanup days? {see my haul in “Recent Vintage Thrifted Finds”}. One of the blow-my-mind finds were 2 craftsman styled built ins. They had just been brought out to the curb when I drove by. I stood there until I could get someone to help me get them home! Here’s their makeover, Trash to Treasure: Reviving Salvaged Built Ins.
Trash to Treasure: Reviving Salvaged Built Ins
For your convenience, this post contains affiliate links. If you make a purchase, I may receive a commission. There is no additional cost to you. “As an Amazon Influencer, I earn from qualifying purchases.” My full privacy policy is here.
First Off, Clean
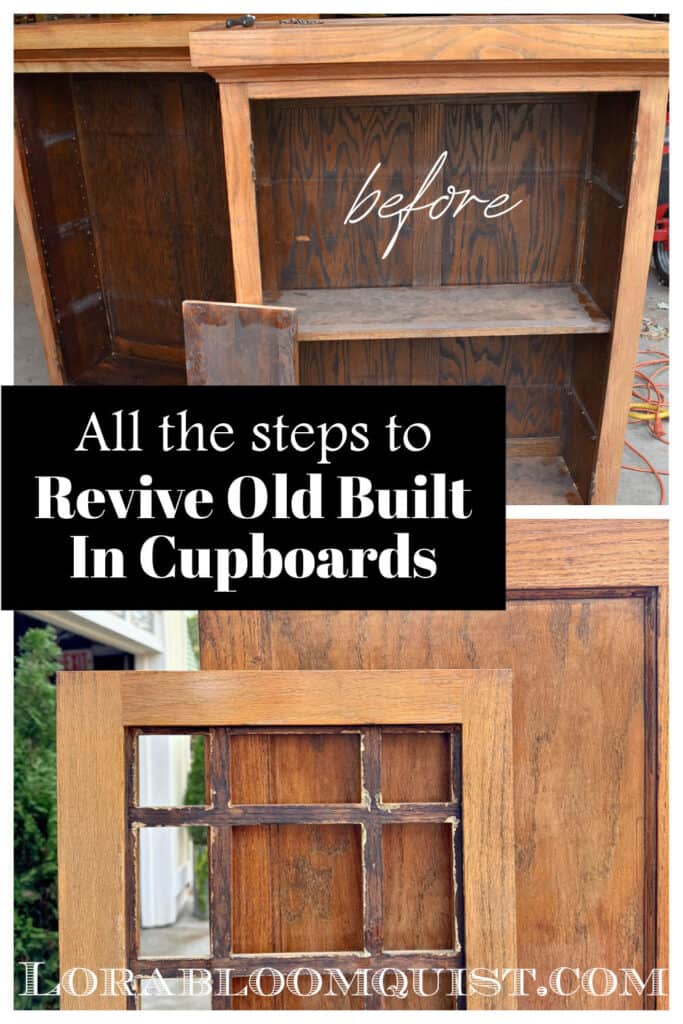
These built ins have been waiting for their makeover in the garage since Spring. First they needed a simple clean up.
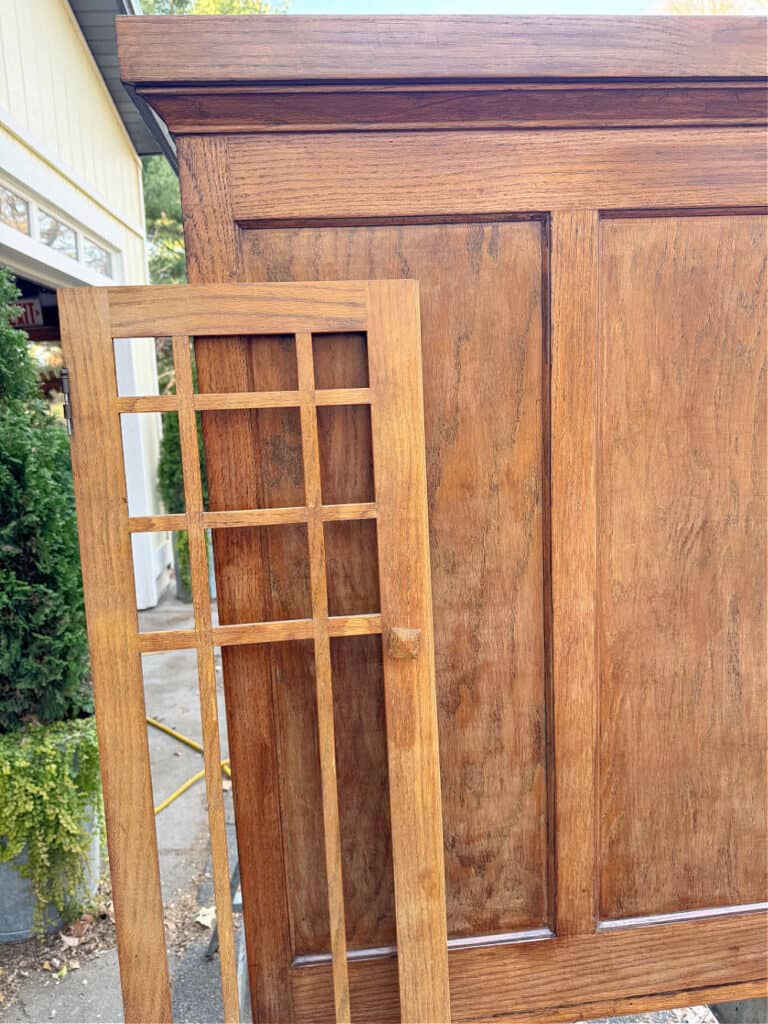
The glass in one of the doors was cracked, so I had Mr. Fix it take all of the glass out. I set the doors aside while I worked on the cabinets.
I wiped down both pieces and their shelves with white vinegar and warm water. The water was very brown when I got done.
The woman who had put these on the curb said they were taken out of her grandma’s house, 10 blocks away from where I had grown up;) She had intended on doing something with them, but was finally ready to pass them on. I assured her they were going to a good home and would indeed be loved.
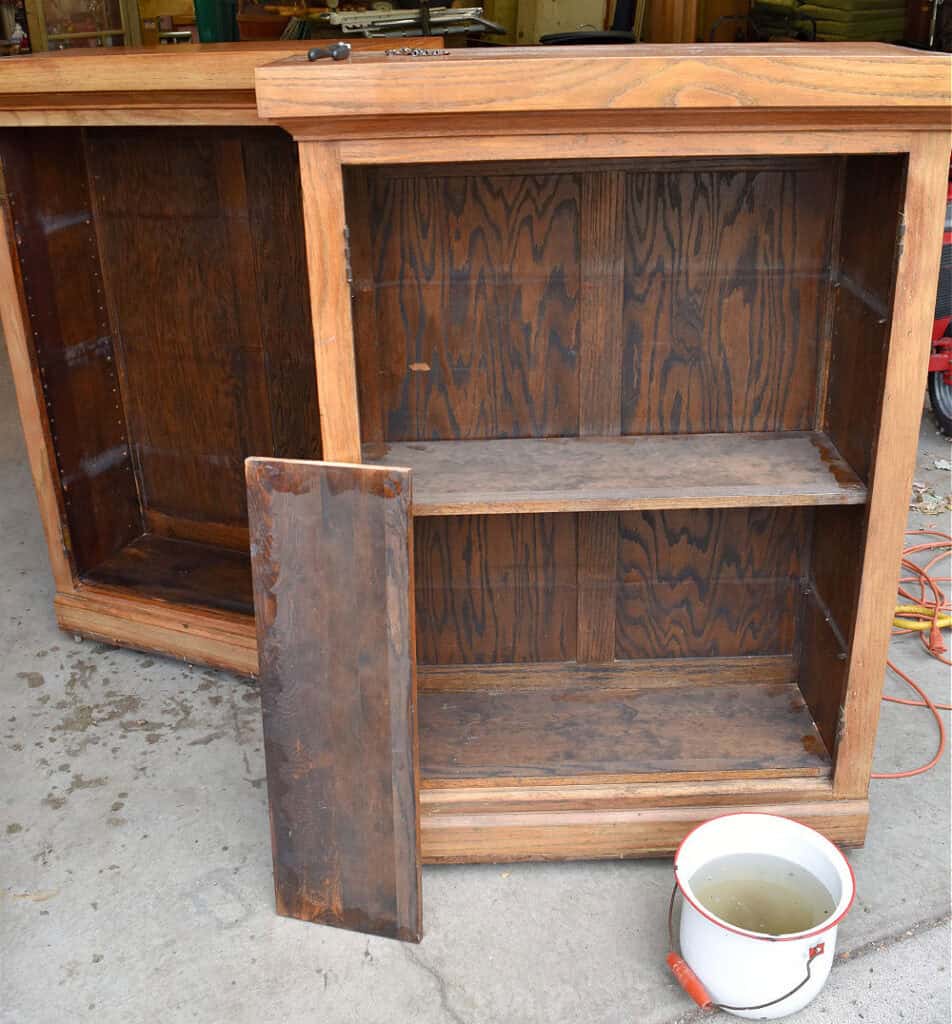
The inside is probably the original stain color, dark brown. These types of built ins were typically in bungalow styled homes from the 1920’s-1930’s. They were built in between the dining and living rooms. The doors on this set have craftsman styled details.
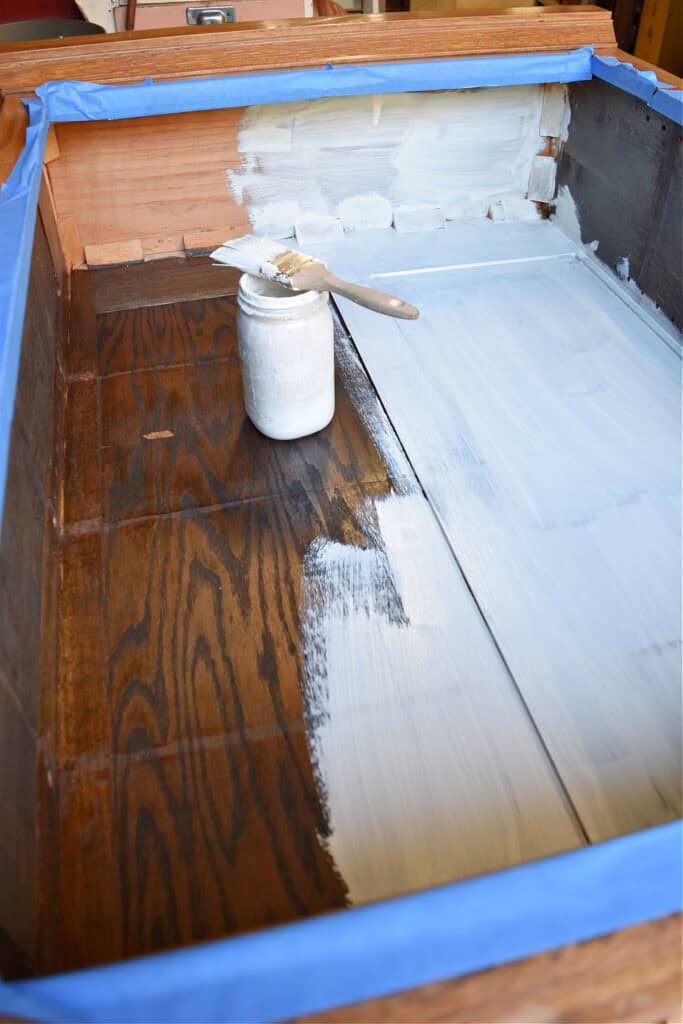
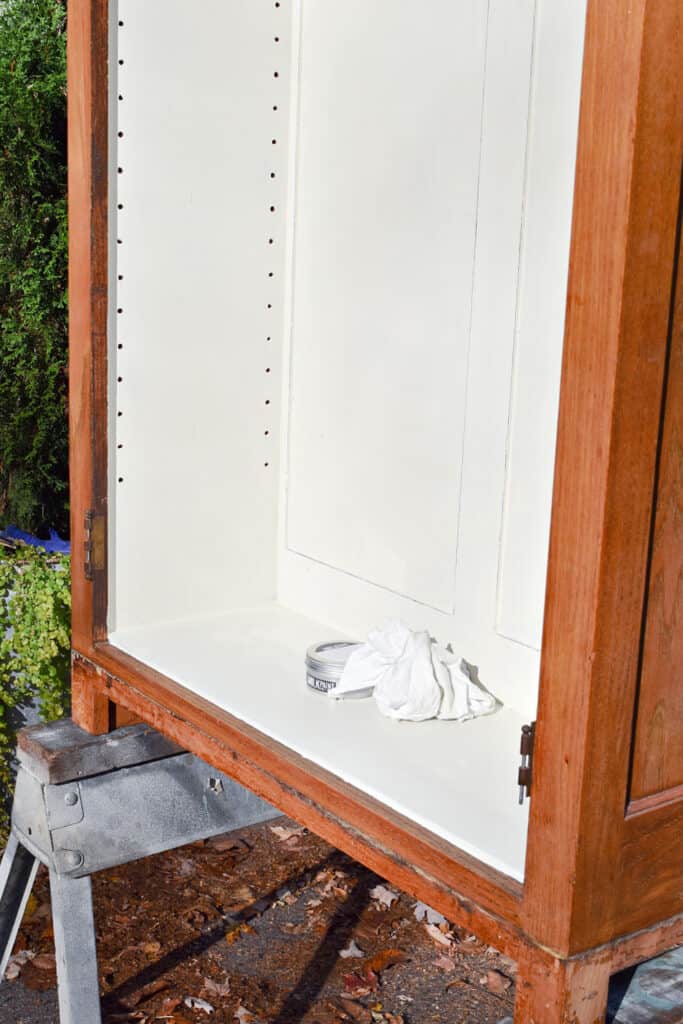
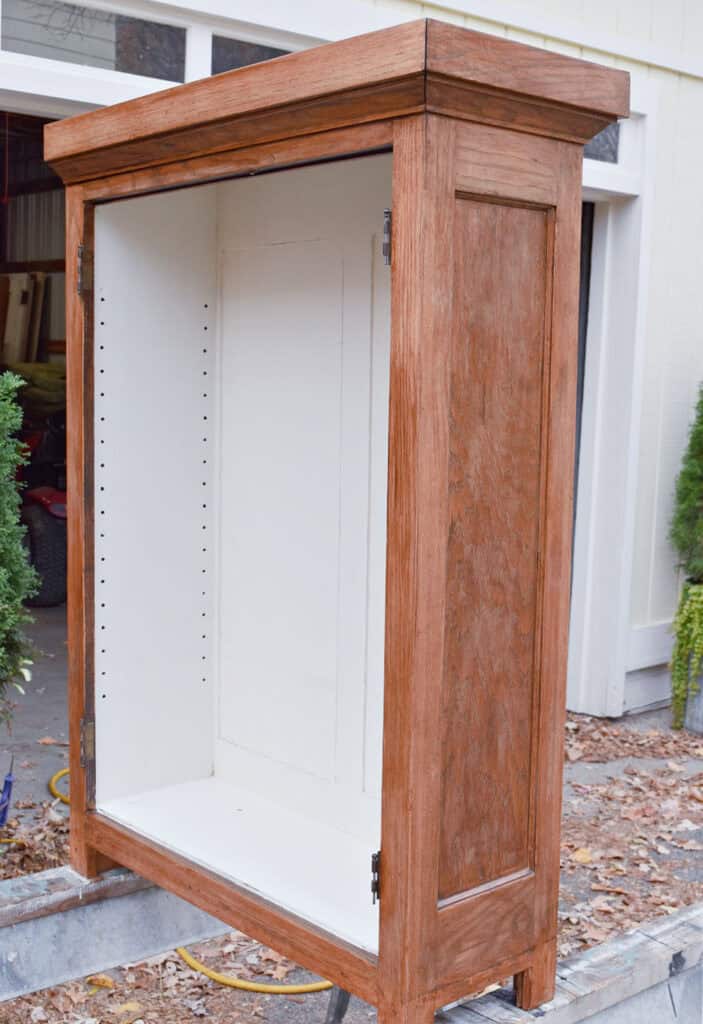
Reviving the Inside with Paint
Both Mr. Fix it and I agreed that the inside needed to be lighter so accessories could be seen and enjoyed.
I taped off the outside and brushed the insides with three coats of Miss Mustard Seed’s Milk Paint in Farmhouse White. (Find MMSMP HERE. Use code 10OFFLB for discount)
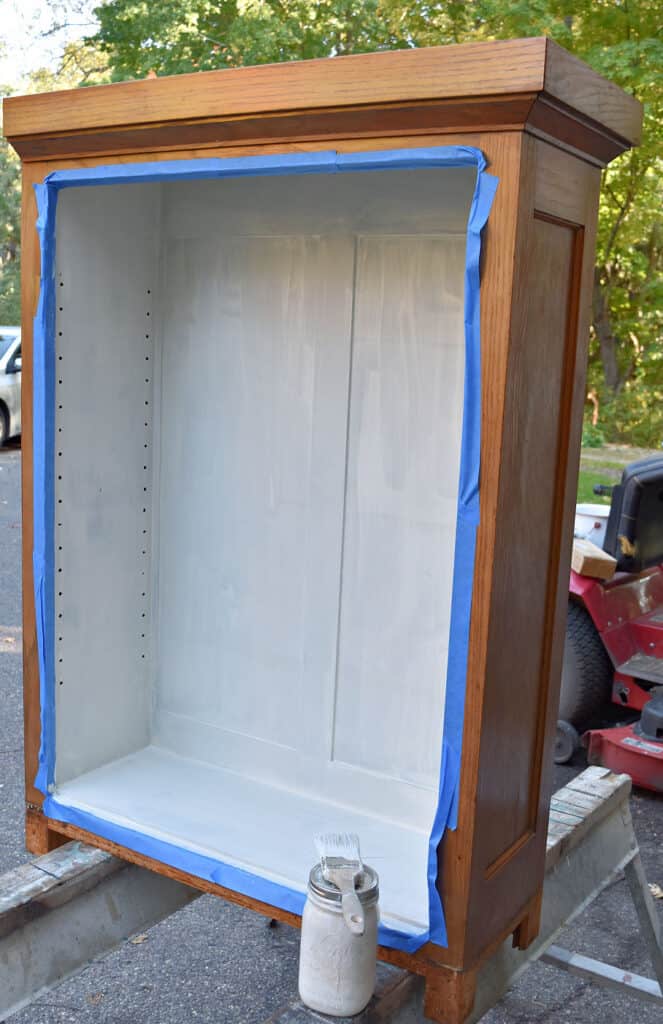
Once thoroughly dry, I used 220 grit sandpaper to lightly distress the details so the dark stain showed a little. I love to see the architectural details of a piece, because they don’t make them like this anymore!
I sealed by wiping it with Miss Mustard Seed’s Clear Wax for a smooth finish.
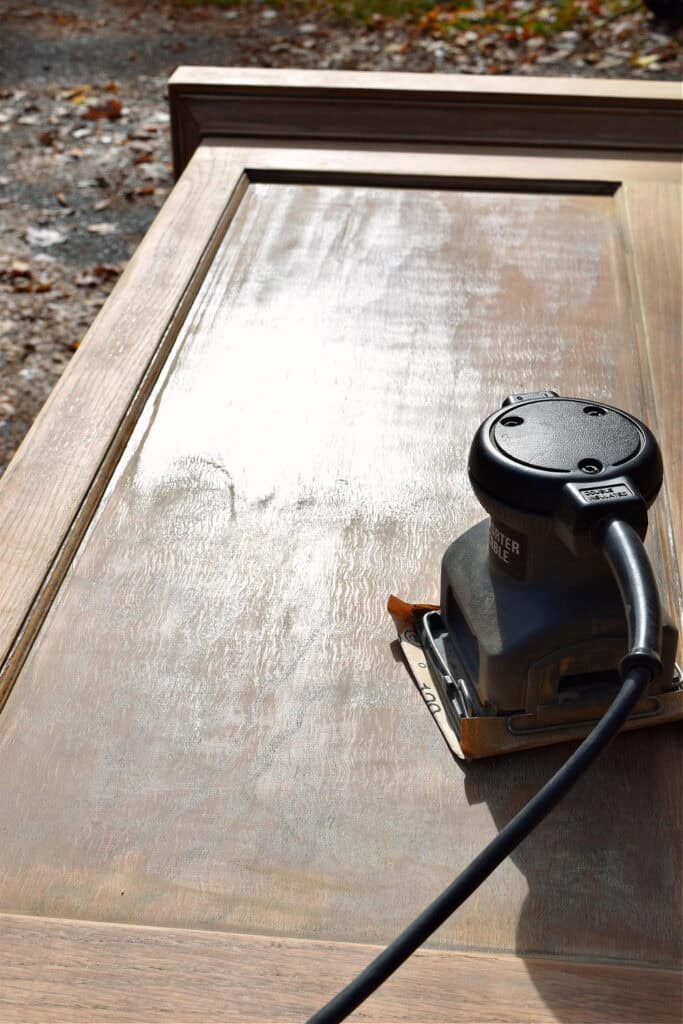
Refinishing the Cabinets
Next I got to work sanding the outside of the cabinets. There was a shiny shellac finish on that I’m never a fan of. I wanted to sand it enough to knock that off and open the grain so I could wipe a darker stain on. I used 100 grit sandpaper in my palm sander, mostly going with the grain of the wood. (find my Vintage Reviver’s Favorites and Favorite DIY Tools HERE)
Someone had obviously stripped these pieces when blonde furniture was the trend (probably the 50’s). I was hoping to get them to a nice, classic brown.
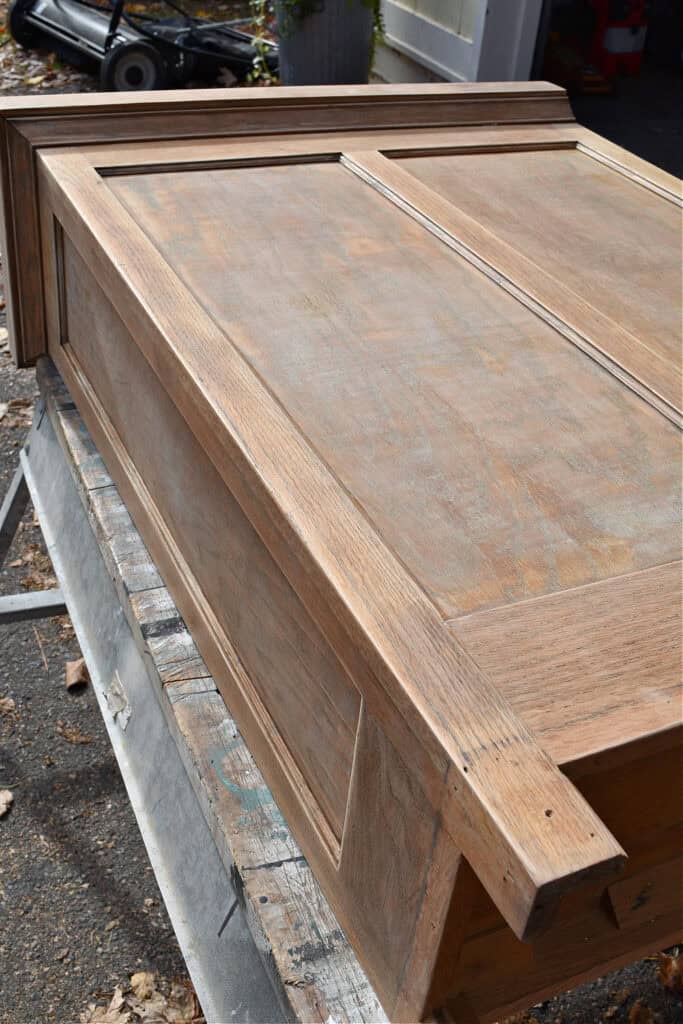
Once I’d blown off the sawdust with the compressor, I wiped on 2 coats of gel stain, drying 24 hours between coats. (I used THIS color first) I’ve always preferred gel stain to liquid; it’s so much easier to apply and control. I usually use a lint free cloth or a sponge applicator. Make sure you wipe thoroughly, so you don’t have streaks.
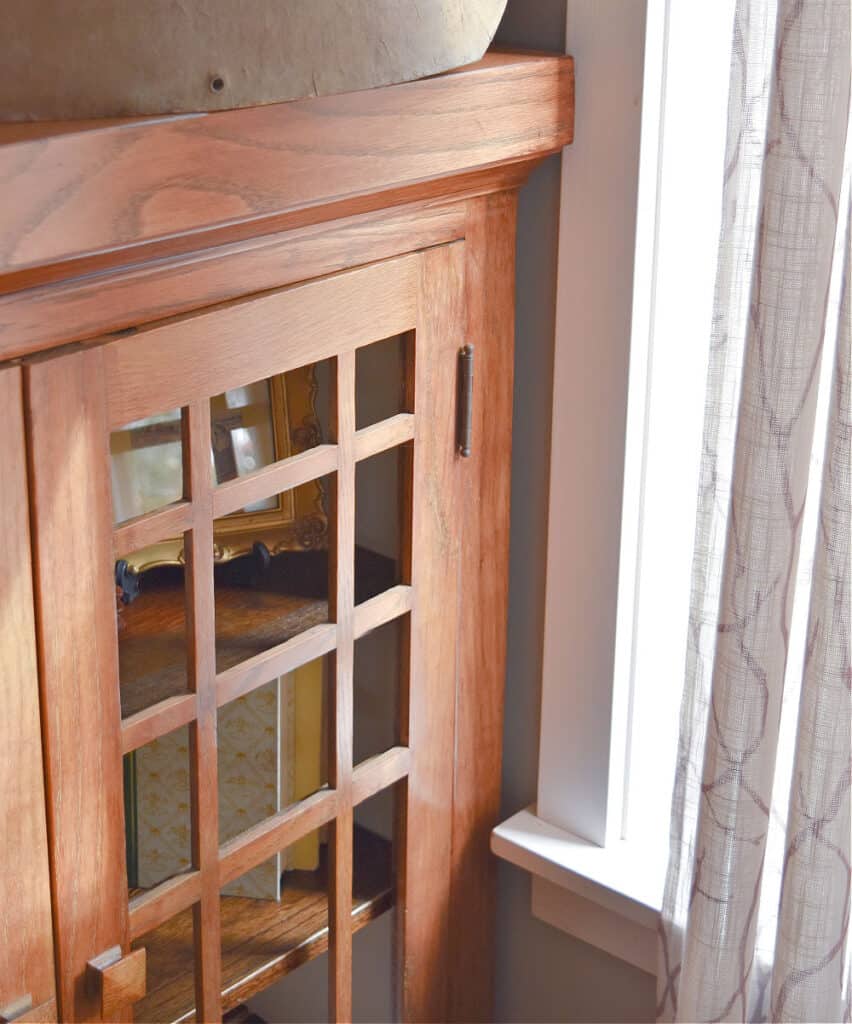
You can see the different stain colors here. The original stain is on the back of the doors. The blonde look is on the front. I wanted something in between for the cabinet bases.
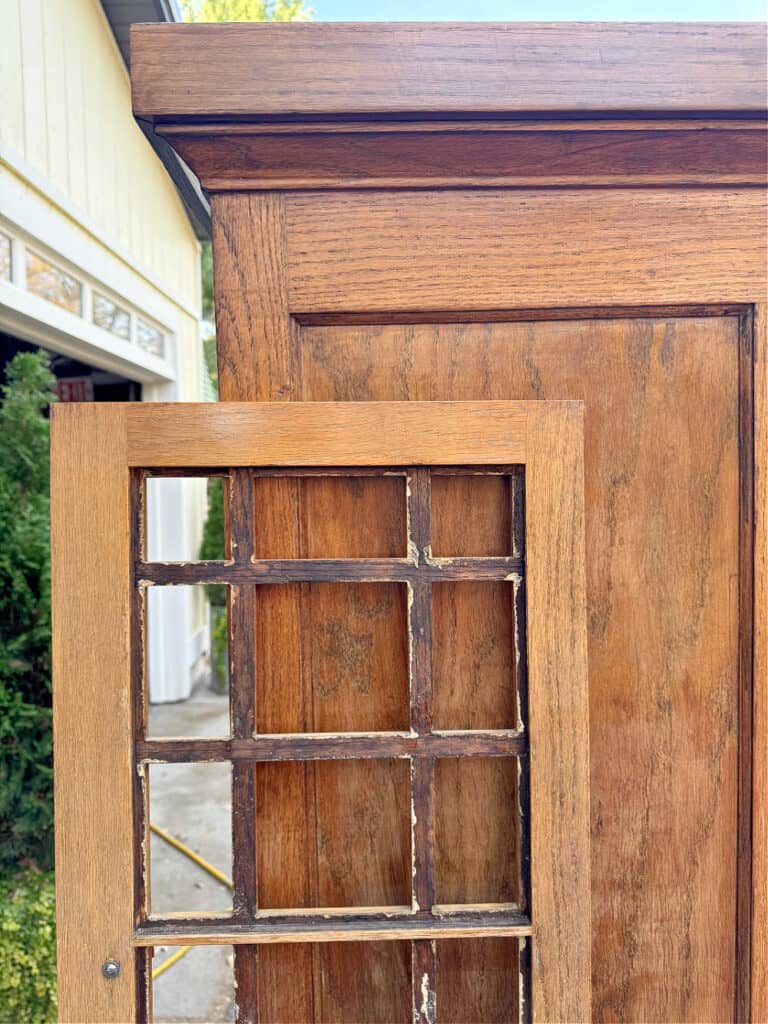
To get them a little darker, I sanded lightly (220 grit) and wiped on one more coat of walnut to darken the brown. (find it HERE)
Mr. Fix it had also taken off the base trim. We both liked them better without it; they look more like freestanding furniture.

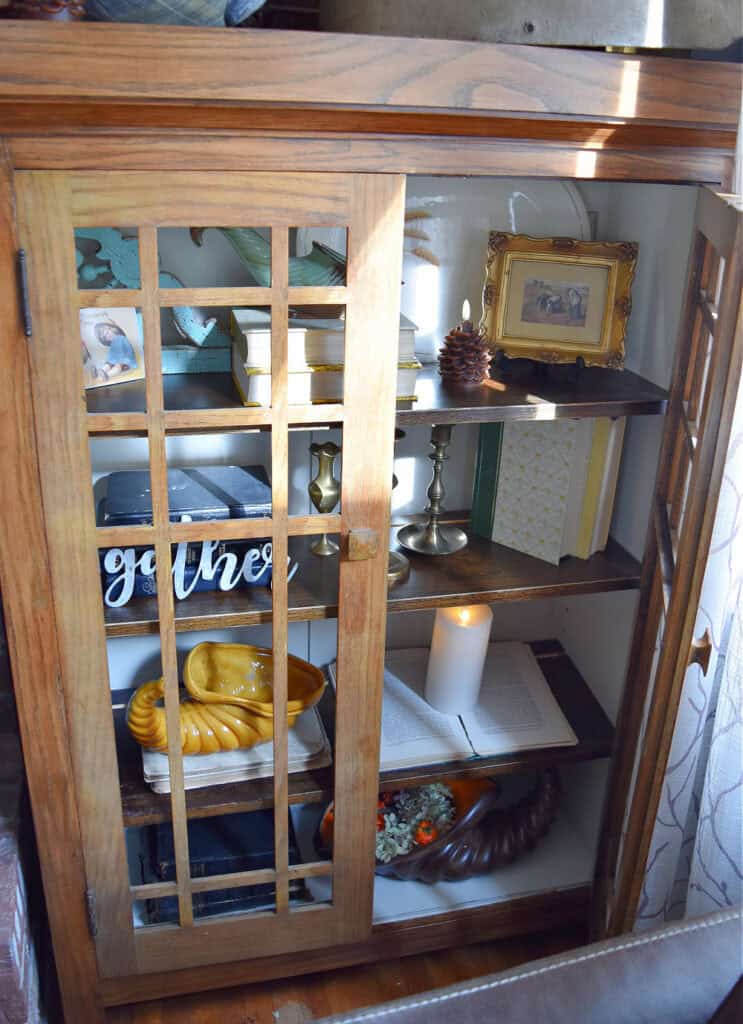
I love the paint/wood combo. Instead of painting the shelves, I decided it would be a nice contrast to just sand and poly them (and a whole lot easier).
When the stain was all dry, I brushed on two coats of satin poly to seal.
Placing the Salvaged Built Ins In Their New Home
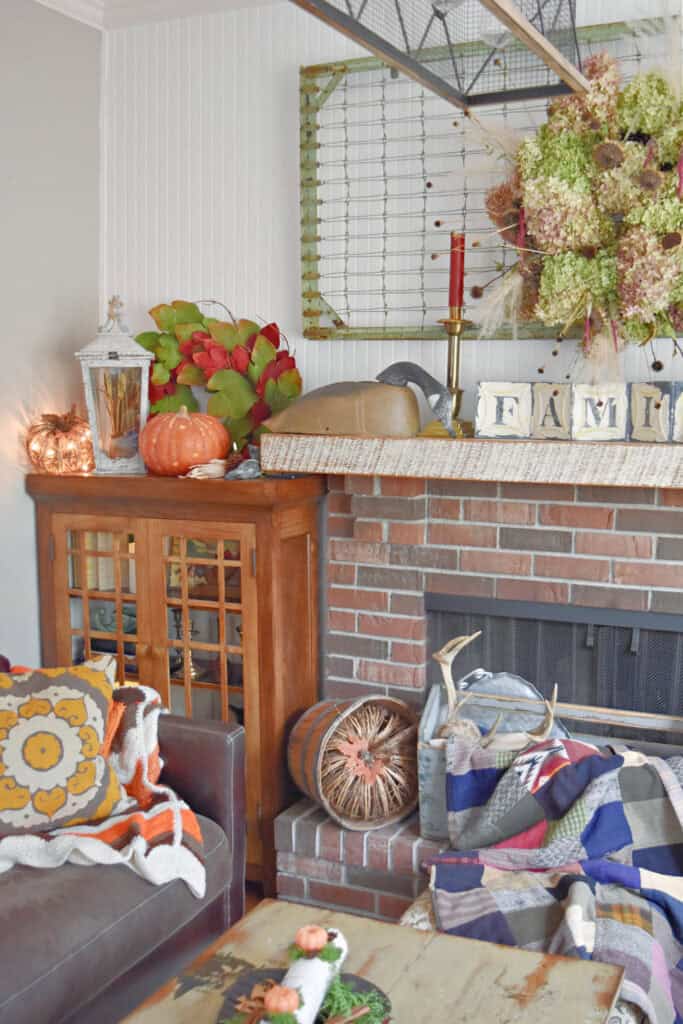
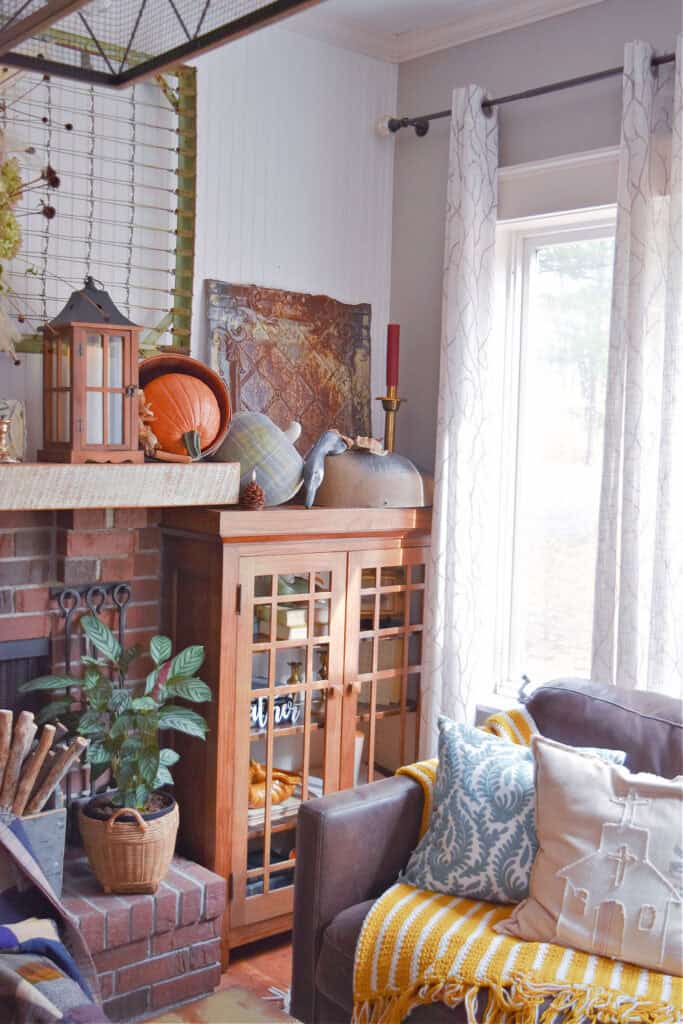
We had measured either side of the fireplace and it looked like they were going to fit perfectly. The one on the right side just barely made it between the window trim and the fireplace. We had to take the mantel off and lift it above to slide down into place.
And yes, I refinished these on all the sides, knowing we’d never see the beautiful backs. But I figured if we ever added on to this house, I’d build these into the entryway into a great room, so I might as well finish them now;) We also may like to have someone build a drawer that they would sit on, so they would be about 12″ taller than the mantel. The pretty doors could be seen better then, and the whole wall would look more built in. Always plenty of ideas around here;)
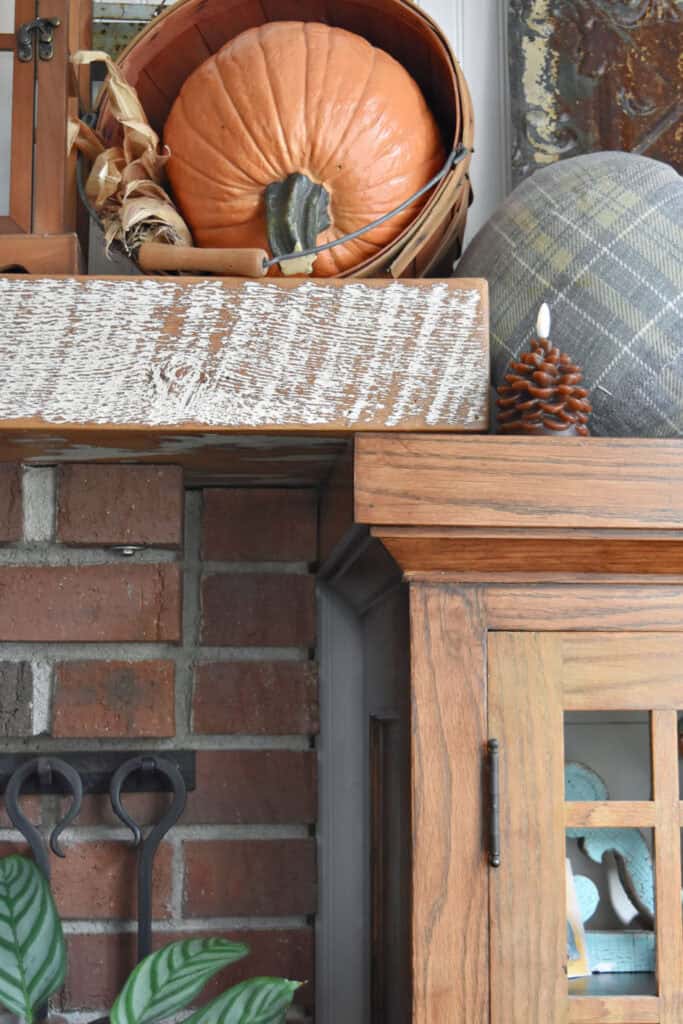
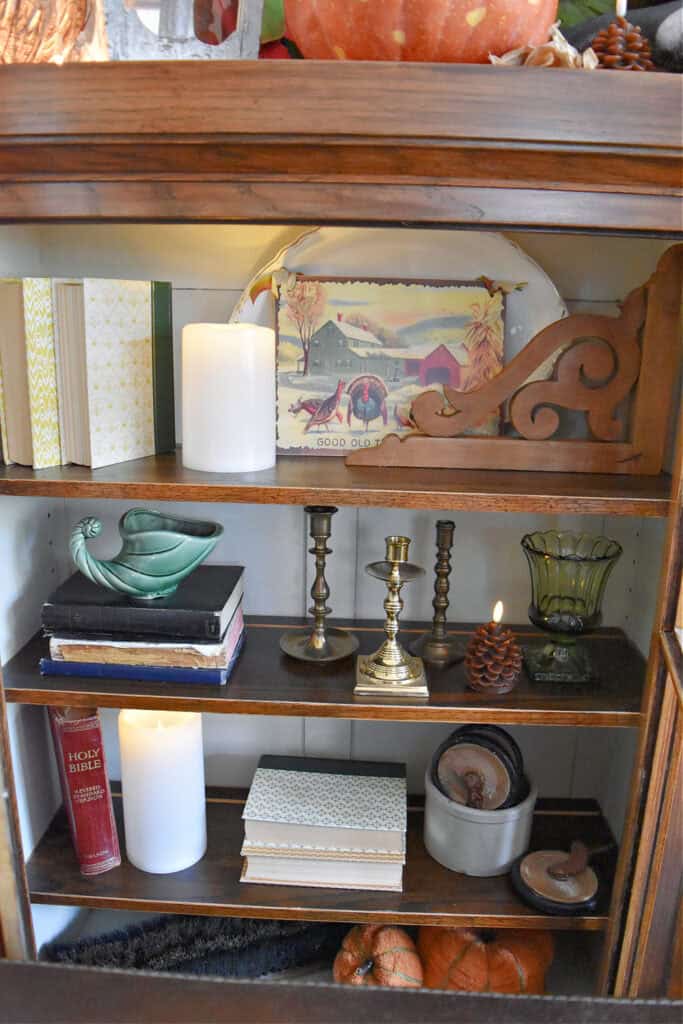
Adding Thanksgiving Decor
Of course I had to get started with some seasonal styling. I filled the new decor space with Thanksgiving decor-cornucopias, brass candlesticks, harvest colored books and battery powered candles.
Mr. Fix it also added a plate groove to each of the shelves, so I can easily stand plates and accessories in the back. Always a win!
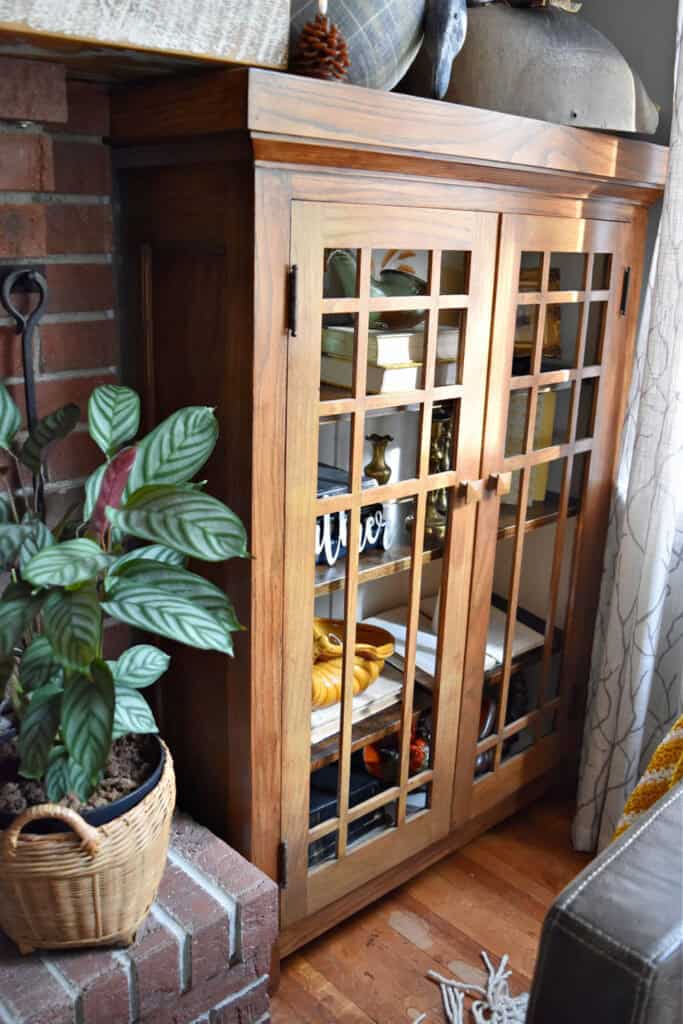
The style of these 100 year old salvaged cabinets perfectly fit with the style of our 100+ year old fake farmhouse. And I’m so excited to have two more cabinets to style for the seasons. (see “10 Styling Ideas That Make Glass Front Cabinet Displays Beautiful” for more ideas)
I ended up leaving the blonde look on the cabinet doors. I like the mix and match with the darker stain on the cabinet. Maybe one of these days we’ll get around to refinishing the floors:(
The whole end of the living room looks so much better with these beautiful salvaged built ins; what a find! They look like they were here from the beginning.
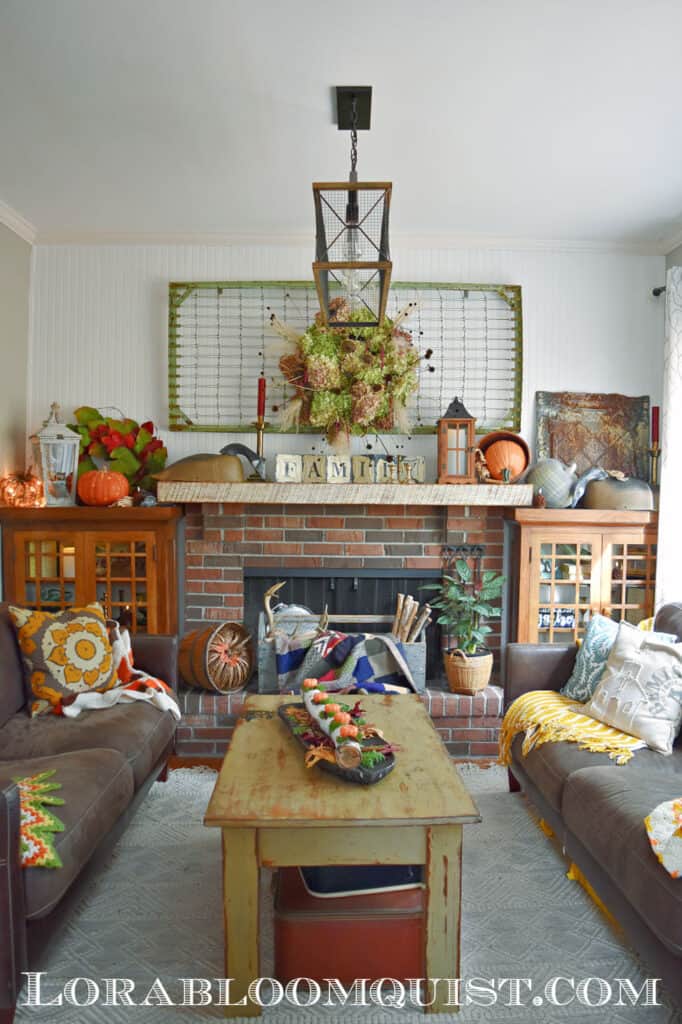
(yes, I store our duraflame logs underneath the sofa; sorry they’re wrecking the picture)
Don’t they look so pretty? And yes…I have a lot of vintage suitcases that are being spread all over the house now! I’m enjoying this look for a couple of days, but am ready to rip it all down so I can get my Christmas on!
Hope you enjoyed seeing this furniture makeover! Thanks for reading Trash to Treasure: Reviving Salvaged Built Ins. If you enjoyed your visit, be sure to Become an Insider so I can send the ideas right to you! You can Sign Up HERE.
Follow Me: LTK | Amazon | Pinterest | Instagram | Facebook
Pin and save

Sharing at these lovely parties:
They are so gorgeous. You did a great job with them! Amazing how they fit right into those spaces. Happy weekend, Lora
They fit like a glove, and we are enjoying them so much!
Your cabinets look perfect, but I’m really loving the bedspring on the wall. Something my hubby would never let me get away with. We have very little wall space anyway. I always enjoy your projects, glad you are keeping these. Sandi
I tried to sell that bedspring in my store years ago and no one could see the potential. I love being able to switch up my decor without putting a bunch of holes in the wall:)
They did turn out beautifully. You did a great job of making them over. They look great by your fireplace.
Thanks, Marlene!
It’s like they were made for your gorgeous home. Bravo!
Thanks, Laura! Yes, they look like they were original to this house;)
Gosh I cannot believe how they fit like a GLOVE!!! Holy cow…meant to be!! They look beautiful….such an amazing find!
One of the best finds ever, I think! (and that’s saying something for me;)
They look nice Lora , not a whole lot of difference but look good . And you could put the duraflame logs in a basket since you mentioned them.
Thanks, Teresa! They are a classic, so yes, I just revived them a little. And yes, I could put them in a basket:)
Thank goodness for the warm fall weather to get these cupboards back to glorious! It does look like they were always in your home and I think your living room looks larger now. I like how you kept the door panels a different color.
Do you think you will ever put glass panels back in the doors?
Have so much fun styling these for Christmas!
Yes, I agree, our little living room definitely looks more important now! We’re keeping the glass safe, but so far I do enjoy seeing the decor inside better. And for a blogger who’s always taking pics, it’s nice to not have to worry about that glare;)
They fit perfectly and turned out amazing. It is incredible what you find on curbs. We never see that here in Tennessee. Great job.
Thanks, Miche. Yes, I was crazy excited when I found them!
What a great find! They look like they belong in the space!!
Thanks, Margie! Yes, they are right at home in this house:)
What great work you did to restore these valuable cabinets. Thanks for sharing!
Thanks, Debbie! We are enjoying them.