
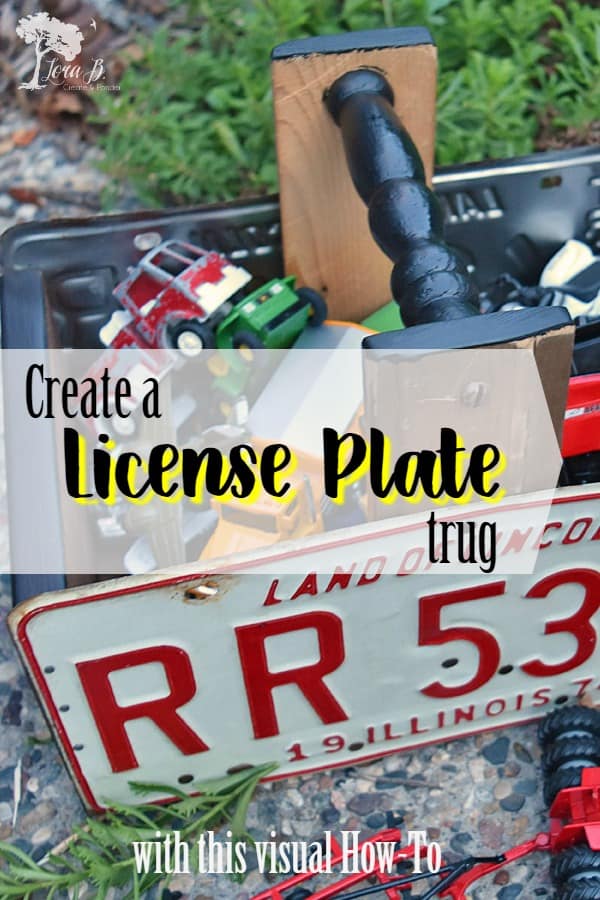
License Plate Trug How-To
It’s time for another Thrifty Chicks Challenge! And this time these creative junkers and I challenged ourselves to make something with or inspired by license plates! I’m going to show you how to DIY a fun License Plate Trug.

I’ll show you their “befores” and link to all their projects at the end of this post. I can’t wait to see them all!
Luckily, I hit a great local estate sale a while back where the homeowner had lived in several states and was an old car buff! I had to pick my favorites, because there was a whole box of license plates from the 1970’s! Yes…junker heaven! And so many fun colors!
Mr. Fix-it and I created what I like to call a “License Plate Trug”. When I sold these at my former store everyone always asked, “What the heck is a trug?”. So I will provide you with a definition:
trug: -noun, British, a shallow basket for carrying flowers, vegetables, etc., made from strips of wood.
O.K., our version doesn’t have wood strips…but I’m still going to call it a trug!
And I’m sorry, my directions are kind of like my cooking…never really exact. “A little bit of this, a little bit of that…”
Because this project is really meant for you to use whatever you have laying around. Just like the old handymen used to make their workroom organizers out of anything they had available. Fortunately (or unfortunately) we have a lot available in our garage;)
Here’s what your final project should (kind of) look like:
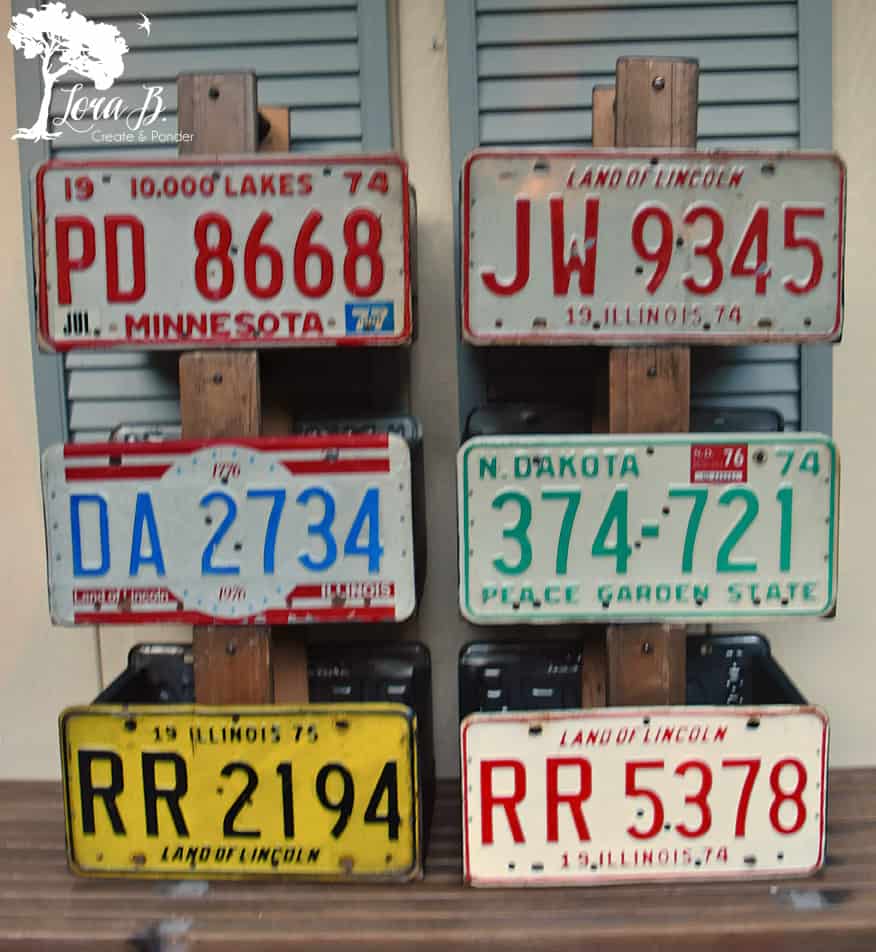
(Sorry for the blur…think I was past dusk on this photo)
And no, they’re not connected in this pic, just stacked. I have quite a few to have fun with;)
Here’s how we make them in collage form. I’ll explain the steps down below.
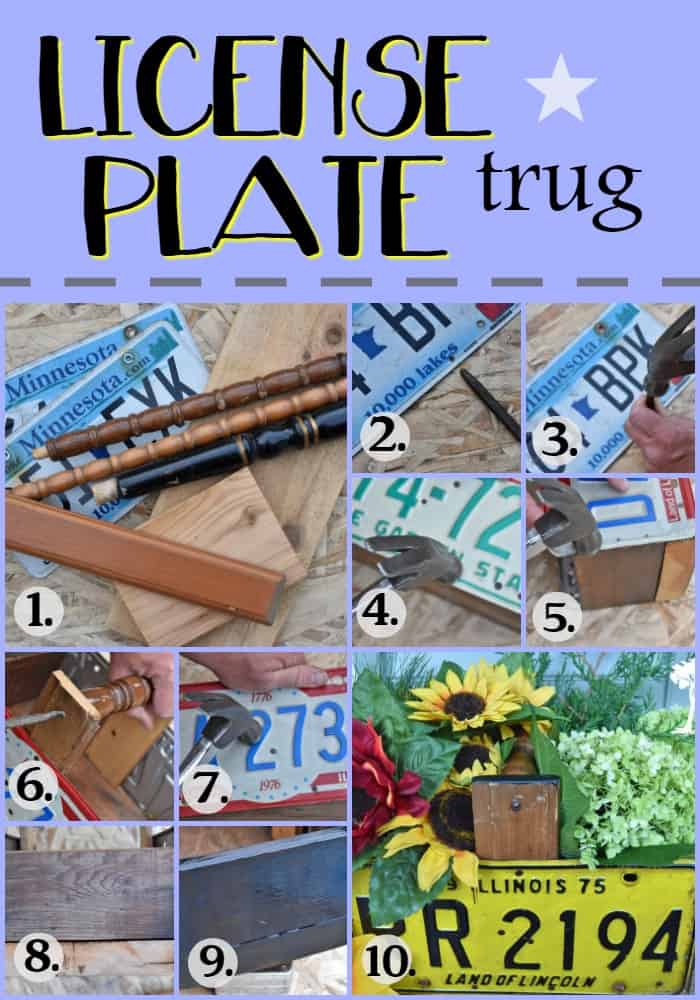
- Gather your materials: 2 license plates for the sides, a 1″ or thicker board for the bottom ( ours is cut at 12″ x 7″), 2 boards for the ends (7″ x 3 1/2″x 1/2″), 2 boards to support the handle (ours is 7 1/4″ x 2 1/2″), the handle (an old chair leg works great), cut to fit in between. Old nails.
- This is a centerpunch.
- Use a centerpunch with the hammer to make 4 holes in the long side of your license plate, evenly spread across the span.
- Nail your license plates on either side of your base board.
- Do the same for the ends, fitting them in between the license plates and fairly tightly to the bottom board. Our side boards did not go all the way to the top edge; they were 1/2″ shy…just because ( or maybe Mr. Fix-it had a reason;)
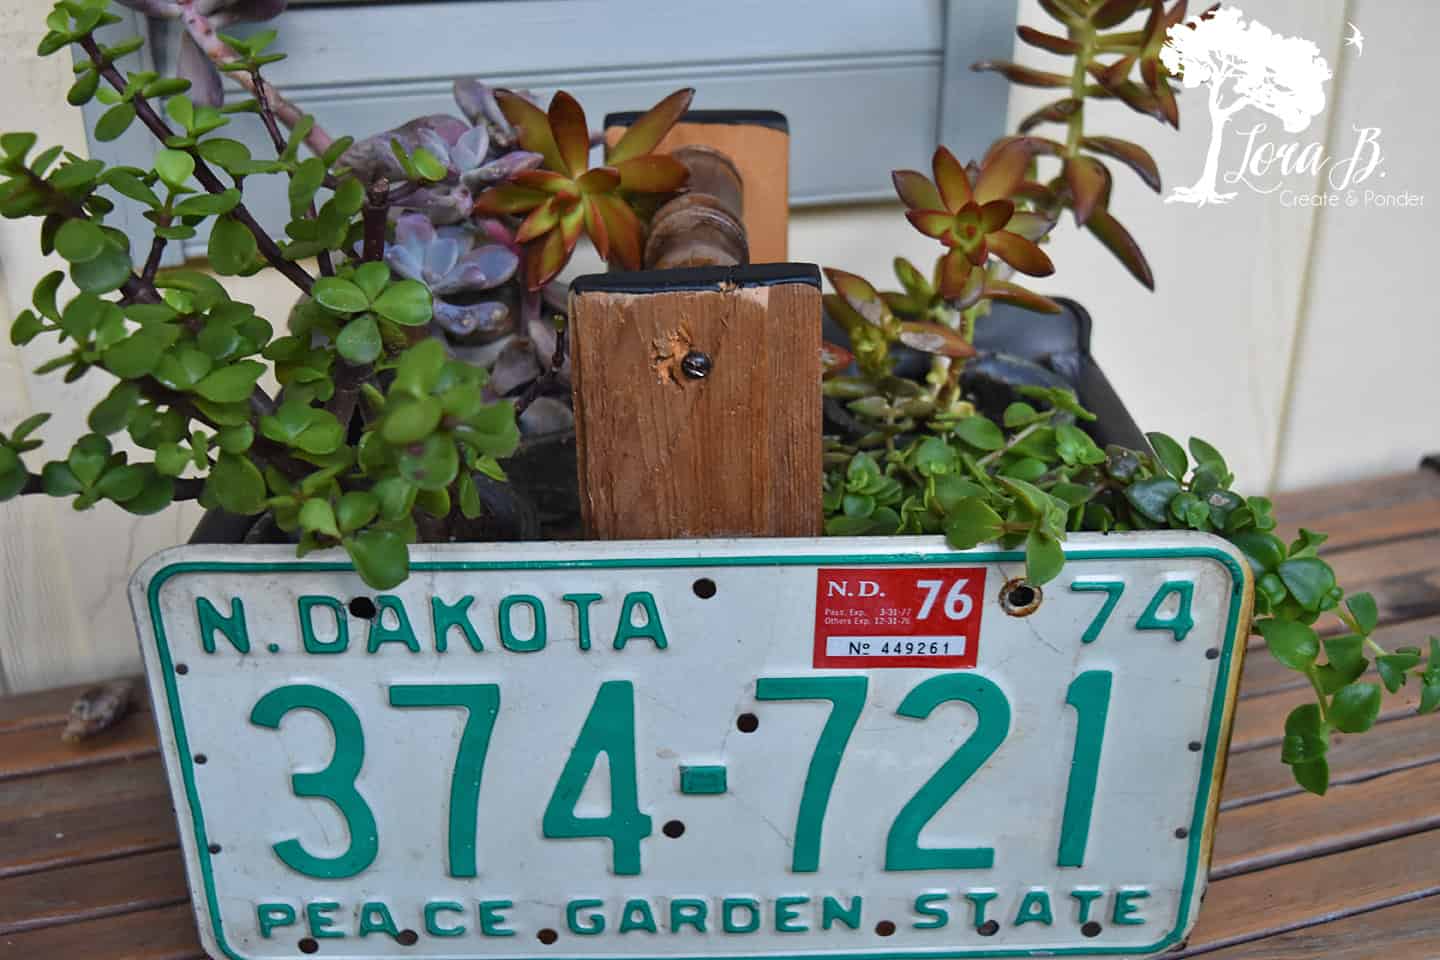
- Attach handle supports the same way with punched holes and nails. Predrill holes in spindle and attach with an old screw.
- (Attaching handle supports)
- Sand ends and rough spots.
- Paint ends and whatever other parts you’d like painted. I used black chalkboard paint and left the handle supports rough, sealed with poly. You could coordinate paint colors with your license plate colors, or just go neutral like I did.
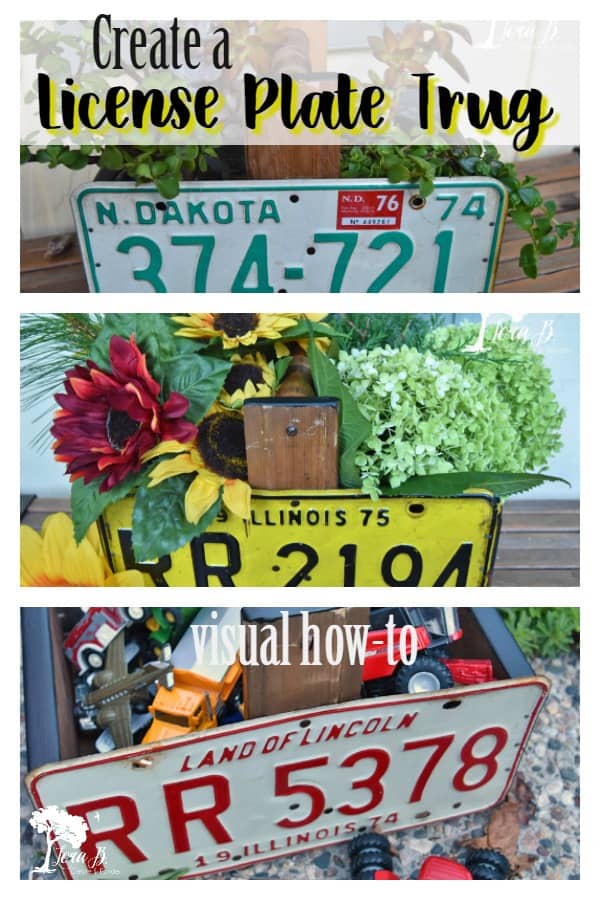
- The finished project! Decorated for the late-summer season!
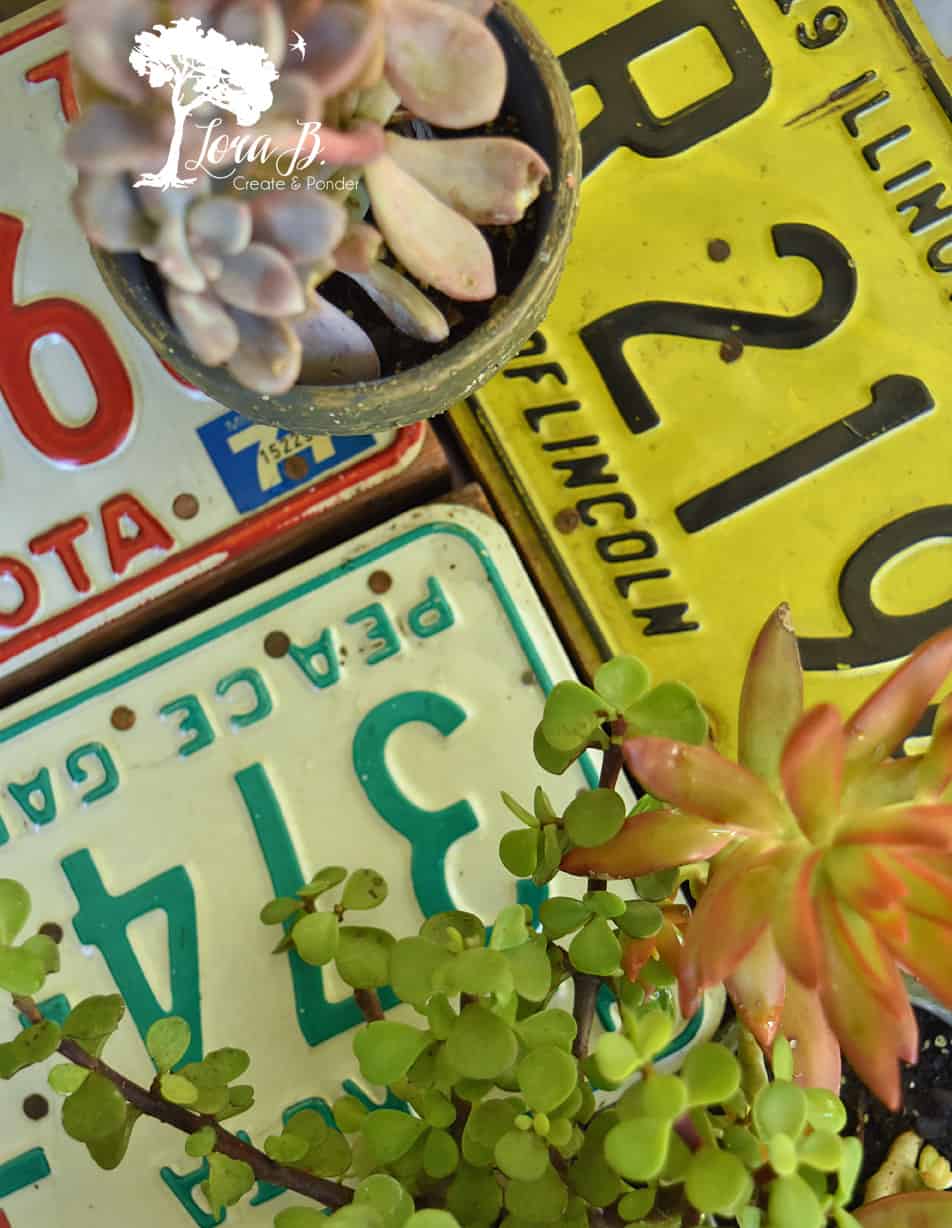
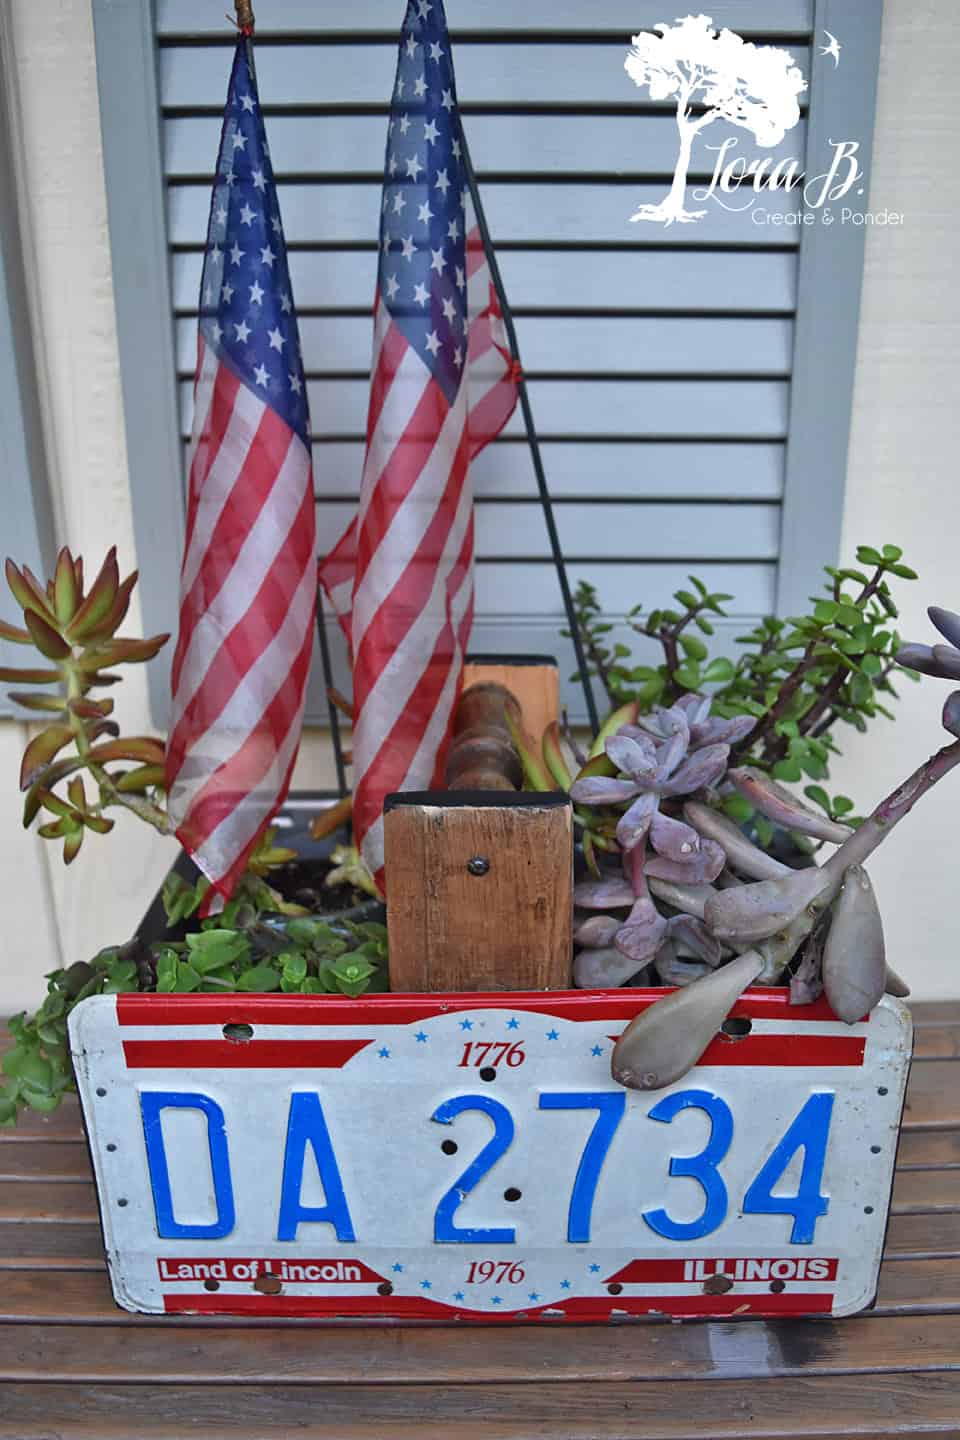
Depending on the license plate colors you use, you can style these trugs for the seasons. I’ve been thinking I should drill some holes in the bottom, line it with heavy plastic, and plant some succulents in one for the summer months:
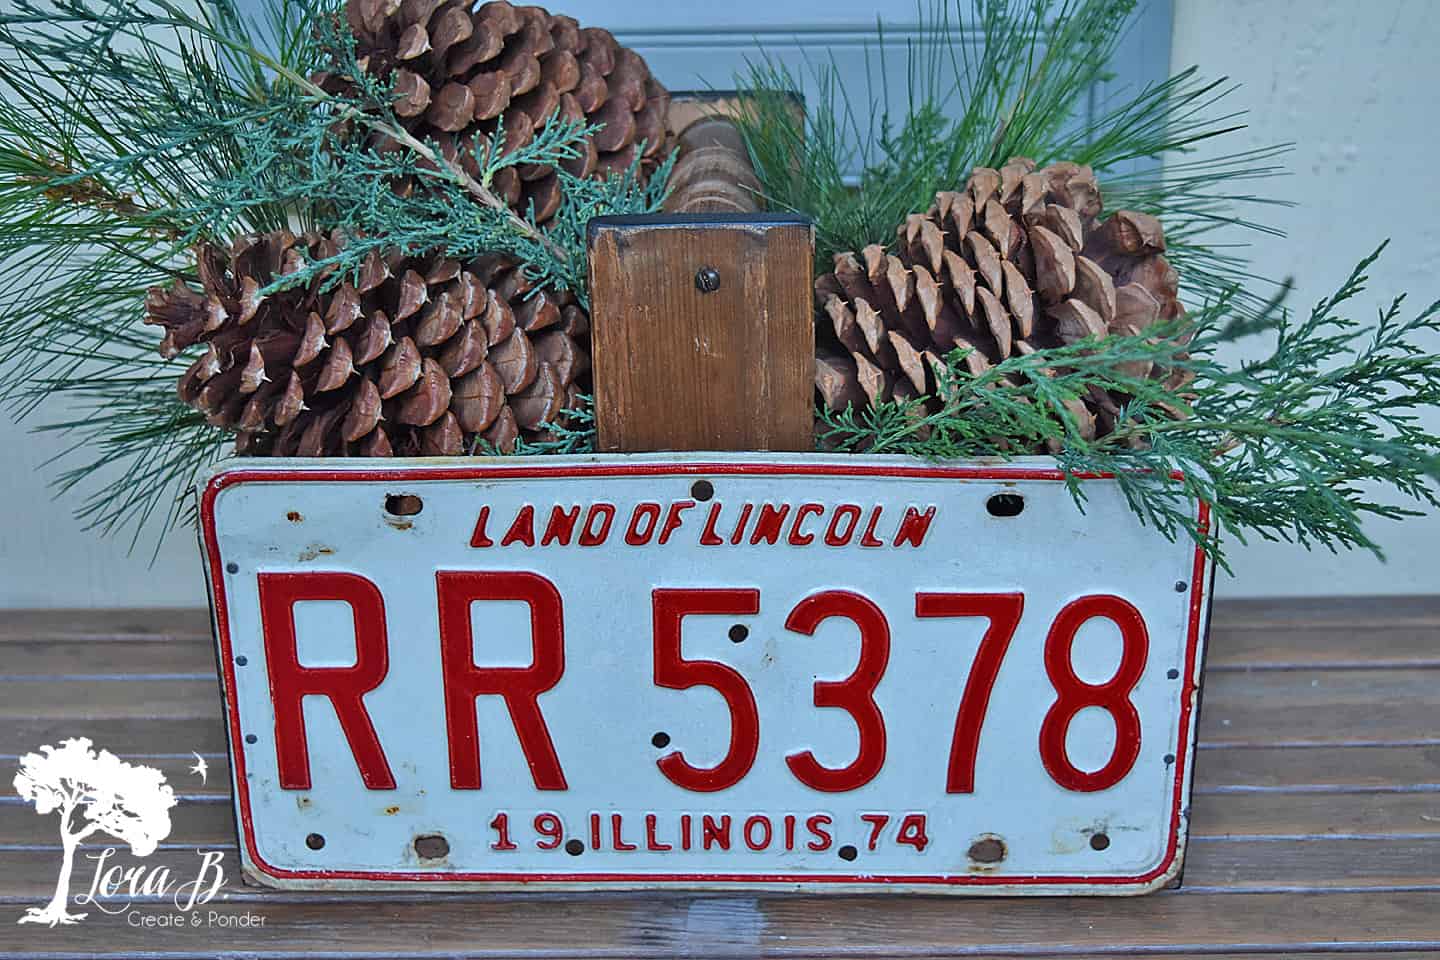
If you craft one that has Christmas colors, decorate it with some pinecones and greens for on your porch:
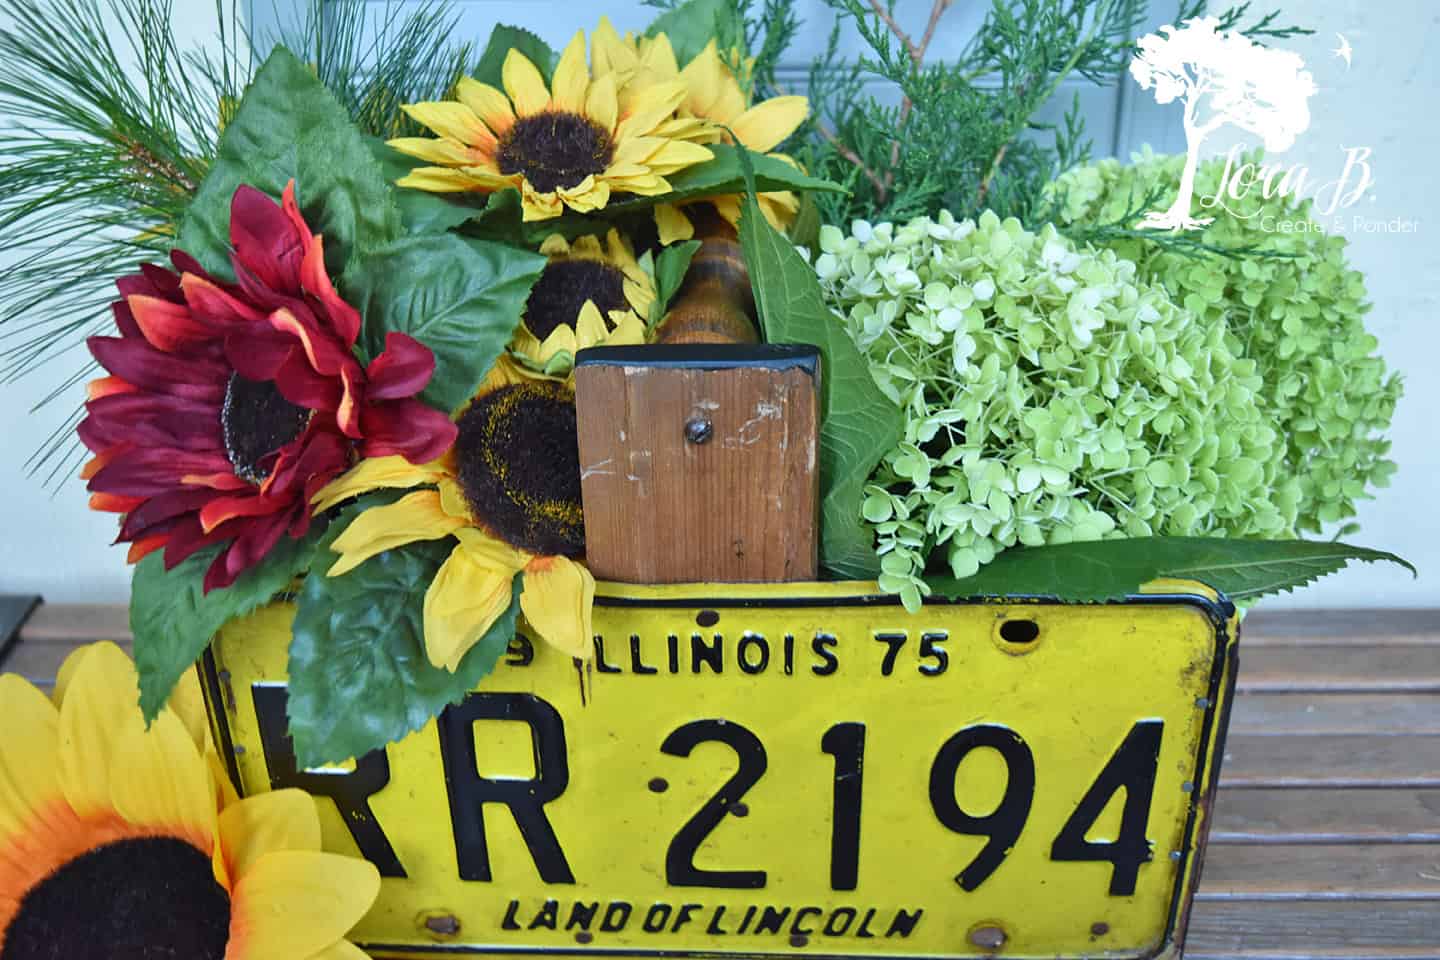
For this time of year, I love sunflowers, with their warm golds and browns:
And if you’ve got little boys in your house…they may hijack your well-styled junky creation:
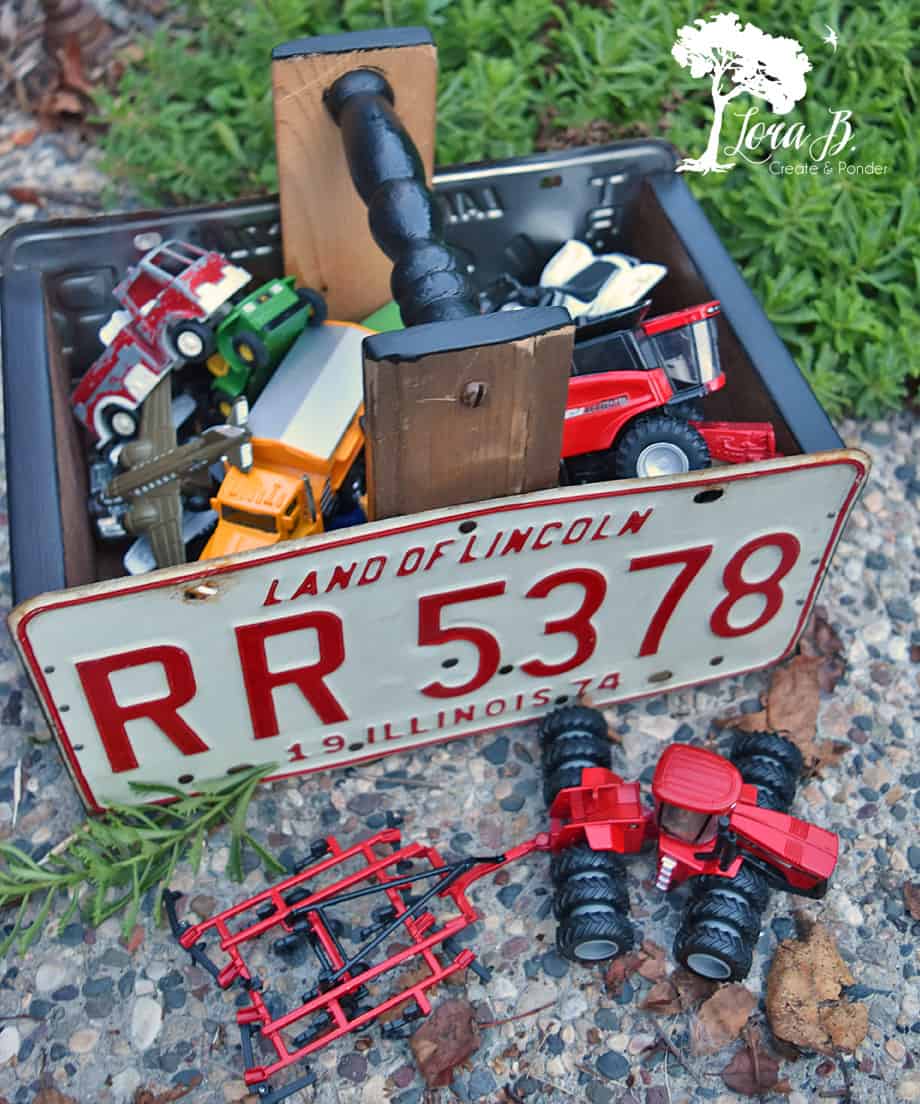
And they do look pretty perfect filled with a bunch of play cars and trucks…or legos…or playmobile…
And you could even grab some chalk and write on the ends, if you use chalkboard paint, like I did!
Pick your favorite Pin and then check out the rest of The Thrifty Chicks license plate projects below!


- Debra at Shoppe No.5, “How To Make A Welcome Sign”
- Diana at Adirondack Girl @ Heart, “A Vintage License Plate DIY for the Man Cave”
- Me;)
- Marie at The Interior Frugalista, “License Plate Art”
- Tania at Little Vintage Cottage, “License Plate Yard Art”
- Tuula at Thrifty Rebel Vintage, “How to Make a License Plate Windchime”
Hope you enjoyed all our license plate projects! Next month’s theme is chalkboards…perfect for back to school!
And if you missed our other Thrifty Chicks themed projects, you can find them here:
Chair Theme: “Leg-O-Matic Chair Refresh”
Kitchen Theme: “Sewing Machine Drawer Kitchen Organizer”
Sharing at these lovely parties:
Very Creative! I love this idea! Thank you for sharing!
Hugs,
Tiffany @ teediddlydee
Glad you enjoyed it, Tiffany!
Yea, Tania! So glad I’m not the only one with the trug vocabulary! Thanks!
I didn’t know what a trug was but I do like your version. Plus you styled them so nicely. I can see how these can be used in so many ways.
I just didn’t want to get a bunch of comments of people asking what a “trug” is, Debra! Guess I thought everyone knew that word! Thanks. These are pretty fun to have around;)
Awesome project, Lora!! I LOVE your styling of them. Can’t decide which I like better the Illinois with the pine cones or the Illinois with the flowers. If you were selling these, I think they’d go like hotcakes 🙂
Thanks, Diana! All the ones with MN licenses sold, of course. These were my leftovers;)
I’ve never heard of a Trug before. Now I want one or two or three. I especially want one for my grandson’s room at our house to hold his toy trucks, like yours. I love these Trugs and their many uses! You rocked this challenge, Lora! Pinned and sharing
Thanks, Marie! They are kind of fun for little boys to carry around their toys with-plus they look cute when they put them away-win/win!
Love your trugs Lora! I had never heard that term before and it’s always fun to learn new things. Your plates are all so colourful and these trugs can be used in so many ways.
Thanks, Tuula! I do love the variety of colors, too! Lots of decorating possibilities!