
How to Repurpose a Vintage Buffet into a DIY Bathroom Vanity
great how-to tips to repurpose a vintage buffet into a beautiful DIY bathroom vanity.
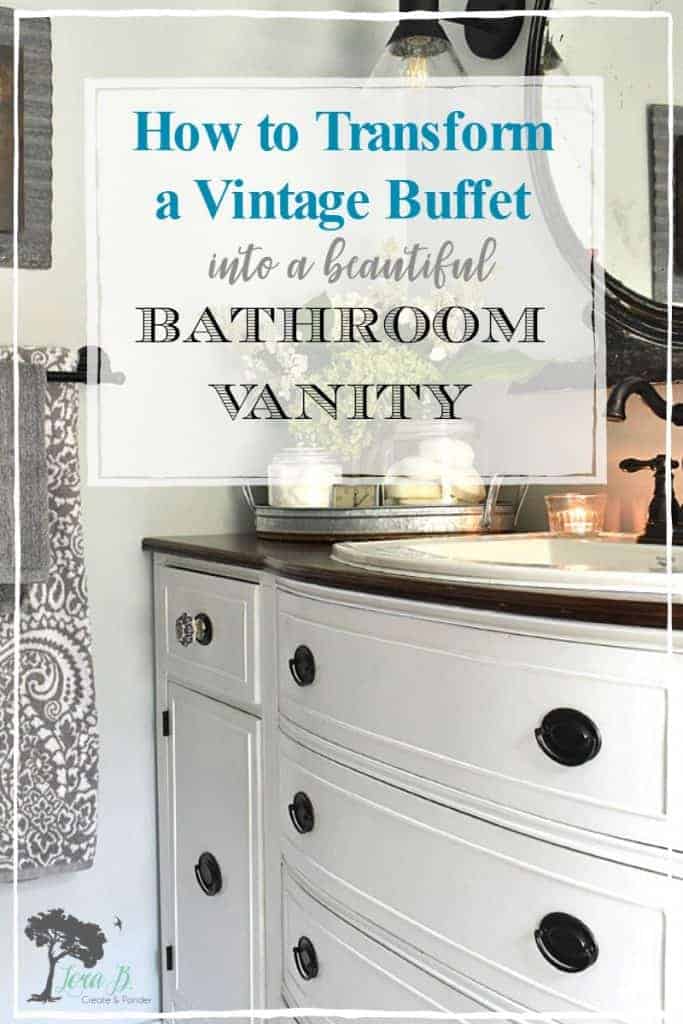
When you remodel an old house bathroom but still want to keep the vintage style, you need to be creative. For our DIY bathroom makeover we had to make choices whether to use some truly old pieces or install new. You can see the finished bathroom in “Vintage Modern Bathroom Remodel Reveal”. I gave up on the idea of using the antique clawfoot tub I’d saved for 17 years, but I’d always wanted a piece of furniture in the bathroom. Today I’ll share the many steps it took to make that dream happen! But the beautiful and functional results of How to Repurpose a Vintage Buffet into a DIY Bathroom Vanity was so worth it!
Choosing a bathroom vanity was one of the last steps in our DIY bathroom remodel process. When we were getting close, we went shopping at the big box stores to take a look. We both were amazed at the prices and the low quality; we definitely needed to be creative with this last piece of the job.
Instead of buying new, I turned to Facebook marketplace with the measurements we were looking to fill. I found a vintage buffet that was a part of a garage sale. Despite smelling a little musty inside, I loved the curved front, the tall height and the details. This piece could turn the whole bathroom into the WOW that I wanted it to be!
Here are the steps we took to transform an old $145 garage sale buffet into a gorgeous and totally functional bathroom vanity! (And by the way…that’s spending a lot for me; I usually pick up furniture pieces for free in curbside piles;)
How to Repurpose a Vintage Buffet into a DIY Bathroom Vanity
For your convenience, this post contains affiliate links. If you make a purchase, I may receive a commission. There is no additional cost to you. My full privacy policy is here.
First, Get Rid of the Musty Smell
I was nervous about the musty smell in this old buffet. This piece was going to be permanently installed in our bathroom and I am touchy about bad smells. I usually steer clear of musty pieces, but this piece was so perfect for the room.
While it sat in the garage, I put charcoal briquettes in every drawer and the cupboards, and closed them all. The charcoal absorbs the musty smell. This can also be done with kitty litter, too. There’s also a product called Damp Rid (you can get it HERE).
Next, Take off Hardware and Sand
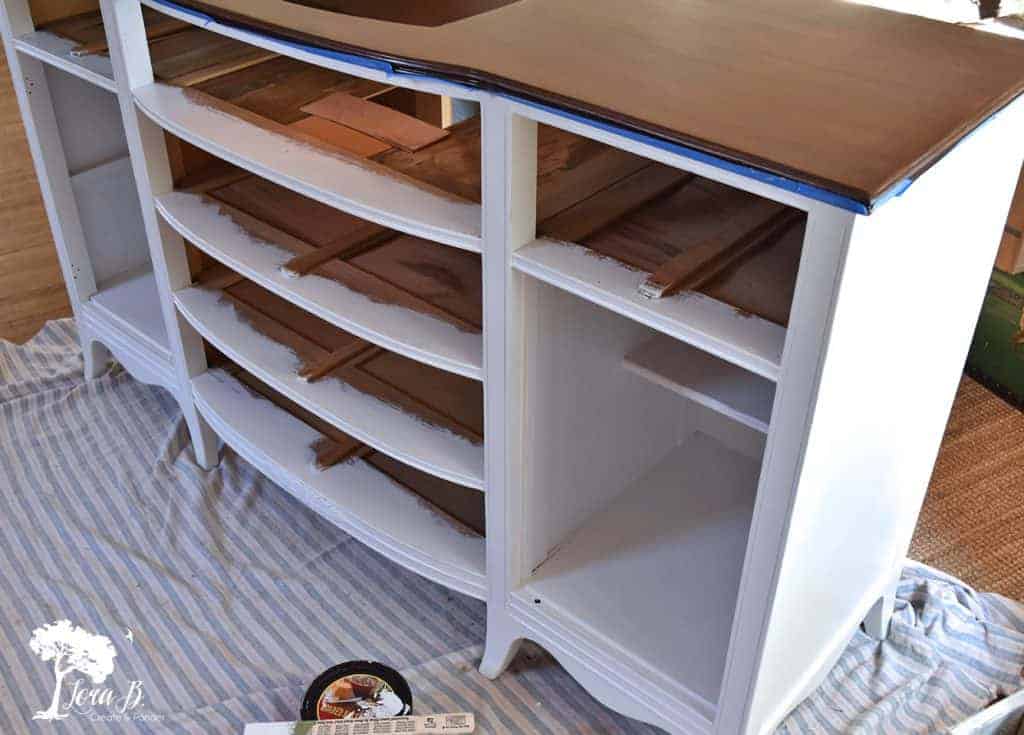
To prep the whole piece, I took all the hardware off and sanded it down with my orbital sander and 120 grit sandpaper. (I like THIS sander) I wanted all the rough edges to be smooth and the shiny finish to be scratched, so the paint would have enough “tooth” to adhere.
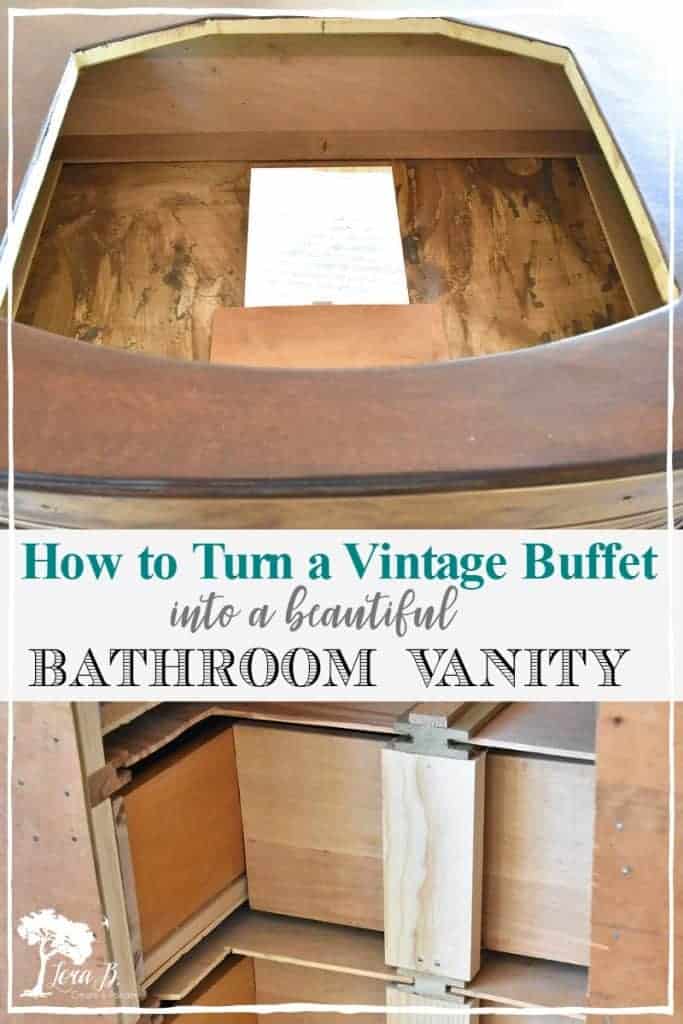
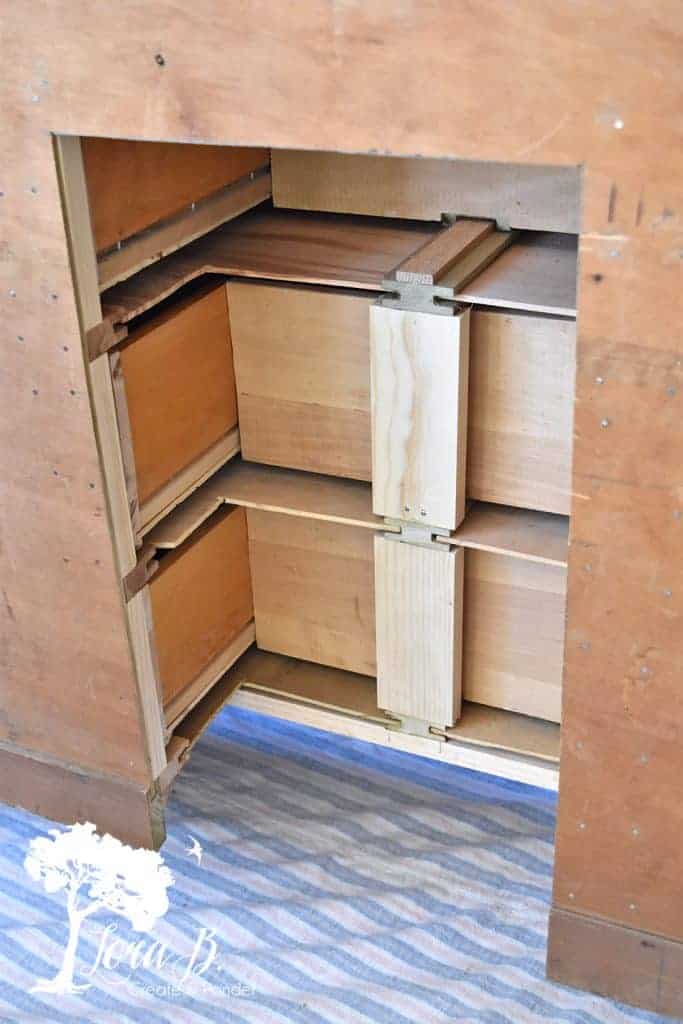
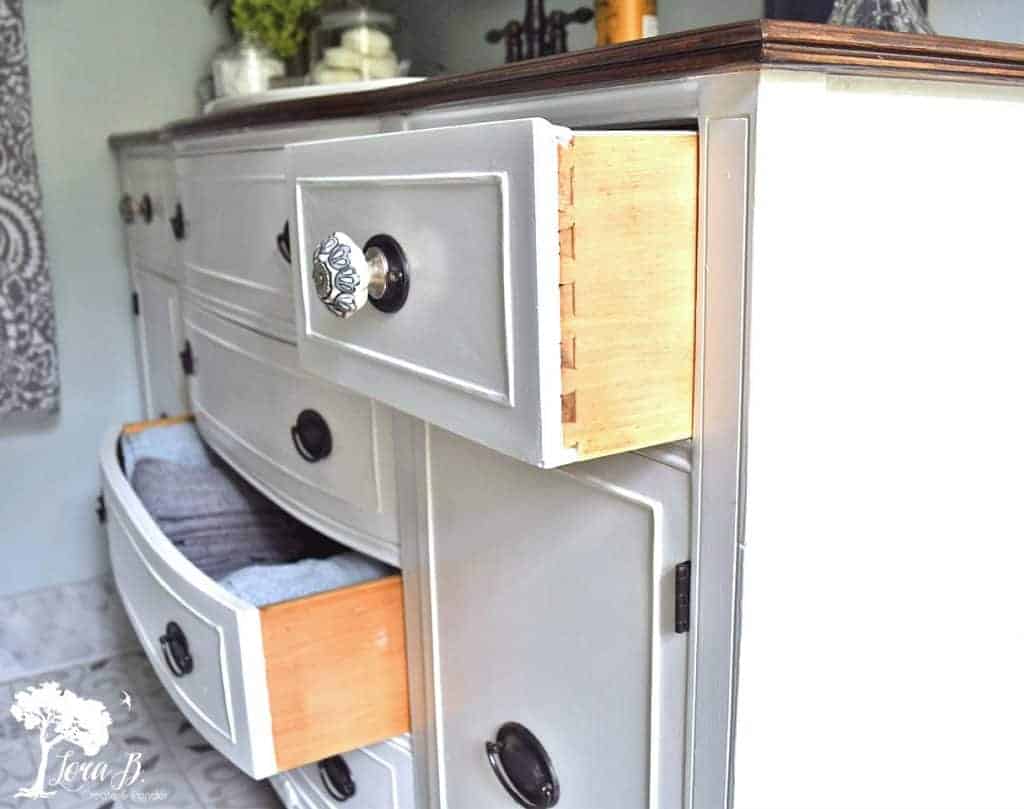
Retrofit Drawers to Make Room for Plumbing
Next, it was Mr. Fix-it’s department. He cut a hole in the back of the buffet and retrofitted each of the drawers individually to make room for the plumbing. I won’t go into the details, but hopefully the pictures will explain it better, anyway!
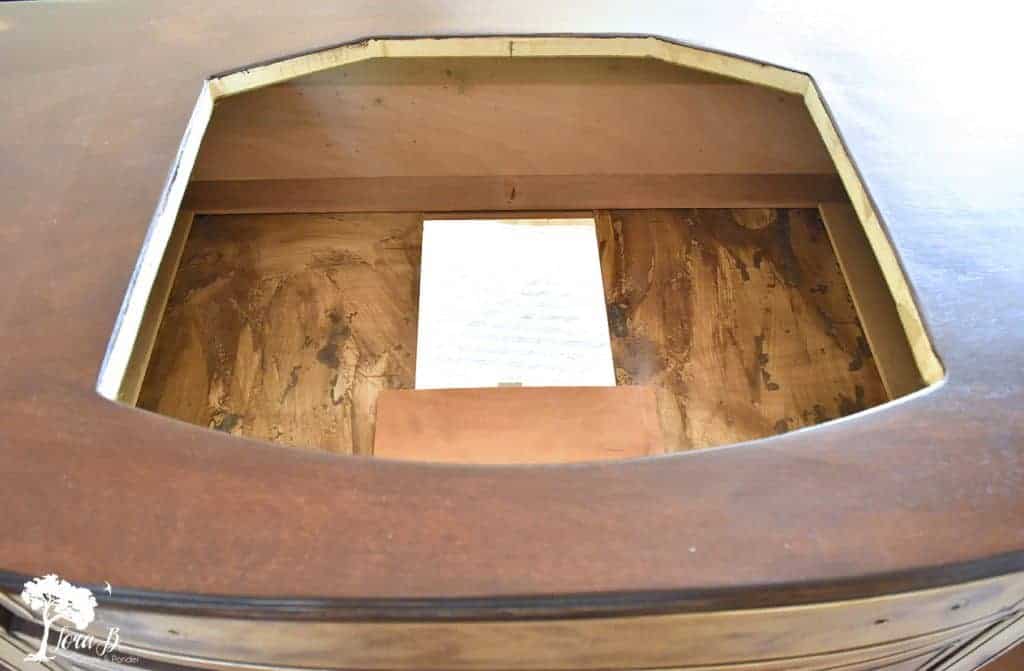
Cut Hole in Vintage Buffet Top for Drop In Sink
We purchases a curved front, drop in sink that harmonized with the curvy front of the buffet. Mr. Fix-it followed the directions on the package to cut the proper sized hole.
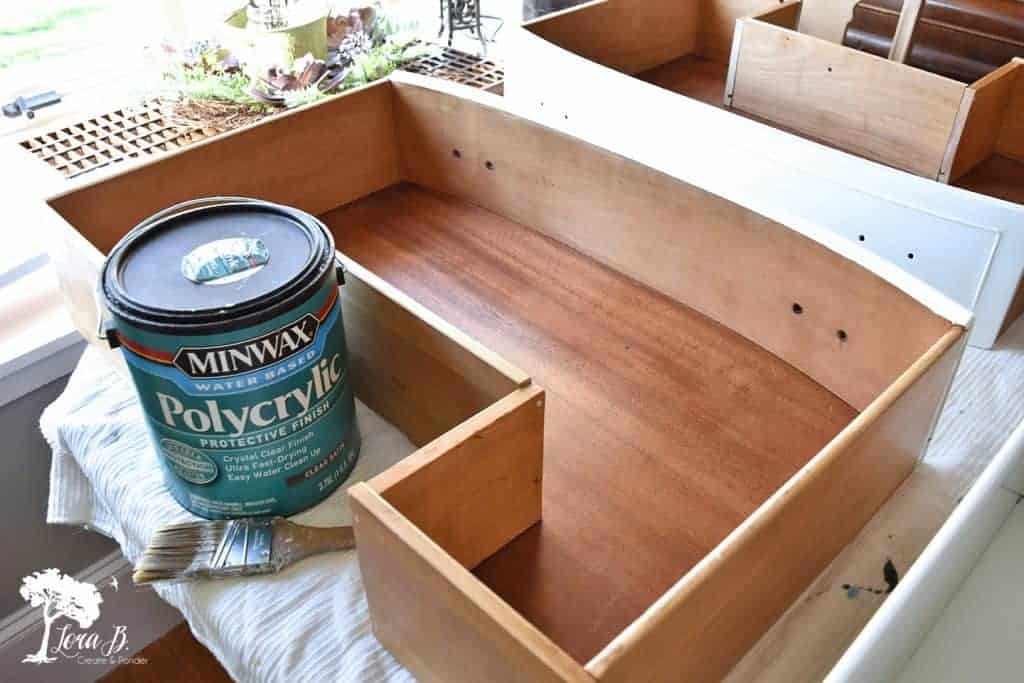
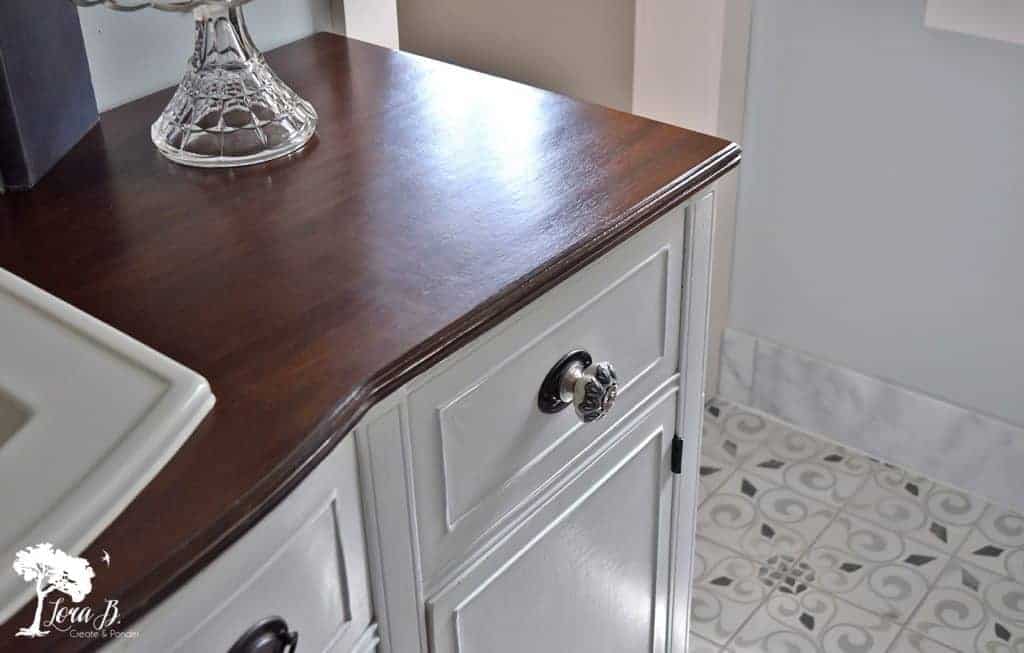
Refinish the Wood Top of Buffet
Once all the engineering was done, it was time to make this old piece pretty! I wiped 2 coats of gel stain carefully on the top, taping off the bottom of the piece where I wanted to paint.(THIS stain) I let it dry thoroughly between coats. Next I layered on 5 coats of polyurethane (I love THIS product). I lightly sanded with 220 grit sandpaper between each of the coats and let it dry thoroughly between each coat.
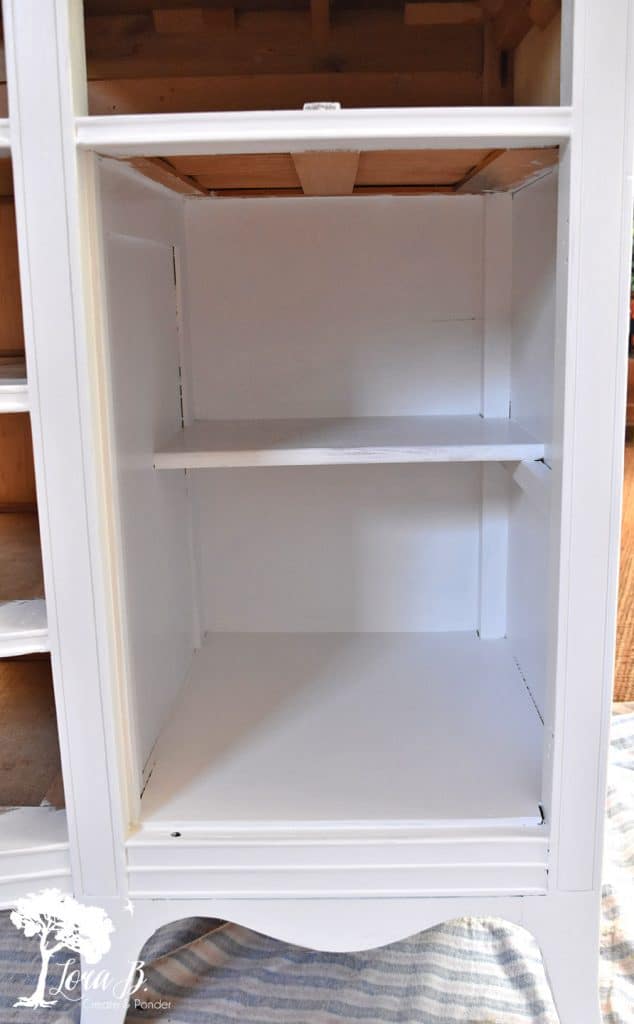
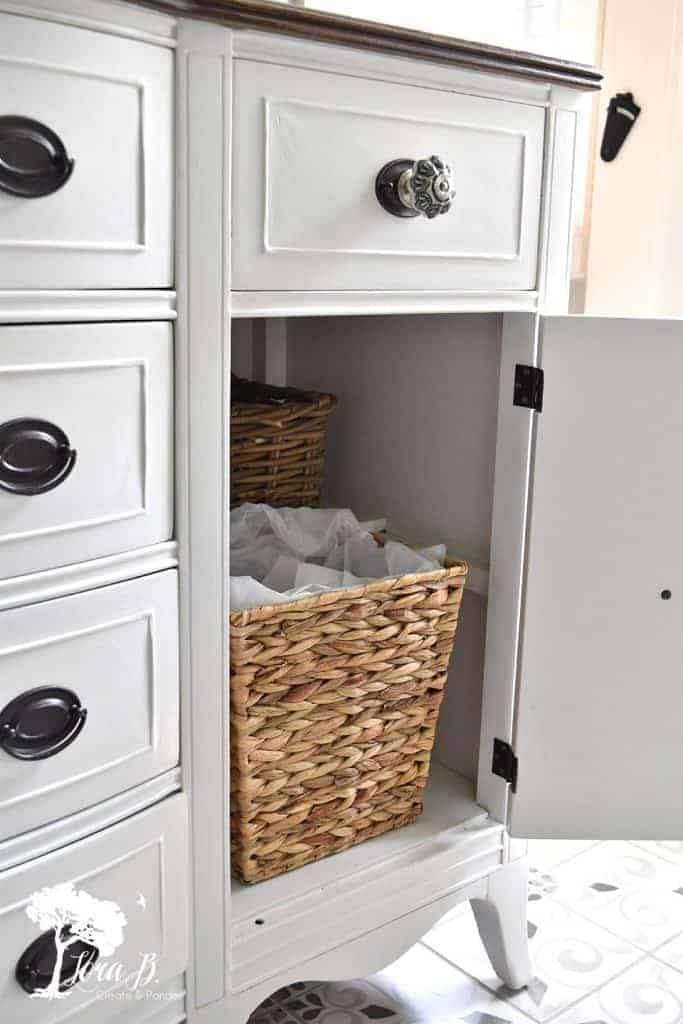
Prep and Paint the Buffet Body and Drawers
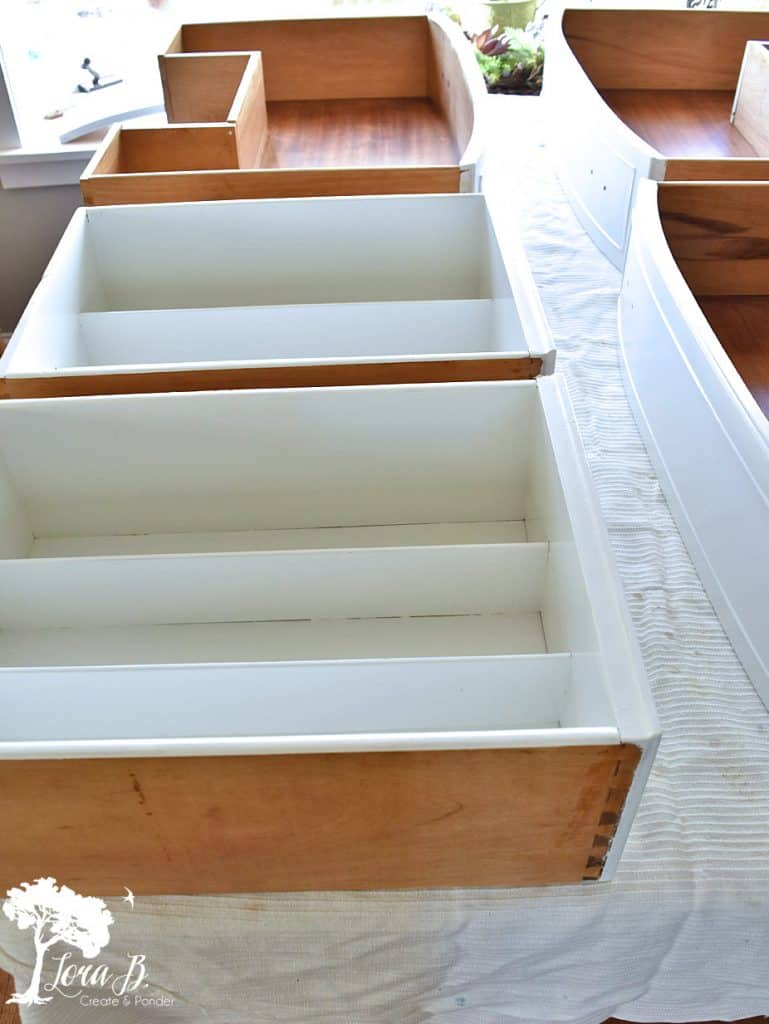
This era of furniture has a nasty habit of getting furniture bleed, where the pigments from in the wood show through your paint. I wanted a white as white outcome, so I wasn’t going to take any chances of it happening. Before painting, I brushed on 2 coats of (THIS blocker). I wanted the insides of the cupboard doors to be white also, so I brushed the interior, too. I was very happy with the result! Would totally use this again.

For paint, I used a chalky paint powder additive with a store-bought latex paint. (you can get a similar mix-in powder HERE). I love the flexibility of being able to use any color latex paint I have laying around and turning it into chalk paint. Often I get “oops” paints for $5 a gallon and mix this powder in. For this piece, I used Valspar’s Signature paint in “Cool Gray”, semigloss. I brushed the whole piece with 3 coats of white and painted the insides of the top 2 divided drawers white also.
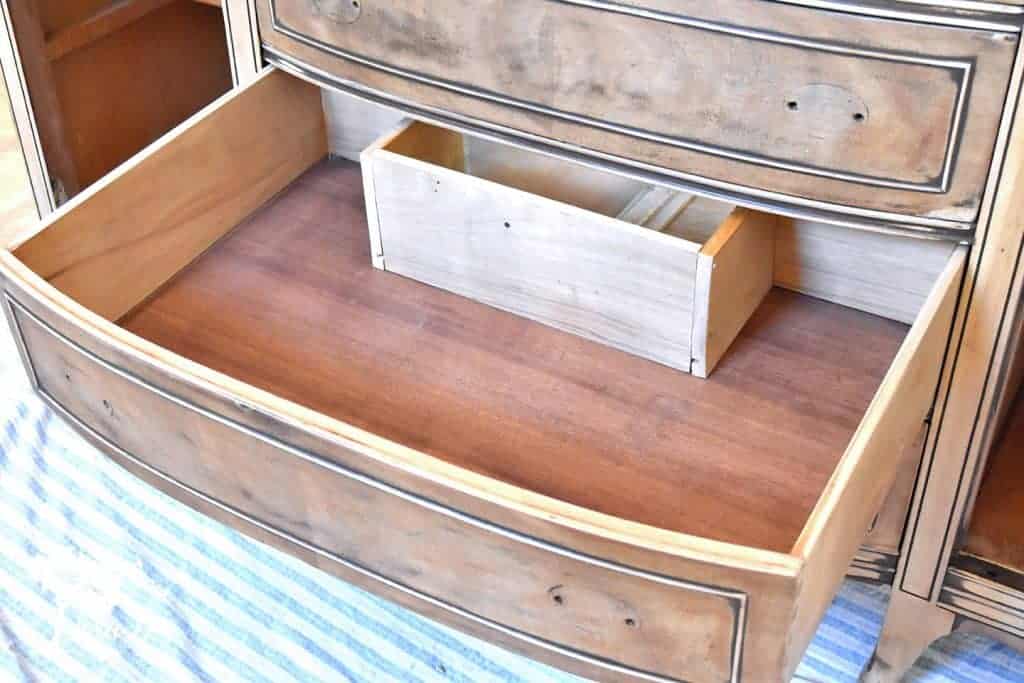
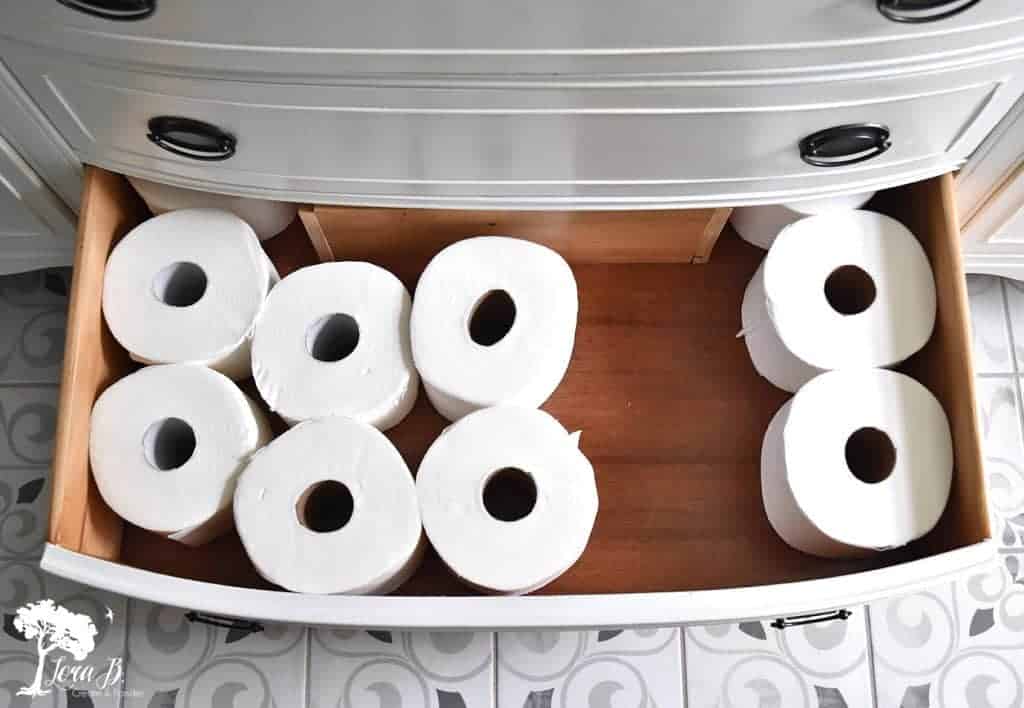
Finish the Insides of the Drawers
The insides of the drawers were made from a beautiful wood that was in great shape. I like the insides of these old pieces to be as pretty and functional as the outside. Each drawer was treated to a couple coats of poly on the insides and the sides to seal and bring out the patina. The poly also makes them much more wipeable. I brushed a couple coats over the paint on the divided drawers and inside the cupboards for the same reason.
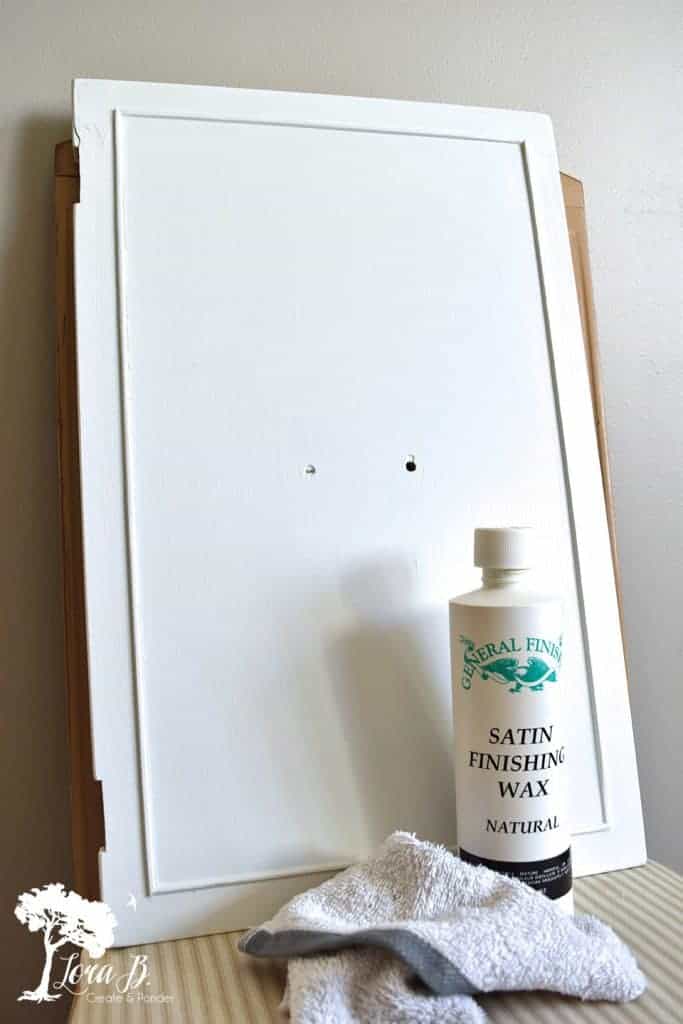
Seal Outside Painted Surface of Buffet Vanity
I wiped on a couple coats of finishing wax to seal off and protect the outside of the whole piece. I like General Finishes Satin wax in natural because it’s very liquidy and easy to wipe on with a lint-free cloth. (sorry, couldn’t find a link). When dry it can be buffed to a subtle sheen.
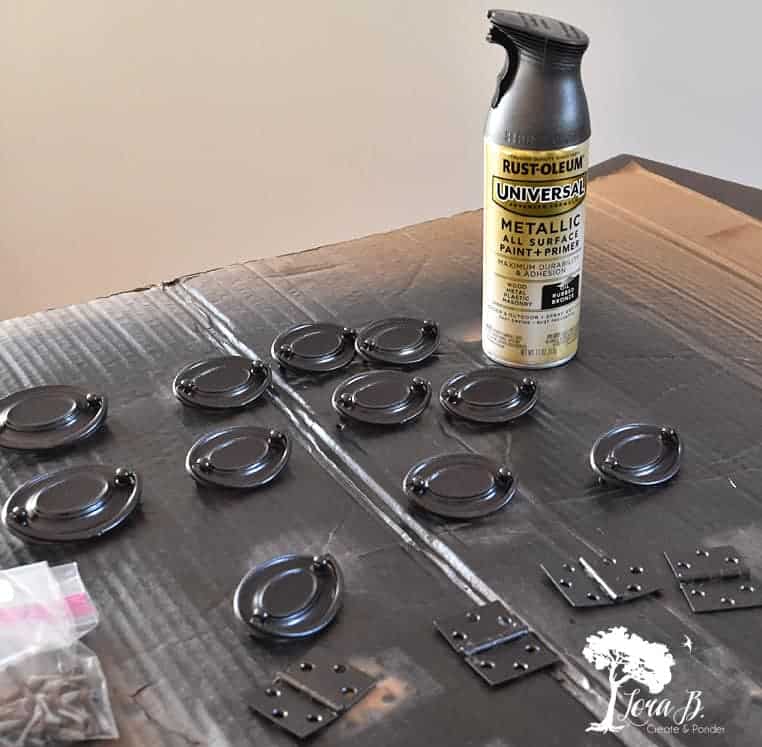
Refresh and Repurpose Old Hardware
The old hinges were scrubbed with an SOS pad to get clean. The original hardware was given a fresh update with spray paint (THIS is the color I used). For an added update, I drilled holes in the ovals of the top 2 drawers and added a ceramic knob with a design that coordinated with the tile floor. It was a creative way to solve the issue of not having one of the handles!

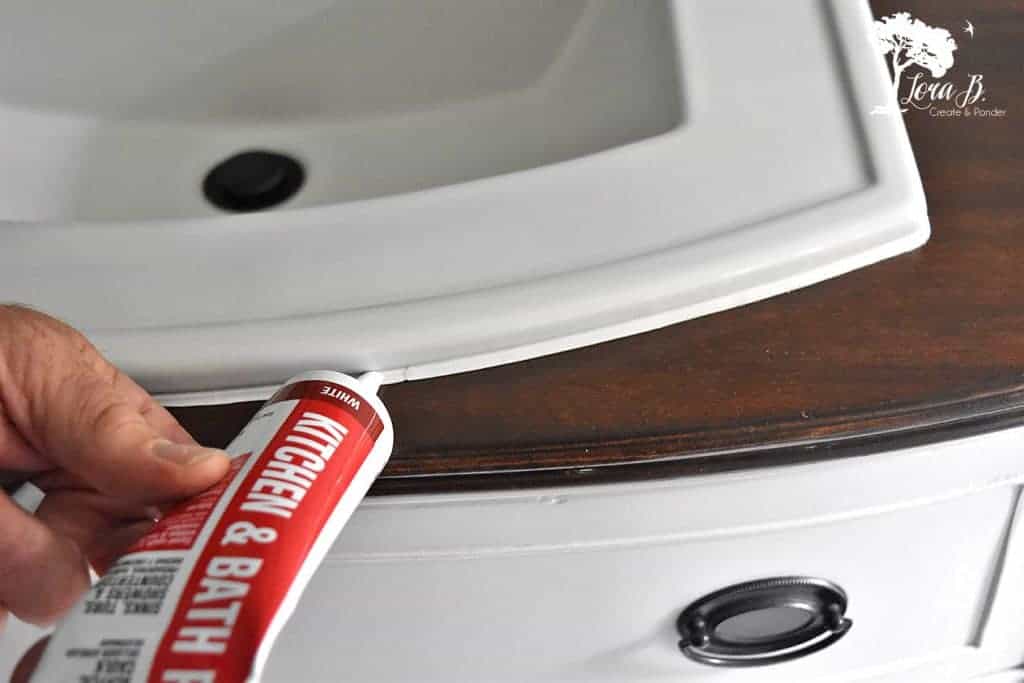
Install Faucet, Sink and Caulk to Finish
Once the plumbing is all hooked up and the sink in, the final step is to caulk around the sink to seal. (THIS is the faucet we used, THIS sink is similar).
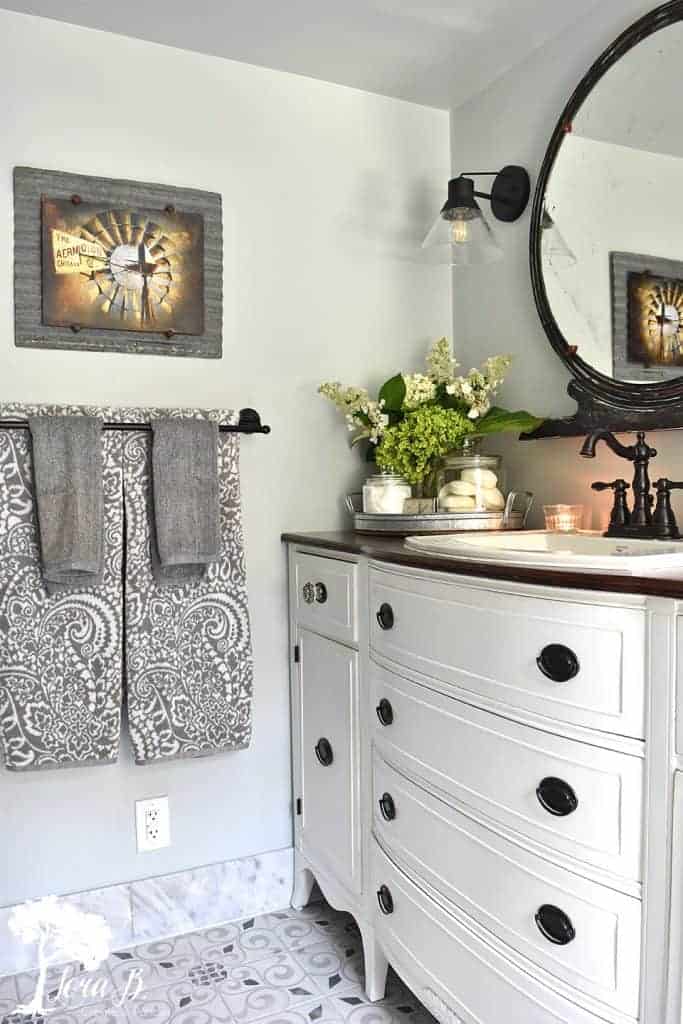
Repurposed Buffet to Bathroom Vanity: Functional and Beautiful
We couldn’t be happier with the final result! Yes, it was a lot of work, but the function and beauty of this piece was worth it. It is much better quality than anything we could have purchased new. I love real wood so much better than composite board!

Whenever you put the doors and drawers back onto an old piece after you’ve painted and polyed it, you need to make adjustments. The door edges needed to be sanded around a bit to fit. I simply wiped a thin coat of white around after. I also make sure to wax the drawers and drawer slides with THIS so everything moves smoothly.
Hopefully all these steps in How to Repurpose a Vintage Buffet into a DIY Bathroom Vanity helped explain the process! And also gave you some DIY products to use if you decide to do this yourself! If you’ve got the patience to remodel a bathroom, you can definitely tackle this project, too. You’ll be happy with the function, beauty, and quality you can enjoy for years! Let me know if you have any other questions!
See the full Bathroom Remodel Reveal HERE with all the details.
If you enjoyed your visit, be sure to Become an Insider so I can send the ideas right to you! You can Sign Up HERE.
Follow Me: LTK | Amazon | Pinterest | Instagram | Facebook
Pin and share

Sharing at these lovely parties:
Do you have a better picture of the sink you used? Top down…or even a link to where you purchased it? Thank you.
You can find more pictures and the link to the sink in my post, “Vintage Modern Bathroom Reveal” https://lorabloomquist.com/vintage-modern-bathroom-remodel-reveal/ I’ve also listed a link to the sink there, also. Hope that helps!
JUST LOVELY! I PURCHASED AN EARLY 1900’S TIGER WOOD BUFFET THAT I AM CONVERTING TO A VANITY. THIS HAS CERTAINLY SET MY MIND AT EASE. GREAT INSTRUCTION. THANK YOU SO MUCH.
That sounds beautiful, Tracey; love the look of tiger wood. Good luck!
What tool did you use to cut the hole at the top?
We used a jigsaw.
How do you anchor the piece to the wall?
The plumbing pipes really anchor the piece in place. It’s not snug to the wall; more like a free standing piece of furniture.
PLEASE, PLEASE, PLEASE tell me where you got your tile flooring? It is exactly what I’m looking for and can’t find!
Warmly,
Deanna
My tile guy got it at a local tile store. I will try to find out more for you, if I can.
Can I do this as a double sink with antique sideboard/buffet. I’m concerned about the sink size fitting the top.
It’s going to be totally different, depending on the furniture piece. You could always use a vessel-type sink that sits on top of the counter if you don’t have enough depth for a drop in sink. Hope that helps!
That turned out so beautiful. I’ve been looking for the perfect piece for my bathroom. Hope I find something like this. Great job!
I hope you do, too!
That is one impressive bathroom! Wow!
Thanks so much, Sally! Wish it was self-cleaning, though;)
Gorgous upcycle and the charcoal briquettes to remove the musty smell is BRILLIANT!! I’d love for you to share over at our weekly Wednesday Creative Crafts Linky Party https://creativelybeth.com/creative-crafts-linky-party-8-join-in-the-fun/
Have a great week!
Creatively, Beth
Thanks, Beth! I will try to remember to swing by; thanks for the invite!
Gorgeous job and piece Lora. You gave a great tutorial too on how you achieved your goal.
A fantastic addition and you must be so happy.
Cindy
Thanks, Cindy! Now if I could just figure out how it could be self cleaning like the oven;)
Great Job.
Thanks, Rebecca!
That turned out beautiful! And I am eyeing up those gray paisley towels, I think I need them.
Thanks, Bliss! Yes, I love that gray paisley! Home Goods never fails;)