
Easy Paper Heart Garland, 3 Ways
Craft easy paper heart garland 3 different ways with this simple how to. Cute DIY Valentines decorations or anniversary party decor.
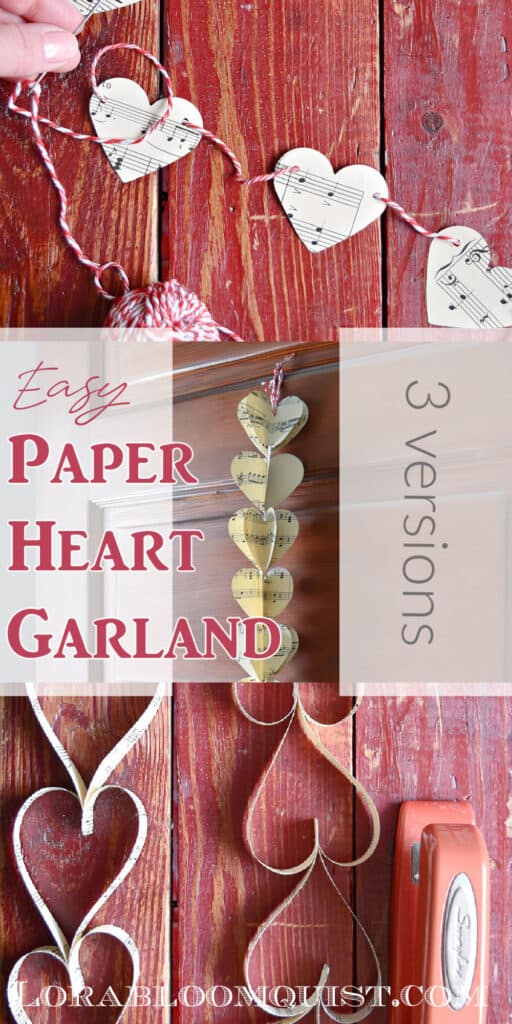
Sometimes the simplest things are the most charming. Nostalgic paper chains are so simple to make that even kids can join you to craft. Multi-generational art projects can be a sweet time of connecting and a fun way to decorate for parties or everyday. Hopefully this Easy Paper Heart Garland, 3 ways will inspire you to get crafty!
Easy Paper Heart Garland, 3 Ways
For your convenience, this post contains affiliate links. If you make a purchase, I may receive a commission. There is no additional cost to you. “As an Amazon Influencer, I earn from qualifying purchases.” My full privacy policy is here.
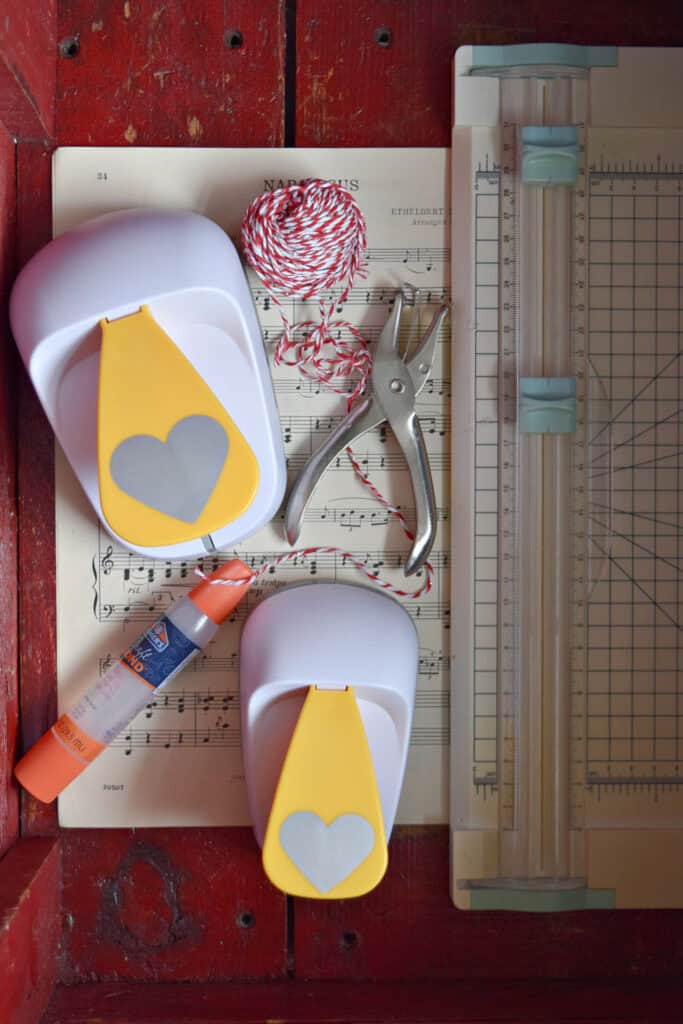
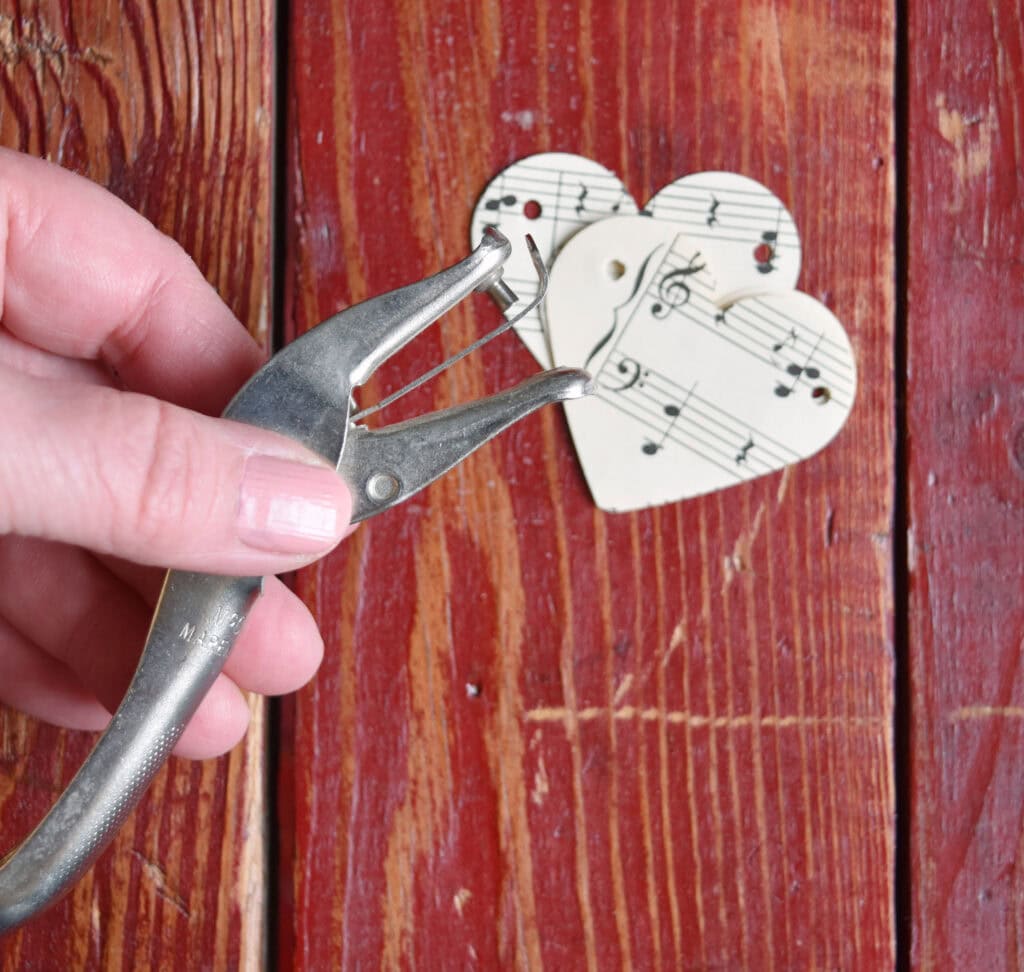
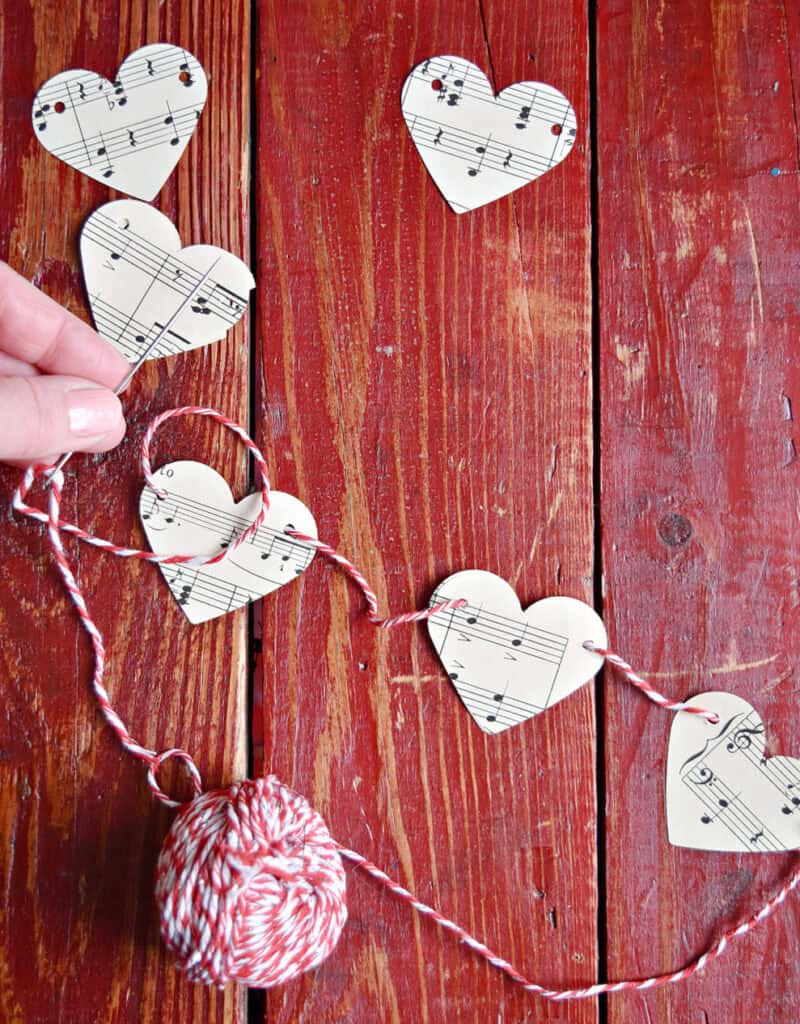
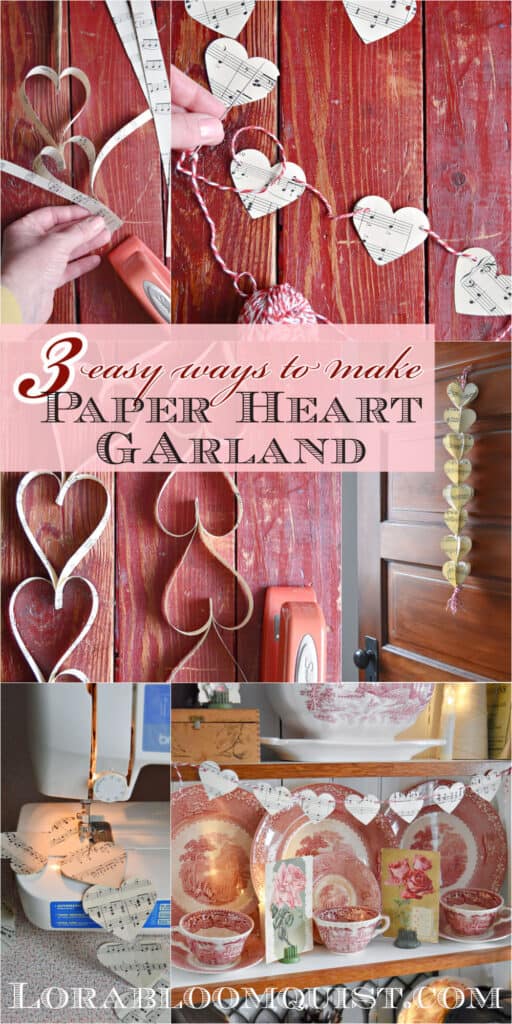
Simple Hole Punch Paper Garland
Materials needed:
Decorative paper or vintage book pages, old music
Directions:
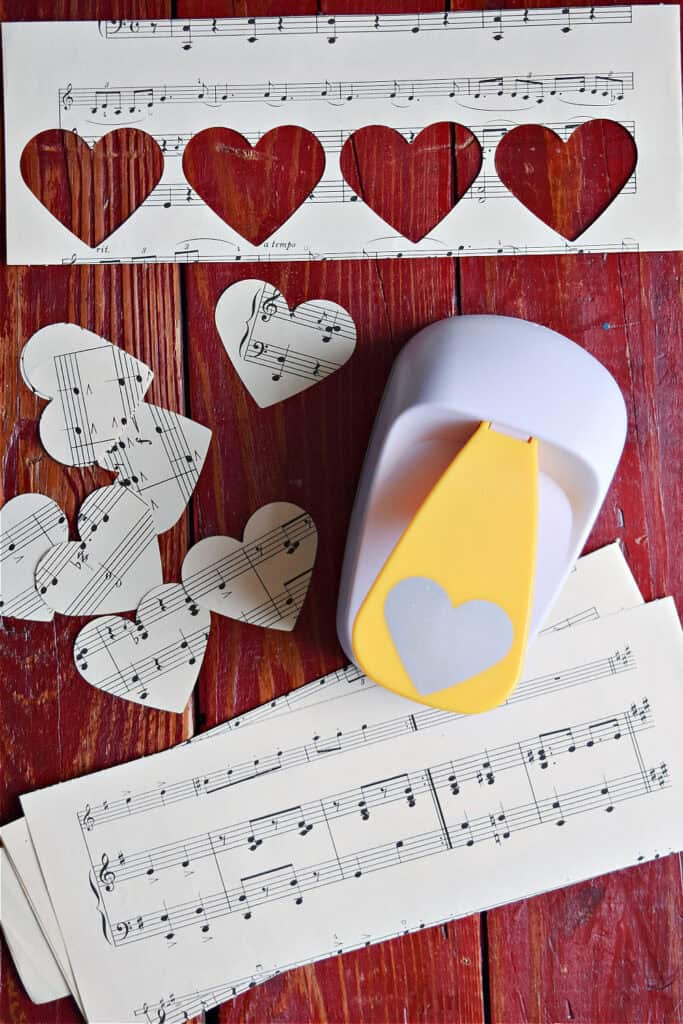
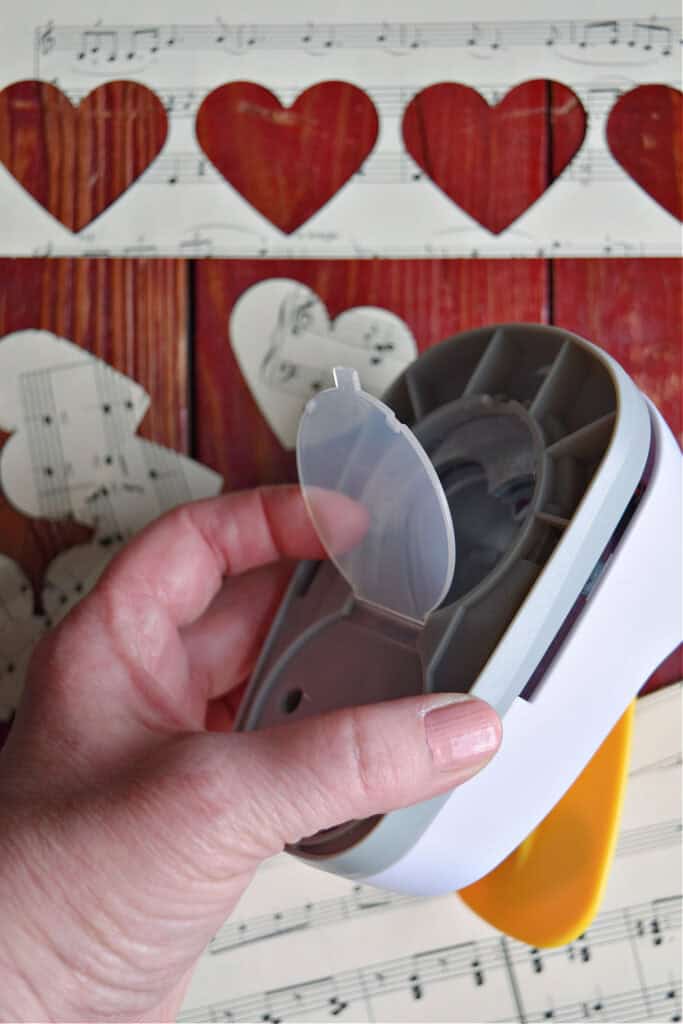
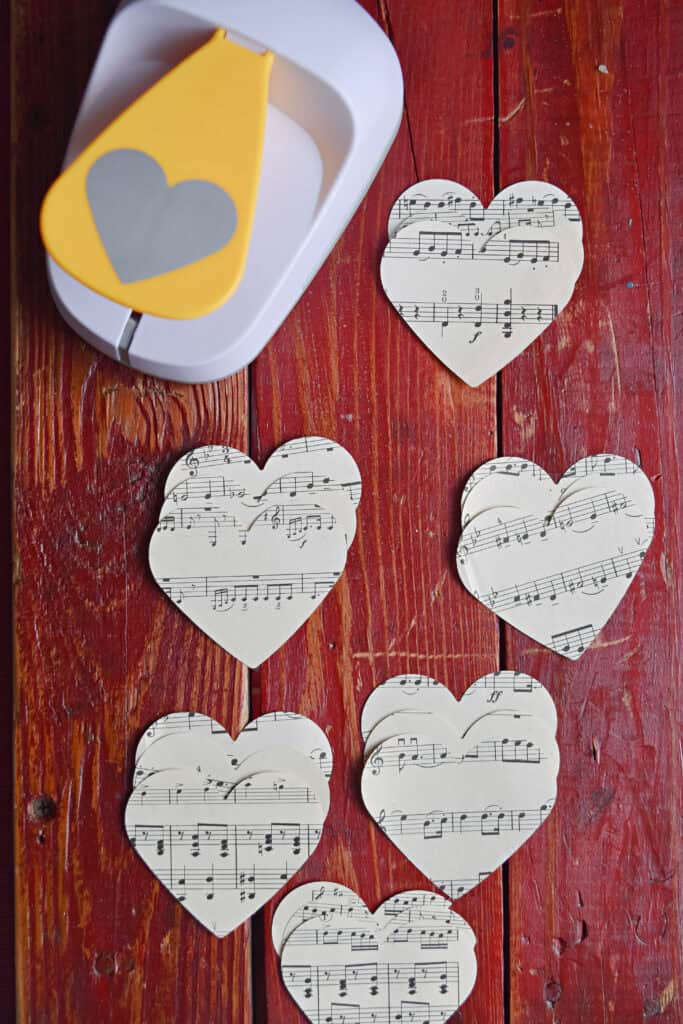
Use your heart punch to cut out heart shapes from your desired paper. Using a small hole punch, make 2 small holes on either side of the hearts. String as many hearts as you would like on red and white bakers twine. Hang anywhere with clear tape.
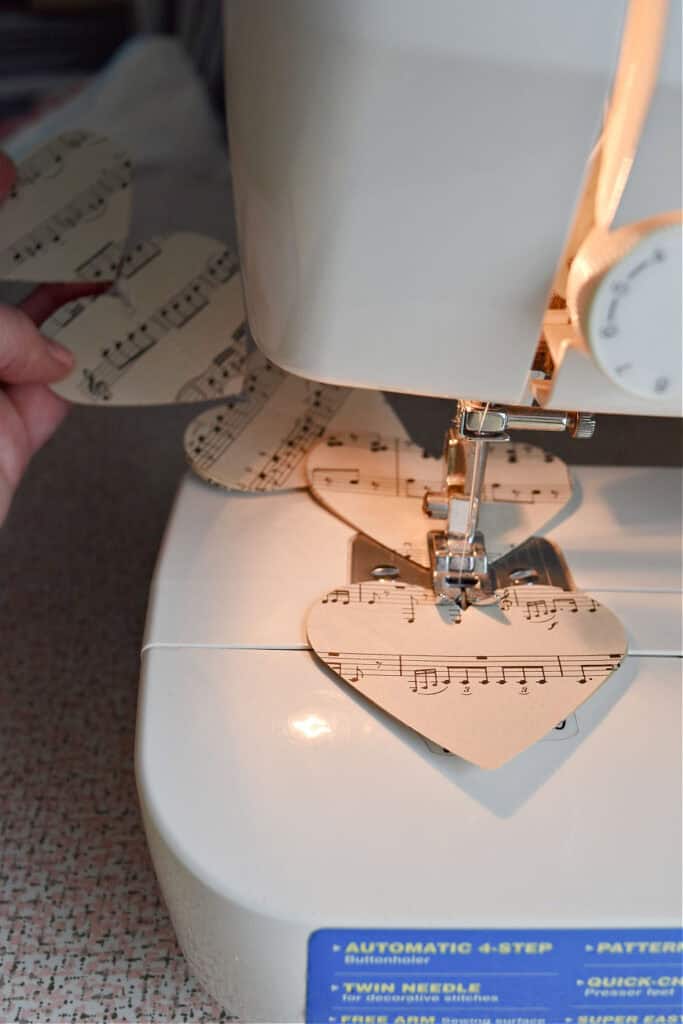
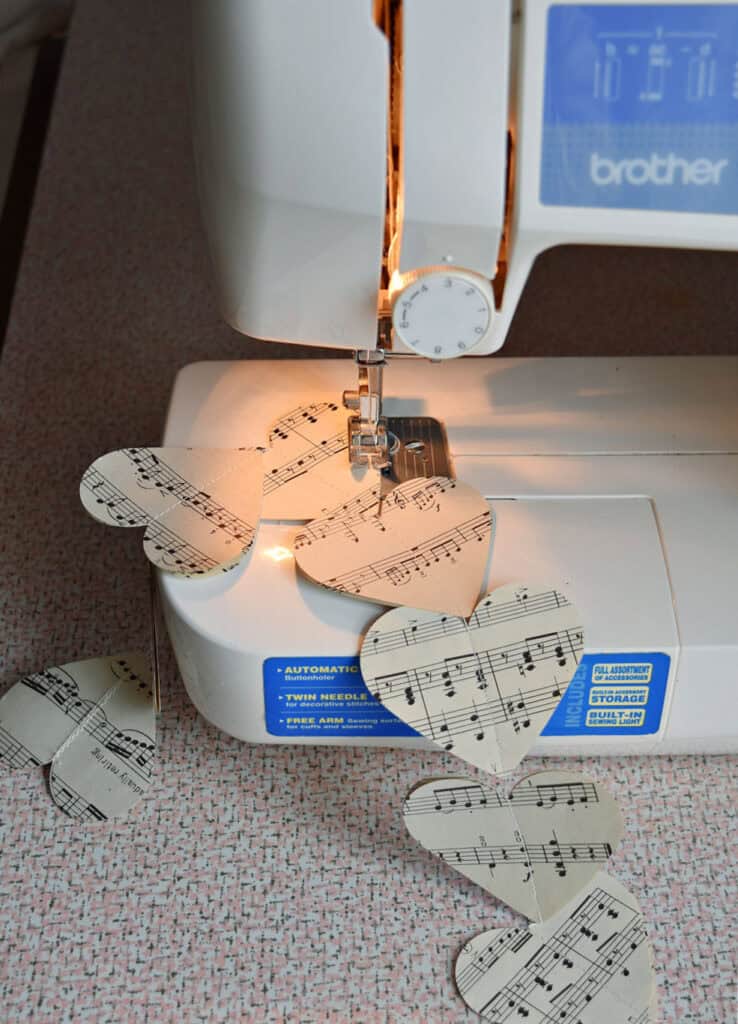
Sewn Paper Heart Garland
If you have beginner sewing machine skills, this paper heart garland version can be a fun decorative accent. Hang vertically or horizontally.
Materials Needed:
Decorative Paper (I used vintage music for a nostalgic vibe)
Directions:
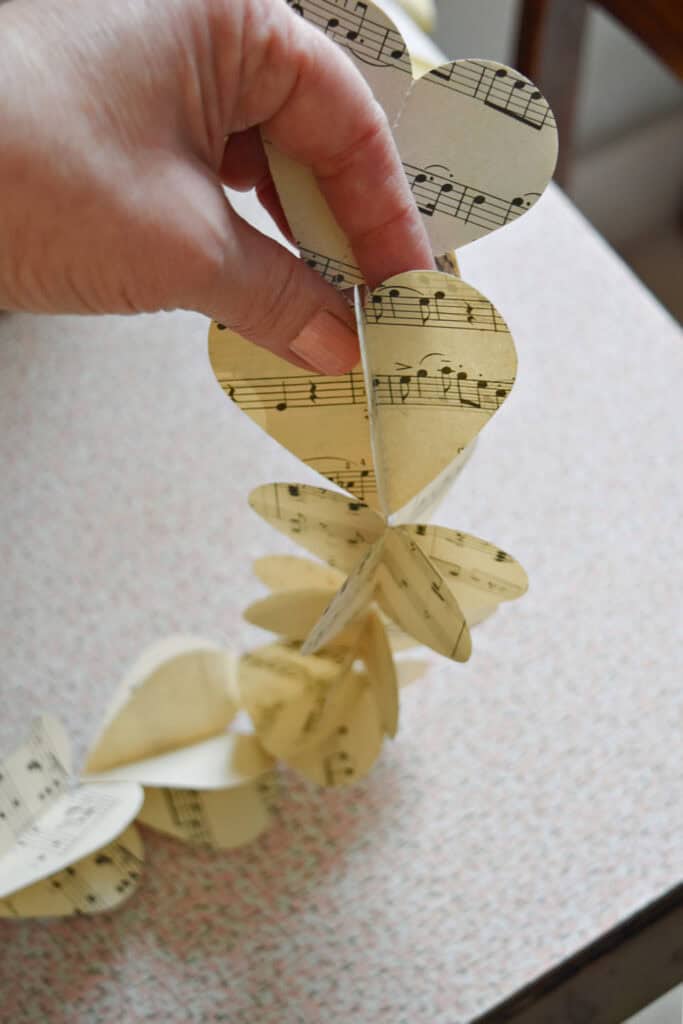
Punch out paper heart shapes and stack in groups of 3. Using a straight sewing machine stitch (closer to a basting stitch), sew from top to bottom on a stacked group of paper hearts. Continue stitching to next grouping of 3, leaving a little stitching between each. Keep going as long as you want your garland.
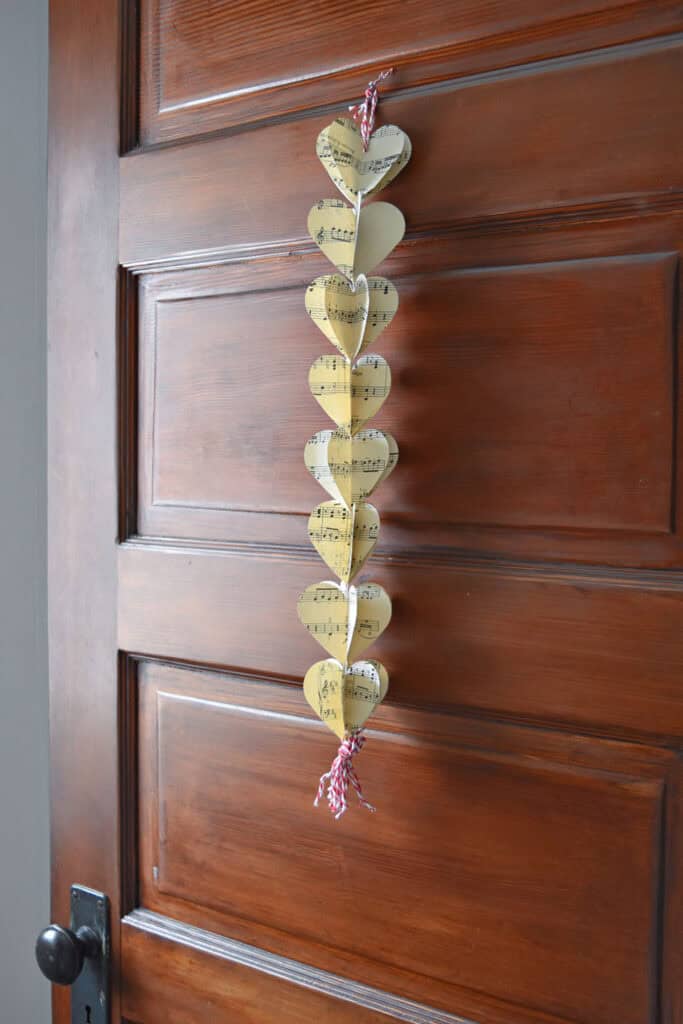
When finished, fold 2 outside hearts in half, creating a 3 D heart.
Hang by making a small hole punch in the top heart for a ribbon or bakers twine. Add a tassel at the bottom, if desired.
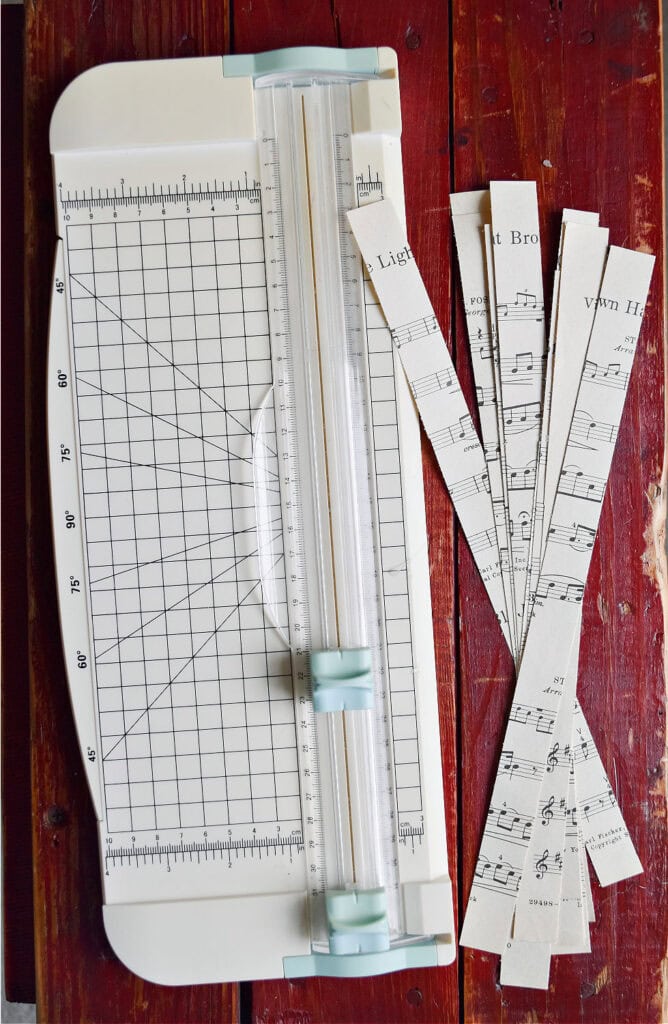
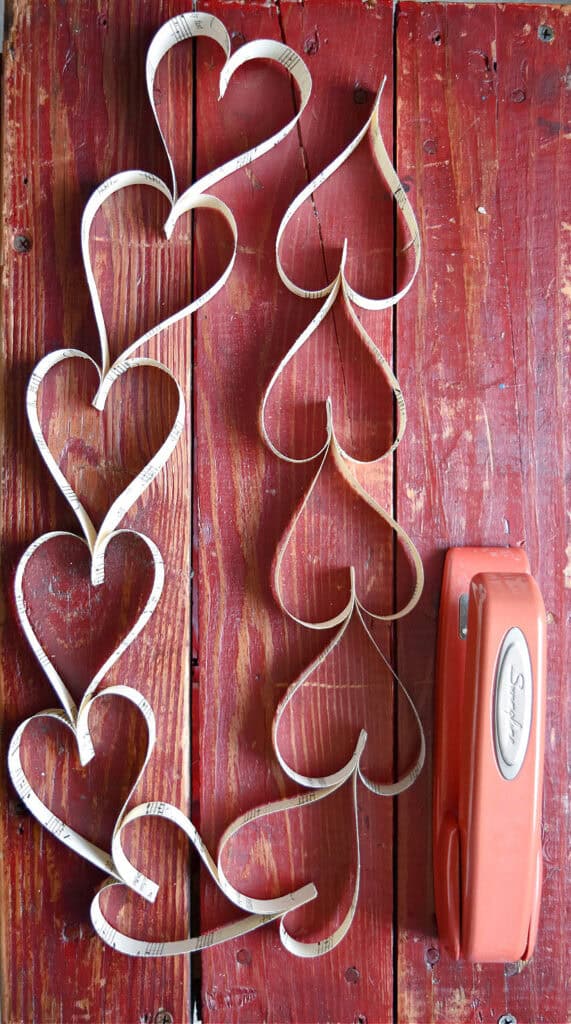
DIY Paper Heart Chain Garland
Paper chain garlands are so easy to make. Take them to another level by making them into hearts. So cute for Valentines, an anniversary, wedding or baby shower…even a sweet birthday. Hang as a backdrop or simply weave through a centerpiece on the table. Coordinate your paper to your decor.
Materials needed:
Decorative paper ( I used vintage music)
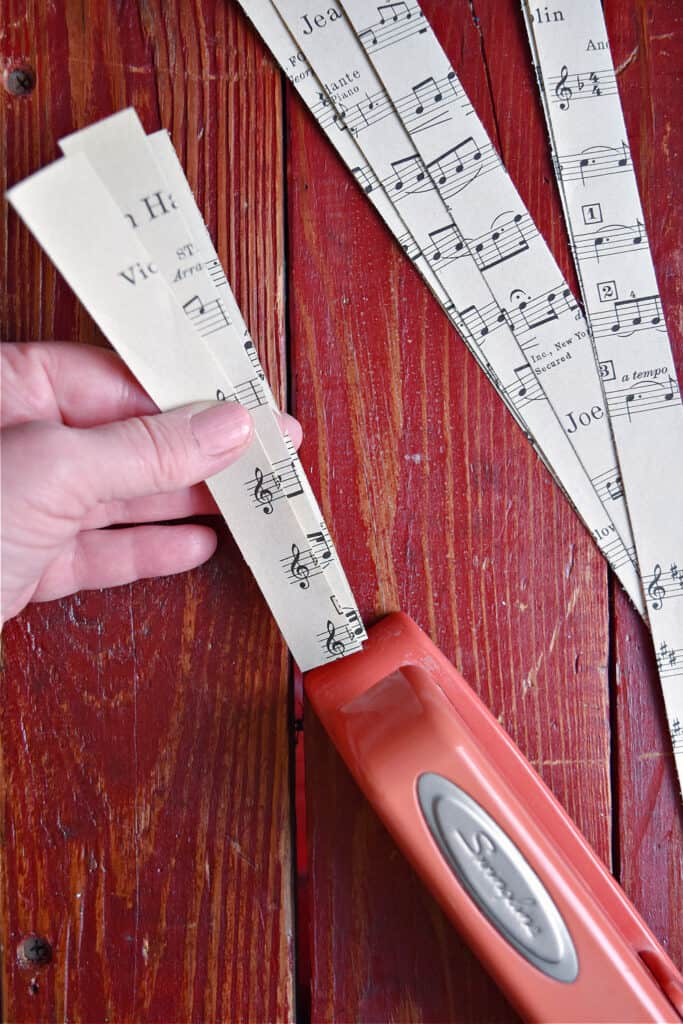
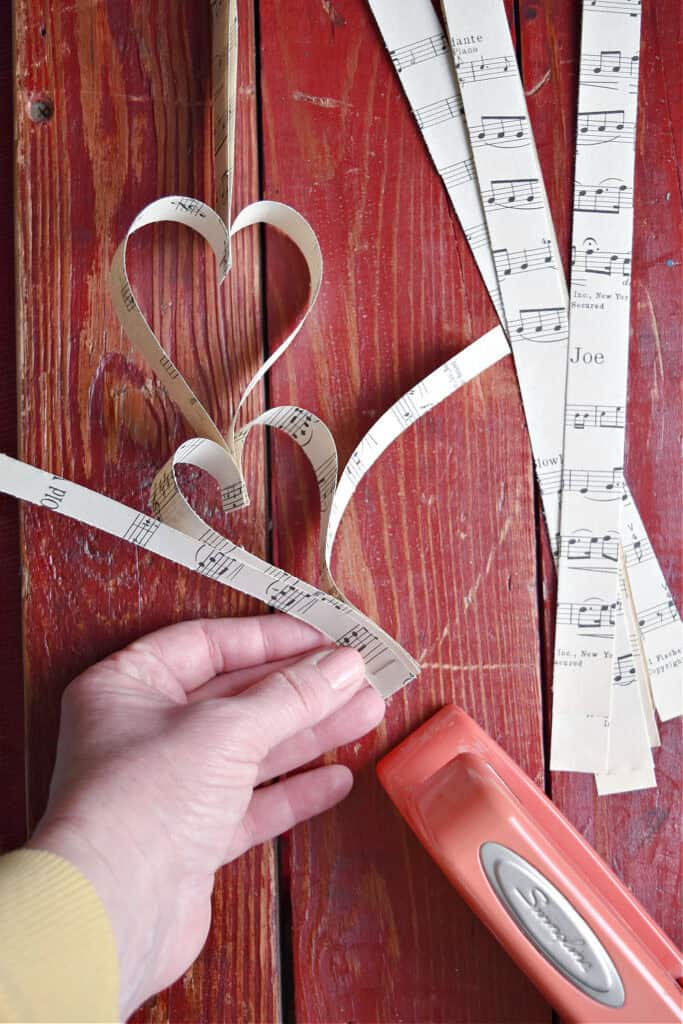
Cut your decorative paper into >1″ strips. Your paper length will determine your heart size. Take 2 strips and fold in 1/2 to get started. Staple together, 1/4″ from bottom fold.
The inside strip becomes your first heart by bringing the top ends together and stapling. The outside strip gets turned downward to form your next heart. To create continuous hearts, staple another strip at the fold when you’re stapling the bottom of each heart. Make your heart chain as long as you’d like.

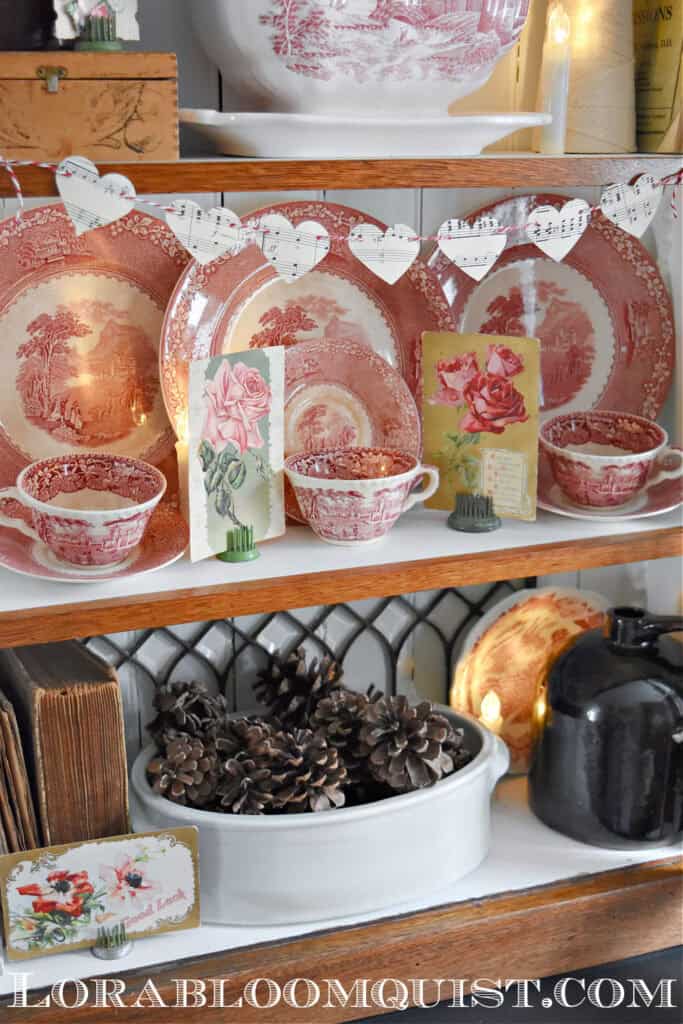
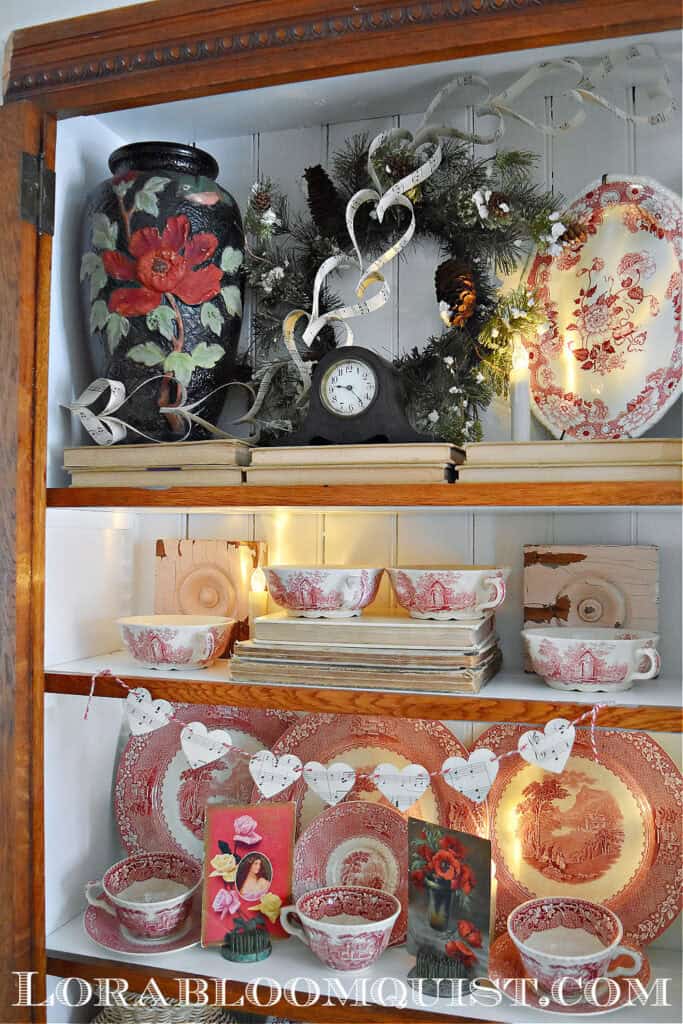
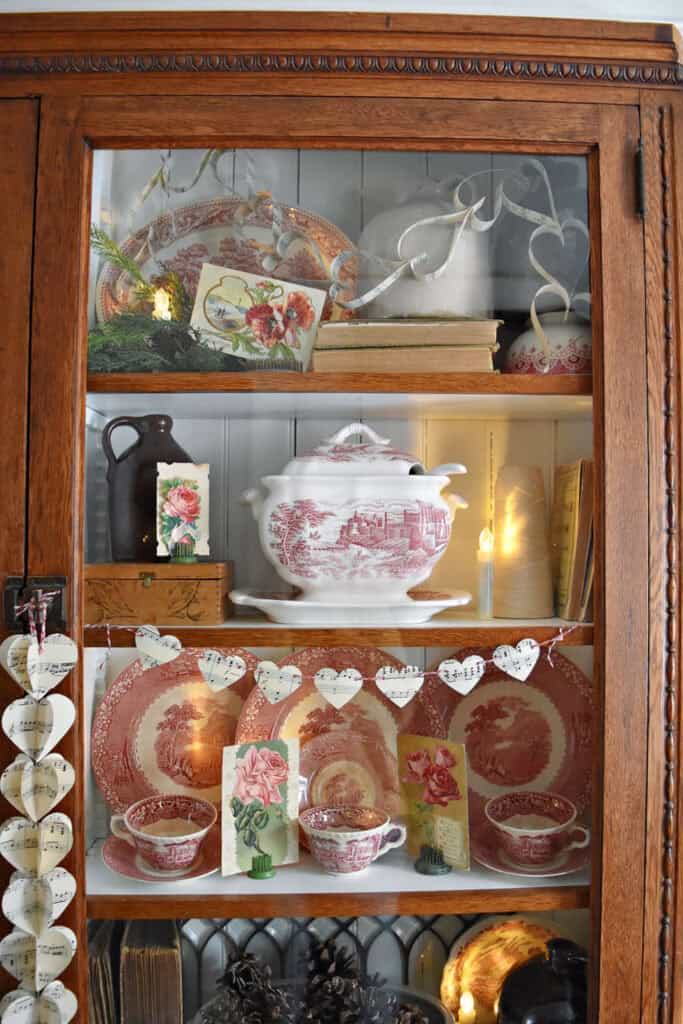
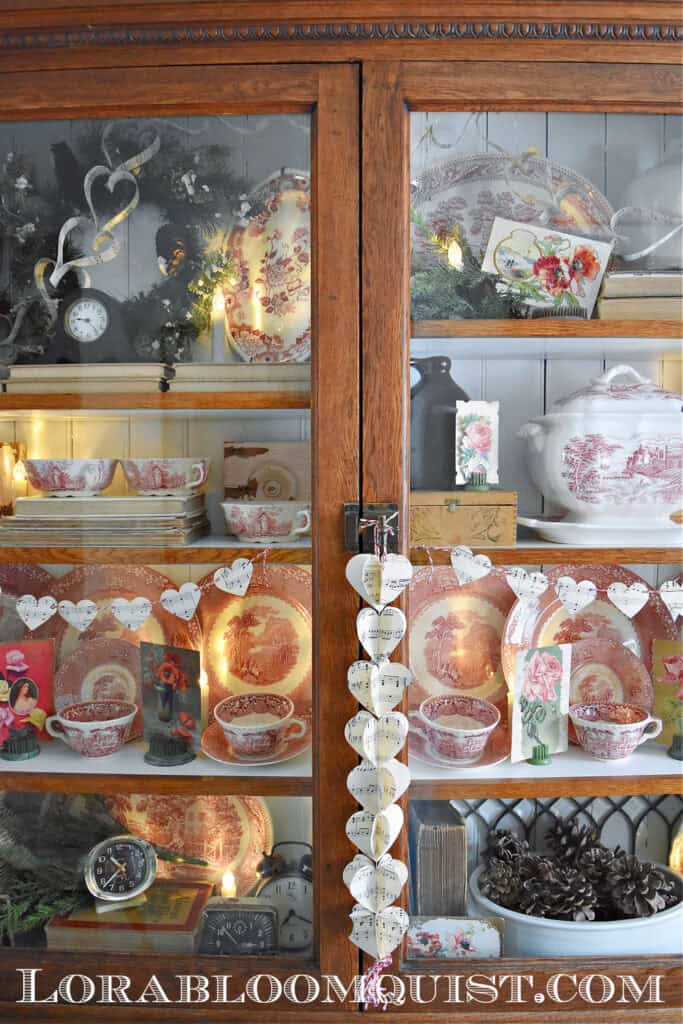
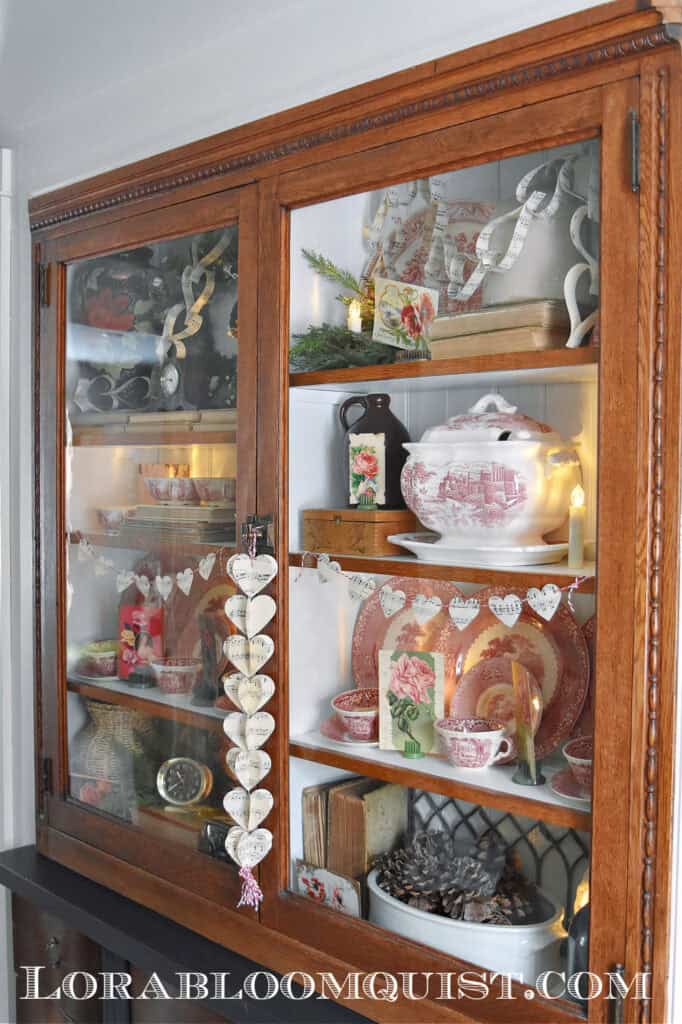
Vintage Valentines Decorations Display
For a bit of vintage Valentines fun, I created a display in our upstairs built in glass cupboard. My red transferware collection is featured, along with other vintage favorites: old books, clocks, wood boxes. Romantic old postcards stand in floral frogs. Battery powered faceted candles add a cozy glow at night.
The DIY paper heart garland was the finishing touch! It’s so fun to create a sweet display like this to enjoy the Valentines season.
Hope you’re inspired to do some crafting! It’s an inexpensive way to add cute decor to your home and parties.
Thanks for reading Easy Paper Heart Garland, 3 Ways. If you enjoyed your visit, be sure to Become an Insider so I can send the ideas right to you! You can Sign Up HERE.
Follow Me: LTK | Amazon | Pinterest | Instagram | Facebook
Pin and save

These are so cute and seem fairly easy to make, thanks for sharing.
They are so easy and fun!
Lora,
As usual your post is great. I love how you decorated your cupboard, the whimsical heart decor you made, the beauty of your dishes. It speaks Valentines, but softly.
Thanks, Sandy! So glad you enjoyed it:)