
Antique Settee: From Curb to Wedding
See how a curbside trash antique settee find gets refreshed for the perfect wedding couple seating. Trash to treasure DIY.
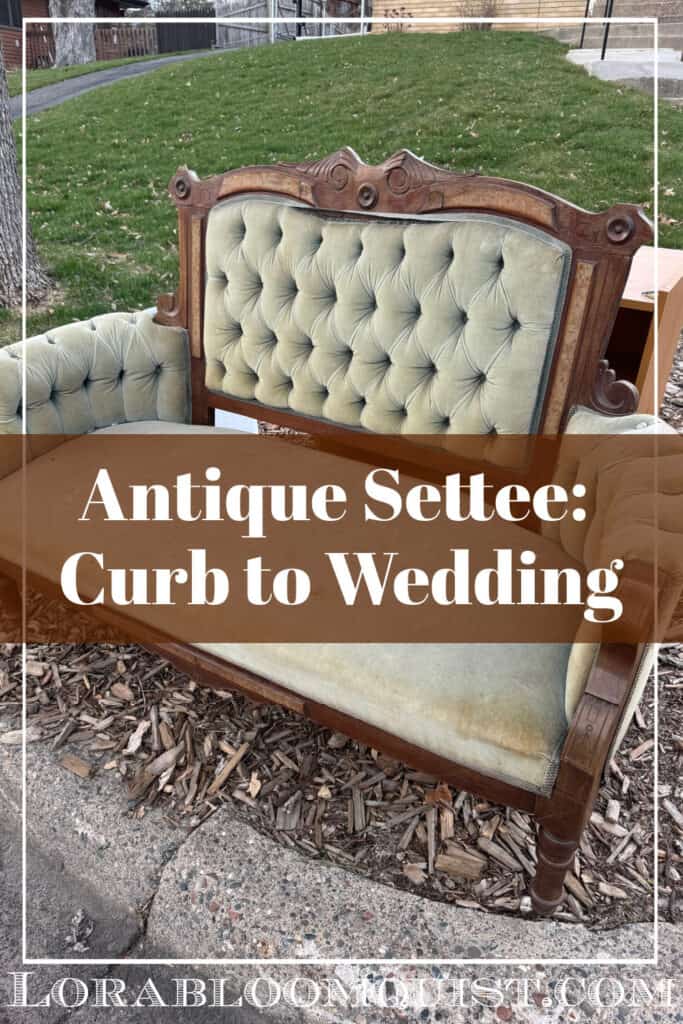
Sometimes curbside finds can turn out to be just what you imagined. But they usually need a little work. Okay…they usually need quite a bit of work to be used as you would like. This is the Cinderella story of a forlorn antique button tufted settee sitting out in the rain. How I revived an Antique Settee: From Curb to Wedding.
Antique Settee: From Curb to Wedding
For your convenience, this post contains affiliate links. If you make a purchase, I may receive a commission. There is no additional cost to you. “As an Amazon Influencer, I earn from qualifying purchases.” My full privacy policy is here.
A Curbside Find
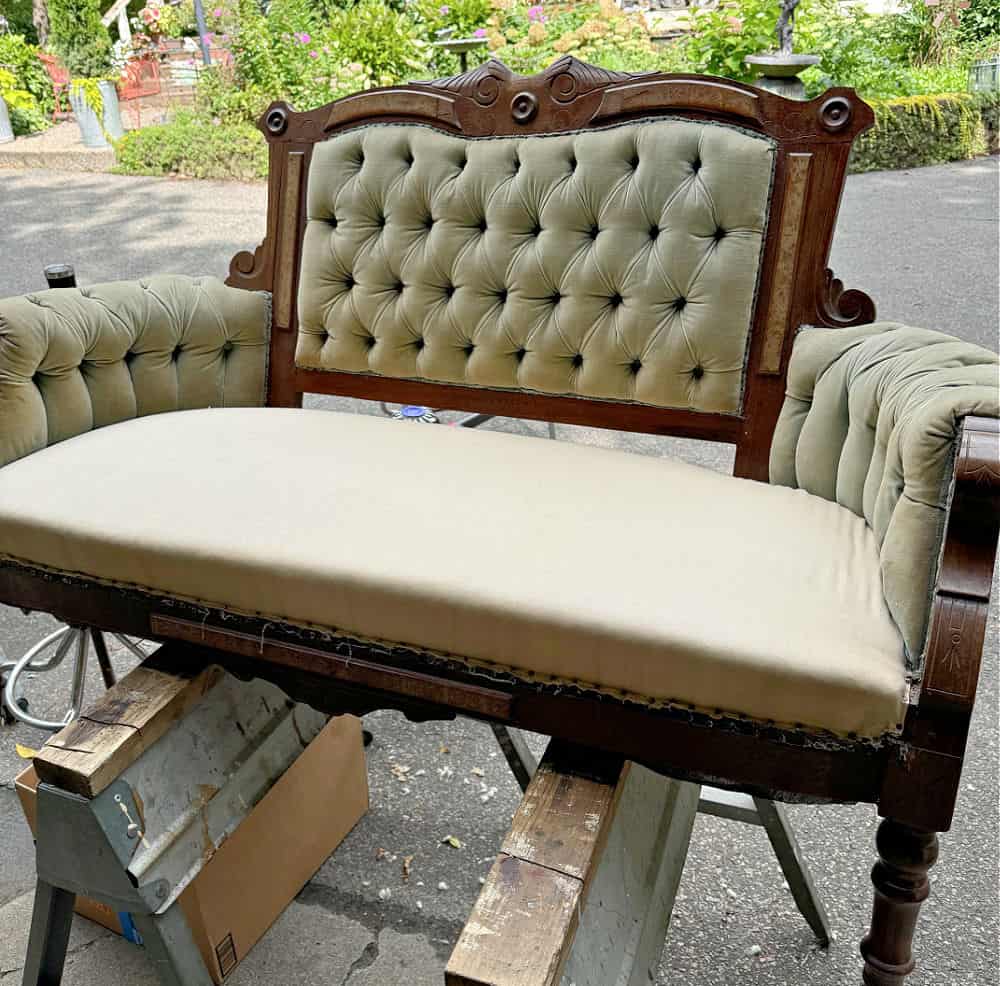
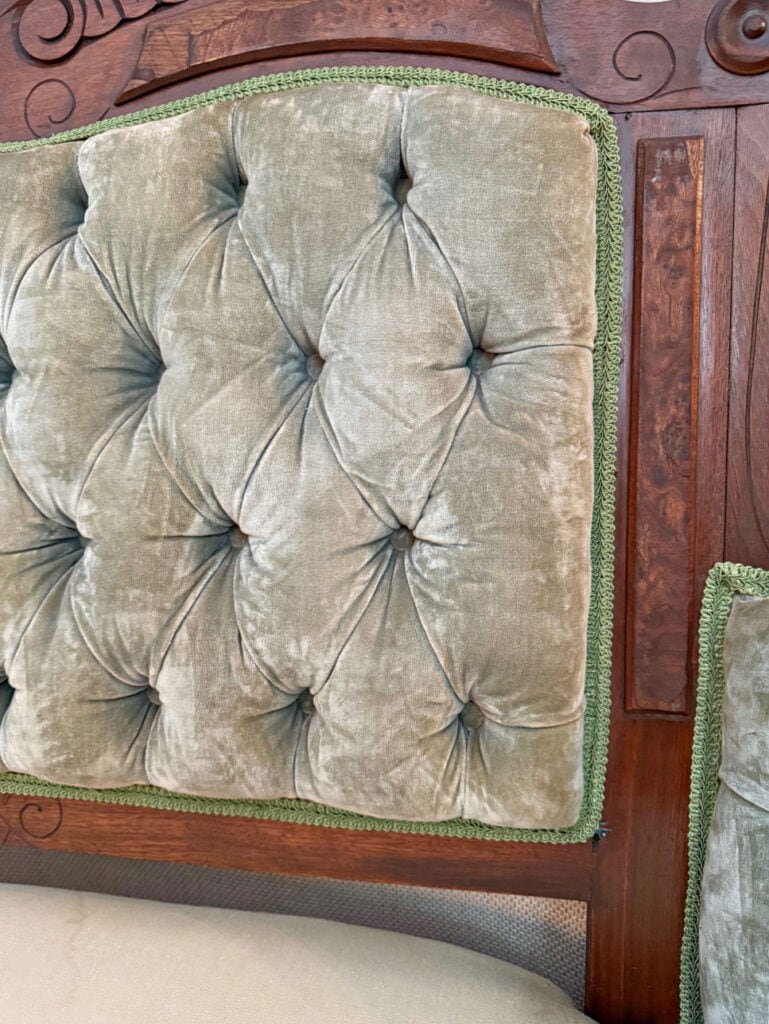
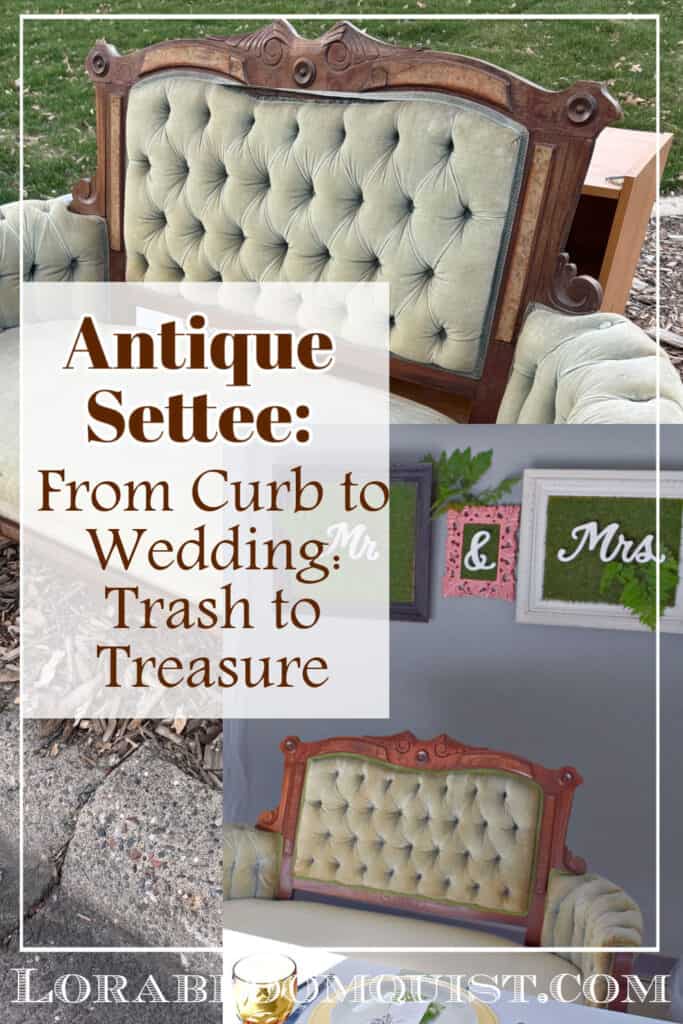
Last spring as I was curbside junking, I came across this lovely green velvet button tufted antique settee. It had beautiful details, but had obviously been unloved for quite a while. Remnants of critters were seen and some of the fabric was stained and tattered.
With my daughter’s upcoming wedding, I quickly sent her a pic and said, “wedding?” She responded immediately with a “yes”! Luckily, I still had room, and a few friendly neighbors helped me lift it into my car.
Follow along on my curbside junking adventures on my IG, HERE.
See all the vintage finds I came home with last Spring, in “Recent Vintage Thrifted Finds (and my plans for them)”.

Refreshing the Antique Settee
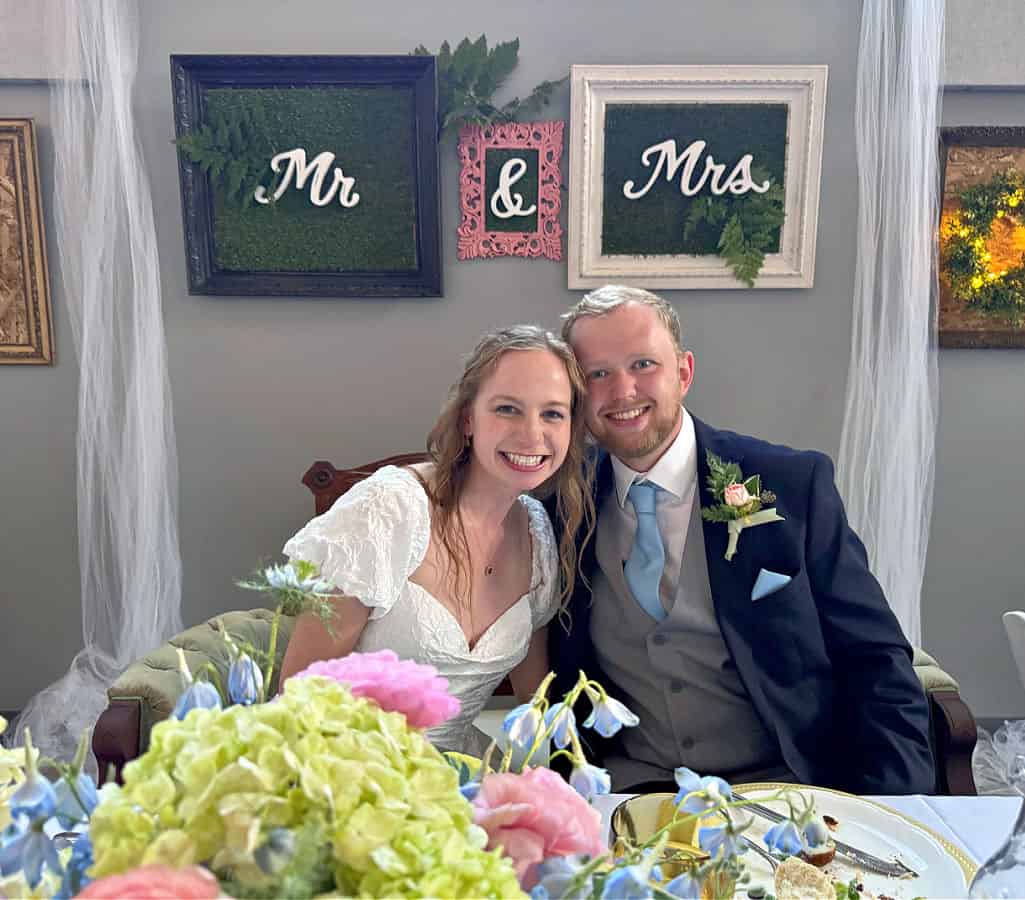
I procrastinated working on this settee all summer, because we had plenty of other wedding projects to do. It was going to be a if-I-still-have-time kind of a project. But I knew my daughter was dreaming of sitting in a velvet tufted green settee at the head table with her groom;)
The thing is…I really do not know how to do upholstery. This would be a learn-as-I-go kind of project. I wanted to preserve as much as I could of the original, but wanted it to feel cleaned up enough for the bride and groom to sit on. When you get something for free, what do you have to lose?
Deconstructing Furniture
With a basic upholstery set, a scissors, a pliers and a cardboard box for garbage, I started on the outside of an arm. I wanted the back to have the look of deconstructed furniture, with a clean look. The fabric was very stained in the back, too.
Find basic upholstery tools HERE.

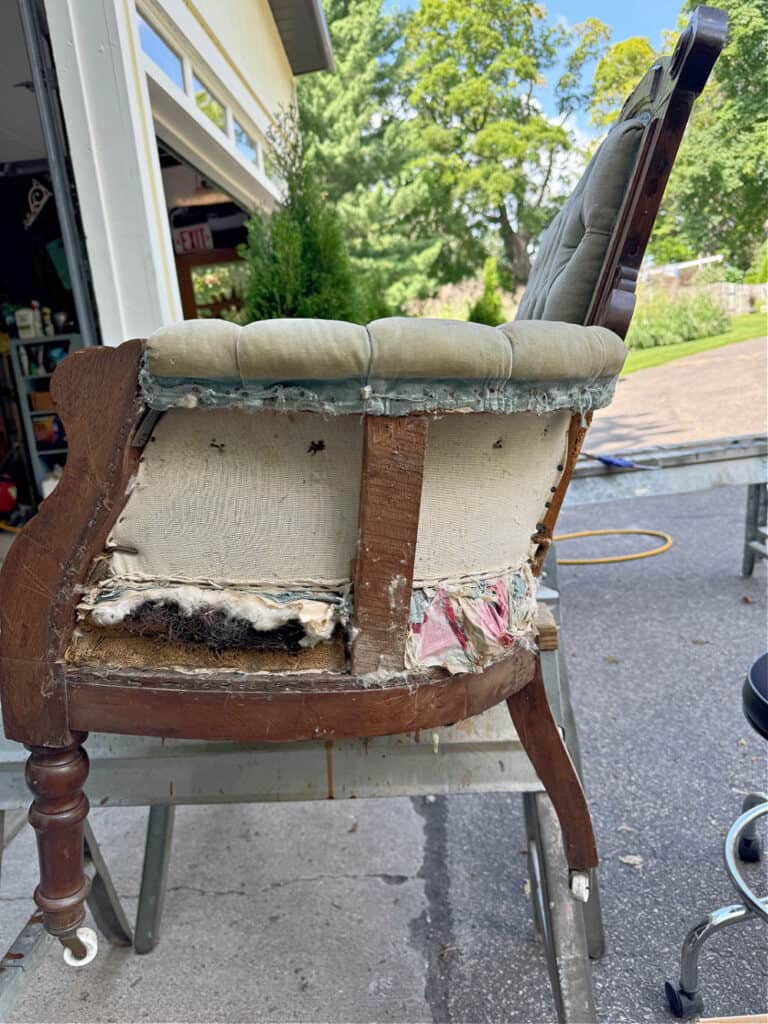
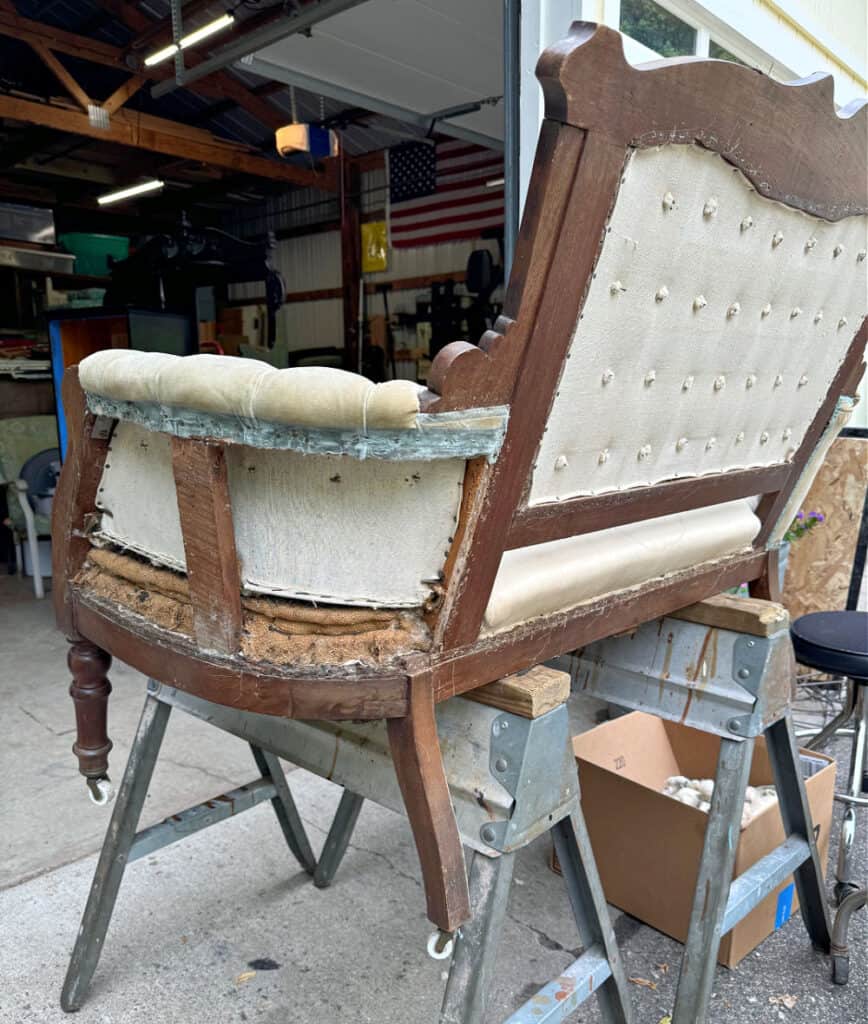
The gimp came off easily because it was falling off already. But taking out the million little tacks was a challenge to my patience. The fabric and cording ripped off easily with the help of a pliers to save my hands. I pulled off the stuffing and this was the mess I saw underneath.

Where should I even begin? I just kept removing pieces I thought could go away without disrupting the basic construction of the tufting and the velvet on the arms and back. I liked the neutral look of the muslin in the wood frame, and planned on covering holes, etc. with green gimp.
Getting the Deconstructed Look
It was looking more like I was picturing for the wedding. I kept removing the velvet, the gimp and meticulously taking out the millions of little tacks.
What To Do With The Seat
I had originally thought I could save the seat fabric, but as I worked on it, I knew the velvet was shot. It ripped easily off, revealing a neutral cream cotton liner underneath.
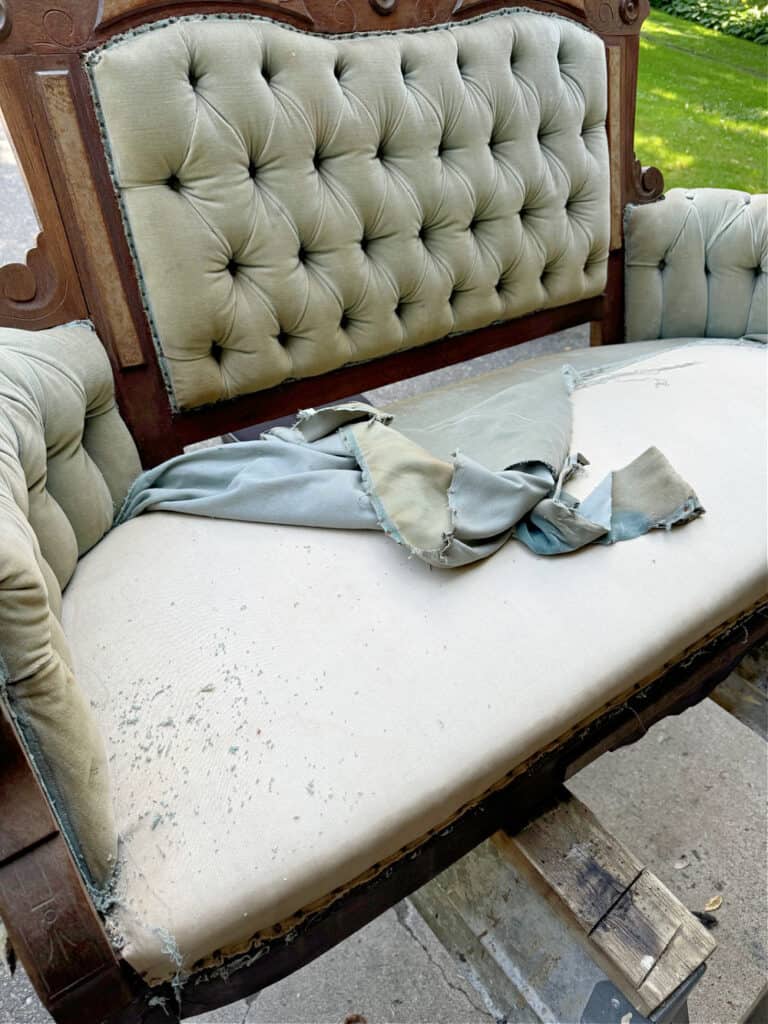
At this point, I was feeling pretty good about the look. I’d removed all the gross layers and millions of tacks and had the look of deconstructed furniture.
Reviving the Antique Wood Frame and Cleaning Upholstery
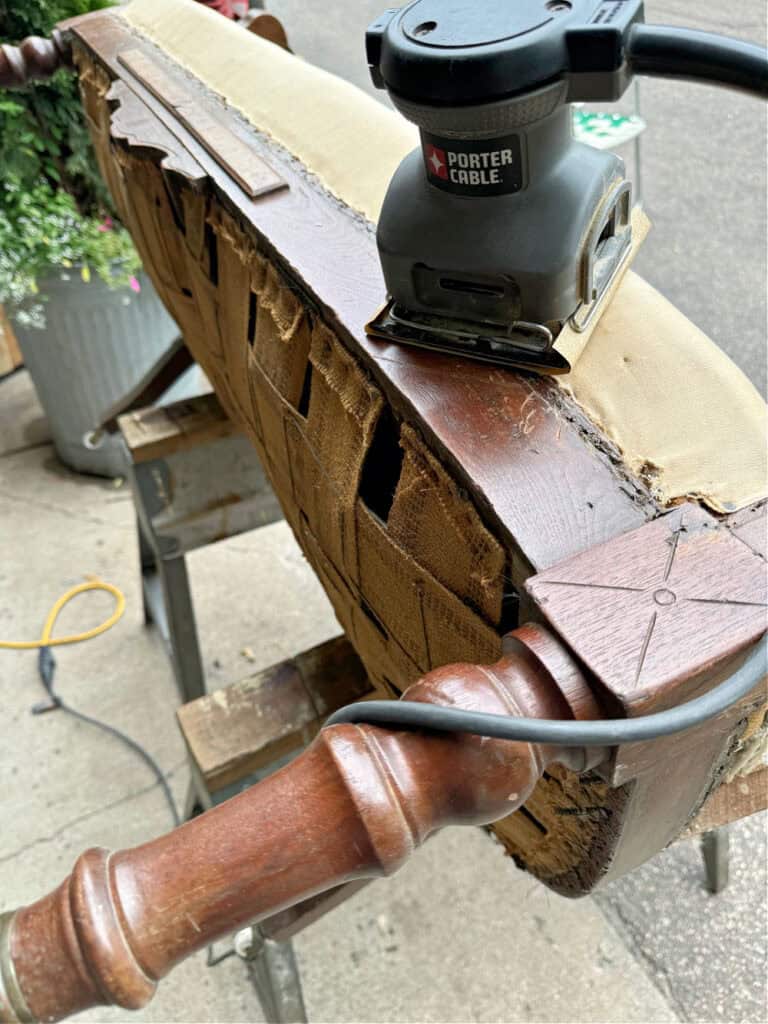
Next up was to revive the pretty antique wood frame. I sanded it all over with 120 grit sandpaper, smoothing out the rough edges.
Next, I cleaned the upholstery with THIS handy device. The water was very dirty, so I knew I was getting years of grime out of the fabric. I couldn’t quite eliminate a stain on the seating fabric, but it improved. The velvet turned out looking more like crushed velvet after washing, but I kind of liked the look, and it disguised any stains better.
Lastly, I wiped THIS all over the wood frame, which restored it beautifully.
Adding Finishing Touches to the Antique Settee
With about a week until the wedding, I brought the settee inside to add the finishing details.
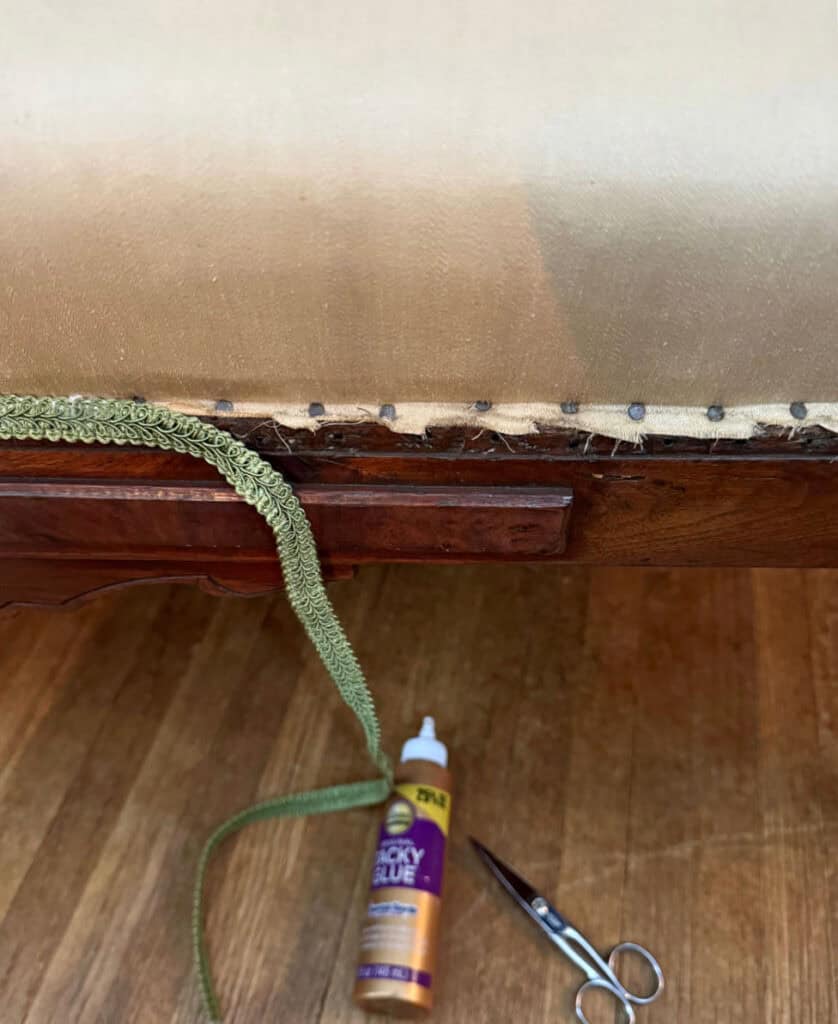
First, I glued green gimp all around the edges where the tack holes were. It’s amazing how much more finished a piece looks when you add gimp over all those rough fabric edges. I used THIS glue. The brighter green gimp also brightened the whole thing.
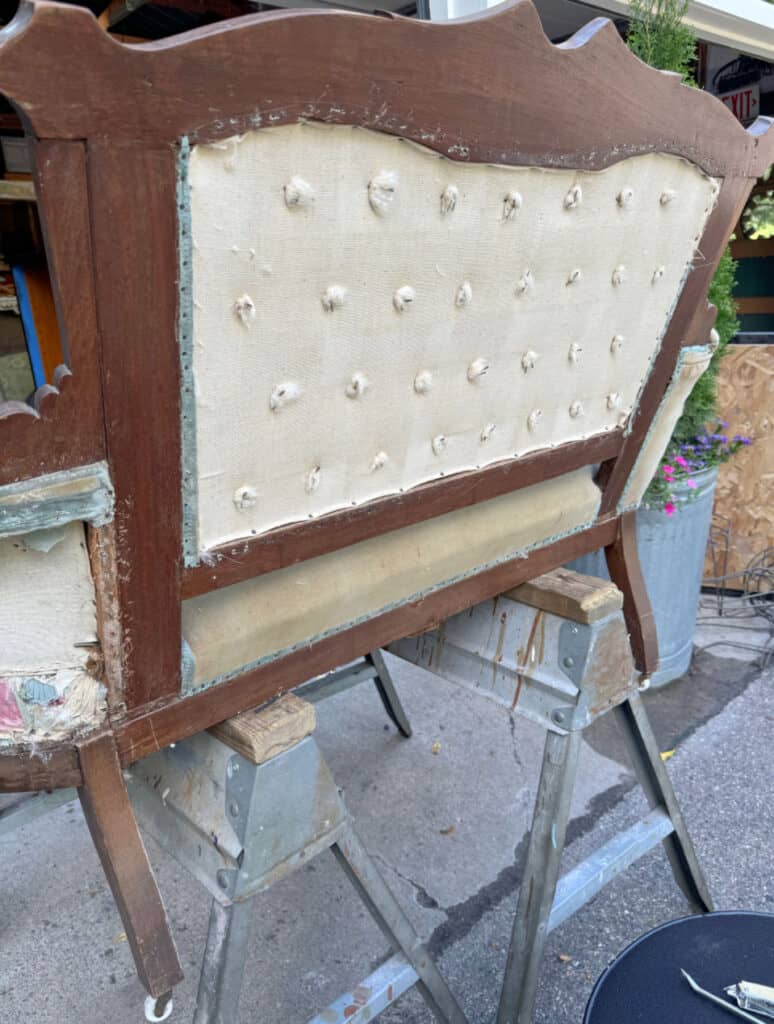
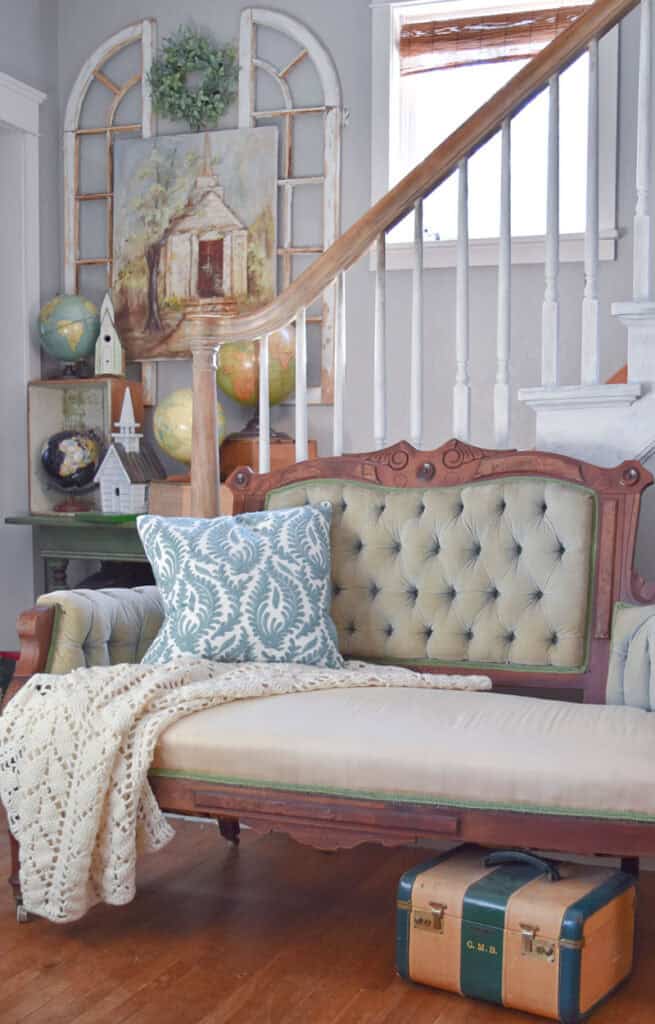
I ran out of gimp for the backside, and needed to be done with this project. But I wanted it to at least not look totally undone from the back. The tufts of stuffing from the button tufts looked weird. I decided to disguise them with vintage buttons. I simply hot glued buttons onto each of the tufts. It was kind of a fun look.
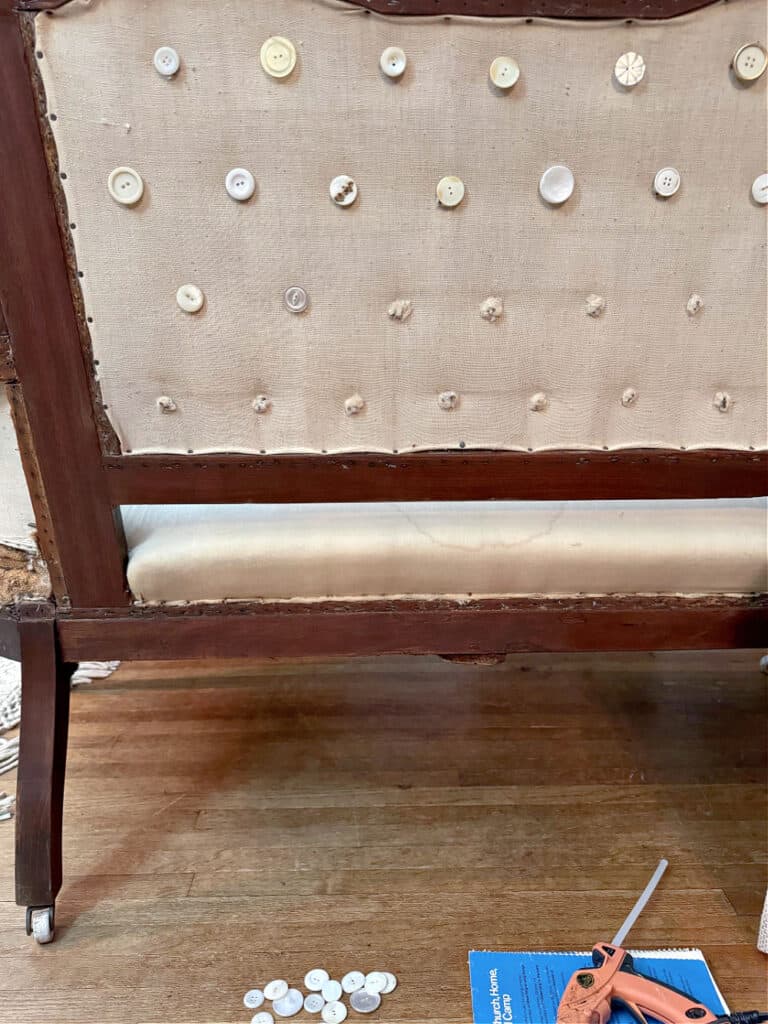
You can see the stain that was left on the seat fabric. But the bride and I decided it wouldn’t be seen with the newlyweds sitting there anyway.
The back of the settee is still waiting to get green gimp to finish it off, but unfortunately I need to locate more of the matching color.
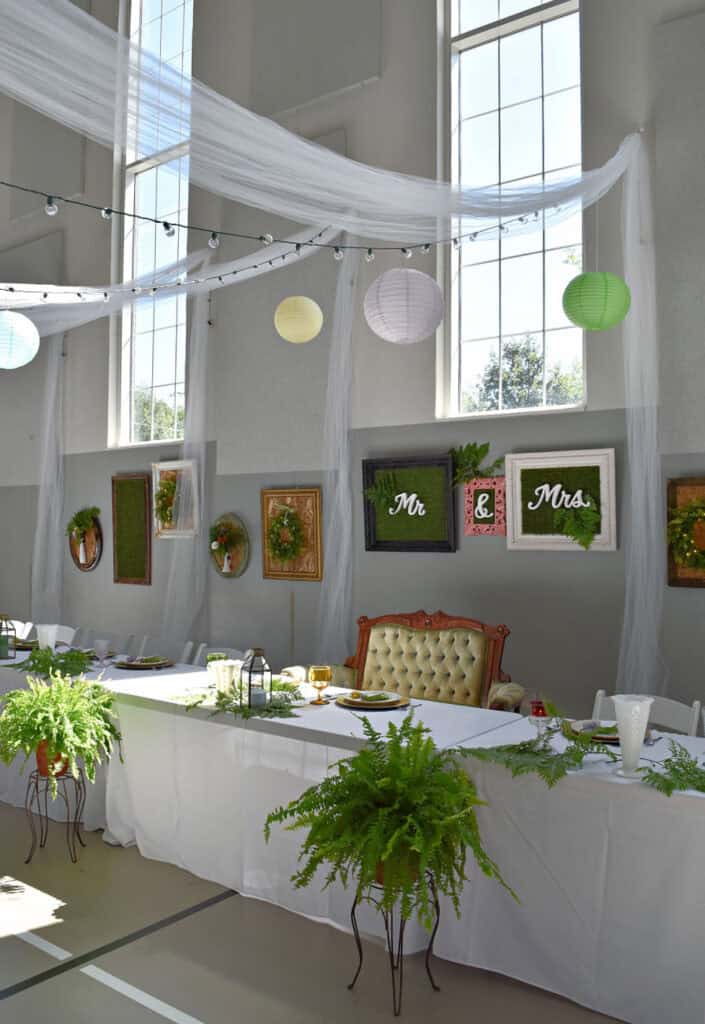
All in all, this curbside find looked pretty good for it’s wedding reception debut! It was a project that involved patience and courage, but that’s what it takes when you work on something you’ve never done before!
See “A Garden Party Wedding with Vintage Style” here.
Another tip for using vintage seating, pulled up to a modern table. Use risers like THESE so they’re not sitting too low. They come in several different heights.
Hope you enjoyed this trash to treasure curbside find refresh! Sometimes you just need to try new things and put one foot in front of the other with these old finds. Anything to save them from being sent to the landfill!
Thanks for reading Antique Settee: From Curb to Wedding. If you enjoyed your visit, be sure to Become an Insider so I can send the ideas right to you! You can Sign Up HERE.
Follow Me: LTK | Amazon | Pinterest | Instagram | Facebook
Pin and save

Sharing at these lovely parties:
Great job, Lora! I have 8 dining chairs (seats and backs) waiting for me in the garage! Mom was a great inspiration because she did just about everything!!! I had been thinking about tackling a couple of second-hand upholstered chairs, too, and happy that you mentioned that you’ve never done upholstered items before, because that’s just the encouragement that I needed!!! And if it doesn’t work out, 🤷🏻♀️, at least I tried. Hahaa! Congratulations to your daughter and her husband!!!
Good luck, Kimberly! It’s my goal to be able to do upholstery, so might as well just dive in;)
I love that you were able to fulfill your daughter’s dream of having a beautiful settee to sit on at the wedding table. It came out awesome!
Thanks, Jan! Happy to give an old piece new life:)
Lora, this turned out great; super job. It’s the perfect perch for the newlyweds!!
Thanks, Debra! She’s always loved that tufting;)
You did a great save. It’s not something everyone would think of or try to accomplish. But you definitely did. Kudos to tackling a different project that your daughter loves.
Congratulations to your daughter and her husband.
Thanks, Rita! Yes, I’m a little crazy about just diving in, but I figured what did I have to lose?
Loved the buttons on the back. It looks so cute. Know your daughter loved it.
Thanks, Marlene!
Beautiful job.
Thanks, Teri!
Love this so much Lora. I have an upholstery project waiting for me and like you I have no clue. You’ve inspired me. I love love that they used the sette at the bride & groom table. Where is it now? Do they use it in their home? What a great memory. XO- MaryJo
It’s adding extra seating to our living room currently, MaryJo. They don’t have room for it at this point. Not quite sure where it will end up. Maybe some photographer might like it to seat cute kiddos on.
How brave of you to attempt this in the first place and how great that you were able to give this piece a new lease of life.
It was an adventure, but glad I did it!